
These suggestions and solutions for technical problems are from service bulletins and other information published by Mercedes-Benz, selected and adapted for independent repair shops.
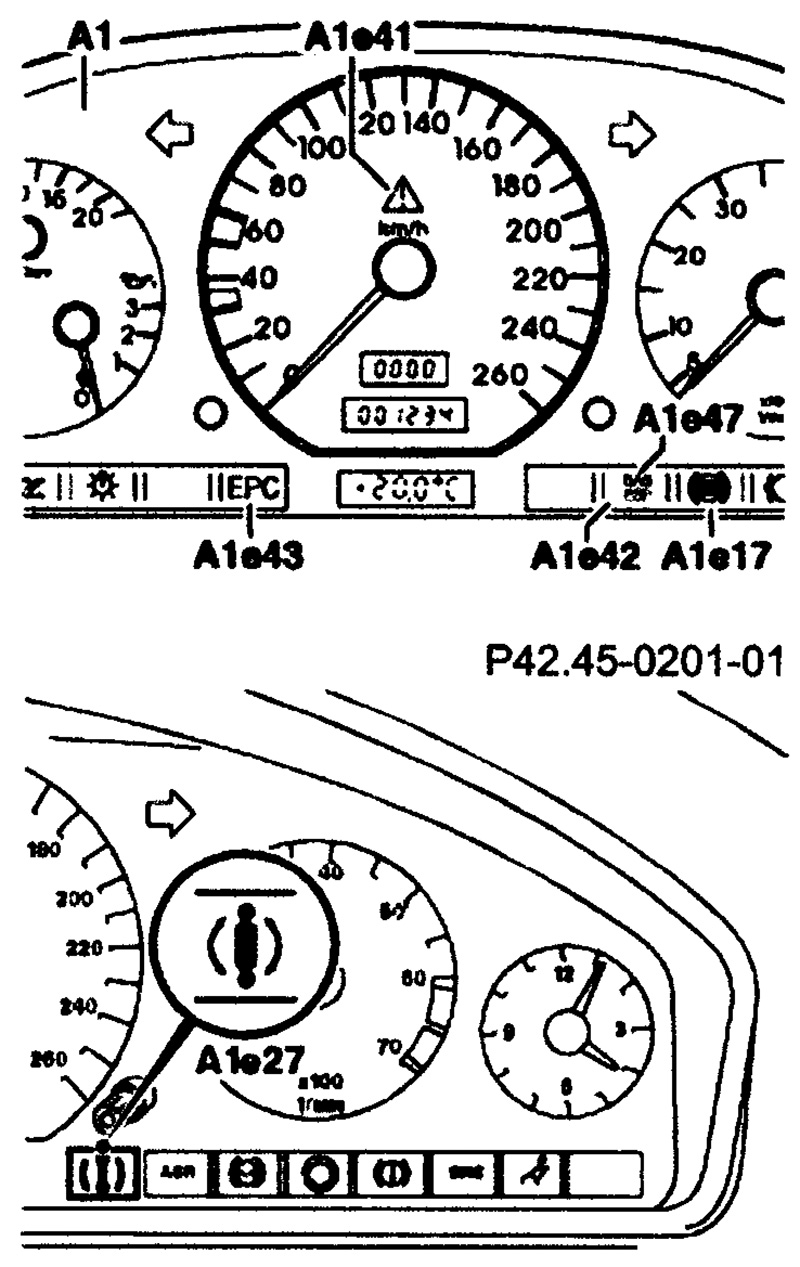 ESP Malfunction Lamp After Battery Replacement
Some shops, I understand, clip on a small 12-volt motorcycle battery to the cables when they replace a car’s main battery (because motorcycle batteries have various fluid baffles to prevent acid spill if they tip). Aside from losing the radio station settings and various other kinds of vehicle memory, the voltage interruption can addle the calibration of the steering angle sensor. If that happens, the ADS or ESP warning lamp will turn on (the lights are different for different vehicles – check in the owner’s manual), and the corresponding traction control system will turn off.
The recalibration is quite simple. Start the engine and let it run at idle. Slowly turn the steering wheel from lock to lock. Some info sources say this must be done twice; others don’t. The system has accepted the recalibration and reset itself as soon as the lamp goes off.
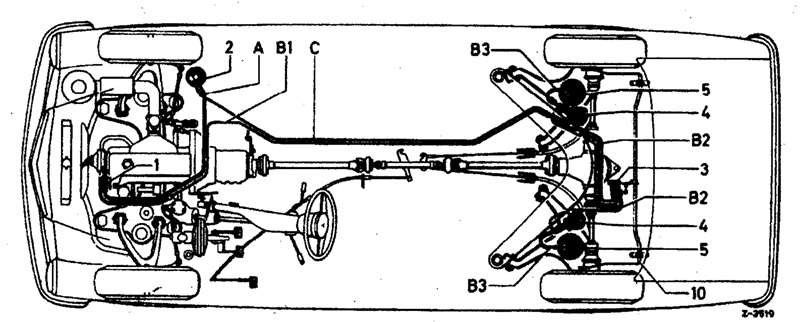 Hydraulic Load-Leveling And the Hydropneumatic Suspension
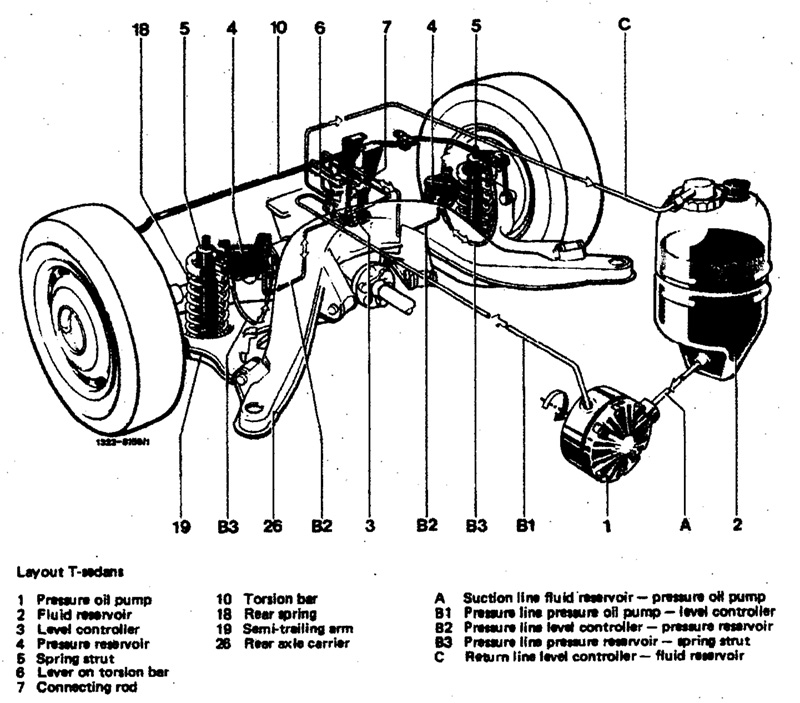 Most Mercedes-Benz cars using the semi-trailing arm rear suspension offered a hydraulic load leveling system, effectively a hydraulic auxiliary suspension, as an option or as standard equipment, depending on the model. The 116, in fact, one of the most mechanically complex vehicles ever built, used a full hydropneumatic suspension on all four wheels.
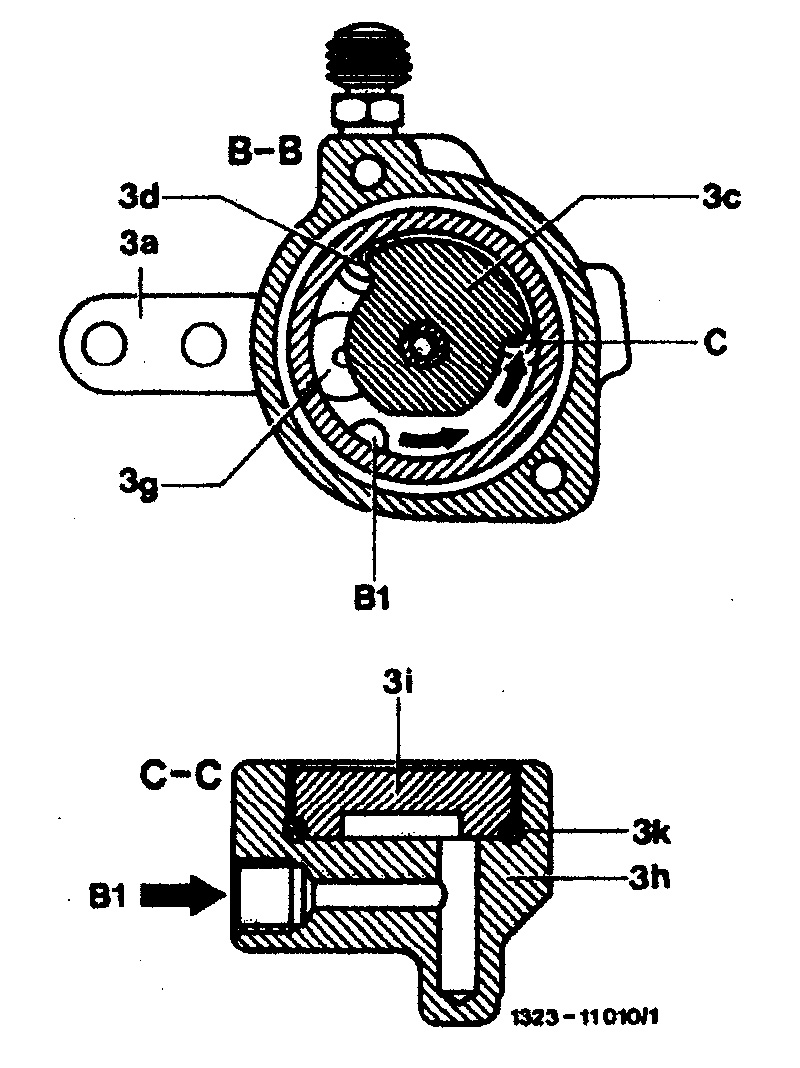 If you prefer working on mechanical systems to electronic, this is the diagnosis and repair for you. Of course, if what you really want to avoid is complexity, it’s not. The Mecedes-Benz technical information includes complete information on how these systems work and how to diagnose and repair them when they don’t Even though some of these cars were built and sold over 30 years ago, you can still get practically every part you need through your Genuine Mercedes-Benz Parts source, as listed in this magazine.
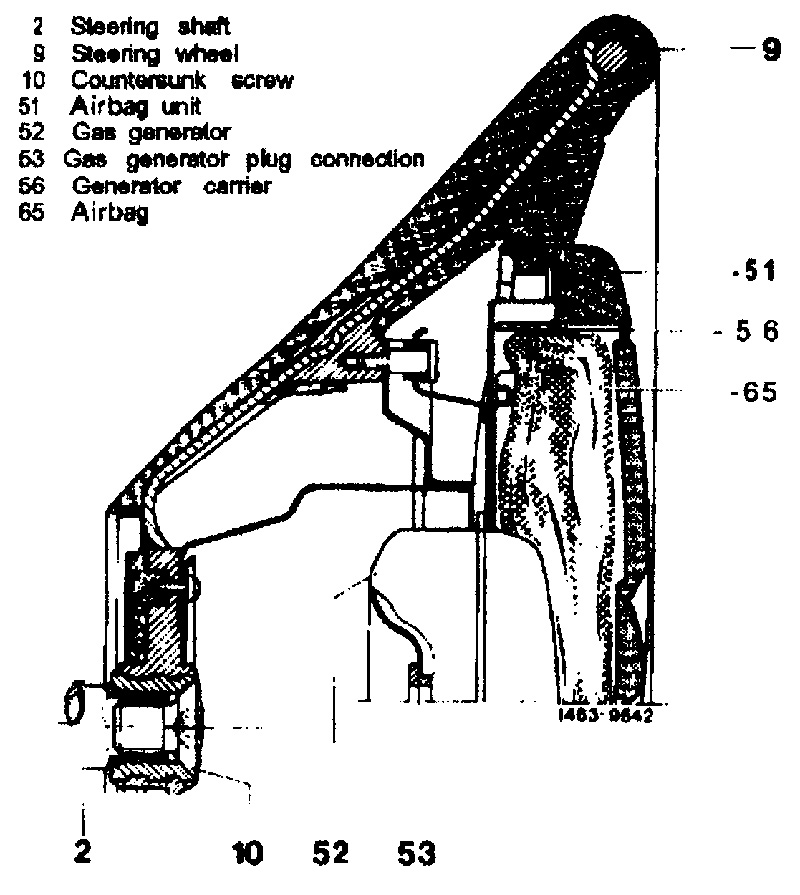 Airbag Replacement Model 201 (Others Similar)
If you have to replace an airbag, there’s always some level of interest to see you do the job correctly. After all, the wrong kind of mistake could not only cause expensive damage, it could result in injury as well. Here’s how to do the job properly:
Turn the ignition key off and remove it from the lock. Then disconnect the battery negative cable and cover the post for safety. Lift out the passenger’s side floor mat. Loosen the foot support bolt and remove the support.
Disconnect the 10-wire connector plug to the control unit at the foot support. Unscrew the fillister screws, breaking the circuit to the release unit. It is not separate from the contacts. You are ready to remove the airbag from the steering wheel safely.
Pull the plug connector from the airbag gas generator. This will automatically engage a short circuit bridge in the gas generator. You can now remove the airbag from the steering wheel and the car. Do not attempt any further disassembly, repair or exploration of the airbag (it’s available only as a complete piece as a replacement part, anyway). Always store it with the pad side up, and keep it in a safe place, under lock and key, because if accidental detination occurs, the airbag may propel dangerously through the air. While it is not inherently dangerous, the removed airbag is a chemical pyrotechnic device and cannot be left sitting around casually. The person who removes it from the car is responsible for its secure storage or disposal.
You’re not done quite yet. Unscrew the countersunk bolt holding on the steering wheel and lift off the steering wheel. The object is to inspect the carbon brushes for the airbag as well (as long as you’re there) for the horn. There is a cover plate to remove in case you need to remove either or both of these sets of brushes.
When reassembling the steering wheel, Mercedes-Benz recommends replacement of the countersunk bolt. In the absence of a replacement bolt, at least employ a secure threadlocker on this critical fastener. 80 Nm is the tightening torque.
Disconnect the plug cable at the contact ring long enough to make a short test drive to confirm the centering position of the steering wheel. You can move it a maximum of two splines in either direction, if that is necessary to center it properly. Once that position is determined, reconnect the plug cable at the contact ring.
To install the new airbag, observe these modest precautions against its percussive vulnerability: do not expose it to temperatures over 100 degrees Centigrade (212 F); do not drop it from even a modest height (50 cm). Dubious airbags should be returned to the manufacturer in the original packaging.
Before you reconnect the airbag, go back to the battery and confirm the ground cable is still disconnected. Check that the ignition switch is still off and the key removed. These steps may seem redundant, but a single adverse mishap would put that impression in its proper perspective.
When you reconnect the airbag cable, listen for the audible click as it connects. Place the airbag on the steering wheel, close to its proper position. Replace and tighten the fillister bolts into the generator carrier. Replace the foot support in the front passenger’s footwell.
With the battery reconnected, turn the steering wheel from lock to lock. There should be no flash nor flare from any indicator lamp.


0 Comments