
You can become a hero to any customer who owns a BMW with either the M62TU or S62 V8 engine that has a clogged secondary air system.
These engines are used on 7 Series (E38), 5 Series (E39), X5 (E53), and Z8 models. Instead of a staggering bill for replacing the plugged head castings, you can restore the passages by cleaning them.
There’s even a nostalgic benefit for you — the chance to actually fix something. Yes, we can recite all the reasons why service work now is mostly diagnose and replace, instead of repair. But we still find a strong sense of personal satisfaction when we repair something and return it to working condition rather than removing the old part and installing a new one.
Clogged air passages typically set a BMW fault code 80 or 81. Start by checking the operation of the air pump, one-way valve, solenoid valve, and other components. If all parts are operating properly, then the passages are plugged.
According to BMW, clogged air passages can occur at any time after the engine has 35,000 miles or more on the odometer. The primary culprit is burning low-grade gas that doesn’t have an adequate amount of detergent additives. BMW currently recommends that its customers only use“Top Tier” gasoline. A list of oil companies that dispense “Top Tier” gasoline can be found at www.toptiergas.com.
The Kit
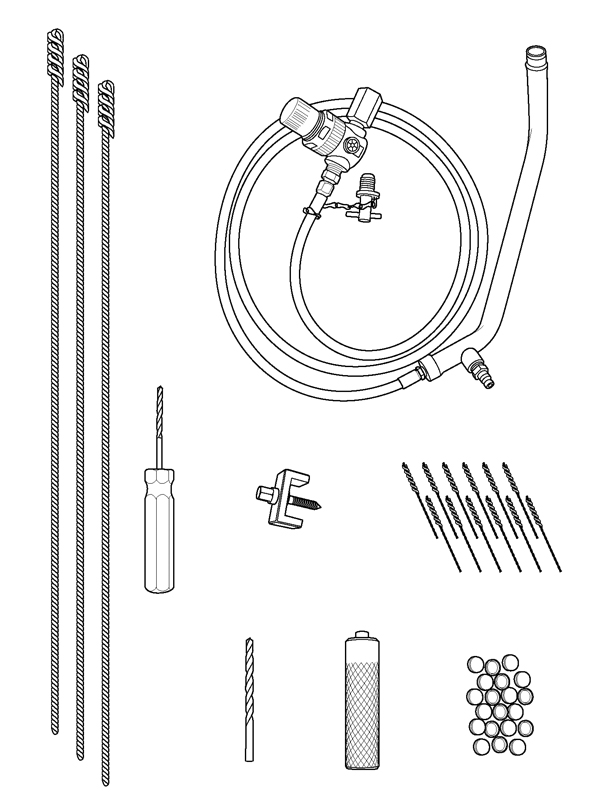
You will need BMW’s special tool kit, PN 99 00 0 006 668, to clean the secondary air passages on the M62TU or S62 engines. The kit includes:
- Cylinder head back pressure diagnostic tool
- Set of 4mm nylon final clean up brushes
- Core plug installer
- Core plug remover
- Drill bit to enable use of core plug remover
- Reamer for 4mm air passages.
- Set of 10mm brass brushes to clean out main air supply passage.
You can order replacement nylon clean up brushes (set of 12, PN 82 11 0 416 754) and replacement brass brushes (set of 3, PN 82 11 0 416 755). The repair kit does not include replacement 12 mm main secondary air passages core plugs. These plugs must be ordered separately (3 per vehicle, PN11 12 1 736 330).
Calibration
Your initial tests of the air pump, one-way valve, and other components are “diagnosis by elimination.” If all the other components operate properly, the secondary air passages must be plugged. The first step in cleaning the passages is to confirm that the passages are blocked by testing with the Cylinder Head Back Pressure Diagnostic Tool, which is part of the special tool kit.
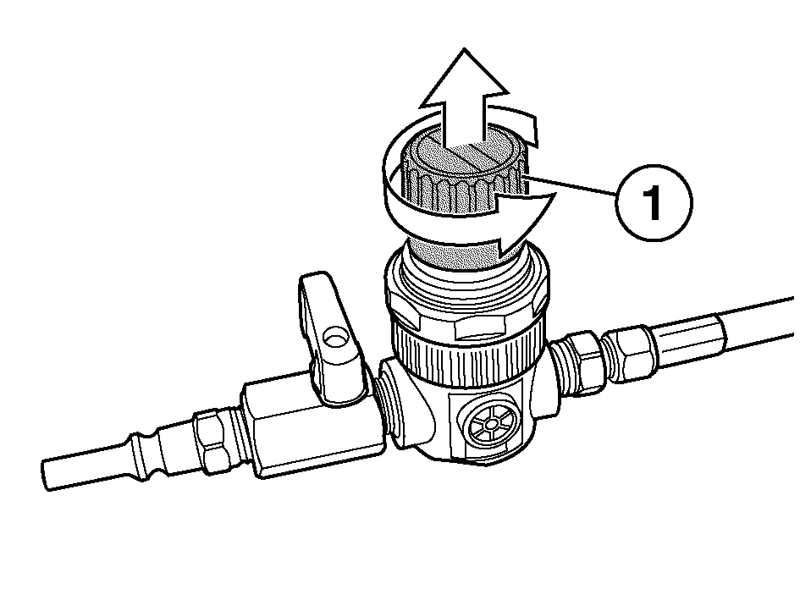
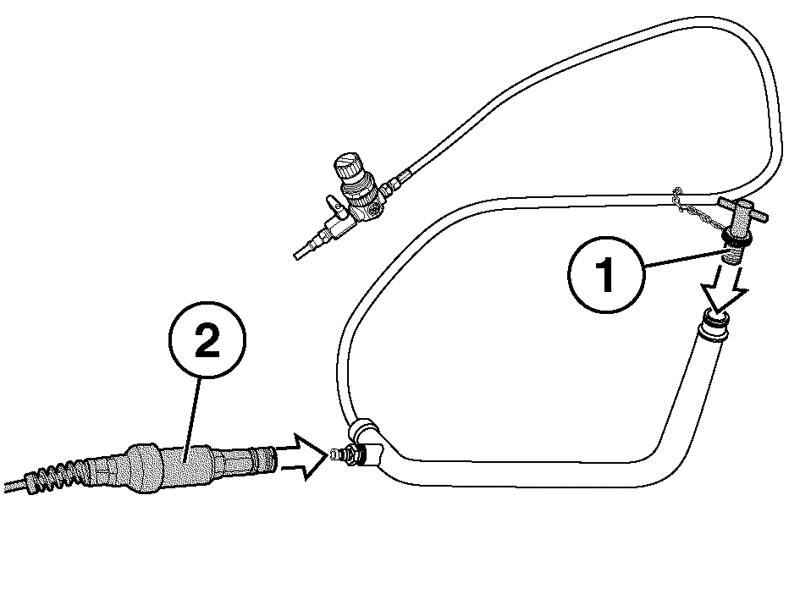
Open the red knob on the regulator, then insert the plug into the end of the tube and tighten until secure. Attach a pressure gauge or DISplus unit to the fitting on the tool. Connect shop air to the end of the tool.
Open the yellow flow control valve until the system reads 3.5 bar (50 psi). Then press down on the regulator knob to lock the reading. Shut off yellow flow control valve, disconnect the pressure transducer and remove the plug from the end of the pipe.
Testing
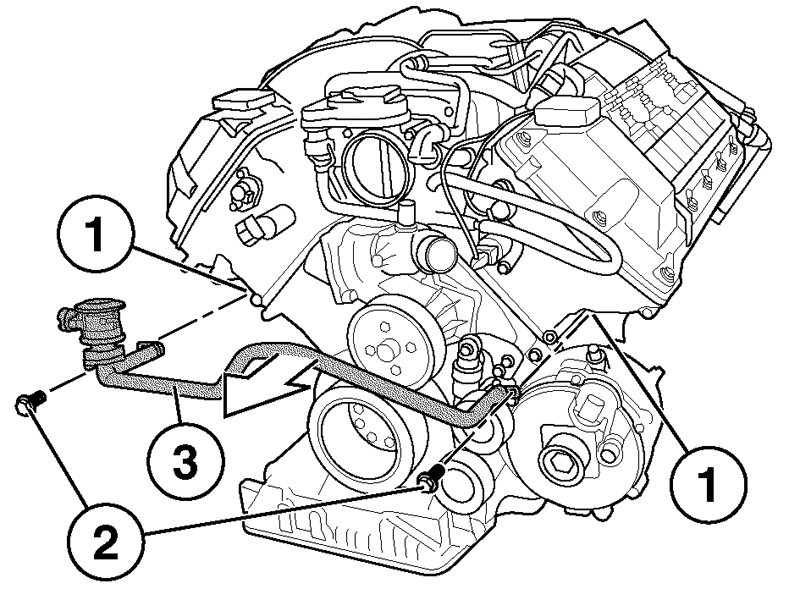
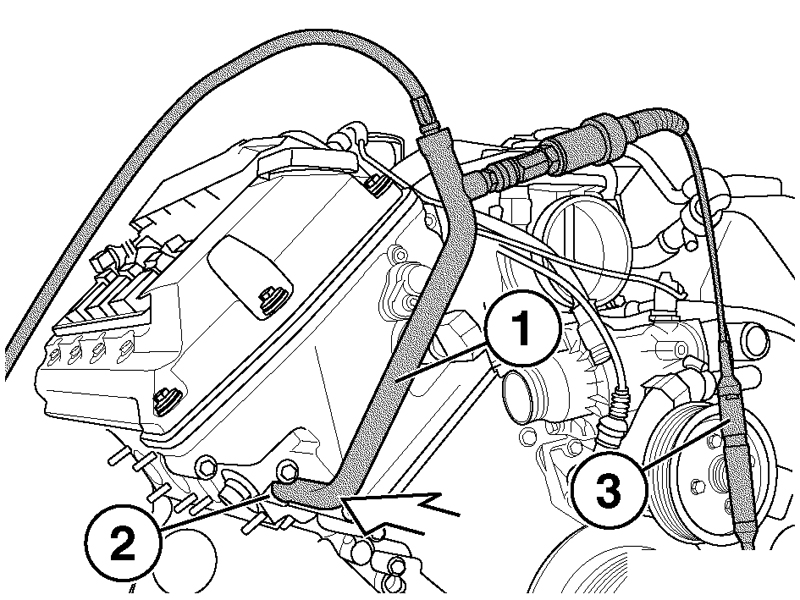
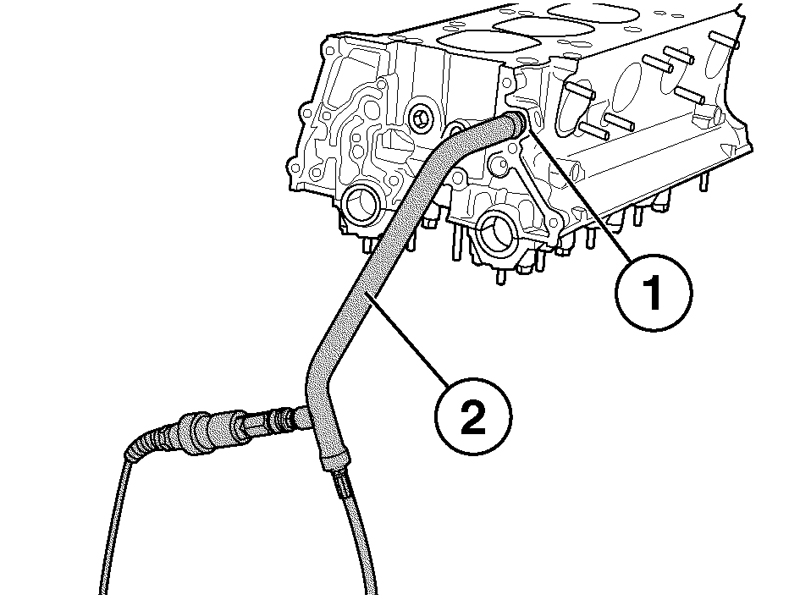
Remove the fan assembly from the engine. Remove the two 10mm bolts (#2 in the next illustration) securing the delivery tube to the cylinder heads at the position shown. Move the tubing out of the way so you have access to the ports.
Insert the tool into the right cylinder head secondary air supply passage. Connect the pressure gauge or DISplus to the tool, connect shop air, and open the yellow flow control valve to allow the free flow of regulated air to pass through the head. Observe backpressure reading. If the backpressure is more than 1.10 bar (16 psi) the passage is blocked. Repeat the backpressure test for left head.
If either head has blocked passages (backpressure reading greater than 1.1 bar/16 psi), the head must be removed for cleaning. Before pulling the heads, BMW recommends that you do both an engine compression test and a cylinder leakdown test that would show if additional engine work is needed. Running on poor quality fuel isn’t the only possible cause of blocked air passages in the head. A severely worn engine can also cause the condition. If only one head is blocked, but the head has heavy carbon deposits, the other head probably also has heavy carbon buildup, even though it didn’t show a blockage. You should pull both heads to remove the carbon.
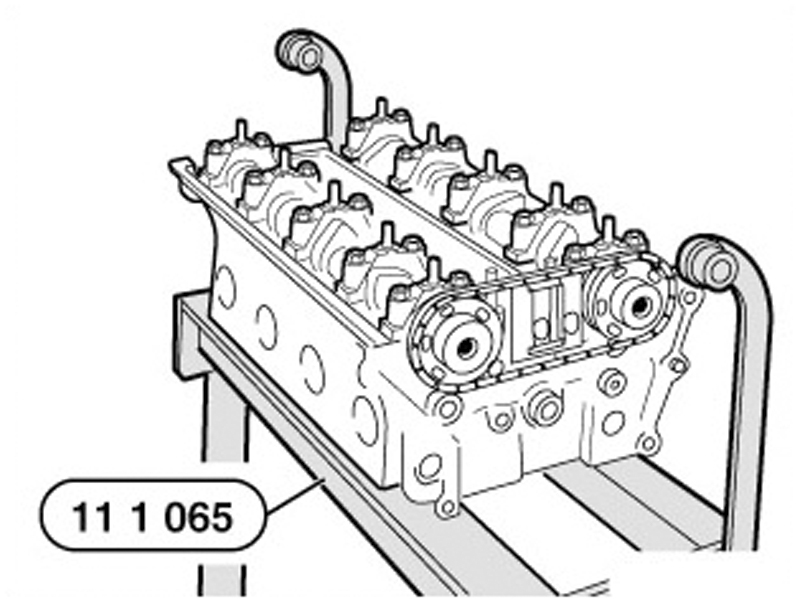
Remove the heads according to BMW’s standard procedure as described in Repair Instruction 11 12 505/506. Mount the heads on the fixture (Special Tool 11 1 065) and disassemble them. Use the special tools as required to remove the camshafts, bucket tappets, exhaust valve retainers, exhaust valve springs, and exhaust valve guide seals. Always position the removed parts so that you can reinstall each valve in its original cylinder, and all the other parts in their original locations.
Push on the valve stem until the edge of the stem is flush with the top of the valve guide. Secure a dial indicator to the side of the valve face and measure valve movement within the guide. Movement should be no more than 0.5 mm. If the movement is greater than 0.5 mm, the guides are worn and must be serviced.
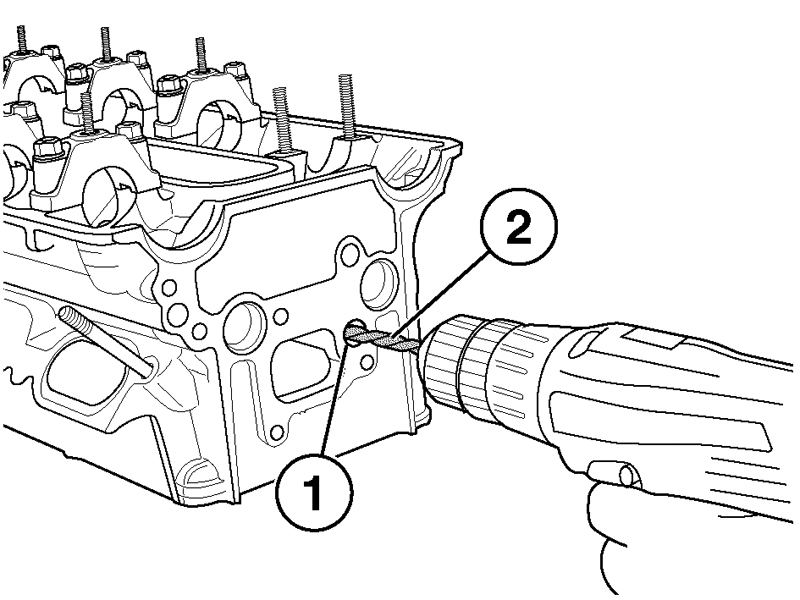
Using the drill bit supplied in the tool kit, drill a hole in the 10mm core plug for the main secondary air supply passage located in the rear of the head.
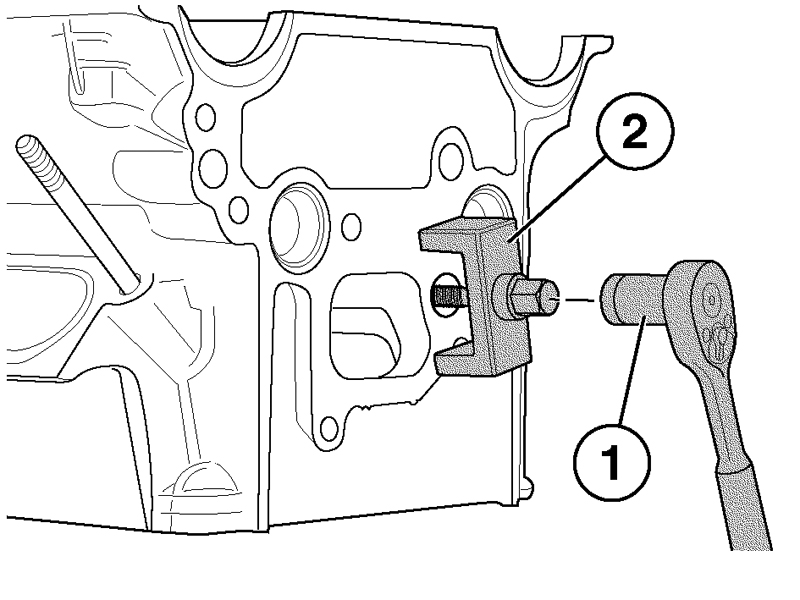
Using the core plug remover from the tool kit and a 10 mm socket, thread the removal tool into the hole you just drilled. Continue to turn the screw clockwise until the plug is removed.
On the right side head, remove the plug from the front of the head the same way you removed the plug from the rear of the other. On the left side head, there is no front plug, only a rear core plug.
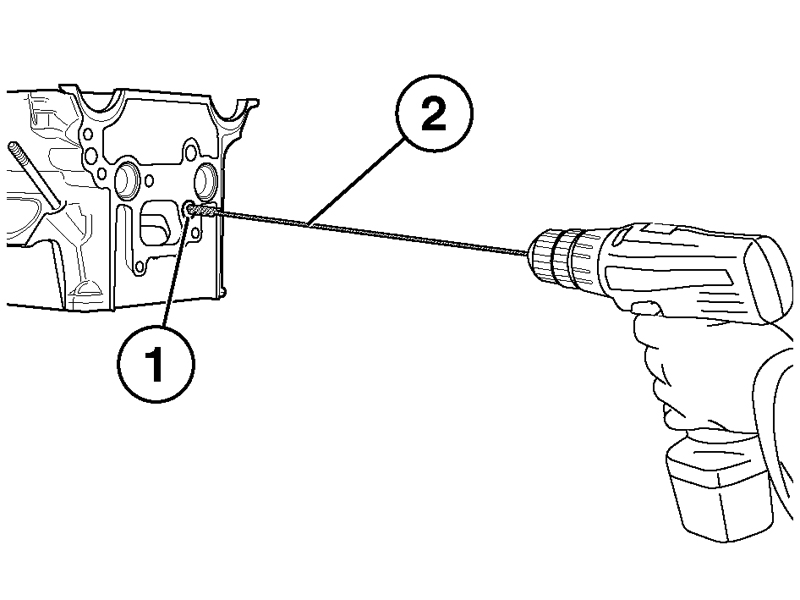
Chuck the 10 mm brass brush from the kit into a drill and clean out the main secondary air delivery passage. Blow out the passage with an air nozzle and shop air and repeat. Repeat the brushing and blowing out with shop air until there is no more carbon in the passage.
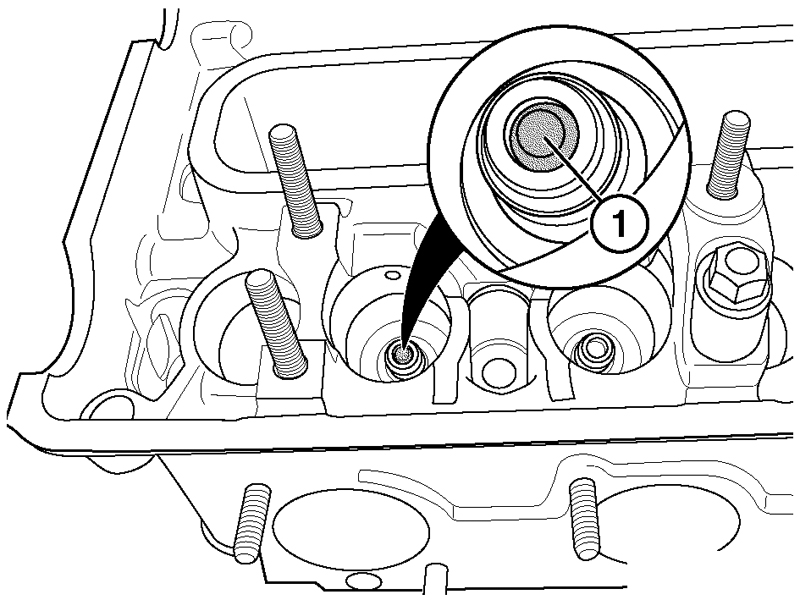
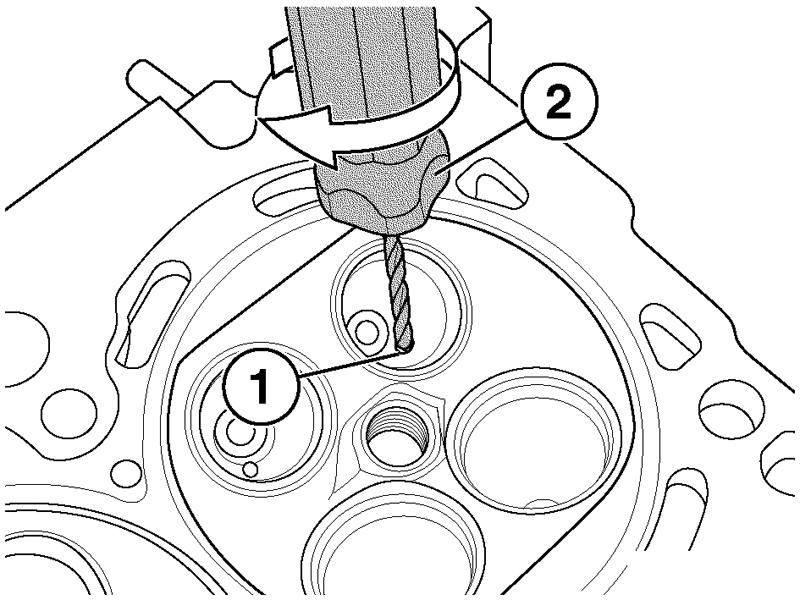
Locate the secondary air distribution ports (1) under the removed exhaust valve. Insert the reamer tool (2) from the special tool kit into the port. Slowly rotate the reamer clockwise until no resistance is felt and the tool goes to the bottom of the passage. Repeat the reaming process for all eight ports in the cylinder head.
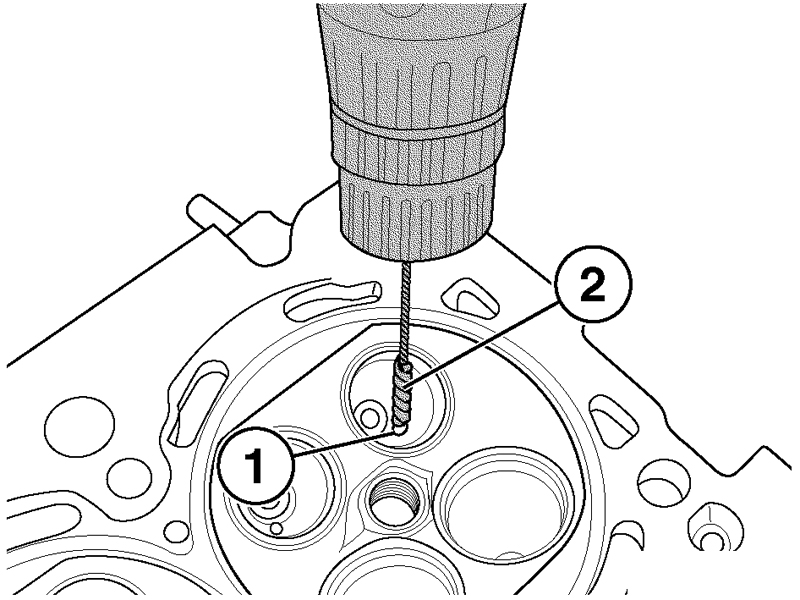
After reaming each secondary air passage, clean the passage using the 4mm nylon brushes from the tool kit. Chuck the brush into a drill and clean each passage. Blow out the passage with air until all material is removed from the passage.
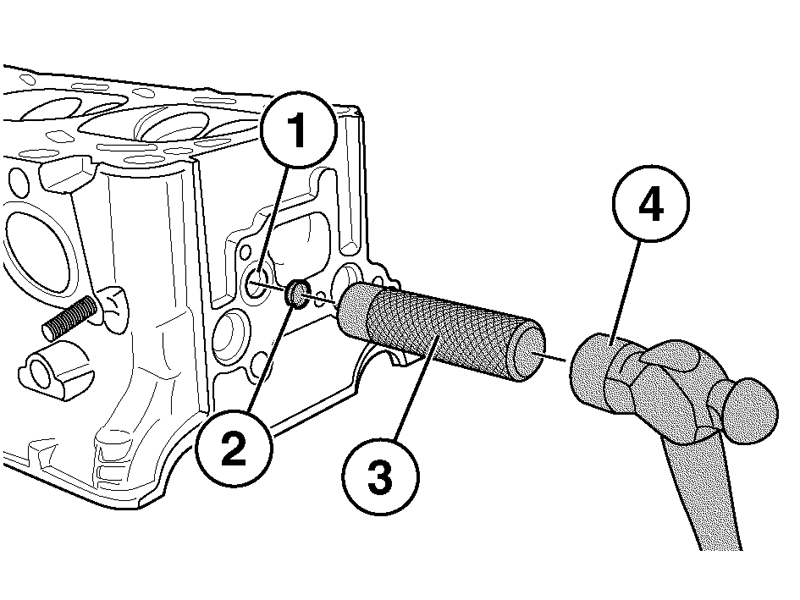
Using the core plug installer (3) from the tool kit and a suitable hammer, install the new core plugs into the secondary air distribution passages. Core plugs (PN 11 12 1 736 330) have to be ordered separately (Qty: 3 per vehicle).
Before reassembling the heads, recheck the backpressure. You should get a reading of no more than 1 bar (14.5 psi). A stead flow of air should also come out of each of the eight secondary ports. If the reading is high, there is still blockage in the passages and you will have to repeat the cleaning process.
Install the protective sleeve (PN 11 1 960) over the end of the valve stem and place the new valve seal on the sleeve. Press the valve seal in place using special tool PN 11 1 200. Reassemble the heads and reinstall them on the engine using the proper bolt tightening procedure.
Finally, clear the 80 or 81 codes, test drive, and your customer’s BMW is ready to go with its secondary air system as good as new.


0 Comments