

Very often, an illuminated MIL and an EVAP code are due to nothing more mysterious than the driver neglecting to tighten the gas cap. That’s hardly the whole story, though.
Since 1996, OBD II has required that fuel storage systems be checked for leaks so that no errant hydrocarbons will escape to pollute our atmosphere. Well, between fuel’s Reed Vapor Pressure and temperature fluctuations between cool fuel in the tank and heated return line fuel, this is no walk in the park. Add the difficulty of running the monitor to test for fuel tank leakage and you know by now how difficult it is to diagnose one of these codes. The call two weeks later informing you that the light is back on doesn’t help either. Here is a look at the different systems BMW uses to monitor tank leakage and some testing methods that may boost your confidence in your diagnosis.
In The Beginning
BMW was ready to check for leaks in its Evaporative Emissions System (EVAP) in 1996 with program HC II. Federal EVAP emissions regulations were not that strict early on, so non-enhanced systems were allowed. You could consider BMW’s first system non-enhanced. These vehicles were known as Transitional Low Emissions Vehicles or TLEV. You can determine what EVAP system you have by knowing the engine management system. TLEV vehicles use MS41.1 systems.
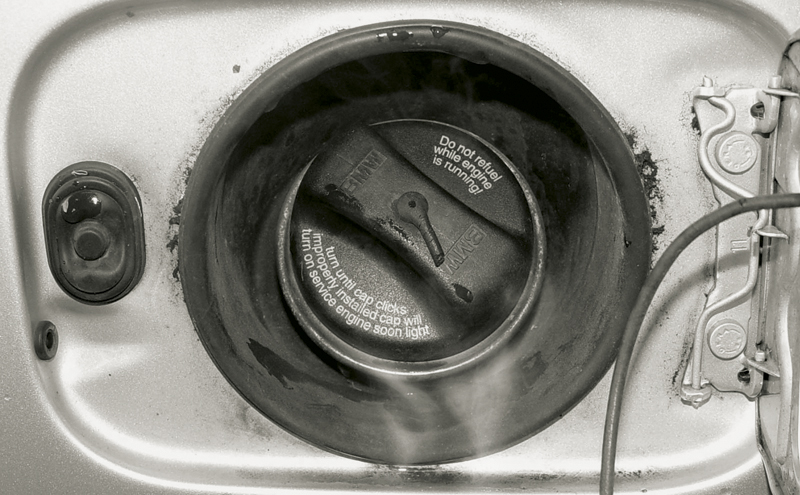
You can smoke any year system to check for leaks. Here the gas cap seal is missing, allowing smoke to leak past. Notice that the tether is cut. A BMW Technical Service Bulletin warns about these tethers getting caught between the filler neck and the cap.
A rundown of the components starts with the fuel tank itself. Second would be the Activated Charcoal Canister, which has a shut-off valve mounted on it. This valve is sometimes referred to as the Carbon Canister Valve in diagrams. The next component is the Liquid Vapor Separator that has a Fuel Tank Pressure (FTP) sensor mounted in it. The job of this separator is to capture fuel vapors during refueling. Finally, there’s the actual Canister Purge solenoid. With the system purging normally, the shut-off valve is open allowing air into the canister. The purge solenoid is commanded open and gasoline vapors are drawn out of the canister as well as the liquid/vapor separator. Before the test, the DME control unit monitors the fuel tank pressure sensor signal voltage.
To test the purge system, both the canister purge solenoid and the shut-off valve are closed. The FTP reads the resulting increase in pressure in the system. If the pressure increase is below a specific threshold, the testing continues. If the pressure increase is too high, then the fuel temperature is probably too high also and the monitor is abandoned. If the pressure is right, the purge solenoid is opened and the resulting pressure drop is read, the purge function is deemed okay. Once the purge valve is switched off, the DME expects to see an increase in the pressure. If not, the DME determines that there is a leak. Finally, the shut-off valve is turned off allowing venting to resume (valve closes when energized). By alternating between purging and not purging, and monitoring the FTP change over time, OBD II checks for proper purge operation along with leak detection. Solenoid operation and sensor signal voltage are critical to proper monitor operation.
Evolution, or Revolution
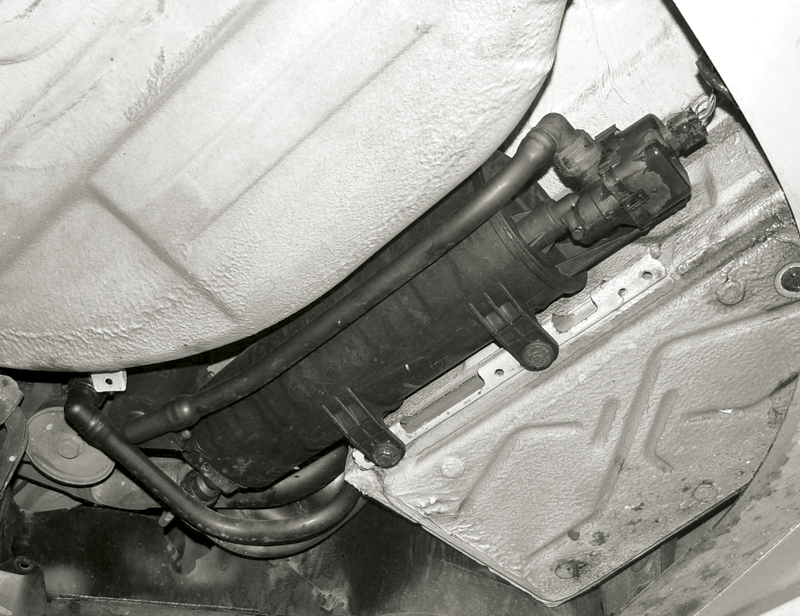
Here, we’ve removed a cover to expose the charcoal canister. In this model, the DMTL is mounted on the canister. Most of the EVAP system is easily accessed for smoke testing.
In 1998, BMW started to phase in the next generation of leak detection systems. With the next evolution of the DME, version MS42, it had to be able to differentiate between a leak of .5mm for being “Low Emissions Vehicle” or LEV compliant. These systems are different from their predecessors. This system uses pressure to determine if a leak is present. Once again, a brief rundown of the components is necessary. Of course, we still have a gas tank and charcoal canister. We also have the liquid vapor separator, but the fuel tank pressure sensor has been deleted. It has been replaced by another component called the Leak Detection Pump (LDP). This unit applies a slight amount of pressure to the evaporative emissions system, and the DME monitors a pressure switch inside LDP. The pressure switch indicates the pressure built up in the EVAP system. If a substantial leak is present, the pressure switch will quickly indicate that to the DME, which will flag a large leak code. If it takes longer for the pressure to drop, the DME will set a small leak code. To pass the leak check, the pressure switch needs to indicate that the pressure is maintained for at least 1.5 minutes. With the Federal Test Program (FTP) regulations getting tighter on EVAP, the systems had to continue evolving to allow even lower emission vehicles.
History Repeating
Getting ready for the 2001 model year, BMW introduced the next phase of EVAP leak detection. The new system is referred to as Diagnostic Module — Tank Leakage (DMTL). This debuted on the 3.0L engine using DME version MS43 and meets the new requirements for Ultra Low Emissions Vehicles (ULEV). It uses an electric air pump assembly. In the normal state, the valves are open to the atmosphere and fresh air is allowed into the EVAP system. After the vehicle is shut off, the pump is energized and forces air through a .5mm orifice. The DMTL monitors and records the amp draw of the motor. Then, a valve switches over and the pump is activated again, but now pumps air into the EVAP system. If the current draw is the same, the DMTL determines there must be a .5mm leak in the system, which indicates a small leak. If the current draw is lower, then there must be very little pressure built up in the system, which indicates a large leak. If the amperage draw is higher, there must be greater pressure in the system, which means no leaks are present. This is a sophisticated system, and, as a result, it is very difficult to test.
When There Is a Fire, What Do You See?
So, how are we going to test these various systems for leaks? Generally, EVAP is tested with very small amounts of vacuum or pressure. Special test equipment is required for measuring and monitoring the subtle changes. After over ten years of implementation, the subject of testing EVAP is still up for debate. You may not find your test method here, but if it works for you keep doing it. We realize not every shop has the high-dollar test equipment to monitor the pressures in the system. Even if you do, this will not tell you where the leak is, just that you have one.
Since we already have the diagnostic monitor of the vehicle to tell us there is a leak and the GT1 is capable of running the monitor, we are going to focus on finding the leak and testing individual components starting with the early systems that use the Fuel Tank Pressure sensor mounted in the liquid/vapor separator. The FTP should read over 4.50V DC at sea level, normal atmospheric pressure. When a vacuum is drawn, the voltage may go as low as .5V. Remember, vacuum is not measured in inches of mercury here, but in millimeters of water, which reflects a much weaker vacuum.
After checking simple things like the gas cap, you can quickly determine if you have a leak. Manually close the shut-off solenoid, activate the purge solenoid and monitor the FTP signal voltage. Deactivate the purge solenoid and the EVAP system should be completely closed. Continue to watch the FTP signal voltage and see if it drops. If it does, you have a leak.
One of the best ways to look for a leak is with a smoke machine. Not just any smoke machine, either — it must be EVAP safe. Since these devices burn oil to produce smoke, care must be taken to assure that fuel vapors don’t enter the machine. Also, it is not recommended that you pressurize the EVAP system to over 0.1 BAR (1.5 psi) as you might damage it. A flow-meter incorporated into the tool is also very useful to determine if there is a leak. Bright lighting will help you see the small wisps of smoke seeping out of the leak.
Remember, smoke will only reveal an external leak. For example, if the shut-off solenoid is not closing properly, you will see smoke leaking out of it. However, if the purge solenoid is not closing properly you will not see any external smoke. Also remember to disconnect the intake side of the canister purge solenoid so you can see the smoke. Another option is to energize the shut-off solenoid and see if the FTP signal voltage drops before opening the canister purge solenoid. If the signal voltage drops, then the purge solenoid must be stuck open. The resistance of the purge solenoid is about 28 ohms. In order to flag a code for this solenoid, the DME expects to see a rich/lean switch when the solenoid is open. If it is not satisfied with the mixture change, then it will pulse the solenoid on and off and watch for an rpm change at idle.
Leak Detection Pump
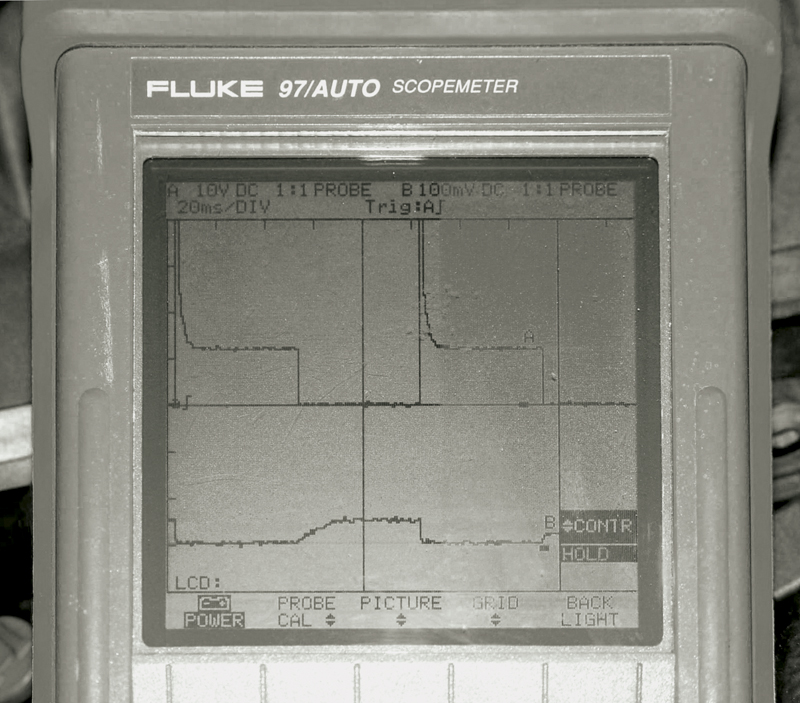
You can monitor the amperage draw of the canister purge solenoid to see if it is stuck or sticking. The top trace in this photo indicates the voltage command by the DME during activation test mode. The lower trace indicates the current pattern. With 100mv equaling 1 amp, you’re looking at about .5 amp.
This system does not have an FTP, so we cannot monitor its signal voltage. We can monitor the switch mounted in the LDP, but the signal will either be battery voltage or ground, neither of which is precise enough to indicate a leak. It is more important that we watch the switch input over a specific time period to indicate if there is a leak or not. In the normal state, the lower chamber of the LDP is open allowing fresh air into the canister. Very often after a cold start, the DME energizes the LDP solenoid with an on/off command. When the LDP is commanded on, the internal diaphragm forming the upper chamber is pulled up drawing air into the lower chamber and closing the vent. When the solenoid is de-energized, an internal spring forces down the lower chamber and the vacuum in the upper chamber is bled through the balance tube to the vent. Also, the air drawn into the lower chamber is forced out into the evaporative system creating a positive pressure.
This on/off pulsing of the LDP solenoid generates a pressure in the EVAP system. The normally open (12V) LDP switch closes under the pressure (0V) and stays there until the pressure starts to drop. The switch will toggle back and forth as the pressure decreases in the system. If the switching ends early, it is determined that there is a large leak. If the switching carries on long enough, then no significant leak is detected. You can check the function of the LDP switch easily by running the engine and monitoring the signal voltage on the switch and energizing the LDP solenoid. The switch voltage should change from 12V to ground. If you are using smoke to fill the system, you will need to close the vent. Activating the LDP solenoid while the engine is off will not close the vent, so you have to supply your own vacuum source to the LDP.
DM-TL

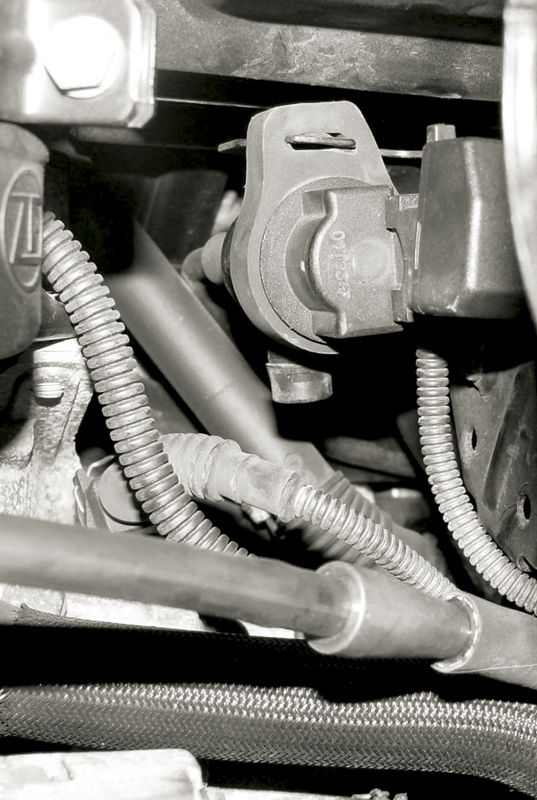
Here is a Bosch-manufactured LDP. Monitor the switch input while the engine is running and the LDP solenoid is activated. You should see the voltage change from 12 to 0 volts. The best way to run this monitor is with cold starts and warm-up times of over three minutes.
As already mentioned, this system first appeared in 2001 vehicles with DME version MS 43 and the 3.0L engine. Eventually, it was phased into all vehicles. This system is much more difficult to test than its predecessors. The variations in amperage draw are small. However, if the motor amperage is abnormally high, this indicates the motor may be locked up or debris has entered the reference orifice. Like the LDP, the DMTL unit is the vent for the system, so you must close the vent to use smoke detection. This can be done with the GT1, or by manually grounding the vent switchover solenoid in the DMTL unit. Once again, the canister purge solenoid needs to be checked for proper closing. You can also check this by simply applying vacuum to a closed solenoid and seeing if any vacuum is found on the other side.
To assist in vapor management while refueling, an Onboard Refueling Vapor Recovery (ORVR) valve is included, which allows tank fumes to be drawn into a chamber in the gas station’s fuel filler nozzle. The running of the monitor for this involves extended idling of around five minutes, particularly before engine shutdown.
Mode $06
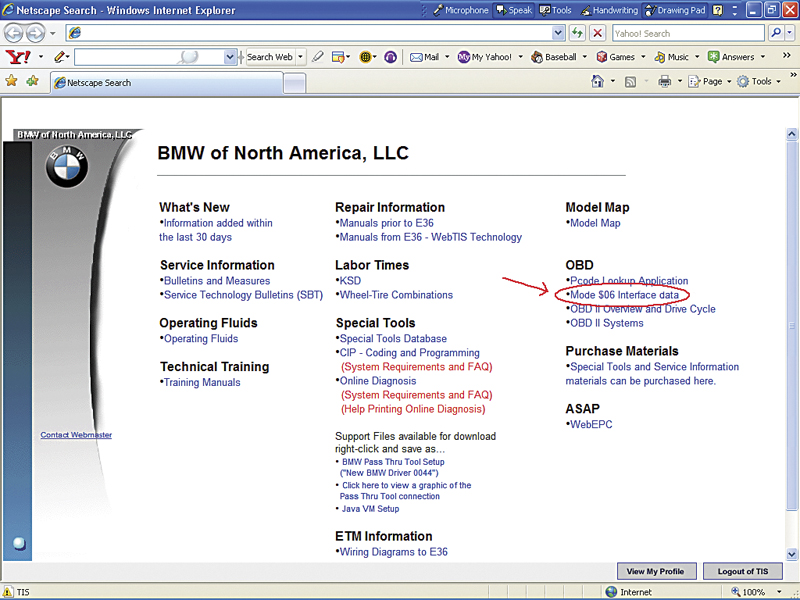
Going to the BMW technical website (www.bmwtechinfo.com) will give you access to the Mode $06 tables for component and test IDs. Knowing which test failed will help you to determine what the cause is.
OBD II requirements include Mode $06 (sometimes referred to as Component Parameters) for evaluating monitor performance. Using a generic scan tool, you can access Mode $06 data after a code has set. Once you see an EVAP code, do not just clear it. While in Mode $06 scroll to the proper component and test ID. A table of these component and test IDs is available on the BMW technical website. Test ID #5 represents the EVAP monitor scores. They are often given in hexadecimal form, so you may have to use a hexadecimal conversion calculator (found in MS Windows XP), or learn the various scales used and what they mean. You will be given a maximum and minimum value and a measured value. If either the maximum or minimum values are passed, a code may set if enabling criteria(such as coolant temp, ambient air temp,
fuel level, etc.) are met.
Finally . . .
EVAP testing and running the EVAP monitor are some of the most difficult diagnostic dilemmas facing any technician. We hope you are now armed with the knowledge and ability to tackle these elusive problems.



0 Comments