
As always, at Mercedes-Benz the top priority is the safety of the people who drive its vehicles. Airbag systems need to be maintained and serviced to ensure the same level of safety that the engineers intended.
. These monitor if someone is sitting in the seat and the relative size of the individual. Regardless, Mercedes-Benz highly recommends that all children be seated in the rear passenger seats where they are safest.")
This is a passenger seat occupant sensor and BabySmart™ transceiver for an older SRS (later Occupant Classification Systems have their sensors sealed into the seat cushion). These monitor if someone is sitting in the seat and the relative size of the individual. Regardless, Mercedes-Benz highly recommends that all children be seated in the rear passenger seats where they are safest.
Mercedes-Benz has always been at the forefront of occupancy safety. In 1969, United States Federal law mandated automatic occupant restraint systems. Yet, since 1967 Mercedes-Benz had been developing airbag technology for its passenger vehicles. By 1980, the company had started to employ this advanced technology on a growing number of its vehicles. Initially, there were some of the same concerns that we hear about today, such as how to prevent secondary injury as a result of airbag deployment, particularly as relating to children and smaller passengers.
Supplemental Restraint Systems (SRS) have come a long way since the early generations. Complex computer algorithms differentiate between smaller and larger impacts, seat occupancy detection sensors prevent airbag deployment if a light-weight individual (child) is sitting in that seat, and dual/multiple-stage airbags have been only a few of the advancements made over the years.
What is the Goal?
While it is often believed that airbags are deployed to counter forward impact in the event of an accident, this is not entirely true. If a body flying forward is struck by a deploying airbag traveling in the opposite direction, the impact might be twice as great, possibly causing greater body trauma. The goal of an airbag system is to deploy fully before body contact and gradually slow down the body that is traveling forward. This gradual slowing process keeps points of impact at a level the human body can absorb. This also means the bag must fully inflate quickly, to the tune of about 40 milliseconds or less. A body not seat-belted in could impact the bag at the wrong time and/or slide around the bag negating its intended purpose. Seat belts need to be used to control the occupant’s position and maximize the air bag’s effectiveness. In fact, some older systems were engineered to only respond with the respective seat belt fastened.
With different body types, both the distance to the airbag (seating position) and energy of impact differ. These factors also play into the SRS’s effectiveness. So, multi-stage airbag systems were developed that can differentiate between more and less severe impacts and deploy with only enough force to counter the forces exerted on an occupant during the accident. With this added sophistication comes added diagnostic complexity. Self-diagnostic capability has been incorporated into each control unit and is monitored during each ignition key cycle to ensure that the SRS is functioning properly. When the SRS warning light comes on, the driver is directed to the “Workshop” to address the problem. This not only serves as a warning to get the vehicle repaired, but also as a warning that the SRS may not function properly in the event of an accident.
“Visit the Workshop”
If this warning message appears in the driver’s information display, or after a four- to 20-second bulb check the Airbag or SRS warning light stays on, the SRS self-diagnostics have determined that there is a fault in the system. There are many DTC (Diagnostic Trouble Codes) associated with SRS. It is your job to determine what code is setting and what testing procedures need to be implemented. Your Star Diagnosis, or Compact III, can pull these codes for you and even help you step-by-step along a diagnostic trouble tree with the use of WIS.
When pulling codes from the SRS, you will notice that there are “B” codes. As you may know, the Society of Automotive Engineers (SAE) implemented a program to homologate automotive service information among the various manufacturers that sell vehicles in the United States. You should also know that when searching for diagnostic information either in the vehicle itself, or in service information, that DTCs have been broken down into several categories, such as:
- PXXXX Powertrain
- BXXXX Body
- CXXXX Chassis
- UXXXX Communication
- Etc.
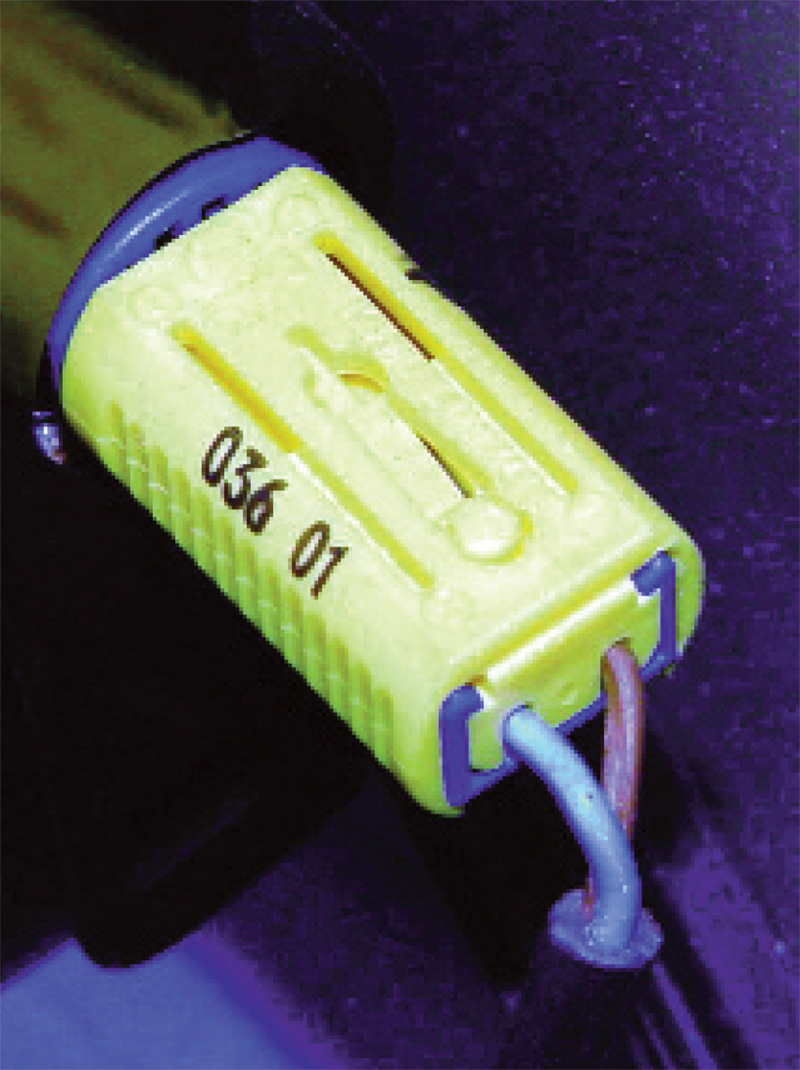
Yellow connectors and harness tape indicate that this is airbag system wiring. This is a two-wire squib for the door-mounted airbag. If you had a fault code for this airbag, you would open this connector and measure resistance between it and the SRS control unit.
Since the SRS is part of the body, you will find that its DTCs are “B” codes. If you would like to retrieve codes from the SRS, you need to select “Body.” The next pull-down menu should display SRS or Airbag. Upon retrieving codes you will notice all of these codes are “B” codes unless you have a communication fault. All “U” codes are for a failure in communication with one of the other control units. There are two different codes available from the SRS, first is the “Stored Code” and second is the “Active Code.” The stored code is a problem that was detected using the SRS control unit’s failure criteria, but is not currently a failure. These problems still need to be addressed, but conventional diagnostics will probably yield no failed components at this time. Intermittent electrical connections and/or system voltage issues could flag this type of code. Diagnostic testing should include more in-depth procedures such as voltage drop to arrive at any useful conclusion. The active codes are just that, active. They are hard faults and are occurring at that moment. Here, straightforward diagnostics should find the cause of the DTC.
Once you have retrieved a DTC, you will need to look up the proper testing procedures for this/these code(s). Here is where a paid subscription to www.startekinfo.com can provide manufacturer-specific, accurate and pertinent testing for this particular problem. When dealing with vehicles around the 2000 model year, you can look up service information in the “Launch Manuals” selection under Service Info, or in WIS-Net. There, you will be asked to select the chassis of the vehicle you are working on. Once you have selected the chassis, look at the left side of the screen and you will see a list of the various sections of the service repair manuals. At the top of that list should be “Body and Accessories” just above “Chassis and Drivetrain.” Select “Body and Accessories” and you will now see a pull-down menu of the various sections. Select Volume 5.1 and on the right side of the page you will see another list of chassis to choose from. Once you select a chassis within a model production year (under selection 16), there will be displayed an additional list of diagnostic service information to choose from. The list is broken down into three sections, Diagnosis, Electrical Test Program (ETP), and Control Unit Coding. Diagnosis gives you trouble code tables, data PID actual values and a symptom-based trouble tree among some other choices. ETP gives you component location and step-by-step trouble tree testing for each circuit in the SRS. Keep in mind, these testing methods are based on being a properly equipped shop with the special service tools, such as factory scan tools and breakout boxes, that allow you to precisely follow the test procedures.
Accident Damage
If the vehicle has been in an accident, self-diagnostics indicate sensor data that can be recalled to help indicate what components need to be replaced and what sensors have failed. Obvious repairs include SRS components that have deployed, or have received physical damage. You do not have to replace the control unit, or other parts that were not damaged or deployed, unless otherwise instructed by the party responsible for repairing the vehicle, such as an insurance company. Obviously, if an airbag has gone off, it’s going to need to be replaced. Since the vehicle is obviously being driven at the time of the accident, the driver’s side airbag is going to deploy. Since the airbag is getting replaced, we also recommend replacing the clock spring. What’s a clock spring?

In the unfortunate event of a collision, the SRS works so fast the bags are fully deployed by the time an occupant makes contact with them.
Since the steering wheel must turn to direct the vehicle and the driver’s side airbag is in the steering wheel, a device is needed that allows the firing charge to make it to the airbag no matter what position the steering wheel is in. The clock spring performs this task. It has an electrical connection on the steering column side. This is what carries the signal from the SRS control unit. This side of the clock spring is mounted solidly to the steering column. A flexible band of wire is mounted in the clock spring and carries the current through to the other side. This side is solidly mounted to the steering wheel. It is the flexible band of wiring that maintains the electrical connection while the wheel is being turned, not the brushes you might expect from having seen cruise or radio controls mounted in the steering wheel. Since the steering wheel is used every time the vehicle is driven, this flexible band gets expanded and retracted constantly. Although engineers take every precaution to build a component that will last, it will eventually wear out. Given sufficient use, it will finally break and the connection will be lost. This can also happen if mechanical work outside of the vehicle is performed. The act of changing a power steering gear can damage the clock spring if precautions are not taken. If the steering knuckle is not carefully removed (and we know how hard that can be sometimes) excessive steering shaft movement can be transmitted up the steering column and damage the clock spring.
Another simple diagnostic test is to clear the clock spring code. If the code returns right away you have an open in the “Squib” circuit. This is more than likely the clock spring, so test that first. If the code does not come back right away, simply turn the steering wheel and see if the code returns. If it does, you can now be more certain that the clock spring has failed, narrowing your search for the solution to the code. Mercedes-Benz recommends that you remove the airbag from the steering wheel and insert a fixed resistance between the two terminals in place of the airbag. Then, measure resistance from either the steering column through the clock spring, or from the SRS control unit. At this point you can turn the steering wheel and see if the resistance changes. If it does, then you need to replace the clock spring.
Used or reconditioned airbags?
Mercedes-Benz does not recommend the installation of salvaged, used or reconditioned airbag system components since they can strongly compromise the safety features of the vehicle, leading to an increased injury or even death risk to the occupants.
Used or reconditioned airbag components do not ensure the same safety features as new components, due to the following: 1. History of the component is unknown (pre-existing damage, removal or reconditioning processes, etc.) 2. Airbag components are specifically developed for each vehicle, working together with other safety systems (e.g. safety-belt, sensors, etc.), resulting in the fact that not every airbag is compatible with every vehicle. 3. During the life-cycle of a model, several enhancements may have been introduced (new regulations, new developments, new parts, etc.). Salvaged, used or reconditioned airbag components do not ensure the fulfillment of the latest requirements.
For all of the above reasons, Daimler AG strongly recommends that no salvaged, used or reconditioned airbag component be installed on any Mercedes-Benz in the interest and safety of all parties (drivers and vehicle’s occupants, insurance companies, repairing workshops liability). Next time, we’ll look at the Emergency Tensioning Device (ETD), further testing and checklists.


0 Comments