In the last issue of StarTuned we introduced basic air bag maintenance and repair and as promised, here is part two of Cushioning the Blow. Now we’ll take a look at the Emergency Tensioning Device (ETD), further testing and checklists.
Mercedes-Benz has always been at the forefront of occupancy safety. In 1969, United States Federal law mandated automatic occupant restraint systems. Yet, since 1967 Mercedes-Benz had been developing airbag technology for its passenger vehicles. By 1980, the company had started to employ this advanced technology on a growing number of its vehicles. Initially, there were some of the same concerns that we hear about today, such as how to prevent secondary injury as a result of airbag deployment, particularly as relating to children and smaller passengers.
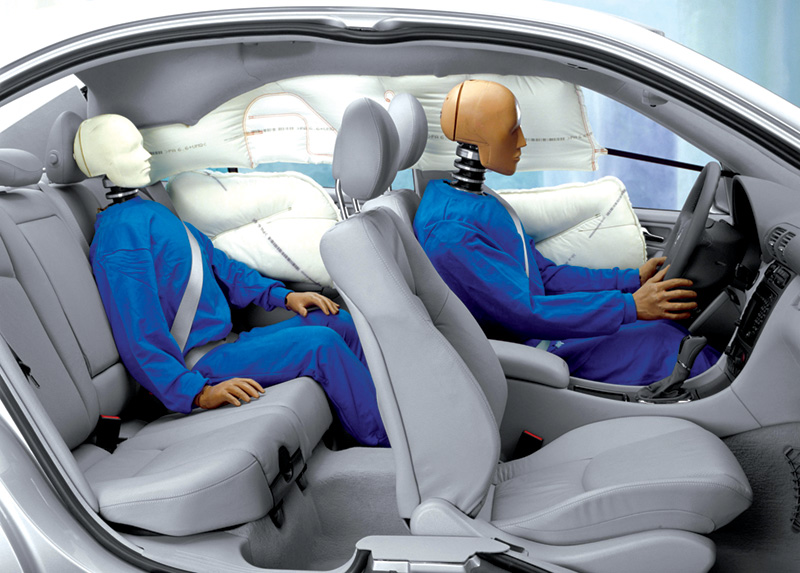
Supplemental Restraint Systems (SRS) have come a long way since the early generations. Complex computer algorithms differentiate between smaller and larger impacts, seat occupancy detection sensors prevent airbag deployment if a light-weight individual (child) is sitting in that seat, and dual/multiple-stage airbags have been only a few of the advancements made over the years.
Emergency Tensioning Device
Another component that needs to be replaced in the event of an accident is the Emergency Tensioning Device (ETD). The ETD is a pyrotechnic component that retracts the seatbelts during impact to keep the occupant in the proper position for contact with the airbag and distribute some of the pressure exerted on the occupant’s body more evenly. The ETD is commanded to deploy by the SRS control unit when an impact is sensed. If the impact is not severe, the SRS control unit can activate the ETD without the airbags in only the seats that are occupied. Both front seats have this feature and some rear passenger seats closest to the doors. The SRS control unit uses the Seat Belt Buckle switch to determine what seats are occupied. These switches can be the source of a self-diagnostic code and can be monitored on you factory scan tool. Most Mercedes-Benz vehicles utilize a dual-stage ETD. The first stage uses an electric motor to pretension the seat belt in order to secure the individual in the seat. This is often in response to a signal from the BAS control unit (Or ASR/ESP unit) in the event of a panic stop. The second stage uses a pyrotechnic ignition squib to fire a charge to tighten the belt even further if there’s an impact. There are also force limiters to slowly slacken the belts during certain accidents.
As mentioned earlier all you have to do to test the system once components have been replaced is simply turn on the ignition key. Every time you cycle the key, the SRS does a comprehensive self-test during the four to 20 seconds that the airbag warning light is on. There is no need to evaluate the system once this self-check has passed. There may be codes in the system, but these are past problems or at least problems that are not occurring at this time. We recommend clearing all codes in the SRS after repairs have been completed. This will help the next technician working on the system to properly diagnose the current problem without any wasted effort.
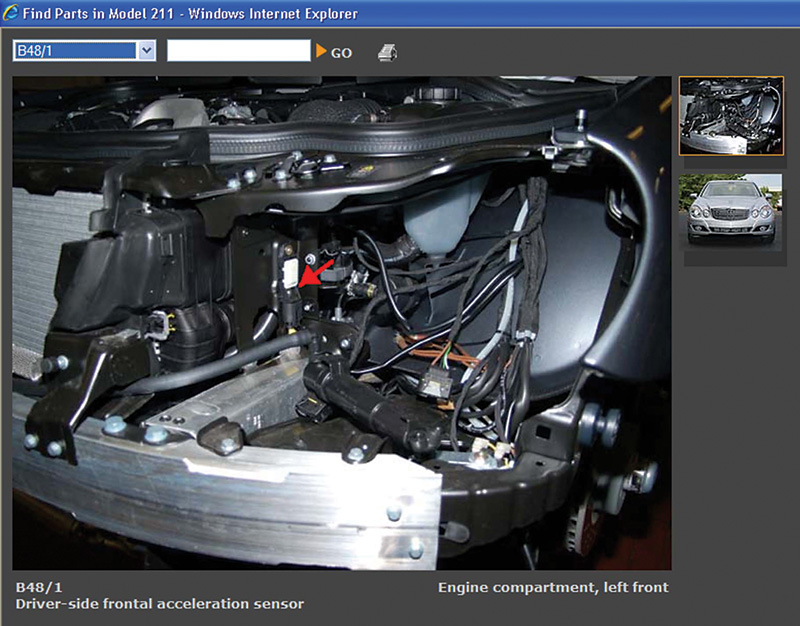
Of course, some other critical components in the SRS are the acceleration sensors, otherwise known as crash sensors. These are placed in strategic locations throughout the vehicle to help determine the point of impact and the severity of the crash. The SRS control unit also has an acceleration sensor built into it and it is often mounted on the transmission tunnel between the driver’s and passenger’s seats. This sensor reading, in combination with the satellite sensors placed around the body, help the SRS control unit learn the facts about the direction and level of impact of the collision. The control unit also houses a roll-over sensor that determines that conditions exist for an impending roll-over. All of these sensors help the computer logic decide what airbags need to be deployed and when. For instance, in the event of a side impact the side or curtain airbags would be deployed. The SRS control unit also receives signals from other control units on the network, such as the BAS, to indicate a panic stop, and if the ETR needs to be deployed in either the first or second stage before impact.

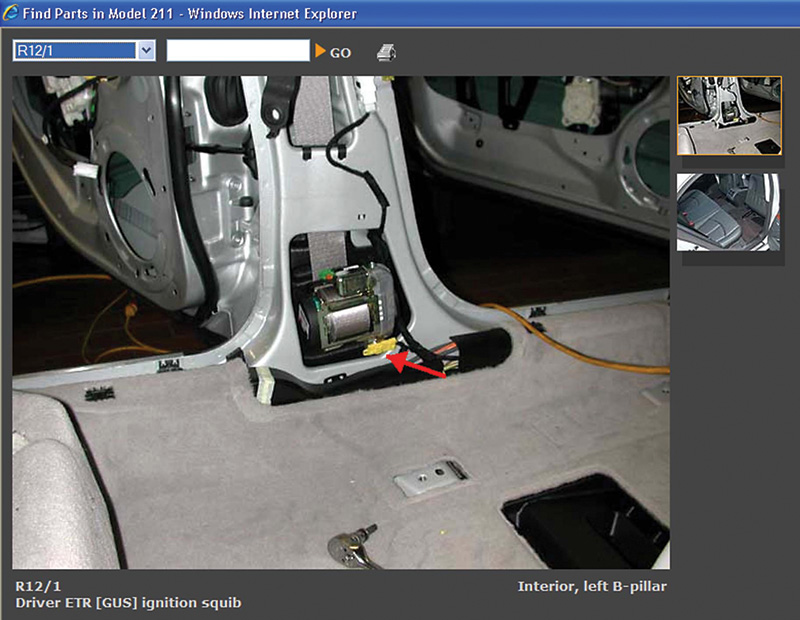
With a paid subscription to www.startekinfo.com, you can access information such as component location of the driver’s seat ETD found mounted here in the B pillar. These units have a pyrotechnic charge that fires and applies tension to the belt even if the airbags do not deploy.
A Short Checklist
When it comes to diagnosing a problem in the SRS, you will find no better tool than the SRS control unit itself. As mentioned earlier, if it detects a problem in the system it will flag a code for the components in question. Testing is relegated to measuring circuit integrity between the SRS control unit and each of its inputs and outputs. Be sure to only unplug the SRS control unit with the battery disconnected, or the ignition key in the off position. Also, identify if the vehicle has the Dual Battery system, and, if so, disconnect the other one as well. Then, unplug the component you would like to test and install a jumper plug of a fixed resistance between the two pins of the component, such as the driver’s side airbag squib, the passenger side ETR squib, or the front acceleration sensor. Measure the resistance of the circuit with your DMM. Of course, this testing cannot be performed with the airbags connected to the system as there may be an accidental deployment of an airbag. Resistance should read the same as when you installed the jumper, although a few tenths of an ohm higher is acceptable to account for the wiring in the system. If the resistance is abnormally high, it indicates an open circuit or poor connection somewhere in the wiring. If the test value is lower than the resistance of the jumper, there is a short between the two wires you are testing. If the resistance it acceptable, yet you still flag a code, you are probably dealing with component failure.

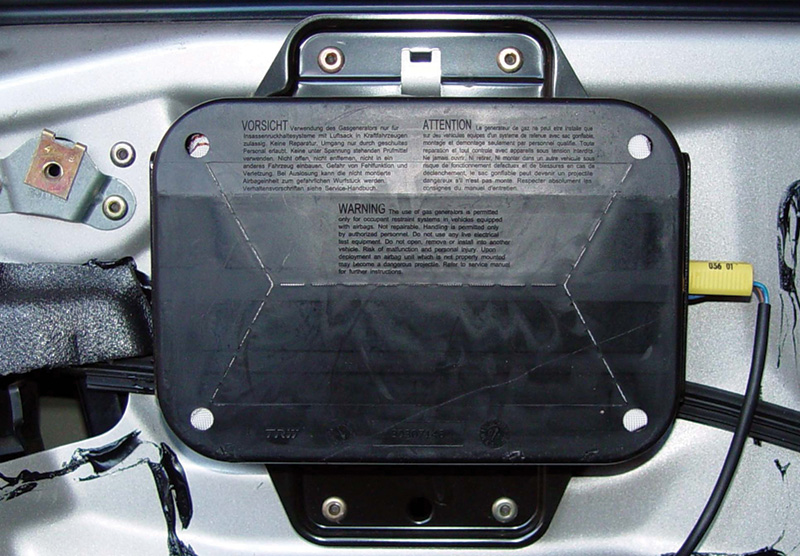
This is a driver’s door airbag on an ML series. Notice how the unit is riveted in to provide clearance for the window, so nuts and bolts should not be used as a substitute.
Depending on the location of the harness being tested, you may have to replace the whole harness or find the damaged wiring in the existing harness and repair it. In the case of the acceleration sensor, one wire comes from the SRS control unit and the other wire continues to a grounding point. You will need to test resistance between the single wire on the SRS control unit and ground to determine if the wiring is the problem, or that there is a failed component.
With all the SRS components installed in the vehicle and everything else safe to connect the battery, you can turn on the key and verify that the SRS/Airbag light goes out. If not, you can retrieve codes and start testing the necessary circuit in the system while the car is still apart and repairs can be performed. If you wait until the entire vehicle is assembled, there may be additional labor involved in removing and reinstalling components to access the problem. This wasted time is probably coming out of your bottom line on the job.
The Importance of a Proper Repair
In the course of a body repair job, there may be the temptation to cut costs by using aftermarket, or even used parts. These parts have already been involved in some incident that sent the vehicle to a salvage yard in the first place and have been sitting there exposed to the elements. This often leads to corrosion. These conditions can wreak havoc on internal circuitry and result in unpredictable operation. It could be a liability nightmare if corners were cut that provide less-than-adequate SRS operation if another accident occurs. This may also put you in hot water with the insurance company that is footing the bill for the repair. The company will often guarantee the work it has insured, and may force you to absorb the cost of substandard components and workmanship. So, it makes sense to use only genuine Mercedes-Benz replacement parts available from the parts department of your authorized Mercedes-Benz dealer.


0 Comments