by Wade Nelson
Determining the reason a battery keeps going dead includes testing for parasitic draws. The rule of thumb is, “Anything under 30mA is acceptable, anything over 50mA indicates an excessive draw.” The greatest difficulties in measuring parasitic draws are mostly practical matters. Having a third hand would make taking a parasitic draw measurement much easier. Mistakes are easy to make, like inadvertently opening a car door, or leaving the keys in the ignition. The first will blow the fuse in your DMM, the second will give you an incorrect reading. Here are some tips and tools to make parasitic draw testing faster, easier, and perhaps save you a few meter fuses.
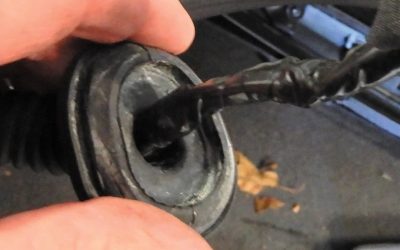
The primary difficulty in making a parasitic draw measurement lies in establishing the “shunt” connection through your ammeter (DMM) prior to disconnecting the terminal from the battery post, without accidentally breaking that shunt connection while removing the terminal from the battery post. It absolutely has to be a “make-before-break” transfer to avoid sending one or more modules back into an initialization process.
Having a co-worker help you set up the test leads on a parasitic draw measurement is the fastest method of getting the job done. Several commercially available test adaptors will allow you to accomplish the task solo including the Kent Moore J38568 and OTC 7645, or you can home-brew an adaptor.
 One eBay vendor, “A-fluke,” offers a parasitic draw tester, similar to an OTC7645, but with test leads already attached. If you were to cut one of the two leads, and insert a 10A blade fuse holder or circuit breaker, you’d have an almost perfect tool for parasitic draw testing – one that would prevent you from ever again blowing an expensive meter fuse.
As with all measurements of electrical current, you sever the circuit, and insert your ammeter in-line between the two severed ends. But in this case, you can’t ever allow the two ends to become completely electrically disconnected. Current must always be able to flow, either through the battery cable itself, or “shunted” through your DMM. If the circuit gets completely opened and you re-connect the leads, one or modules in the vehicle will go into an initialization routine, boosting current flow considerably. This may or may not blow your meter fuse, but it will definitely give you an incorrect reading. You have to wait until that process completes and they are ready to go to sleep before you can try again. On some vehicles, you can use a scan tool to command modules to quickly go to sleep, which is a time-saver.
Calibration Run
You need to determine what amperage range the parasitic draw is in immediately after the ignition is turned off, and approximately how long it takes before the vehicle goes to sleep. It could be 45 seconds, or 15 minutes on different vehicles. Baseline information from testing similar vehicles can be invaluable, and save you time on a “problem” vehicle.
Suppose that for 30 seconds after ignition off, you’ve got a current draw of 2.2 amps, or 2200 milliamps. After 45 seconds it goes down to .12A, or 120mA. After five minutes it then decreases to 17 milliamperes. You may need to change the range on your DMM, perhaps even which jacks the probes are plugged into to accommodate measuring such a wide range of current levels. Since changing the jacks, or even switching the range, can momentarily break the circuit, you may need to plan ahead, and NOT insert your DMM into the circuit until an appropriate time.
Pre-Test
GM’s parasitic draw test procedure recommends road testing the vehicle and activating ALL electrical accessories, including the radio and air conditioning prior to parking, turning the ignition switch to the OFF position and removing the key. With today’s feature-laden cars, that can be a lot of button pressing.
Be sure to unplug any accessories from the cigarette lighter outlet and any accessory outlets in the rear of the vehicle. Most importantly, remove the keys from the ignition. Otherwise, some systems may stay powered-up. Consider the effect on the factory security system of having the hood up. Look for hood switches, and defeat them. Unhook any underhood trouble lamps. If having the hood up doesn’t prevent its use, use the remote (key fob) to lock the vehicle, just as you would if you were leaving it in a parking lot. Make sure all doors and hatches are shut.
Get Ready:
The most time-consuming mistake you can make is starting the measurement process with the fuse in your meter already blown. Test it beforehand by measuring the current through an #1156 tail lamp bulb set on one of the battery terminals, using your meter leads to form the other connection. It should read approximately 1.6 amps. Have some extra meter fuses available in case you screw up. Courtesy lamps alone may not pull more than 10A, but other onboard systems may “wake up” if a door is inadvertently opened, immediately putting the shunted draw over your meter’s fuse limit.
 Second, have all the alligator clips and jumpers you could possibly need, including perhaps some battery charging clips or side post adapters, so after getting everything hooked up you can set your meter down and walk away. Having to stand there and firmly press a DMM probe into a lead battery terminal gets very old after very few minutes, especially the third or fourth time you do it! This is where a DMM with min/max recording ability proves its value, since you can walk away, and come back anywhere from 10-30 minutes later and hit the button to see the value.
The “Usual Suspects”
When a vehicle has an unacceptable amount of parasitic current drain, remove one fuse at a time until the current drain falls to an acceptable level. This will indicate which circuit is causing the drain. If pulling a fuse eliminates a parasitic draw, refer to the vehicle’s power distribution schematics to determine which circuits are fed by this fuse. Careful – you can’t just open the door to get to an in-cabin fusebox!
Using 30mA as a baseline, you can sometimes use the amount of excessive parasitic draw to help refine your guesses as to what may be causing it. For example, is there enough additional drain to suspect a light bulb is illuminated somewhere? Beware of non-fused circuits. A failed diode on an alternator can cause a parasitic draw that pulling fuses won’t reveal. Some relay circuits may not be fused. Improperly installed audio amplifiers staying powered up all night long are some of the most common causes of parasitic draws. You’ll often see the power leads for “suspect” systems “MacGuyvered” directly to the battery terminals. Before you pull a single fuse, unhook these bad boys and re-check the parasitic current levels.
Future of Parasitic Draw Testing
The future of parasitic draw testing is either very dim or very bright, depending on how you look at it. The latest BMWs and Toyotas and most hybrids incorporate a sensitive battery current monitor directly on the battery terminal. Combined with the PCM, this is capable of monitoring and recording parasitic draws. All the tech need do is hook up a scan tool and view recorded data.
Multiple battery setups can complicate parasitic draw testing. Hybrids aren’t the only vehicles equipped with dual batteries these days. Others vehicles include the Mercedes McLaren SLR and Lexus 460, and “mild” hybrids like the Chevrolet Silverado. Unlike large trucks and RVs where two or more 12V batteries are simply connected in parallel, various electronics may greatly complicate parasitic testing on these vehicles. Virtually all hybrid “main” batteries incorporate battery current monitoring features, fortunately.
Summary:
Parasitic draws are one of the three most common causes of dead batteries. Any parasitic draw over 50mA is suspect. With a little practice making parasitic draw measurements becomes secondhand. The usual suspects in parasitic draw measurements are aftermarket stereos, amplifiers, and security systems. Homebrew or aftermarket adapters help make parasitic draw tests easier. The key technique is a “make-before-break” shunt of battery current through the DMM used to measure parasitic draws.
Parasitic Measurement Gotchas:The auto manufacturers seem to be intent on making parasitic draw measurements ever more difficult to make. Here are some of the “land mines” they’ve left behind: •Reportedly, some Chryslers are programmed to burn off the MAF sensor wire in the middle of the night, causing a noticeable increase in current – several amps. A similar report claims some Chryslers test 02 sensor heaters at oh-dark twenty. •NVLD (Natural Vacuum Leak Detection) can run on GMs for up to 45 minutes after Key Off. •Toyota’s EVAP pump can run for 10-12 minutes starting five hours after the engine is turned off. •On Ford Escape hybrids, the antilock brake system reportedly does a self-test with the key off. But when? •Boomerang 1 [theft recovery] devices draw between 35 and 55 mA. Boomerang 2 units “lay low” for 15 minutes when power is removed. Details on LoJack current draws aren’t available. •Some GM regulated voltage control (RVC) systems are designed to wake-up, perform a task, and fall back to sleep at regular intervals. •OnStar will create draws for the first 48 hours after turning the ignition off. The system will cycle every 10 minutes and spike to 250 mA for about ten seconds, taper down to 75 mA for another 45 seconds and go to less than 1 mA until the next cycle begins. This cycle stops if power is removed from the OnStar system for a short period and will resume once a GPS signal is reacquired. •Some Chevy Dual Zone Automatic A/C systems were designed to “stay awake” for up to four hours after the ignition is turned off. •As always, check for TSBs. |

0 Comments