We’ve all been performing brake jobs for as long as we’ve been technicians. We’ve heard all of the typical complaints in the aftermath:
”The brake dust!,”
”It’s vibrating when I brake!,” and, finally,
“That squeal!”
Let’s look at the savings that accrue if we do it right the first time.
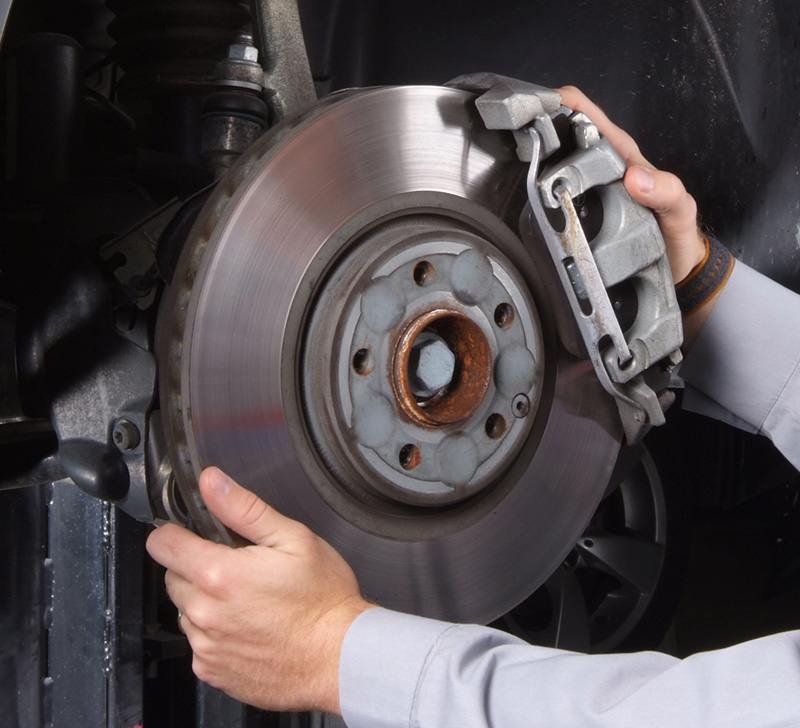
First determine if you are dealing with the SBC system. If you are, disable it. Then, you can start disassembly. These are heavy calipers, so suspend them so that there’s
We all perform brake jobs. Most of them go flawlessly — no complaints from the customer at all. Some do not go so well. We may have the vehicle in and on a lift once or twice more to take care of one problem or another. The time wasted in putting the vehicle on and off the lift either cuts into the profits of this job, or the next one. Take a minute to calculate the time lost on a single brake job comeback. Let’s say you do one brake job a day on average. For a five-day work week, that comes out to about 20 brake jobs a month. If 25% of them come back, and you only spend 30 minutes rectifying each one, that’s a loss of 2.5 hours a month, and, more than that, you may have some unhappy customers.
How can you avoid this wasted time? You’ll get all sorts of advice on how to install wheel shields, cutting the rotors, and insulating the pads, but you should realize you may only be masking a problem that can resurface in anywhere from a month to a few months. The time invested in doing the job right once represents substantial savings for both you and your customer. What causes brake dust? What creates a braking vibration? What makes the brakes squeal like that? If you can answer these questions, you can prevent these costly mistakes.
Most often, your demanding Mercedes-Benz owners are willing to invest in better quality parts, so you can still maintain the same profit margins as you would with aftermarket “equivalents.” Also, a brake job is more than just cutting or replacing rotors and slapping on a set of new pads. Let’s do a quick review of some overlooked items.
Fact of life
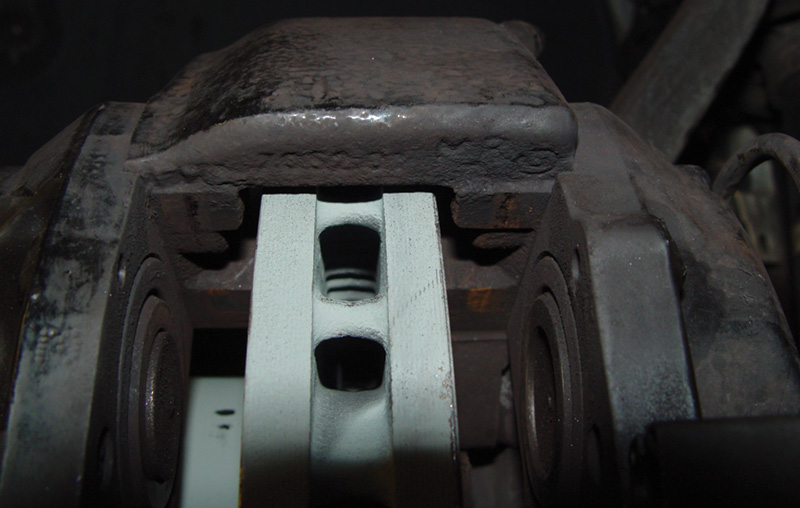
Look at the surfaces where the pads slide in the caliper. These areas need to be free of brake dust and corrosion to allow the pads to slide back and forth. If the surfaces are clean, you should not need any lubricant.
It’s very common for customers to complain about accumulations of dust on their beautiful alloy wheels. Unfortunately, there’s no real remedy, but explaining the truth about friction material formulas will help keep your patrons happy with your work. That is, brake pads are made according to a proprietary “recipe” that gives the best combination of stopping performance, durability, silent operation, and avoidance of dust generation. In the case of Mercedes-Benz Genuine Parts, these characteristics are very carefully engineered and tested, even to the point of the formulas being model-specific. So, to make pads that won’t produce dust would require sacrifices in other, more important areas. You also might want to recommend that they apply car wax to their wheels, which will keep the dust from sticking — just a quick rinse with a hose will wash it off.
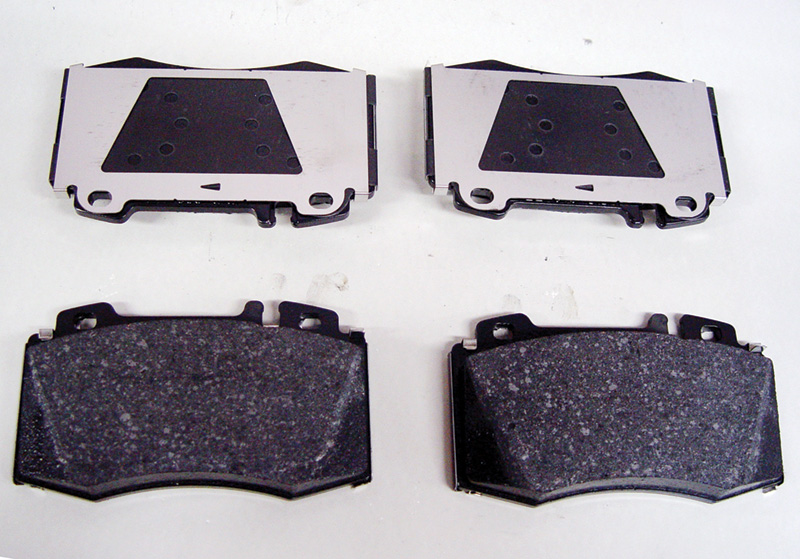
The OEM pads provided by your Mercedes-Benz dealer have chamfered friction material to help avoid brake noise. The shim on the back reduces brake pad vibration, which is what causes squeal.
Procedures
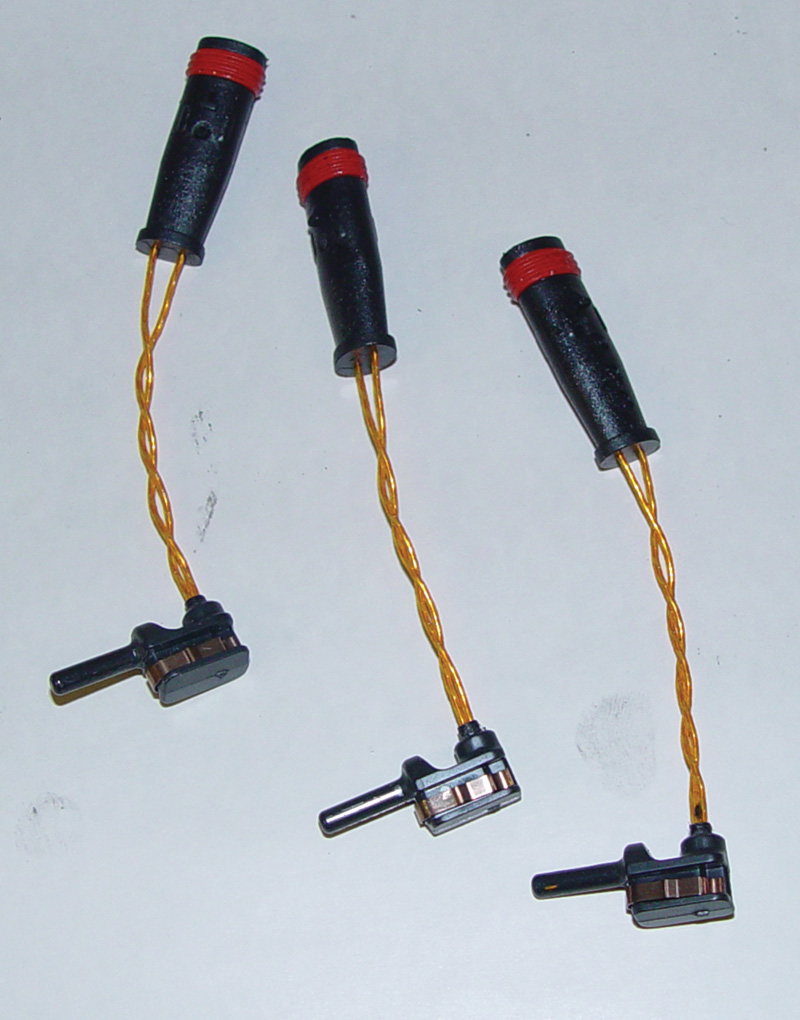
While ordering brake pads and rotors, don’t forget the brake pad wear sensors. You should replace them even if the old ones are not worn out. Be careful not to route the wires so that they bear against any moving parts.
If there’s a problem that needs to be diagnosed, it’s always best to do a road test, with the customer if possible, to feel and isolate the complaint. If it is a straightforward brake job, you should start with a visual inspection. All of the wheels should come off of the affected axle. If the pads are to be replaced, then they should be removed, and each pad’s thickness should be looked at. This will tell you if there are any sticking pads or pistons that may require special attention. Before any disassembly takes place, find out if the vehicle has SBC brakes. This system applies the brakes when the door is opened. If it were to be activated while the brakes are disassembled, it could be a disaster. For procedures on how to disable the system, refer to www.startekinfo.com. Once you’ve determined that the brake pads must be replaced, you need to look at the brake rotors. The finish should be perfectly smooth to properly “seat” or “bed in” the new pads. If a rotor has grooves, it will have to be resurfaced, or replaced.
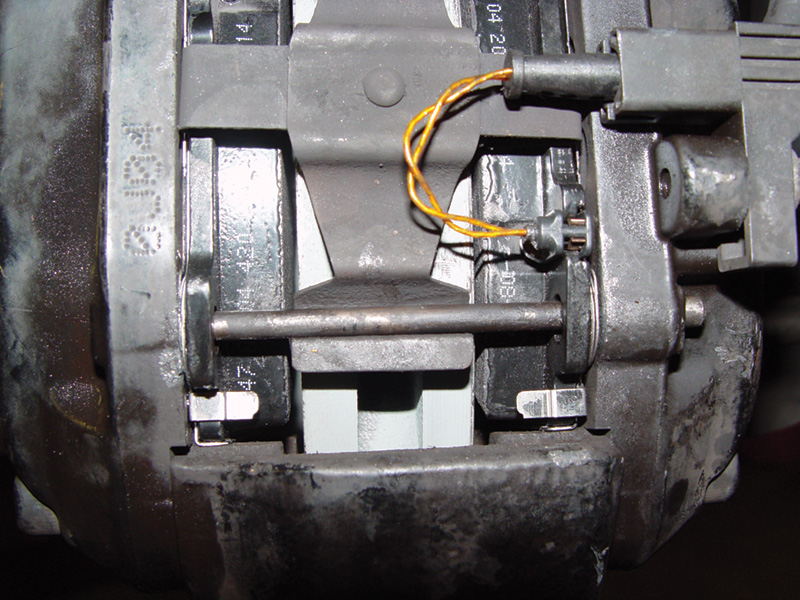
Clean and/or replace all brake hardware before reassembly. This well make the job go more smoothly, and will help reduce the chances of binding pads and pad vibration.
There are many rotor resurfacing machines that do a good job, but what will the thickness of the rotor be afterwards? Will it be down to the specified throw-away thickness? Even if it’s not quite, the thinner rotor will naturally be more prone to warpage and thickness variation. Also, the brake rotor run-out will need to be measured. If the rotor is warped, even more material will need to be removed to straighten it. This may require multiple cuts. Fast cuts will get you through the process in less time, but you will need to do at least one slow cut to create a fine surface for the new brake pads. These multiple cuts will add to the labor time.
A more cost-effective solution may be new rotors. In fact, rotor replacement has become the preferred choice, especially among first-class shops that specialize in Mercedes-Benz. As one service manager tells ST, “We’ve thrown away our brake lathe.”
Of course, in order to remove the rotor you will need to unbolt and lift off the caliper. Always make sure to suspend the caliper from a suspension component to keep the stress off the brake hose and lining sensor wires. Usually a securing bolt holds the rotor in place. Also, you may want to order new caliper mounting bolts in case the originals are damaged during removal.
Before Reassembly
Clean components work best. You do not want brake dust and road debris interfering with pad movement. In a Mercedes-Benz brake job, you will be dealing with either a single- or dual-sided piston caliper. With the dual-sided type, you should clean the surfaces where the pads slide. This will prevent uneven wear and unusual pedal feel. Scrub with a wire brush and wash with brake cleaner. Do not use compressed air as brake dust may be inhaled and create a health hazard. On single-piston calipers, steel springs fit into the caliper mounting bracket. You will still need to clean these surfaces, and you should replace the pad springs. New ones will apply the proper amount of tension to the pads, thus reducing the chances of brake squeal. You should also clean and lubricate the caliper guide pins. Do not use anti-seize compound because it accelerates wear. Synthetic brake grease will allow the caliper to “float” and apply even braking pressure.
Clean out as much dust as you can from the caliper dust seals without damaging them. The goal is to have all the components moving freely. You can now force the pistons back into the calipers. There has always been some debate as to whether or not the bleeder screws should be opened while doing this. The straightforward answer is that it depends. If the brake fluid is being replaced every two years as Mercedes-Benz recommends, then you do not have to open the system. Try to inform your customers that brake fluid is hydroscopic, which means it absorbs moisture over time. With those customers whose brake linings last only a year or so because of heavy use, a flush should be performed every other brake job. Besides moisture, flushing the system removes most other contaminants that may cause components to stick. While you’re at the dealer’s parts department picking up the pads and rotors, don’t forget to order OEM brake fluid and the other parts mentioned above.
Reassembly
When installing the new pads, always put the wear sensor in the inside pad. This is usually the first pad to receive pressure. When bolting on either the caliper, or the mount to the spindle, use an approved thread locking compound and torque the bolts to specifications. After connecting the brake pad wear sensor, you can install the wheel. Tighten the lug bolts to specifications with a torque wrench. If you hammer them on with an air gun, there is a chance you will over-tighten them and warp the rotor. While the vehicle is on the ground, apply the brakes repeatedly until the pedal is firm. It is now safe to go on a road test to check your work. If the SBC systems was disabled it will need to be enabled before your road test.
In Conclusion
Waiting for parts can slow down production. A one-step order from your Mercedes-Benz dealer will save you time and increase your profits. A single order of genuine original equipment brake pads, rotors, securing bolts, retaining springs, wear sensors, and brake fluid allows your independent repair shop to provide OEM-level service. Remember, a soft brake friction material will reduce squeal, but wears relatively fast and may create an objectionable amount of brake dust. A hard pad lasts longer, but is more likely to make noise and cause accelerated rotor wear. Original equipment brake pads from your local Mercedes-Benz dealership’s parts department offer the best balance between the two.
Download PDF 〉


0 Comments