Last time we explained how the Subaru Air Suspension System works. We’re back with Part Two to show you how to quickly diagnose and repair problems.
In the previous End Wrench (Summer 2001), we discussed the operation of the Subaru air suspension system (Subaru Air Suspension Part One – Operation, page 16). In this article, we will explain the diagnostic procedures and tools necessary to repair this system.
Testing a Solenoid Valve
To test the solenoid valve in an individual strut, perform the following steps:
- turn the ignition switch to OFF,
- connect a fused jumper wire between a known good ground and the strut solenoid’s terminal in the control unit connector (back-probe connector at the control unit, do not disconnect)
- connect a fused jumper wire between a known good ground and the air charge solenoid’s terminal in the control unit connector (back-probe connector at the control unit, do not disconnect),
- turn ignition switch to ON.
The strut should now begin to raise with pressure from the tank. When tank pressure drops to 109 psi, the pressure switch should close, and the control unit should turn on the compressor. If either solenoid fails to energize, make sure your connections are good, then check the solenoid with a multimeter.
Compressor Does Not Run
If the compressor fails to run during any strut- inflation checks, the pressure switch may be faulty. The following paragraphs describe several checks you can make.
You can bypass the pressure switch to see if that causes the control unit to turn the compressor on. To do that, separate the connector from the pressure switch. On the harness side, connect a jumper between the two terminals. This should have the same effect as if the pressure switch had closed its contacts.
If the compressor now runs, you know the pressure switch is faulty. Replace it and re-test the system. If the compressor still does not run, bypass the compressor relay. To do that, connect a second jumper between a known good ground and the compressor motor.
If the compressor runs, check the relay next. You can either try a new relay or continue checking with the jumper wire. If the relay is good, next make sure its coil and contacts are getting power.
If you do not measure battery voltage at the relay terminals, check the fuse connectors and wiring between the relay and the battery. If the relay is getting power, check for continuity between the relay and the control unit (at pin 12).
If you find continuity between the coil of the relay and the control unit, then the control unit is not closing a path to ground for the compressor. Replace the control unit and re-test the system.
Note: A failed control unit is the least likely failure in the system. Make sure you have properly done all the other tests before replacing the control unit.
Unusual and Deceiving Faults
Leak
An air leak in the system will likely cause the control unit to shut off the system after 8 to 10 minutes. In most cases, an air leak will eventually cause the control unit to run the compressor for that length of time, trying to either inflate a strut or raise pressure in the tank.
Valve Stuck Open
If a strut solenoid valve sticks open, the following sequence of events    will occur (example deals with a right front strut valve):
- When the control unit tries to raise the rear of the vehicle, the right front strut also raises.
- Soon the right front strut height sensor reports that it is too high.
- Because control unit logic commands “lower before raise,†the control unit stops trying to raise the rear and begins to lower the right front strut.
- When the right front strut height sensor reports that it has been lowered to the normal position, the control unit once again begins trying to raise the rear.
- Again the right front strut raises along with the rear.
This process can continue indefinitely. The system would not recognize that a fault existed. The owner might report that the compressor seems to be running a lot.
Bad Pressure Switch
A defective pressure switch can give some misleading symptoms. Here is just one example:
- Air pressure in the tank is low, but the pressure switch fails to close; the control unit does not know pressure needs to be raised.
- While driving, the control unit gets a signal from the right front strut height sensor that the air spring is low.
- The control unit opens the air charge valve and the right front strut valve.
- The expected result is that the air spring in that strut should inflate, but because tank pressure is low, this does not happen. The control unit keeps the two valves open for 8 to 10 minutes, then shuts off the system and flashes the height indicator.
- Control units with self-diagnostic capabilities (see next section) may incorrectly set a fault code indicating a failed strut solenoid.
Self-Diagnostics
Model year 1988 and later L-series vehicles are equipped with control units that have self-diagnostic capabilities. To use the self-diagnostic feature in 1988 and later L- series vehicles, command the control unit to enter diagnostic mode using the following steps in sequence, all within one minute:
- turn the ignition switch OFF and set the height switch to ON (high),
- turn the ignition switch ON then OFF,
- set the height switch to OFF,
- turn the ignition switch ON then OFF,
- set the height switch to ON,
- turn the ignition switch ON.
The height indicator will now flash to indicate any fault codes present. To read the fault codes, count the number of blinks as shown in the illustration.
To command the control unit to exit the diagnostic mode, turn the ignition switch to OFF, then to ON. If the system malfunction has not been eliminated, the height indicator will again flash (either immediately or after the 8-10 minute delay, depending on the fault).
When you have successfully repaired a malfunction, clear the control unit’s memory of fault codes. To do that, momentarily remove Fuse #5 (with the ignition switch set to OFF) or disconnect the negative battery terminal.
Self-Diagnostics For Vehicles Not So Equipped
The control units in pre-1988 model year L Series and XT Series vehicles
do not have self-diagnostic capabilities. However, it is possible to temporarily install a control unit with self-diagnostic capabilities for the purpose of trouble-shooting.
To perform this procedure, you will need the control unit and (depending on the vehicle) two other items:
- electronic control unit (P/N 88045GA100)
- height switch (P/N 83002GA620)
- test connector (check code) (P/N 81805GA990)
The first step is to replace the vehicle’s Air Suspension control unit with the test control unit. Then you will need a method of commanding the control unit to enter diagnostic mode. Recall that the height switch is used in combination with the ignition switch to command the control unit to enter diagnostic mode.
Height switches in 1988 and later L-series vehicles are push-on/push-off type switches. Early model year height switches are of a momentary contact type. Also, XT models with VIN JF1 have no height switch at all.
If you are working on a vehicle with a momentary contact type switch or without any switch, you can compensate in one of several ways:
- hold a momentary type switch in the ON position manually during those parts of the sequence where the switch must be ON,
- replace a momentary type switch with a 1988 or later type switch,
- install the test connector, then connect a detached height switch to the test connector,
- use a jumper to short the test connector (simulate having height switch to ON by shorting two terminals in the test connector).
To use the test connector on XT models, connect it in place of the 21-pin control wing switch connector. Connect a detached height switch to the test connector. Remember when doing this
procedure that the normal control wing switch functions will then be inoperative. When you have set up one of the above mentioned methods of signaling the control unit, enter the diagnostic mode by doing the following steps in sequence, all within one minute:
- turn the ignition switch OFF and set the height switch to ON (high),
- turn the ignition switch ON then OFF,
- set the height switch to OFF,
- turn the ignition switch ON the OFF,
- set the height switch to ON,
- turn the ignition switch ON.
The height indicator will now flash to indicate any fault codes present. Refer to the table to interpret any fault codes blinked out by the height indicator.
Select Monitor Diagnostics
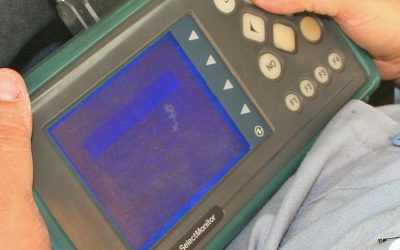
The Select Monitor can be used to diagnose air suspension systems on 1990 and later model year Legacy vehicles. Use cartridge P/N 498347700 for this application.
Use the Select Monitor to activate the solenoids and the compressor, to read signals from the height sensors and the speed sensor and to read fault codes.
Refer to the appropriate model year Subaru service manual and the Select Monitor user’s guide for additional instructions.
Measuring Ride Height
When you evaluate a system for proper ride height, it is important to know where the specifications should be measured. The measurement method is not the same for every vehicle. As an example, ride height for the Legacy is measured as the distance between the center of the wheel hub and the top of the wheel arch in the fender.
On the other hand, ride height for L-series and XT vehicles is measured as ground clearance (the distance between a specific suspension part and the ground).
Check the appropriate model year service manual for the specifications and the method that apply to the vehicle you are testing.
Air Leaks
To make air pressure checks in various parts of the air suspension system, connect the three-way joint (P/N 926940000) into the line, with a pressure gauge connected to the third port. You can use the high side gauge of an A/C gauge set to measure pressure.
When you need to remove or install an air pipe, be sure to use the special tool (P/N 926520000).
This will prevent damage to the air pipe and its fittings.
To isolate a leak, connect the three-way joint into the system at the point where you think the leak may be. Use your fused jumper to energize solenoid valves as needed to pressurize that part of the system. Then watch the gauge to see if pressure holds or leaks.
Download PDF


0 Comments