Contained in its proper place, oil does wonderful things. Elsewhere, it’s a mess. Not only does it make for a disgraceful view when you open the hood, it can contaminate belts and soften hoses. But it’s a dissolving driveway, a stained and slippery garage floor, black tracks on the new rug, and maybe high oil consumption that’ll finally bring that motorist to you for relief.
That doesn’t mean you should wait to be asked. Whenever you’ve got a car in for any service, look for evidence of excessive leakage. It’s a rare vehicle that isn’t seeping liquid lube from one seam or another, so there’s plenty of work to be done, lots of money to be made, and a large number of customers to be pleased.
If you’re a long-time reader of automotive service magazines, you’ve probably noticed that the topic of thwarting leaks comes up over and over. While modern highly-engineered gaskets made of space-age materials (when was the last time you saw cork?) and advanced sealing techniques such as carefully-machined O-ring grooves have reduced the number of leakage problems that find their way into your bays, the job of keeping hot oil inside an assembly as complex as an engine is so incredibly difficult that failures are bound to occur.
An aside is appropriate here: Many years ago, a vice president of one of the major gasket manufacturers told us something interesting: The company’s engineers decided to find out exactly what would happen if they pulled out all the stops and meticulously assembled an engine with special gaskets, chemicals, and seals so that nary a sniff of oil would seep through to the outside, then used it in the real world. At first, it seemed pretty good, but after a while everything on that powerplant, and even the castings themselves, started to rust to the point that it got out of hand and actually caused problems, besides just looking like a horrible lump of iron oxide under the hood. So, they concluded that a certain amount of seepage was a good thing. That, of course, is much less so today with aluminum blocks, heads and intake manifolds. But who says light alloys don’t corrode, and there are still all those steel parts bolted to the castings. Of course, this is no justification for allowing a leak to exist, just a surprising anecdote.
Time to talk
Whether you’re doing this work by request, or trying to sell it, a little time spent chatting with your patron now will go a long way toward his satisfaction with your performance later. Explain that, unless the source of the leak is obvious, it often takes serious diagnosis to pinpoint it.

A case in point is the BMW M60 or M62 V8. An oil (or coolant) leak can develop in the valley due to a head gasket sealing problem. Unfortunately, the liquid lube tends to migrate toward the back of the engine and exits at the weep holes in the rear of the block. From there, it’ll flow down to the engine/transmission seam, and there’s a good chance you’ll mistake it for a rear crankshaft seal leak, which would be a big blow to your reputation. So, whenever you see seepage or drips under the bellhousing of one of these V8s, remove the center sound-absorbing engine cover and look around before you jump to any unfortunate conclusions.
We’ll get to the various oil leak detection methods, both traditional and modern, shortly, but we want to make the point here that the confused, buffeting flow of air through an engine compartment and the way oil can travel along unsuspected paths once it’s escaped from the crankcase can fool you into making a monumental mistake. You might perform a big, expensive resealing operation only to have the same leak present after you’re done, which is the kind of comeback that hurts both your credibility and your schedule, besides giving you a self-confidence crisis.
After you’re very sure you’ve zeroed in on a leak, the repair itself may be as simple and inexpensive as replacing a cam cover gasket, a sending unit, or, as on certain BMW 7-Series cars, retorquing the oil plug in the filter housing. Or, it might be as involved as pulling the engine to install a new rear main seal.
Now would be a good time to insist that the man REALLY look at that disgustingly grimy powerplant, and suggest a thorough cleaning by whatever means you prefer, which will make finding the leak easier while actually improving the resale value of the car.
Looksee
The first logical diagnostic step is a careful visual exam under a strong light. And bring your experience of various models to bear. When you’re presented with a specimen that seems to be losing oil through every possible joint and seal, suspect elevated crankcase pressure from a clogged PCV system. A ring problem that results in more blowby than the PCV can handle is another possibility, as is frequent overheating that dries out gaskets and fries seals.
Newspapers and foot spray
Unfortunately, the convoluted airflow patterns through the engine compartment and under the car cause oil to spread in weird, inscrutable ways. So, when you confront a major leak, it wouldn’t hurt to use the ancient trick of spreading newspapers under the engine while it’s idling to find the drip. Of course, in many cases that won’t tell you the actual source, just the general area.
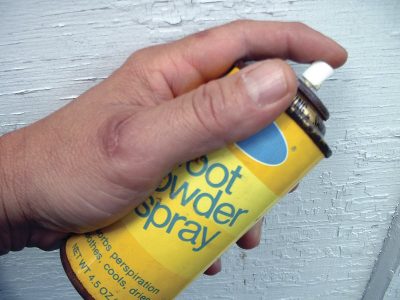
There are better means of investigation. The traditional method is to clean the engine, go for a drive, then look carefully for spreading shiny spots. Another time-honored procedure is the use of aerosol foot powder, which works best with everything clean. Spray the white stuff over suspect areas and a leak will often become almost embarrassingly apparent.
Pump it up
If you’re still not sure where the trouble lies, you can resort to low- or high- pressure testing. For the former, crank your air compressor regulator down to four or five psi, rig up a tight connection between your blow gun nozzle and the dipstick tube (a length of soft hose and two clamps will do it), pull the PCV valve, and plug its grommet. Tape the gun’s trigger in the “on” position, then mix up some sudsy detergent and water and brush it over likely seams. Bubbles will tip you off. If there’s a big hole somewhere, you’ll hear it — narrow down its location with a hose held to your ear. For high-pressure testing, set your compressor’s psi to 80-100, remove the oil pressure sending unit, and screw in whatever adaptors are needed to tap into the oiling system. Use the soapy water and listen as above. This is especially useful for finding leaky casting plugs.
UV and you
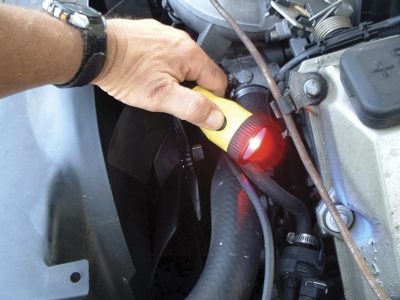
But all those methods pale beside the champion: ultraviolet or “black” light detection. We were always impressed with how well this worked even decades ago when we used a wimpy 15 watt florescent tube, which required that the shop lights be off (that impedes the progress of other technicians and makes you an unpopular fellow) and the windows be shaded. Then we graduated to a succession of high-intensity lights and found contentment. They’re so powerful ambient light doesn’t really affect their use, although many makes come with yellow glasses that intensify the effect.
A little story will illustrate how powerful a quality modern UV light actually is. We had put a reman engine in an air-cooled tractor, and it left a pool of oil on the shop floor overnight. We looked and looked, but couldn’t find anything wrong, so we gave it a dose of the dye intending to do the UV thing the next morning. An ex-mechanic neighbor stopped in for a visit and asked what that light on the bench was for. So, we turned it on to show him. Lo and behold, the hitherto invisible crack in the block was unmistakable even though the tractor was maybe ten feet away. Since then we’ve had automotive cases where we’d NEVER have found the problem at all with any other method.
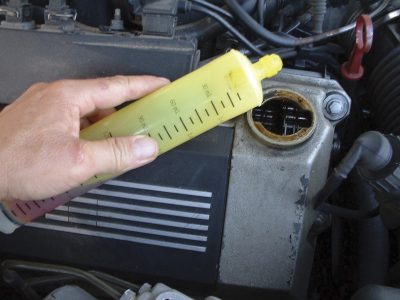
The drill is simple. Pour an ounce of the proper fluorescent tracer dye (it won’t hurt anything, and dissipates in 300 miles or so) into the crankcase, let the engine run, or, if the seepage is minimal, take it for a drive or ask the cutomer to come back the next day. Although cleaning the engine isn’t really necessary, it’s worthwhile if the grime is thick. Then, look around under the light. Use a shop mirror to take those ultraviolet rays where the light unit can’t fit or be aimed. The offending area will jump out at you in bright yellow. It’s the same principle as you might remember from the psychedelic 60’s when a black light really made the colors of that Jefferson Airplane poster pop.
Patron pleaser
Other great aspects of tracer dye detection are sales and customer relations. You can point out exactly where a leak exists, which will make it easy to explain the repair that’ll be necessary to stem the flow. After the job is done, you can clean the engine (the dye can be washed off just like oil) and, under the light, verify that the seepage has stopped. You might even consider running a promotion on this service. A sign that says something like, “Leak Detection Special — Keep Your Engine Clean, Save Oil, and Preserve Your Driveway,” will appeal to your more fastidious customers and probably generate considerable business.
Let ‘er bleed?
Now we come to a delicate question: How much leakage is too much? If the vehicle’s an old heap that’s not worth fixing, advise its owner to let it bleed and just keep checking the oil. On reasonably valuable cars, such as most BMWs, however, anything that allows more than a light film of oil to spread over and under the engine should be attended to. Drips and heavy accumulations of crud just don’t go along with the image of a well-kept automobile. Also, a leak can only get worse. Fix it before the dam bursts.
Avoiding comebacks
We’d better conclude with a couple of important tips on avoiding a comeback whenever you do a leak repair:
- Proper torque on those fasteners really is important. When was the last time you had your torque wrenches calibrated? We do it at least once a year, but they take such a beating in a busy shop that it should probably be done more often than that. We’ve seen bolts broken because of a faulty T-wrench, which can escalate a simple job into a nightmare of extraction. Sure, an Easy-Out will probably work on a fresh assembly, but sometimes you can’t get your drill in there, and how do you work this into the flat rate?
- Torque is dependent upon the condition of the threads, both in terms of cleanliness and lubrication — the slipperier the interface between the bolt and the hole, the more the clamping force at the same torque reading. Unfortunately, there’s no universal rule here, so you must look up the manufacturer’s recommendations for that particular fastener. They may say, “clean and dry,” or “clean and oiled,” or “coat with thread sealant.” A very scientific technician once proved to us through experiments that the condition and lubrication of the threads had a huge effect on bolt stretch and clamping force. If you don’t follow this because you’re too rushed to sit down at the computer or open a manual, you’re risking either insufficient clamping, which can bring that leak right back at you, or, perhaps worse, a twisted-off bolt.


0 Comments