It’s a problem as old as bi-metallic assemblies, side-saddle front-drivers and high under-hood temperatures. It’s gasket failure, and it’s one of the few enduring repair opportunities left as car and truck engines become more durable and less trouble prone. Unless you’ve been living under a rock, I’m betting you’ve fixed a couple of the General’s 3.1/3.4 intake gaskets, and quite possibly a few of the 4.3 V-6 and 5.7 liter V-8 gaskets as well. The multi-hundred-dollar questions are, what causes it, and how can we keep a profit generator like this from becoming a time-consuming comeback? Let’s see if we can find a few answers for you…
How’s that working for you?
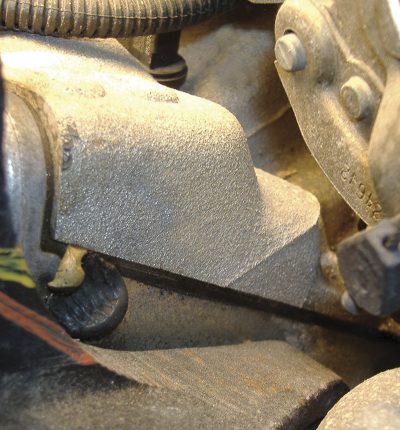
The causes of gasket failures fall into several categories. They can be design (isn’t built right), assembly (can’t be put together right), operating characteristics (heat, expansion/contraction, slip-stick issues), or outside influences (chemical incompatibility or crevice corrosion). During and after the repair process we have those issues to contend with, as well as anything introduced by improper repair techniques or processes. In nearly all cases, failure is influenced to a greater or lesser degree by several of these factors, making analysis difficult as you try to walk back through the exact sequence of events. Try as we might, it’s often impossible to lay the blame for the problem at the feet of a single factor. As we examine General Motors intake manifold gasket failures, we note that several of the conditions that set the stage are present. Let’s look at them, and see what we can do to help correct the situation.
Design problems can be difficult to overcome — it’s always hard to engineer around a poor design. In some cases, a gasket can be re-engineered to fix as many of the design-induced tendencies of the hard parts as possible and still serve only to extend the interval between required repairs, not eliminate them altogether.
Assembly issues are often design- or build-related. Sometimes we find parts that are so difficult to assemble in the chassis that getting proper sealing is more a matter of luck than skill. We’ve all run into designs that cause you to side-swipe the RTV beads you so carefully laid down, or knock the gasket out of position as you rejoin parts because you have to worm the casting past a dozen obstacles as you try to heave it into position. That aside, we still have to make all efforts to ensure that our technique is as good as it can be. Don’t be tempted to let Zippy the Air Tool do the final tightening, do not use sealants except as prescribed and do not deviate from the tightening sequences.
Gasket makers report that nearly all of the “defective†gaskets returned failed because of over-torque, under-torque, uneven torque and the improper use of sealant — in a word, we cause the “defect†by means of sloppy technique.
Push, Pull, Rip and Tear
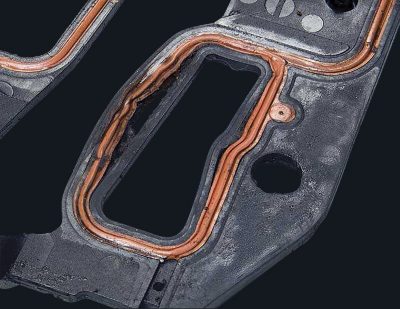
Any engine built using materials with as much variation in rates of expansion and contraction as we find in cast iron/aluminum assemblies will have serious sealing challenges that will need to be addressed. Of course, having heads and intakes both made of aluminum offers some relief, but as long as the main body of the engine is cast iron there will still be significant disparities in heat dissipation and expansion and contraction to deal with. The goal is to allow movement while keeping passages sealed. To accomplish this, we need materials that will seal even when in motion. New types of rubber, such as hydrogenated nitrile butadiene (HBNR) are less likely to stick and tear as movement occurs during warm up and cool down and are less prone to deterioration from errant chemistry as old formulas, while newer plastics or embedded torque limiters help to keep the carrier from being crushed, distorted or chemically attacked.
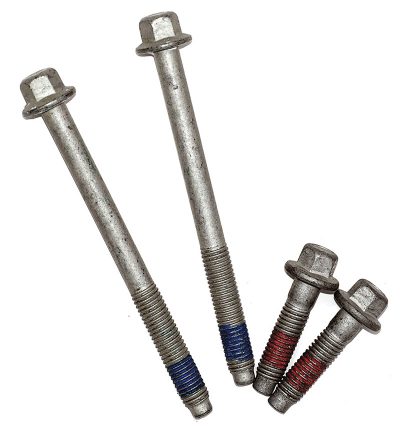
Once a gasket is over-torqued, it can take a set at the greater torque level, which reduces the overall thickness of the bolted assembly. This crushing results in torque relaxation over time, and probably a leak. This is one of the reasons we now see so many torque-to-yield/angle-torqued fasteners on new engines and very specific tightening sequences dictated in the repair instructions. By placing the bolt in the yield region of stretch, the bolt stops acting like a hard fastener and starts acting like a spring. In the yield zone, the tension a bolt exerts is more constant over a greater length, thus allowing for expansion and contraction without over-crushing gaskets or causing torque relaxation.
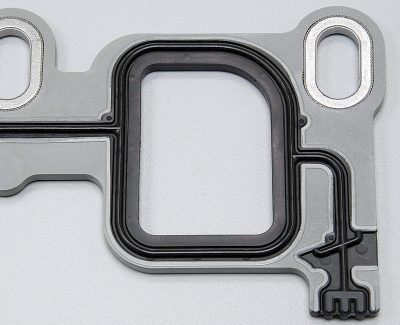
In addition, torque-to-yield is a far more accurate way to tighten a fastener. As we all know, torque is just a poor man’s way of estimating bolt stretch, which is the true measure of a bolt’s proper operating tension. The problem with using torque values alone is that they’re so unreliable. What’s on the threads (sealant, locker, nickel, copper or aluminum anti-seize, moly-based assembly lube, motor or gear oil, or nothing), how many times the fastener and hole have been assembled and disassembled (thus polishing up the threads, which are essentially a spiral ramp), the use of flat washers and/or lube under the bolt heads all change the amount of stretch attained at any given torque wrench value. Plus, when was the last time you saw anyone calibrate a torque wrench? No, throwing it into the bottom drawer of the toolbox at the end of a workday is not a calibration procedure.
Coolant Chemistry and Carrier Damage
Chemistry changes occur in small pockets of trapped coolant throughout the cooling system of the engine. The close proximity of parts keeps the rate of interchange between the main body of coolant and the pocket of trapped coolant restricted to such slow movement that the small quantity of additives present in the trapped body is depleted, leaving highly corrosive coolant caught in areas throughout the engine. In effect, you end up with the main body of coolant in good shape, and tiny pockets of deteriorated coolant standing stagnant in the vicinity of gaskets, heads, intake, core plugs, thermostats and, in some cases, water pumps. If you’ve ever seen localized pitting and evidence of corrosion between closely fitting parts, you’ve seen the results. Don’t mistake it for the cavitation corrosion that’s often found in water pumps.
In the case of intake gasket failures, we know that the type of antifreeze and the length of time it’s been in service has a major effect on intake gasket life. For GM, there is certainly a correlation between the use of DEX-COOL and intake gasket failures. Data collected from failed gaskets shows that systems running HOAT (Hybrid Organic Acid Technology, also known as MOAT for Modified Organic Acid Technology) or traditional/conventional green/gold two-year formulas have about one-tenth the rate of failure of those using straight organic acid technology (OAT, as in DEX-COOL which contains no silicates or phosphates) antifreeze.
For years, reports from the field have suggested that there’s something in the chemistry of DEX-COOL that works on the gasket carrier that’s not present in conventional or HOAT antifreezes. One of the main organic acids used in American OATs is 2-EHA (2-ethylhexanoic acid). Unfortunately, 2-EHA has been found to be what’s known as a “plasticizer,†meaning it softens plastics. Uh oh, GM intake gaskets have some important plastic components, and once this dubious chemistry works its magic on the plastic carrier, it deteriorates, collapses and the rubber seal loses its mechanical support and the system leaks.
By way of contrast, Japanese OAT anti-freezes do not use 2-EHA, but they do contain phosphate. That country’s automakers have apparently done tests that have led them to refuse this organic acid. Honda in particular is pretty firm on this.
Human Error
But chemistry is not the whole story by any means. Old-school technique will simply not work on late model engines. It’s more than just bi-metallic assemblies and different fasteners. It’s reduced cross sections, multi-valve engines with heads and intakes that are more air than alloy (and thus prone to distortion when improperly torqued or clamped down out of proper sequence), and in many cases it’s plastic or resin parts.
To recap, here’s what you can do to prevent comebacks:

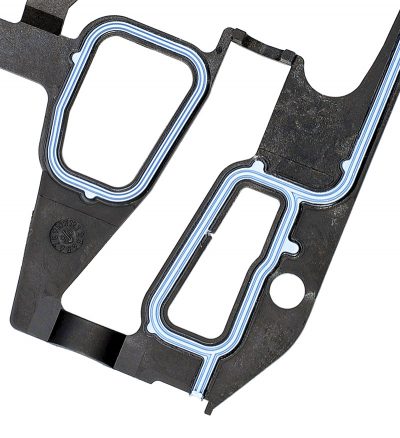
- When you buy gaskets, make sure you’re getting the newest designs. If you take a minute to look, you can see that the latest versions of the 3.4L intake gasket have wrapped coolant ports that prevent coolant from ever touching the carrier. No chemical attack on the carrier means much less chance of carrier failure, thus longer gasket life.
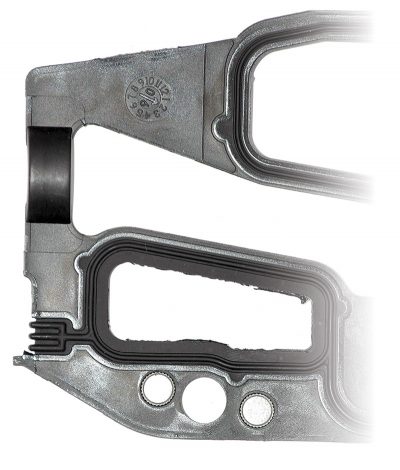
- Follow sealant recommendations exactly. Using excess RTV can cause the seal tip to fold over instead of being properly flattened to seal (see below).
- Always use new fasteners, and use the latest torque, “torque and turns,†or “angle torque†specifications.
- Speaking of fasteners, always use the specified lubricant or sealant on the threads. Anything whatsoever on the threads affects bolt tightening and bolt stretch, and not by just a little bit! We once did an experiment where we measured stretch at a given torque setting using different substances on threads. Stretch grew from .001 in. clean and dry to more than we could measure because the bolt began to yield. If you’re interested, it was the same with the polishing done by multiple assembly and disassembly cycles. Stretch increased at the same torque and lube levels as the ramps got smoother and slipperier.
- Don’t rough up sealing surfaces as too much “tooth†can keep the gasket from slipping when it needs to. Try to preserve the original finish.
- Never use air tools to do the final tightening! We are years past the time when you could use impact wrenches to torque things down, even exhaust manifolds. We’re not working on huge lumps of thick and rigid cast iron anymore. You will distort parts that cannot tolerate distortion. As unbelievable as it might seem in this day and age, improper fastening technique is the number-one cause of repair-based parts failure. We’re sure we’ll hear from at least one guy who’ll tell us about how he’s put ten thousand engines back together with air tools and he’s never had a comeback. The answer to that might be, “That’s because they couldn’t make it back!†Don’t be stupid. Use proper technique when working on late-model engines.
- Due to unpleasant experiences in the past, many shops are recommending that their DEX-COOL customers have their cooling systems retrofitted to HOAT, or even to traditional/conventional green/gold antifreeze, then observe a two-year change interval. Our opinion? Well, we won’t say that’s a bad idea. Please see the article elsewhere in this issue of Master Technician for an in-depth discussion of how to make the right antifreeze choices.
If you stick to good parts and do your part to install them carefully, you’ll generate great profits, make your customers happy and avoid comebacks. And that’s kind of what we’re here for, isn’t it?



0 Comments