BMW’s quest to make vehicles stronger, lighter and more fuel-efficient is never ending. In order to achieve these goals, new ways of thinking and new materials are necessary. That translates into new repair procedures.
In an effort to both clean up the air we breathe and reduce petroleum consumption, government regulations require lower emissions and improved fuel economy. You may think this is a job for the engineers who build engines and powertrain management system. You would be right, but this is only part of the equation.
Engineers design these systems to work with a specific load. The weight of the vehicle and its aerodynamics affect this both under acceleration and at speed. If you can lighten the load, you will take stress off of components, increase fuel economy and reduce overall emissions.
So, the weight of a vehicle is as important as any other engineering criterion in improving a vehicle’s overall performance. One of the efforts made by manufacturers to reduce weight is the increased use of aluminum.
This light-weight metal can replace steel without sacrificing structural integrity and passenger safety. Of course, different construction techniques are required to maximize aluminum’s characteristics, and with these come new repair procedures. In order to provide your customers with the same safe body structure they had before any crash damage, you need to adhere to the proper repair techniques specified for aluminum.
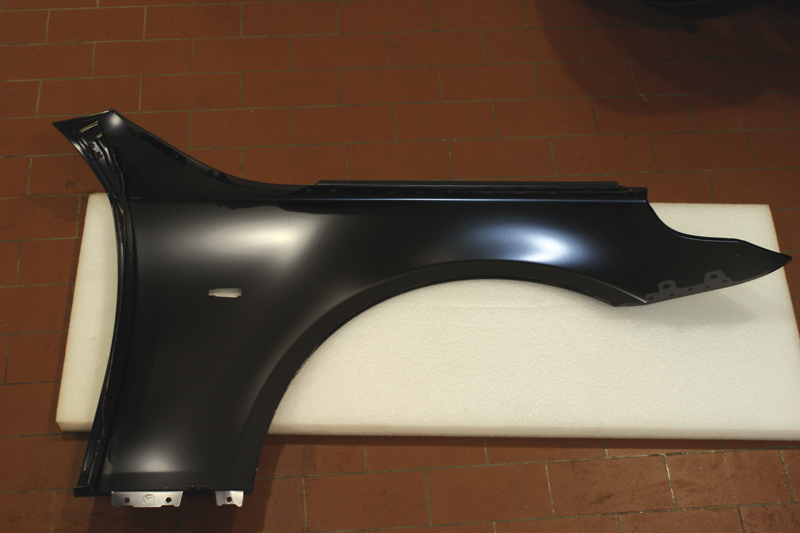
Aluminum panels purchased from your BMW parts supplier come already primed. After cleaning, they are ready to paint with BMW Colorsystems. A typical fender replacement may be more profitable than straightening.
Aluminum 101
You may wonder what has driven the change to aluminum. First, aluminum is about one-third the mass of steel. But that doesn’t mean you can save two-thirds of the weight. First, aluminum is not strong enough by itself for automotive applications. It needs to be alloyed with other metals to exploit its characteristics. Also, if we want to maintain the same strength as steel we need to use more of this alloy. As a result of the need to be an alloy, aluminum has multiple manufacturing benefits. The most common form is sheets, but it can be cast or extruded to form sub-structures. Different alloy blends will highlight different characteristics and these are identified by the series number. For example, a 2000 series alloy has relatively more copper in it. This makes for a fairly strong, workable panel that can be easily stamped. A 3000 series alloy has manganese, which makes for a stronger panel.
A 4000 series alloy will melt at a lower temperature, so is used in welding wire. In the 5000 series, aluminum is blended with magnesium, so in addition to being stronger it is also corrosion-resistant. This series is also strong enough to be used in sub-structures. By adding silicon to the 5000 series, you get a 6000 series alloy that is stronger yet. Adding zinc to the mix yields the 7000 series, which is both strong and corrosion resistant. This alloy is strong enough to be used in bumpers and their reinforcements. Whatever the alloy and depending on its application, on average the overall weight savings ends up around 40% over steel.
Another benefit of aluminum is its ability to conduct electricity. It is an excellent ground path for electrical systems. By the way, as more aluminum is used in manufacturing, its cost-effectiveness increases.
Various aluminum alloys react differently to heat-treating. The 3000, 4000 and 5000 series are not heat treatable. That’s why some of these are used for welding wire. This means they will not strengthen with heat, but they will strengthen by working the metal. To a small degree, you can anneal them, but be careful. These alloys do not show warning signs of excessive heat, so you can easily damage the panel. Use heat-reactive crayons or tape to keep track of the panel temperature if annealing is necessary. Try not to put the metal through too many heat cycles, which can actually make the panel weaker.
On the other hand, 2000, 6000 and 7000 series alloys will strengthen with both work-hardening and heat. You still need to be careful of the temperature as you can do more harm than good by overheating. This is important. Remember that whenever you repair a dent in a panel the damaged area is work hardened. When attempting to remove the dent, the surrounding metal may warp since it is not work hardened. Heating the damaged area softens the metal making it easier to work with. In the “heat-shrinking†process, you apply heat around the dent. This forces the metal to return somewhat to its original shape, which translates into less working of the panel. With more severe accident damage, the panel may not be worth repairing and may call for replacement. Heat can also be used to soften bonding agents between adjoining panels that cannot be welded together. With BMW using more aluminum in its vehicles and mating this metal with steel structures, new bonding methods and materials need to be learned.
Preparation
When an aluminum panel is initially stamped it has either a water-soluble dry-type film, or a water-free dry-type lubricant. These lubricants protect the metal during stamping and must be removed before any welding or painting takes place. Any contaminants on the aluminum during welding can result in porosity in the weld. This happens when hydrogen gas stays in suspension with the molten aluminum. As the aluminum cools, the hydrogen escapes leaving behind a porous weld. In addition to cleaning off metal-forming lubricants, you will also need to clean off the oxide layer that naturally forms on bare aluminum, which requires special solvents. If you purchase a genuine BMW replacement panel, it comes already primed so there is no need to perform all this additional work, something to think about since time is a big factor in profitability.
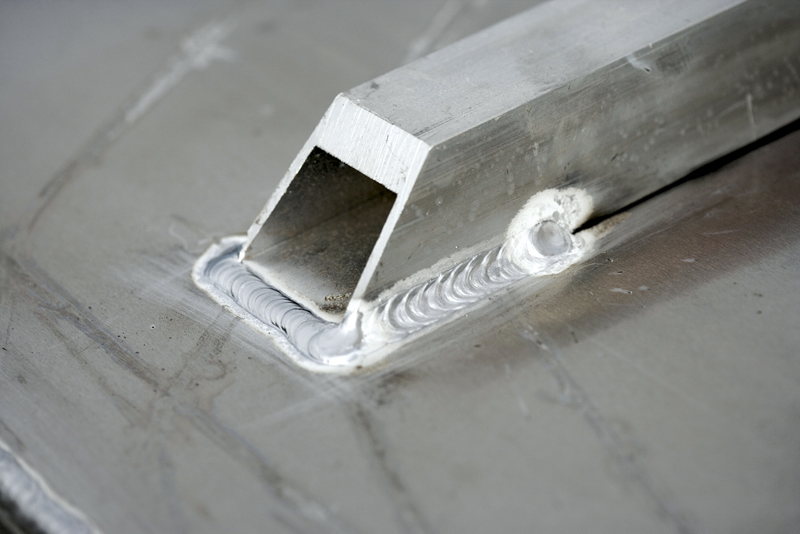
Although currently BMW does not recommend straightening aluminum, some day it may approve aluminum-to-aluminum welding. Be prepared to tool up with an inverter-type welder, which pulses current across the welding tip to keep metal temperatures down.
It is as important for the work area to be clean as it is for the panel to be clean. While prep work is often relegated to the apprentice, here it is one of the most important parts of the repair. Any cross-contamination from other jobs going on in the shop can have an adverse affect, especially on painting when it is often too late. Steel and aluminum chemically react with one another over time. If steel particles from sanding or grinding were to end up on an aluminum panel, the reaction would cause “fisheye†within the paint layer. To avoid steel contamination, the section of the shop working on aluminum must be protected from the rest of the shop with dividers. It is strongly recommended that you maintain a separate set of body tools made of aluminum to be used only on aluminum panel repairs. Even the cart the tools are stored on should be aluminum and clean of any outside debris. If you were to use your steel tools, you would have to thoroughly clean them of any ferrous particles, which is next to impossible considering how dust can hide in a tool’s cracks and crevices. If contamination were to occur, you would have to take the panel back down to bare metal and repaint. This is a waste of time that can take the profit right out of a repair.
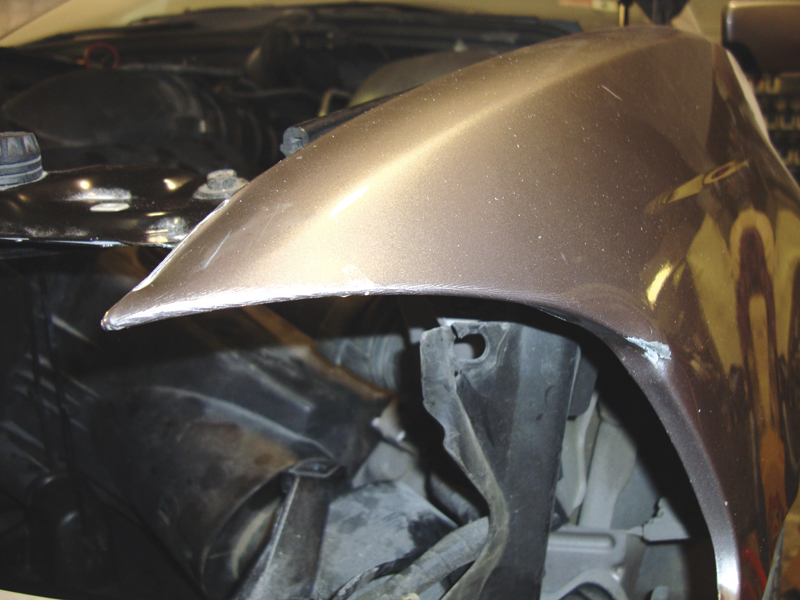
Although to repair this damage is time-consuming relative to the surface area involved, these aluminum panels should be repaired. The general rule with aluminum is to start from the outer most portion of the damage and work inward toward the middle.
Keeping your employees safe is another concern. Aluminum chips are combustible, so welding or the heat source for annealing can ignite them. It is imperative that you have a vacuum evacuation system to extract contaminates and dust away from the work area. In addition, the entire vehicle should be covered with a plastic drop cover except for the damaged portion.
Before and after any aluminum panel work is performed, you must inspect for cracks. You can coat the panel with colored dyes that will fill channels and highlight cracks. Use a magnifying glass to inspect the surface. Cracks that are too small to be seen by the naked eye can cause blemishes during the painting process. Vibration and stress can increase the size of the crack over time, and require further bodywork in the near future. It is also important clean any dye out of the crack before it dries as this type of contamination can interfere with welding and painting — have a solvent ready.
Panel Straightening
If accident damage is no too severe, you can attempt to straighten the panel instead of replacing it. Locate the highest and lowest points of the dent as you do with steel, but unlike steel you should you should start straightening in the middle of the dent and gradually work your way outward. Just as with “paintless†dent repairs, you should start by pressing out the dent using wood, plastic or aluminum hammers. Avoid using any tool with too sharp an edge as it is easy to do more harm than good. Do not “stretch†an aluminum panel. The more you stretch, the weaker it will become.
When the dent has been straightened out as much as possible, it is time to “draw in†the aluminum. Once again, first clean the panel surface of all contaminants. With a neutral welding flame, heat the area in and around the dent. Keep the flame between 300 and 350 deg. F. With heat crayon or tape you can modulate the heat to stay between these two temperatures. Try to cool off the panel quickly and the panel should try to resume its original contours. Heating the panel softens the metal and cooling it allows the outer undamaged areas to pull the dent out.
If more extensive work is needed to straighten out the panel try to keep the metal temperature between 475 and 575 deg. F. This will keep the metal soft enough for you to strike with your wood, plastic or aluminum hammers. Without this heat, the panel becomes “springy†and tries to resume its damaged state. If you apply too much heat, the metal will distort the damaged and undamaged areas as well. Remember to gradually raise the metal temperature and work the panel. If you can, avoid heating the panel a second and third time as this will make the metal weaker overall. After all “tin knocking” is done, re-check for cracks and repair accordingly.
Chemical Bonding
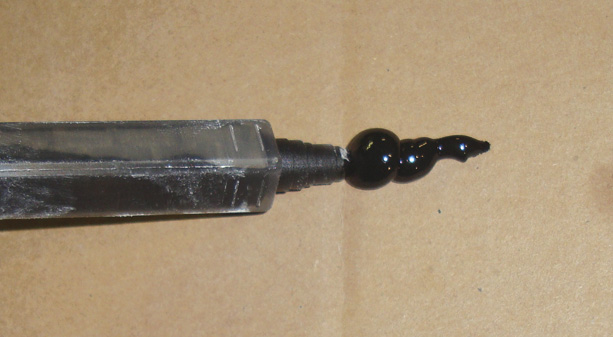
As you can see, the bonding agent is not evenly dispersed in the mixing tube. This chemical bond will not dry or adhere properly. Equalize the mix by squeezing out an inch of material before and after installing the mixture tube.
As seen on the 2004 BMW 5 series, the entire nose section is aluminum. The rest of the body is a steel structure. These two dissimilar metals cannot be welded. In order to join these two sections you need to thoroughly clean and treat the contact surfaces with a Pyrosil kit. Through your BMW parts supplier, you should be able to order the Dow adhesive BMW recommends for chemical bonding. When using a static mixer or mixing tip on your applicator, equalize the mixture by squeezing out one inch before applying the tip, and ½ inch with the tip installed. Apply a sufficient bead to coat the joining surface and, using a chassis jig, join the nose section to the body. You will have to rent the Celette chassis jig for this big job if you do not have one.
Next, install the mechanical fasteners, which is this case are rivets. Use only rivets supplied by BMW (the same goes for any mounting bolts). The rivets are made of a special non-corrosive/reactive metal to protect the attachment seam. For this structural repair, BMW forbids any pulling of the front structure or heating/welding. Mounting screws need to be of the Electro Magnetic Conductivity type (EMC) so they do not adversely react with the aluminum components.
It is this attention to detail that will allow you to provide a safely and responsibly repaired vehicle, and tht will give you peace of mind about guaranteeing your work.
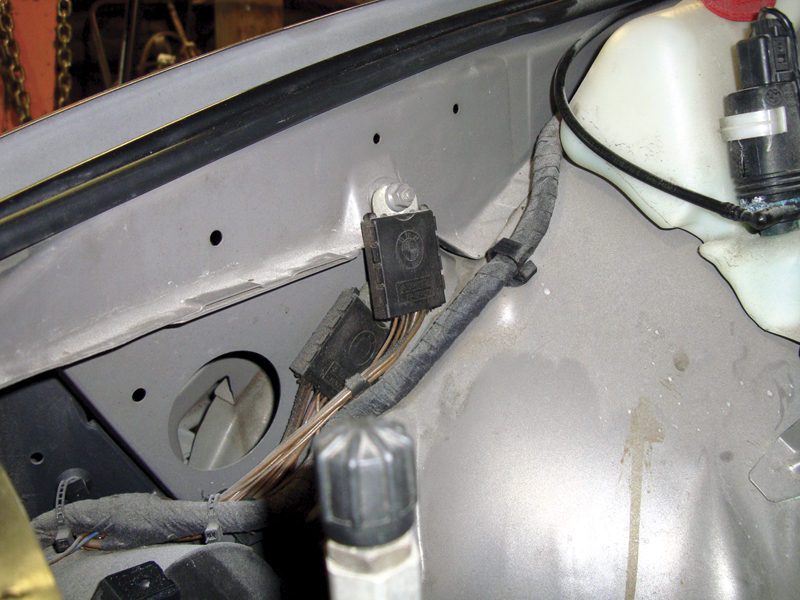
On 2004 and later 5 Series, the entire front clip is aluminum, including the firewall. The unit is bonded and riveted to the body. Be sure to add the ground strap to prevent any electrical problem. Look through you archives of TechDrive for a previous article on grounds.


0 Comments