
You know the feeling. You get those phone calls from customers. They have just had their brakes done. If you’re lucky, they just want to know why the brakes never sounded like that before. Most of us aren’t that fortunate. Almost always, we have to take the vehicle back, evaluate the complaint and see if the problem is something we caused. If it concerned the brake job we just performed, we’d be hard pressed not to absorb the responsibility. While standing by our work now puts us in a less profitable situation, it is still essential to insuring customer confidence and loyalty.
The aftermarket brake parts shops often stock, or are provided by the local jobber, are typically cheaper and may offer a higher profit margin than Original BMW Parts — for the moment. But when the vehicle has to be put back on a lift and a technician has to be paid to “re-do†a brake job, all of that profit and more has disappeared along with customer satisfaction. How can we avoid these “comebacks?â€
Symptoms
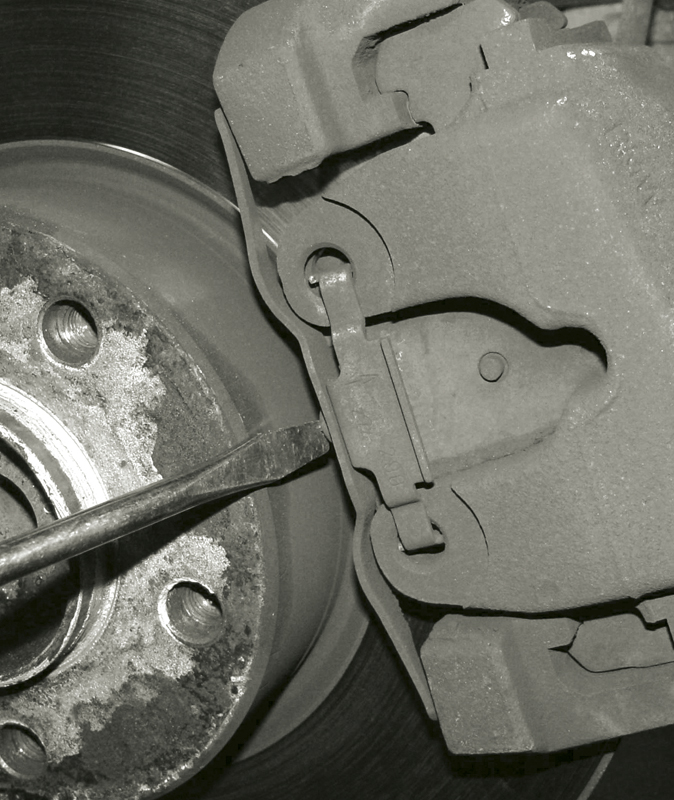
The purpose of the brake spring is to dampen vibrations between the caliper mounting bracket and the caliper itself. If it is installed improperly, it could lead to that annoying brake squeal.
A short list of possible symptoms is in order. The number-one complaint from customers is brake squeal. That high-pitched sound that often occurs in the last few feet while coming to a stop tops the list. A close second is brake pedal/front end vibration while braking. Placing third is low pedal/high braking effort.
Possibly one of the longest discussions you can have in the automotive repair world is the cause and remedy of brake squeal. It is generally accepted that squeal is caused by high-frequency vibrations of the brake pad in the caliper. These oscillations, or back and forth movements, between the brake pad and the caliper create friction between the two. Allowing the brake pad to move relative to the caliper will lead to brake pad squeal. To reduce squeal, you simply need to secure the brake pad to the caliper. Easier said then done. One component that is always applying a load to the brake pads is the brake rotors. As brake rotors wear from braking applications, grooves are formed as the lining rubs against the rotor. These grooves can force the pad to follow them like a needle on a record and also cause the pads to become loose in the caliper. As the original components break in or wear together they do not cause much of a problem. The problems begin after pad replacement. Of course, brake pads should be replaced as a result of physical inspection or after the brake pad lining indicator warns the driver that the pads are getting thin.
In the case of a floating caliper, the first step is to remove the caliper, which starts by removing the outer caliper spring. This applies tension between the caliper and the mounting bracket helping to reduce squeal, so make sure it goes back on when you’re in the reassembly phase. It is also important for the caliper to slide freely. The pins that mount the caliper to the bracket are also the pins that the caliper slides on. These pins should only be cleaned and do not need to be lubricated. They are recessed in a rubber boot with a plastic cap. If the cap is not in place, road grime will get on the sliding pin and cause the caliper to stick.
Next, inspect the flexible brake line as well as the caliper for obvious physical damage such as cracks in the rubber or a torn/missing dust boot. Keep in mind it is not recommended to allow the caliper to hang either from the brake pad wear sensor wire, or the brake line. While the flexible brake line may look fine on the outside, the inner Teflon tube can kink and restrict brake fluid flow into and out of the caliper.
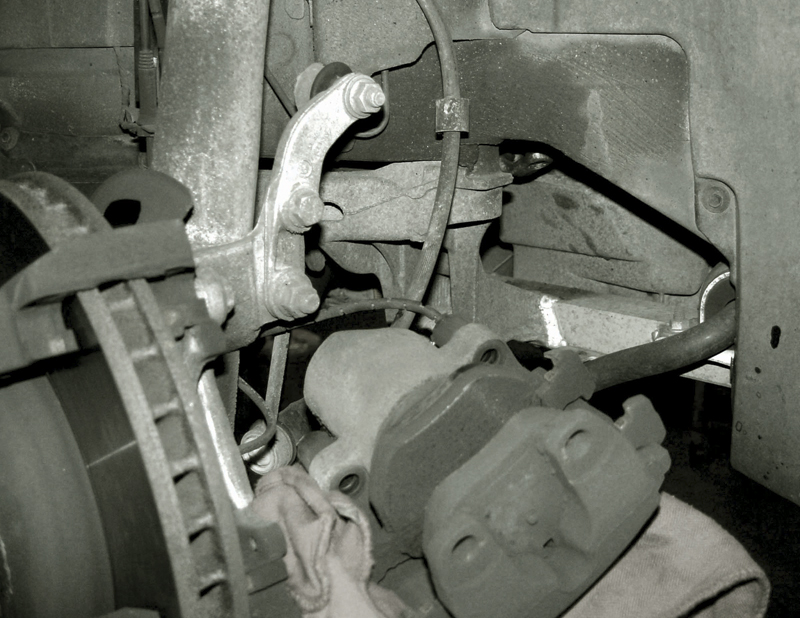
Always support the caliper after removal. This allows you to easily change the pads and takes the tension off of the flexible brake line and/or the brake lining sensor wire.
Once the caliper is loose and properly suspended, you can remove the brake pads from the caliper mounting bracket. With floating calipers, the mounting bracket is the guide for the pads. This means the pads slide back and forth in it. If the bracket were to become “caked†with brake dust and rust, it might prevent the pads from releasing. This can cause uneven wear or binding, which can result in overheating. So, it is important that you clean the pad guiding surfaces, thus allowing the pads to move freely.
With fixed calipers, you will have to remove whatever secures the pads. Fixed calipers do not have pins to clean, but you should still clean the surfaces the brake pads slide in to prevent the same sticking problems.
Now that all of the serviceable components are clean, you can start reassembly. Apply anti-squeal compound to the back of the pads, but try not to have it touch the dust boot on the caliper as this might cause the boot to swell. Some garages use silicone on the backs of pads to reduce squeal, but this is not recommended as the type of silicone may not be able to handle the high temperatures associated with heavy braking. You can use caliper grease to lubricate the bracket. Also, apply caliper lube to where the caliper slides on the mounting bracket. Try not to use anti-seize compound as this has harder metals and will accelerate wear. Caliper lube has softer metal compounds. After installing the new pads, you can mount the caliper and install the guide pins. First, ratchet the guide pins in by hand. If you use an air tool, you can easily cross-thread them and create more headaches. Torque the pins according to repair manual specification. Don’t forget to reinstall the outer spring clip between the caliper and the mounting bracket.
Now we need to discuss the brake rotors. The grooves found on the old rotors will create ridges in the new brake pads. As the brake pad follows the grooves the pad may move around in the caliper and cause the squeal. Ideally, you will have convinced the customer to replace the rotors at the same time as the brake pads. This gives a flat braking surface to “bed†in the pads. Bedding in the pads simply means to apply the brakes in a slow, controlled manner to bring them up to temperature and prevent the linings from becoming glazed due to overheating. A glazed pad surface is harder and reduces friction while increasing the potential for squeal.
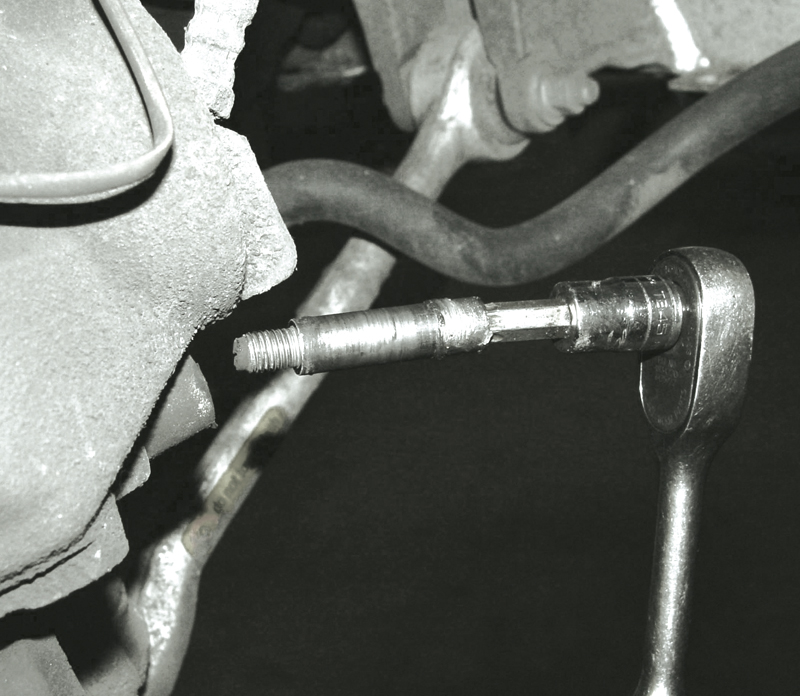
When you look at the caliper mounting pin, you can see the possibility of the caliper not moving freely, or “floating.†Keep the pins clean and be careful not to cross-thread them during installation.
In the event you have to cut the rotors, slower machining provides a better surface for bedding the pads. Before you cut, you should subtract how much you’re cutting from the measured rotor thickness and make sure this measurement is still thicker than the minimum BMW specifications allow. Otherwise, it’s not worth machining and the discs will have to be replaced. Remember, BMW engineers recommend that rotors should be replaced in every case.
If the steering wheel or brake pedal is pulsating, this may be and indication of warped rotors with DTV (Disc Thickness Variation). You should check the radial runout with a dial indicator. Or, you can put it on the lathe and watch the pattern while you perform a light cut. Your best bet is still to replace the rotors. With these new rotors do not blast on the wheel with an impact gun. You can warp the rotor that way also. Torque each lug bolt to specifications.
Often overlooked
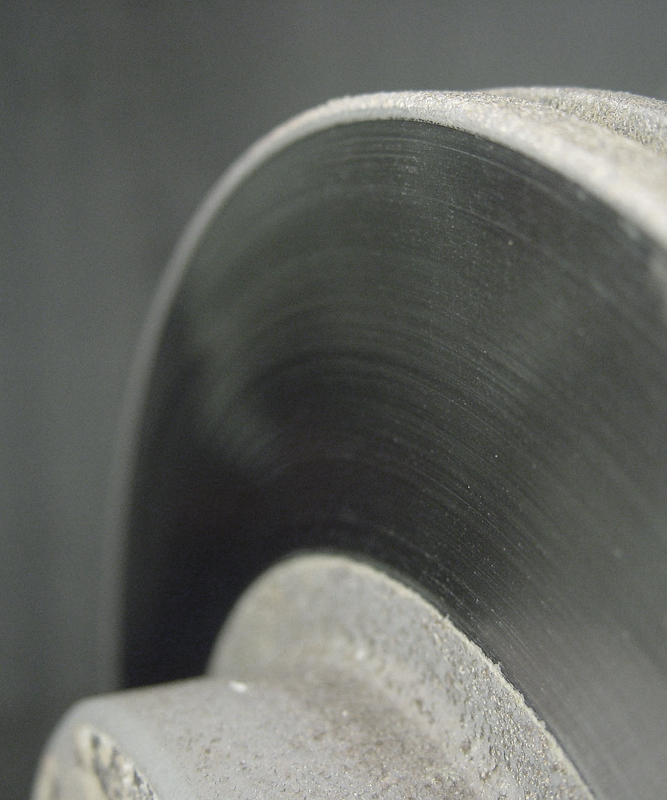
The grooves on this uncut rotor will create ridges in the new brake pads. This may cause brake squeal.
One critical part of the brake system that is often not serviced properly is the brake fluid. BMW recommends that it be flushed once every two years. Brake fluid is hygroscopic, which means it absorbs moisture. Excess moisture can boil in the lines from the heat created by the friction in the braking system when the brake is applied. This causes abnormal brake pressures and brake pedal feel.
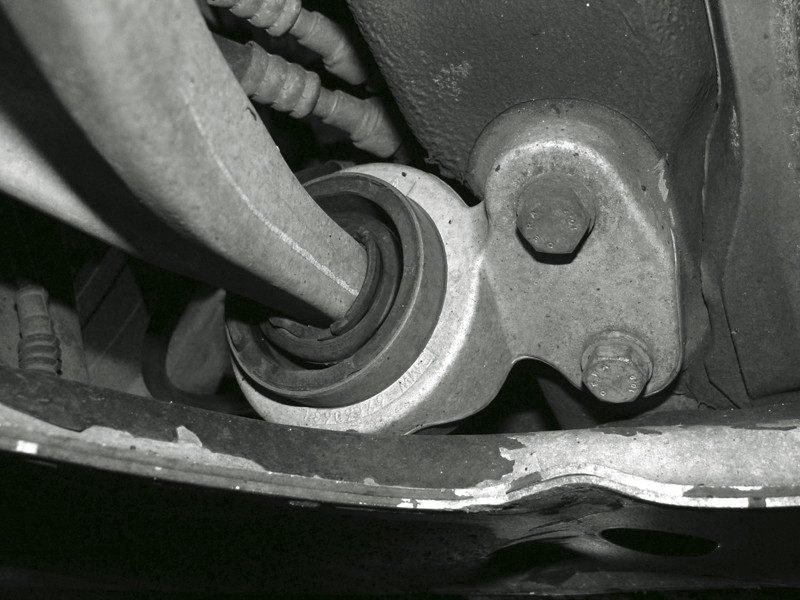
If you have a front end vibration under moderate braking, you may want to look somewhere other than the brakes. Bushings can wear allowing the lower control arm to move back and forth creating a front end “shimmy.â€
Brake fluid changes have become even more critical with the addition of ABS and Stability Control Systems. These systems use electro-mechanical solenoids to control wheel speed. Contaminants can cause these solenoids to stick and compromise ABS control and/or brake pedal feel. Flushing these systems with new BMW/DOT approved brake fluid will help remove any moisture that has been absorbed, and also remove contaminants. During the bleeding procedure on most BMWs, you have to activate the ABS pump/solenoids and pressurize the hydraulic circuit. You can accomplish this with your GT1 factory diagnostic tool. For complete details on the bleeding procedure refer to the appropriate repair manual.
Other causes of brake related symptoms
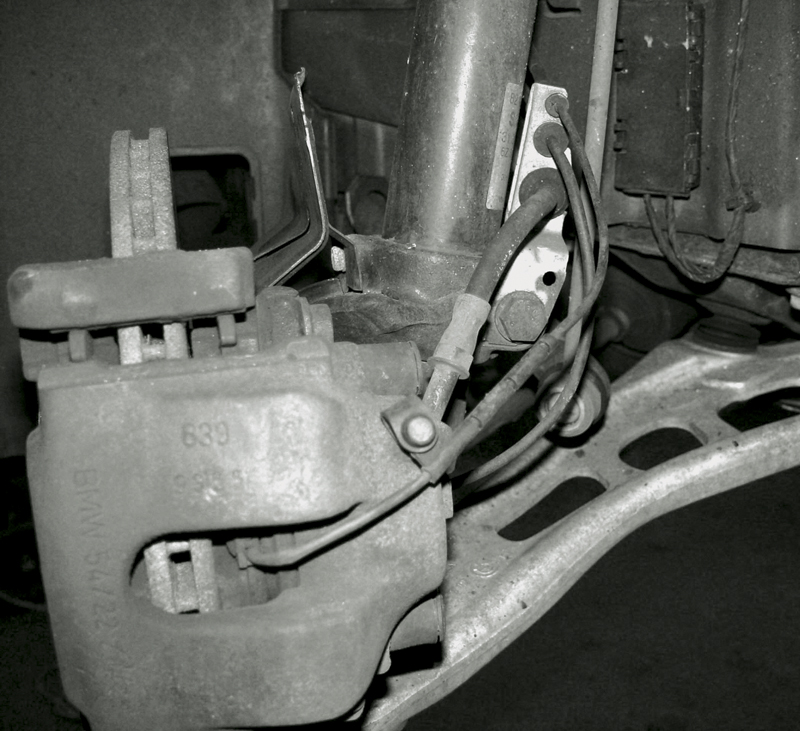
Make sure the brake lining sensor wiring is properly secured. This will prevent the wire from rubbing against anything and possibly turning the light back on.
While squeal is primarily a pad problem, other symptoms that feel like brake issues may be related to other components. When dealing with the second most common cause of brake complaints, which is pedal/steering wheel pulsation, you may need to isolate the problem. Of course, the first step in addressing any customer complaint is to road test the vehicle. Try to do this with the customer driving so you can watch his or her driving habits and emulate them when you drive the vehicle. This gives you a better chance of duplicating the customer’s concerns. Once this is achieved, you can start to isolate the cause of the symptom. When applying the brakes and the vibration starts, does the steering wheel transmit the vibration? Do you feel the pulsation in the brake pedal? Do you feel the whole front end of the vehicle vibrating? Typically, when the whole front end vibrates either a tire is out of round, or a suspension component is worn or broken.
If you feel the pulsation in the brake pedal and/or the steering wheel and the rotors are true (or, ideally, new) the problem may be in the suspension. Worn suspension bushings can allow the lower control arms to move and change suspension geometry. As they move back and forth under load it can feel like a warped rotor with DTV. This symptom usually occurs under light to medium braking. One way to test if the bushings are the cause of the pulsation is to apply the brakes even harder while they’re pulsating. If the pulsation goes away, the bushings are probably the cause. If the pulsating continues, then the rotors are not true. Don’t forget that worn wheel bearings, tie-rod ends and ball joints can also cause brake-related symptoms.
Closing remarks
Nothing is more frustrating than performing a brake job because the Brake Lining light is on only to find out you cannot get it to turn off. This small detail is the one thing the customer is going to see and this is the reason he or she brought the vehicle in. Getting the light off is not always so simple. It’s always a good idea to replace the brake lining sensor, and make sure the wires for the sensor are not left loose. They may contact the wheel or a suspension component and turn the light back on. Now you can say you have performed a professional brake job and given the customer the confidence that quiet, well-performing brakes give, and that’s real peace of mind.
Â


0 Comments