Is it a blown gasket? Or, something else? Here’s how to be sure, and procedures that will avoid comebacks.
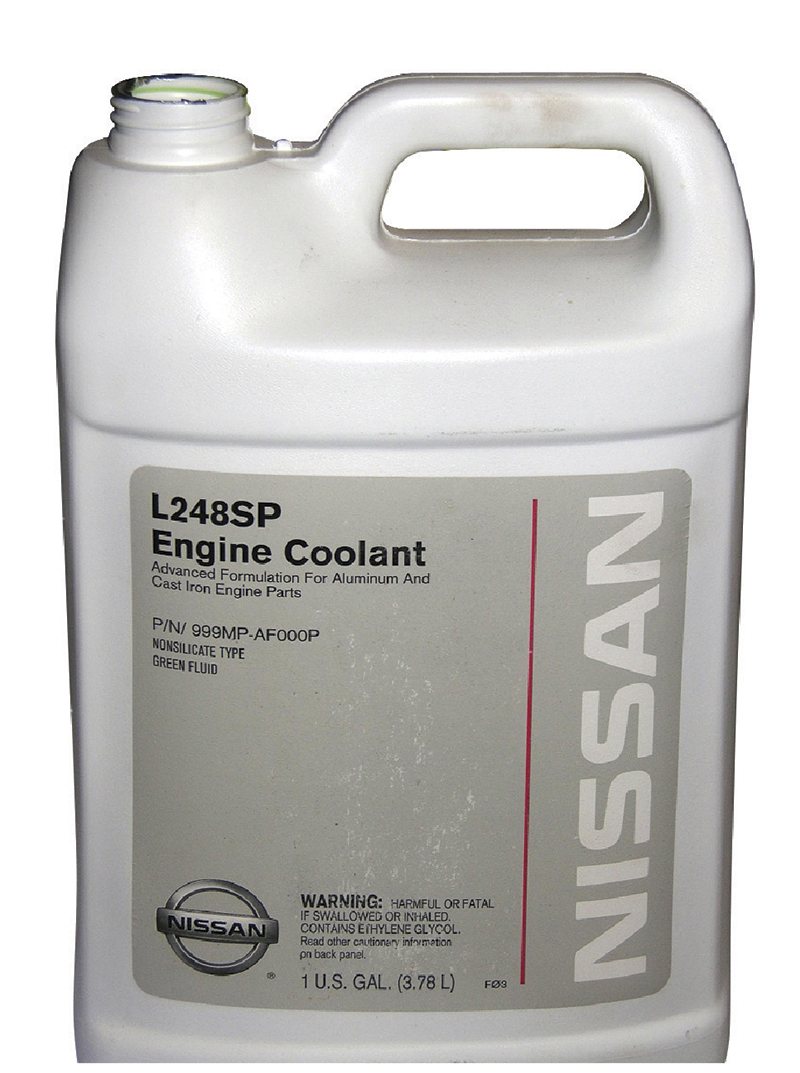
One possible cause of premature head gasket problems is the use of the wrong antifreeze. Use only the type recommended by Nissan, ideally the O.E. formula.
It would be an unusual Nissan or Infiniti customer who comes in seeking head gasket replacement. More often, he or she will arrive at your shop asking for a cure for overheating, coolant loss, steam at the tailpipe, or misfiring issues. A head gasket may fail to seal between two cylinders, or between a cylinder and a coolant passage, because of high mileage, which necessarily entails many, many heating/cooling cycles, a serious overheating incident due to carelessness on the owner’s part, the use of an antifreeze that’s not approved by Nissan/Infiniti, or improper assembly during an engine overhaul.
The key to accurate diagnosis lies in ruling out other possible causes of these problems and confirming that the head gasket is indeed at fault by at least two different methods so that you can be absolutely confident head gasket replacement will cure the problem(s). Also, adopting a few “best practices†in head gasket replacement will insure against reputation-damaging “comebacks.”
Head gaskets became an especially big challenge when aluminum heads were used with some iron blocks (called “bi-metallic” engines). Aluminum expands and contracts at a different rate from that of the block as it heats up and cools down. Even properly bolted down, this difference in expansion rates, may cause “scrubbing†of the gasket. Newer, and better, gaskets became mandatory to handle this.
Even with later Nissan and Infiniti engines that have aluminum blocks, there is still a lot of squirming going on in the head/block seam. So, gaskets have had to evolve. Although Nissan/Infiniti has em-ployed several types of head gaskets over the years, the most common variety in use today is expanded graphite, which is extremely heat resistant, very conformable to waves, pits, and dents in the sealing surfaces, and has excellent torque retention. It’s a natural lubricant, too, which helps it survive the scrubbing action present due to varying expansion rates.
While many will last a lifetime, some percentage will fail and allow combustion gases to escape, or coolant to seep into a cylinder, especially if a vehicle is allowed to run low on coolant and overheat. Pre-ignition or “pinging†is another leading cause of head gasket failure.
Replacing a head gasket that doesn’t solve the customer’s problem is an expensive proposition for both the customer and the independent Nissan/Infiniti shop that performs the work. The first “look see†at a potential head gasket failure is usually a compression test. One low cylinder, or a pair of adjacent, low cylinders is one indication. But a good tech will get confirmation with a second, or even third technique before pulling the head off.
Ruling out other possible causes
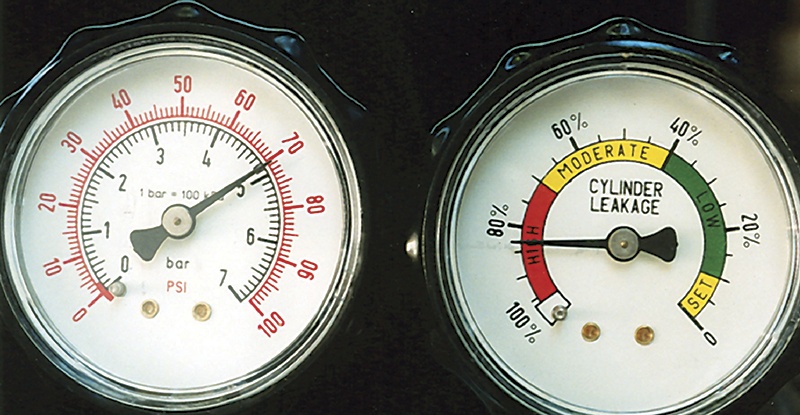
A cylinder leakdown test can tell you more than you’ve found out from a compression test. Listen for escaping air, look for bubbles.
A good second step is a leakdown test. A cylinder with a leakdown rate of greater than 20% is suspect. The value of the leakdown test is in confirming that you don’t have a burned or otherwise damaged valve allowing pressure to escape the cylinder, or worn rings. However a leakdown test doesn’t do much for actually verifying a head gasket leak. If you want to see if there is a leak from the head gasket, apply shop air to the cylinder and see if coolant bubbles appear in the radiator neck.
Pressure testing the cooling system is another method techs should use. Again, not so much for identifying a head gasket failure as for ruling out other possible causes of overheating. Sometimes the failure will only occur when the engine is hot. In that case, remove the radiator cap, warm the engine up, then install the pressure tester to check for leaks. In general, all cooling system faults, drippy hoses, loose clamps, clogged radiators, worn impellers and other faults need to be cured or ruled out before diagnosing a head gasket as a cause of an overheating problem.
Other techniques for identifying cylinder-to-water jacket leaks include filling the cooling system to the neck of the filler, and watching for pressure pulses as the engine is cranked over. All that compression inside each cylinder will perform a better test than even a pressure tester. Again, the engine may need to be warm. Another technique is to place a heavy plastic bag over the radiator neck and secure it with a rubber band. If it inflates rapidly, compression or combustion pressure is getting into the cooling system. If it doesn’t blow up, punch a small hole in it and use your gas analyzer to “sniff†for exhaust gases. Be extremely careful to only sniff gas and not let coolant erupt or splash onto the analyzer head, which may damage it.
A technician who specializes in Nissan/Infiniti gave us a valuable insight into identifying small leaks, saying, “I find with a slight head gasket leak, one that doesn’t leak a lot, or all the time, the heater will intermittently quit putting out hot air before the vehicle starts to seriously overheat. The lack of heat is what brings the customer into the shop. I had one vehicle that would only act up once every few weeks and I never could get a positive test for a combustion leak.
Imagine it blowing a little combustion gas into the cooling system and forming an air bubble that impeded coolant flow to the heater core.”
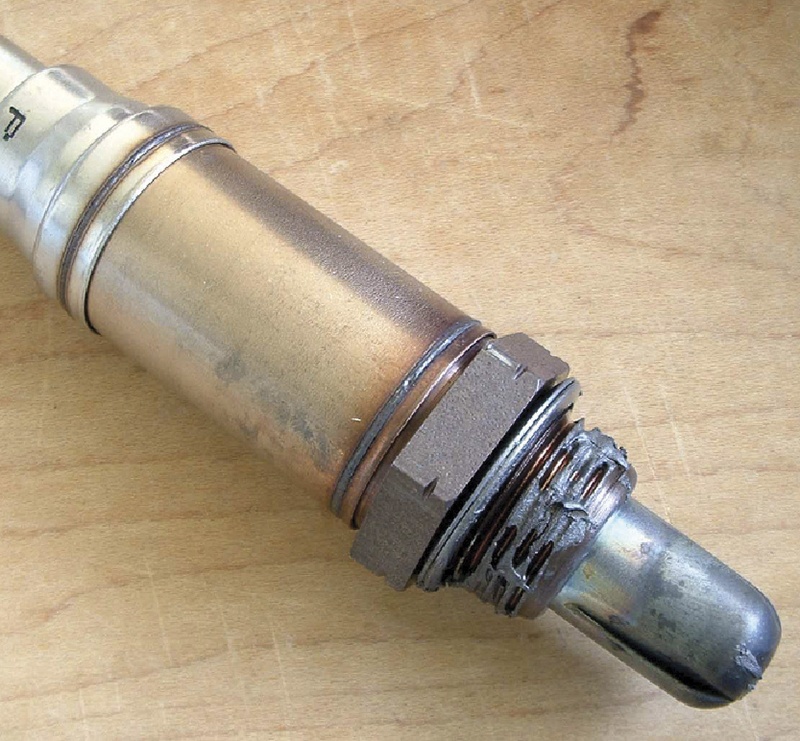
If any appreciable amount of coolant has been passing through a cylinder or two because of a leaky head gasket, there is a good chance that the O2 sensor(s) has become contaminated and will only send a “lazy†signal.
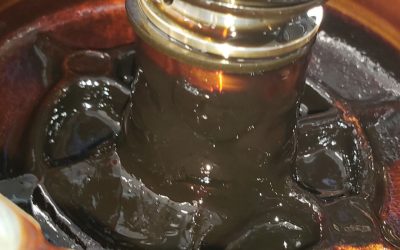
Physical inspection shouldn’t be overlooked. The brown color of water in the oil, or the “chocolate milkshake” color and consistency of oil in the coolant is unmistakable. A vehicle with a starting problem, white smoke, or misfire in the mornings may be leaking coolant into a cylinder. Allowing it to sit overnight, and borescoping the spark plug holes for fluid is a quick and easy test. Any cylinder experiencing coolant leakage will be too clean, completely lacking in carbon buildup, and the spark plug will be too clean as well. Pulling the 02 sensor and putting a clean rag over the hole before cranking may show coolant leakage getting blown out. If a vehicle has been blowing white smoke, plan on replacing the 02 sensor(s) since most antifreeze formulas contain silicates, which can contaminate the sensor.
By this point, the technician has probably ruled out or repaired other potential causes and has at least two confirmations of a head gasket leak, or cracked head, and can proceed with pulling the head. Before removal, use a beam or dial-type torque wrench to give each head bolt a quick check to see if any are significantly looser than the rest; this also may help pinpoint the problem. Or each bolt can be loosened one full turn, and then re-tightened to see what the torque value is/was.
Make sure the engine has come down to room temperature before actually removing the head. Otherwise, the casting may warp as it cools without the rigid support of the block.
If the head is going to a machine shop, cleaning and surface checking should be done there. Otherwise, these critical details are your responsibility. Make sure you remove all of the old gasket shellac, carbon, and corrosion. Be careful not to make any deep gouges or take off any metal in the process. Gasket engineers have told us that savage cleaning procedures, such as using sanding disks or wire brushes on a drill, can cause unsealable unevenness almost instantly. The same goes for those aggressive “zip” disks, which can possibly contaminate the engine with abrasives that may destroy bearings. So, use proper gasket scrapers and your favorite solvents.
Well and truly flat
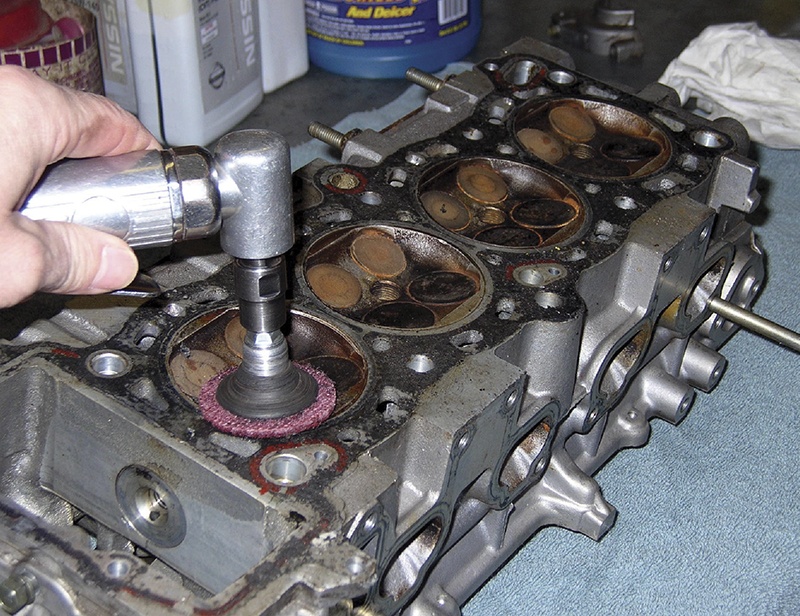
Applying an aggressive “zip†disk to the head is NOT recommended. Not only can it make dents and waves much faster than you might expect, it will contaminate the engine with abrasives that may damage bearing surfaces.
Check for warpage using a straightedge and feeler gauges lengthwise and crosswise. The traditional rule of thumb says if you can slip a .006 in. gauge between the head and the straightedge anywhere over its entire length, or a .002 in. gauge in any six inch span, the casting is too wavy to guarantee a decent seal.
But that may not be good enough anymore. For example, at least one of the major gasket makers has tightened its recommendations. For a V6 or three cylinder head, it’s now .003 in. over the whole length, for a V8 or four cylinder it’s .004, and for an in-line six .006 (come to think of it, that’s easy to remember because the thousandths are the same as the number of cylinders). Max deviation from flatness across the width remains .002, and there should be no “sudden irregularities” exceeding .001 in any three inch diameter. By the way, this is the sum of the values for both head and deck.
But flatness isn’t the only sealing surface consideration. The level of smoothness or “tooth” is also important. If it’s too rough, the gasket won’t be able to fill up the scratches. For years, people said that if it’s too smooth there won’t be enough bite for a good grip, so there’ll be unwanted movement in the sandwich. A gasket engineer has since told us, however, that that’s not a real concern because he’s never seen a case where a mirror-like finish caused a problem.
If you suspect that the head is cracked, you can see if dye testing will reveal the fissure, but it would be better to send the casting to a machine shop that’s equipped to do pressure testing.
We’d better address the question of supplementary sealants. If the gasket has graphite faces, don’t apply any sealer as it’ll soften that carefully manufactured surface. Metal faces should receive an even coat of a suitable chemical sealer.
Nail it down
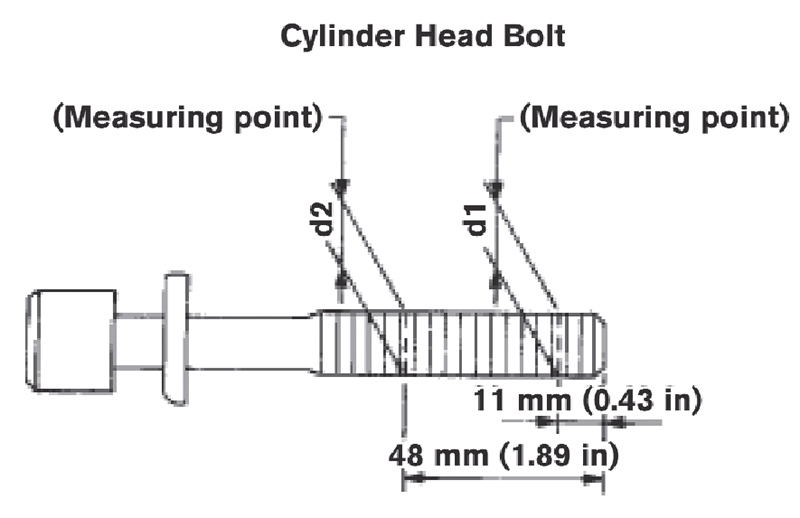
Never reuse “plastic zone†or “torque-to -yield†head bolts without comparing the diameters of the threads at the points shown. If the difference is larger than the specification, get new bolts or risk twisting one off and ruining your schedule.
Clamping force on the gasket must be exactly right, which not only requires that the recommended head bolt tightening procedures be used, but also that the threads and the bolts themselves be given proper consideration.
First, make sure the bolt holes in the block are clean and free of fluid (hydraulic pressure can actually cause cracks). Blow them out, and perhaps clean them with a rifle brush or a thread chaser.
Since most Nissan and Infiniti engines are designed to use the “plastic zone” or “torque-to-yield” tightening technique, you must measure the head bolts to be sure they have not stretched too much to be safely reused — a snapped bolt would be a disaster both financially and time wise. Subtract the head bolt diameter measurement taken near the top of the threads from that taken near the end of the bolt. On an Altima 3.5L V6, for example, those points would be 48 mm and 11 mm from the end of the bolt, respectively. If the difference exceeds the published limit, which will typically be on the order of 0.11 mm (0.0043 in.), replace the bolts with new ones.
If the bolts are to be reused, clean them with a wire brush, then coat the threads with engine oil.
On certain Nissan and Infiniti engines, head bolts need to be replaced every time they are removed.
Nissan particulars
Late-model Nissan and Infiniti engines continue the company’s legacy of durability and dependability. Your job is to make sure these characteristics are retained after you’ve made repairs, and that means adhering to Nissan’s specific procedures. The company’s service engineers know what
works, so resorting to short cuts or half-baked methods is asking for a damaged reputation.
We’ll provide a couple of examples of the particulars of head gasket replacement:
- On the 2000 Maxima 3L V6 (VQ30DE), make sure to rotate the crankshaft until #1 piston is 240 deg. BTDC of its compression stroke before installing the heads or piston/valve interference will occur.
- On the 2000 Sentra 1.8L (QG18DE), a bead of RTV Silicone Sealant (Part Number 999MP-A7007) must be applied to the seam at the front of the head gasket. The major bolts should be angle torqued in this sequence: 22 ft. lbs., 43 ft. lbs., loosen completely, 22 ft. lbs., then an additional rotation of 50-55 deg. The small bolts at the front (11-14) should be tightened to 56-74 in. lbs. Use the proper order, of course.
Obviously, we can’t give the details for every year and model Nissan and Infiniti engine, but the above should illustrate that you must look up the specific instructions for each to assure against catastrophe.
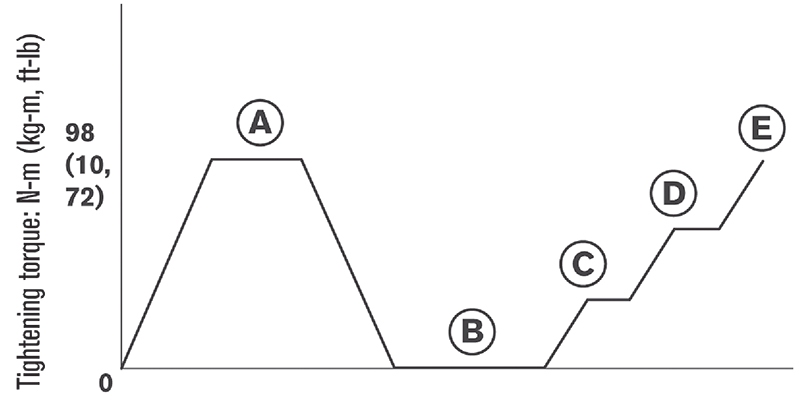
Install the cylinder heads on the cylinder block. Tighten the cylinder head bolts in five steps in the order shown. Step A: 98 N-m (10 kg-m, 72 ft-lb); Step B: 0 N-m Loosen in the reverse order of tightening; Step C: 39.2 N-m (4.0 kg-m, 29 ft-lb); Step D: 90° degrees clockwise; Step E: 90° degrees clockwise


0 Comments