Mercedes-Benz vehicles hold their value better than any other marque. This means customers are likely to invest in major repairs, such as those that involve cylinder head R&R.

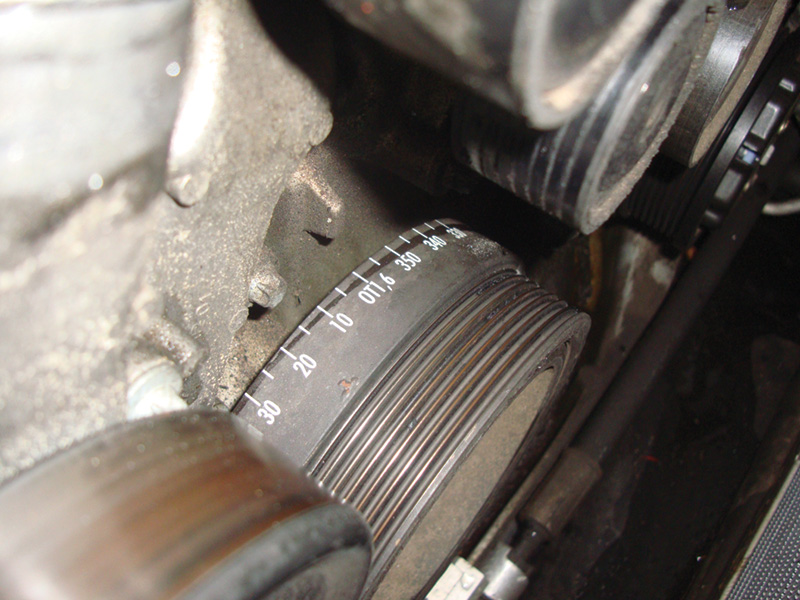
After draining the coolant, but before starting any disassembly of the 137 V12, rotate the crankshaft to TDC using the “OT1,6†mark on the crank pulley. This will allow you to inspect and set cam timing marks to make reassembly easier.
Thanks to superior engineering and the very best materials and assembly procedures, Mercedes-Benz engines last a long, long time. It’s not at all unusual for them to go 200,000 to 300,000 miles and still have plenty of life left. This is a sharp contrast to other market segments where a “life expectancy†is built in at the factory. Since these cars and SUVs are basically rock-solid machines, their owners are typically willing to spend the money to replace major components such as engines
and transmissions.
Mercedes-Benz has a remanufacturing program that extends to these components and offers exceptional warranties. Cylinder head replacement is a relatively common service procedure in high-mileage engines, so knowing how to do this job correctly will ensure that both the service life of the vehicle and your relationship with your customers will be extended.

Make note of the cam position with the engine at TDC. This will help with reassembly. These particular engines do not have conventional timing marks, but use degrees of rotation when the camshafts open and close the valves.
Since you will very rarely have to remove the heads of late-model Mercedes-Benz vehicles, we’ve chosen an older engine for our example here: The powerful 137 V12. There are also some unusual aspects to this service on this particular engine, so we think it’s a good choice as a subject to cover in StarTuned.
Disassembly

All gasket surfaces need to be scraped clean and be free of oil or grease. Avoid using abrasive discs with air tools since abrasive dust can get into the engine and cylinder walls and cause premature wear. Use nylon pads and elbow grease to remove deposits. Vacuum or blow out any material that may fall into the engine.
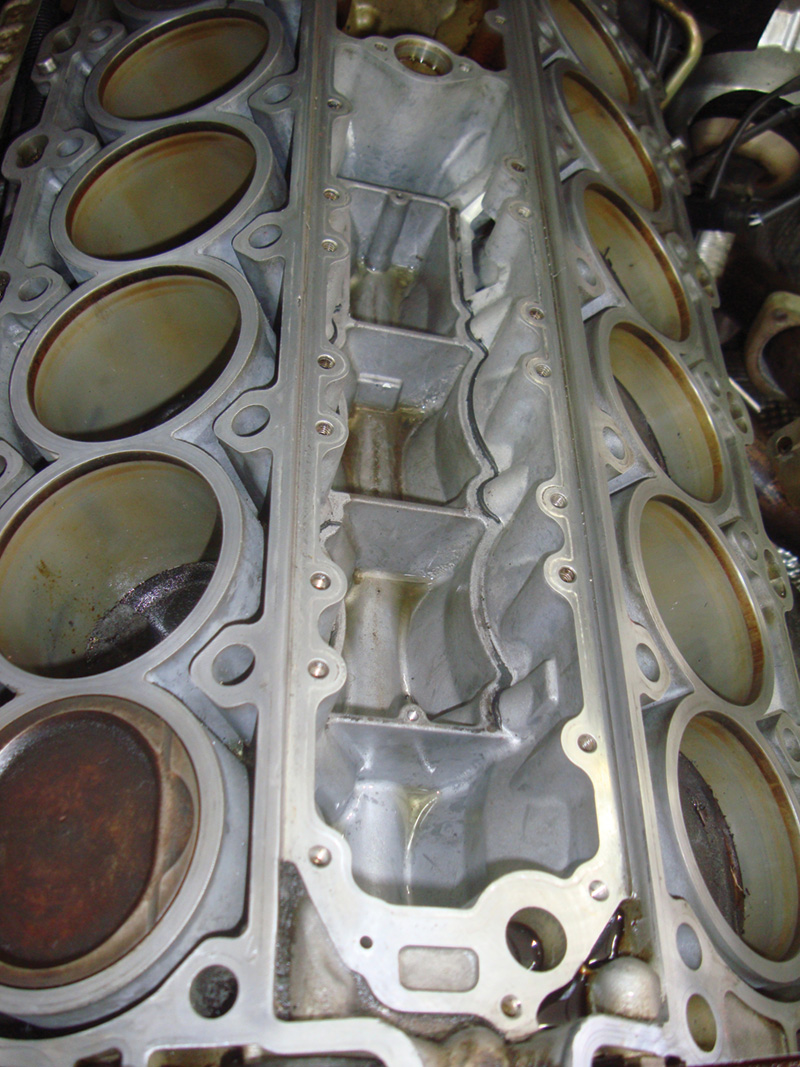
The specimen we used for our photography had a leaking oil cooler at the back of the block. The oil cooler also houses a crankcase breather system, and the whole assembly had to be removed in order to repair the oil leak. It is mounted in the “V†of the block and requires that the cylinder heads be removed to gain access. You might think that this would be a difficult task on a large V12, but Mercedes-Benz engineering made this engine relatively serviceable with no seemingly impossible steps. Still, this operation, which carries the label “01-5795 R & R Engine Cylinder Heads (includes cooler r&r),†is rated at 16.1 hours, so you must follow the instructions in WIS to the letter to avoid having to do it over (WIS document number AR18.30-P-3482L Engine 137 (V12) models 220 & 215).
The first steps should be to remove the electric cooling fan and drain the coolant. At this early stage, you should crank the engine manually and set the #1 piston to TDC using the “OT 1,6†mark on the crankshaft pulley. There are no special tools or conventional timing/alignment marks for the 137 V12 engine. Timing is set by checking the intake and exhaust valve degrees of rotation for opening and closing time with a degree wheel.
So, make very careful note of the cam position with the engine at TDC — you can make your own timing marks to simplify this step, which will help with reassembly. Continue by removing the timing chain tensioner and timing cover. This includes the cam sprocket covers for both banks. Note that bank #2 has an additional CSO (Cylinder Shut Off) system that uses oil pressure to activate and deactivate camshaft operation. With tension off the chain, you can remove the cam sprockets and support the chains so they do not come off the crankshaft sprocket and alter your timing marks. Also, do a close inspection of the chain and sprockets while you’re there.
After removing the fuel injection system, wiring and hoses, the upper intake must be taken off. The intake bolts directly to the cylinder heads and removing the throttle body makes it easier to unscrew the bolts at the rear of the manifold. Putting the car on a lift will give you easy access to the six bolts that hold the two exhaust downpipes to their manifolds. With the intake and exhaust manifolds off, you now only have to remove the cylinder head bolts and timing chain guide pins to lift off the heads.
Cleanliness Is Next To Godliness
The Torx-type head bolts may have stretched. Mercedes-Benz provides length specifications to allow you to tell if the stretch is excessive and the bolts need to be replaced. Do not use a tap to clean the threads in the block as it will remove too much material from the threads and weaken them. Use a thread cleaner, rifle brush, or head bolt to loosen any contaminants and blow out the holes using a clean rag to collect the spray.
With the cylinder heads, off you may want to clean the tops of the pistons, but do not use abrasive discs and air tools to do this. The material that comes off such discs is very abrasive, and these particles can make their way into the engine and accelerate wear. Clean all carbon deposits and gasket surfaces with a nylon pad or brush. The block and cylinder head are both made of aluminum and can easily be damaged with power tools.

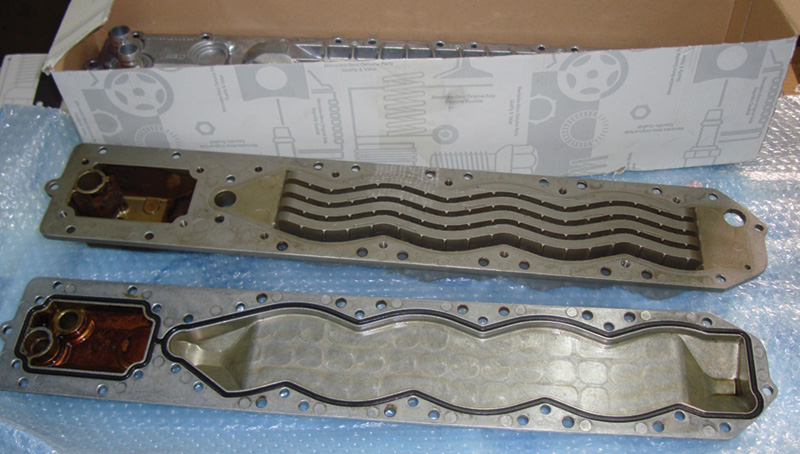
The seal between the two parts of the oil cooler is not available separately. It was very difficult to determine if the leak was from this seal or the one underneath, so we decided to replace the whole assembly.
The Source Of The Problem
Under the cylinder heads in the valley of the block is the oil cooler/crankcase breather. It is a two-piece unit that directs engine oil through passages in the cooling system. It also directs crankcase gases through hoses to the upper intake manifold. The oil cooler sealing gasket is available for replacement, but the gasket between to two pieces is not, so you’ll need to replace the whole unit (part number A137 188 05 01). With clean gasket surfaces, the sealing rings will provide proper sealing if the assembly is properly torqued down. Especially with aluminum engine components, tightening bolts to their proper torque is critical for long-term problem-free operation. Purchasing a subscription to www.startekinfo.com will make all torque specs and service procedures available to you in WIS.
The oil cooler must be installed first since the mounting bolts are not accessible with the cylinder heads in place. With all gasket surfaces thoroughly cleaned, you can now install the heads.
Installation

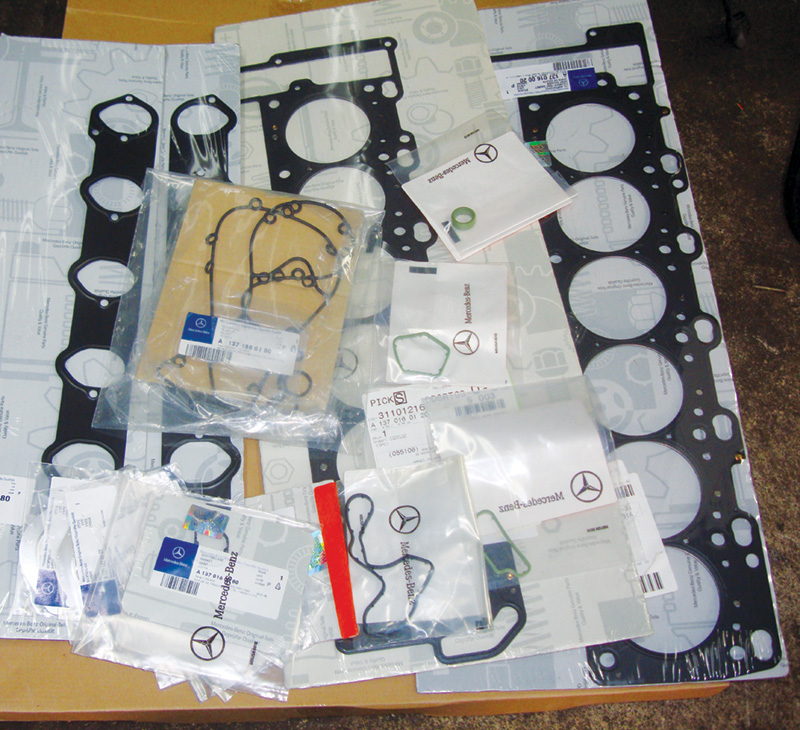
We don’t want to have to do this large job twice. Using OEM
Mercedes-Benz gaskets gave us an added measure of confidence that there would not be any problems down the road for the customer.
This is a labor-intensive job and you will feel more at ease using Mercedes-Benz OEM gaskets in your repair. After fitting the head gaskets, be sure all contact surfaces are clear of oil, grease, and dirt on both the block deck and cylinder head surfaces. Bolt holes need to be clean and clear of debris. Place the cylinder head gasket on the dowels provided in the block and place the head on the block being sure not to slide it into position and damage the gasket. WIS instructs us to tighten the cylinder head bolts to 20 NM in a specific pattern. Tighten each bolt an additional 180 degrees in the same pattern in two stages of 90 degrees each. After reassembly, you should change the oil, flush out any old coolant and read/clear codes with your SDS or aftermarket equivalent.
Throughout this procedure, pay particular attention to installing the new oil seals properly — you certainly don’t want to go back to fix a leak. Also, if you see any signs of corrosion in the water jackets or passages, Mercedes-Benz recommends using its special antifreeze formula Part Number A000 989 16 25 14.
You can find all the steps in WIS before you turn a wrench and lay out a plan for getting the job done properly. A smooth-running engine without complications is your reward for doing the job according to Mercedes-Benz procedures and specifications. You customer is rewarded with many more miles of trouble-free engine operation, and will most likely feel new confidence in your work and loyalty toward you.


0 Comments