


Besides the structural factors, BMW windshields are where vital safety features such as Lane Departure Warning, Collision Warning with brake activation, Active Cruise Control, etc. get inputs. Better use only genuine BMW replacement glass.
The structural strength of the front and roofline of the passenger compartment depends heavily on the windshield and its bond with the A-Pillars, roof, and base where it connects to the upper frame rails. Replacement parts, installation materials, and procedures must meet safety standards.
The windshield is a major source of the strength of the front structure of the passenger compartment of a vehicle. A windshield that is attached securely to the A-Pillar, roof and upper frame rails provides the structural backbone that allows the crumple zones to absorb much of the energy generated in a front-end collision.
If there is any weakness in this front structure, impact energy could travel into the passenger compartment faster than airbags can deploy, and the steering wheel and dashboard could intrude farther and faster into the vehicle.
All cars on American roads are required to meet U.S. safety standards for automotive glass installation. This applies to both factory and aftermarket installation, so glass repair technicians need to understand exactly what is required for the glass in a given vehicle.
Adhesive

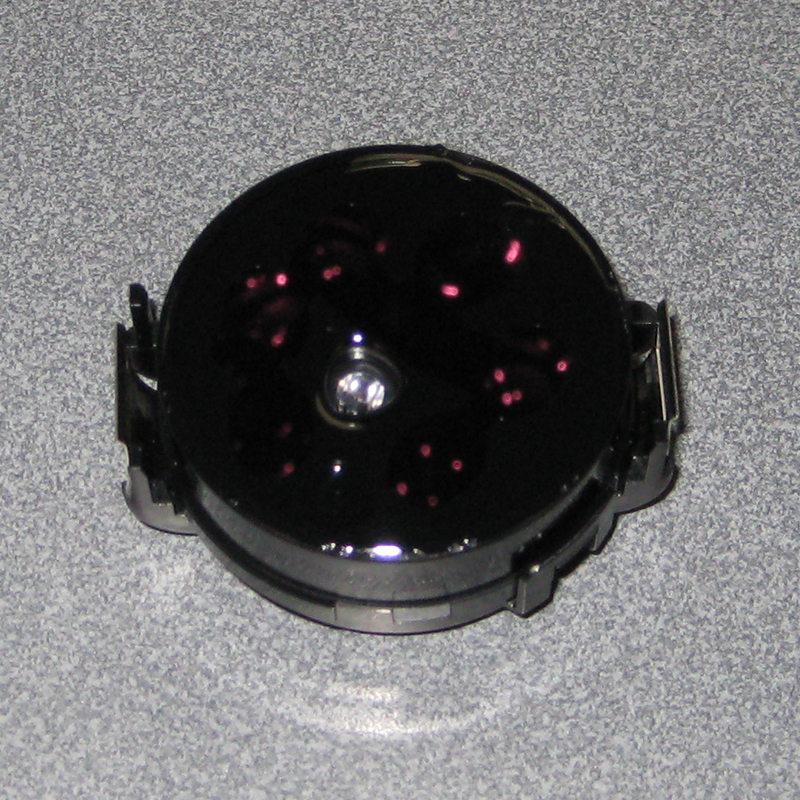
A dash-mounted interior moisture sensor measures the humidity level and automatically signals the climate control system to adjust the air conditioning if necessary to enhance passenger comfort.
The urethane adhesive that bonds automotive glass to the vehicle structure is extremely strong, but installation requires that nothing interfere with the contact between the glass and adhesive and the adhesive and vehicle structural elements. Debris, corrosion, oils from the installer’s hands or clothing, and non-traditional contaminants (NTCs) such as mold release agents associated with the glass bending process, and silicone oil (a byproduct of the glass lamination process) can all inhibit adhesive bonding. Technicians must ensure that all such contaminants are removed as part of the cleaning and preparation of the area prior to placement of new glass.
Because stronger materials in modern vehicles allow the use of thinner metal even in structural components, corrosion damage must be assessed carefully. If corrosion is limited to orange discoloration, formation of light red spots on the metal, or light pitting, it can be removed with a wire wheel, media blasting, or a chemical rust remover. Apply primer to the bare metal to prep it for bonding to the new urethane adhesive.
Metal that has been perforated, even if only with microscopic holes, must be repaired or replaced by a professional collision repair technician. Any level of corrosion that has spread over a 24-square inch or larger area should also be addressed by a collision repair professional.
Some advanced electronics that attach to the glass require the use of special non-conductive or “High Modulus†urethane adhesive that will not interfere with signals or transmit harmful electric impulses through the device housing.
After the area is clean, trim down the existing adhesive bead to one-to-two millimeters in height. Apply enough fresh urethane so that when the glass is pressed on, the adhesive spreads to match the footprint of the original factory bead.
The height of the fresh adhesive bead must match or slightly exceed the distance from the pinch weld to the roofline of the vehicle. This should be enough new urethane to meet strength and energy requirements without pushing the replacement windshield out of alignment with the A-Pillar or roofline.
Too much adhesive will push the glass higher than the roofline. In a front-end collision, the glass will be pushed up over the roof. It will no longer perform the structural support function it was designed to do, and it will not help reduce passenger ejection risk.
Safety and Other Advanced Electronics
Many BMW safety sensors and other advanced electronics rely on the windshield. Lane Departure Warning (LDW) is one example. It takes an image of the road ahead and warns the driver if the vehicle is facing potential danger.
If the vehicle is heading outside of the lane markings without a turn signal on, the system vibrates the steering wheel or sends images to the Heads-Up Display (HUD), if so-equipped. The system uses video camera technology integrated with or mounted near the interior rear view mirror.
The BMW Heads-Up Display beams speed, cruise control status, and navigation information onto a translucent film on the windscreen, directly in the driver’s line of sight. A vehicle equipped with BMW Night Vision and Collision Warning sensor technology can project a warning through the HUD that a car ahead is braking quickly, or that there are pedestrians in the roadway, enabling the driver to see and react sooner than he or she might otherwise.

Many BMW windshields come with safety hardware, including technology not available on aftermarket windshields, pre-attached. We’ve removed the interior rear view mirror housing cover from the windshield of a BMW 5 Series E60 to show the safety technology inside. The mirror attaches to the circular socket at the top of the mirror backing (near the blue protective foam edging). In the middle is a newer version of the BMW Rain/Light and Lane Departure Warning sensor system, and at the bottom is an interior moisture sensor.
The Rain, Light and Precipitation Solar Sensor (RLPSS) turns the wipers and headlights on or off. Some versions include a humidity sensor that affects A/C operation when necessary. Key RLPSS components mount in or near the interior rear view mirror where it attaches to the windshield.
To Be, or Not to Be — Replaced
Depending on the technology and the vehicle, some sensors are not reusable once detached from the windshield. BMW X5 E-platform vehicles require a new RLPSS — excluding models without a HUD.
Even if the existing sensor is re-used, variations in its size and level of complexity may dictate the use of additional installation procedures. These include encoding, reprogramming, replacement of optics, and re-initialization of the sensor.
For example, certain BMW 5-Series, 6-Series, and 7-Series E-platform models contain a 50mm (approximately) sensor that does not need replacement when the windshield is replaced, but does need to have new optics installed.
On newer vehicles, these sensor technologies may take control when danger is imminent. LDW sensors may signal the computer to steer the car back to the center of the lane, collision and pedestrian warning systems may apply the brakes if the driver is not responding, and Adaptive Cruise Control (ACC) may alter speed to maintain a safe distance from a slowing vehicle ahead.
Windshield Position
The BMW Visual Sensor includes the camera used for the Lane Departure Warning system and other safety technologies that look at the road ahead. The sensor mounts directly on the windshield, as part of the interior rear view mirror housing.
A windshield set a few degrees vertically or horizontally outside of factory specification can throw safety sensors off, causing unsafe operation.
The BMW High Beam Assistant (FLA) sensor, which turns the high beam on or off depending on the presence of oncoming traffic at night, is installed directly on the glass behind the interior rear view mirror. The FLA control unit has a tolerance of plus or minus three degrees from side to side, and can compensate for only a slight amount of deviation from the vehicle’s center axis.
To compensate for differences in the angle of inclination of the windshield in various vehicle models, different FLA mounting brackets are used depending on the car. Connection of the FLA sensor and control unit to the system network is provided by the existing 10-pin connector and an additional three-pin connector, both located in the base of the mirror. The three-pin connector features a mechanical design that ensures the correct bracket is selected for the type of vehicle.
Whenever you replace a windshield-related sensor, encoding, reprogramming, and/or re-initialization may be required.
LDW technology is also sensitive to deviation from factory lateral position specifications.
Sensors are application-specific based on the windshield in a given vehicle. For example, BMW280 is the product code for the humidity sensor for certain 3-Series models (E90/E60/E63/E64/E65), and is different from that for other BMW vehicles.
Refer to the BMW Electronic Parts Catalog for further details about sensors and year, make and model applications.
Windshield Leaks
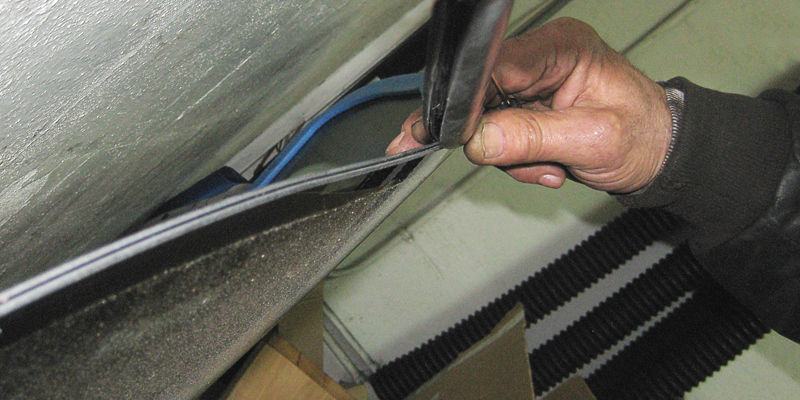
Sliding the glass into the molding channel is easy. Of course, there’s a lot of prep not shown in this picture.
The plastic cowling at the base of the windshield normally fits snugly to a rubber seal. When in good condition, the two pieces together do an excellent job of keeping water from getting under the windshield and behind the firewall.
Unfortunately, after extended periods of high exposure to ultraviolet light, the rubber seal can deteriorate, become brittle, and separate from the base of the windshield, the cowl, or both. When the car gets wet, water seeps through even the tiniest gap. It won’t be long before the vehicle owner notices moisture under the carpet, or mold and mildew odor in the passenger compartment.
The solution is easy. First check to make sure the problem is not caused by a heater core or other leak. If not, inspect the seal to see if it has separated at any point along its length from the cowl or the base of the windshield.
If you notice ragged edges, missing pieces, or places where the seal has warped and moved away from the cowl or windshield, replace the rubber seal. You should also replace the cowl, as it is likely to have also suffered some deterioration due to repeated temperature variations and UV exposure.
Give extra attention to instructions about removing and replacing any multipart clips. The replacement cowl for some models may come with the clips and their anchor components already attached. Any anchors left on the vehicle will interfere with your new installation. Worse, if you force the cowl in place without noticing that an old clip anchor is interfering with alignment of a replacement, the installation will not be tight and your repair will come back leaking again.
Rear Window Replacement
Although the rear window has no cowl, there are other replacement considerations. There may be wiring harnesses for a rear window defroster, keyless entry antenna, and other electronics. Check instructions to see if any electronics must be replaced, re-initialized, or re-programmed when a new rear window is installed.
On some models, the sides and top of the back glass have exposed edges. Proper positioning of the replacement glass is critical to noise reduction.
Before removing the existing glass, measure the gap between the glass edge and the wall of the pinch weld. Mark the window cutout to show where to position the replacement glass to match exactly the factory installation.
After removing the existing seal and cleaning the area, make sure there are no sharp edges on the pinch weld that can cut the soft rubber replacement seal. If elimination of any sharp edges requires removal of a significant amount of metal, the pinch weld may need to be repaired by a collision specialist in order to avoid compromising the structural integrity of the roof and passenger compartment.
Check Your Repair
- Once you have set the new glass in place, go over the perimeter of the repair with an ultrasonic leak detector. If you find a leak, press the glass firmly in that spot to ensure good contact with the urethane as it cures.
- Check the operation of all re-installed electronics. Make sure that air bags and safety belts are in place and pass any on-vehicle diagnostics. Check the windshield washer fluid hose connection and the operation of the wipers.
- Make a checklist of all of these inspection results and offer a courtesy copy to the customer.
- Make sure that the urethane has cured for the amount of time recommended by the manufacturer before returning the vehicle to the customer.


0 Comments