

Tips and tricks for getting it right the first time
Oil leaks can be tricky but they don’t have to be daunting or unsolvable with the right procedures and shop policies in place.
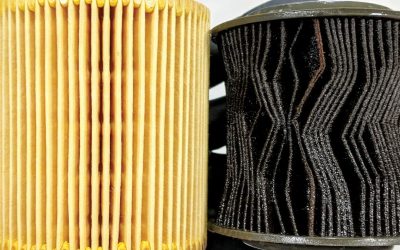
Oil is slippery stuff. All modern BMW engines use a high quality synthetic oil. If it can find a way out, it will. This typically begins to occur at around 4 years or 60k miles.
It’s generally accepted that petroleum-based engine oil starts oxidizing (breaking down) around 240°F (115°C), while full synthetics, such as Rotella T6, can handle temperatures above 300°F. Once oil starts the oxidation process, whatever damage is done by overheating can’t be fixed; the oil has now broken down and will not revert back to its original properties once cooled down. The hotter the oil runs, the shorter the oil change interval needs to be.
This now-compromised oil has a lifespan of a few thousand miles, as the lubricating molecules and added detergents break down during use. When an engine exceeds a normal operating temperature, it begins to damage itself in a myriad of ways, including through quick deterioration of the engine oil.
Changing the oil often keeps the lubricating ability boosted, and the addition of an oil cooling system can maintain the quality of oil for longer periods of time by lowering the working temperature of the oil by as much as 30 percent. These oil coolers can be a source of leaks in the modern BMW engine.
Proper Diagnosis
Proper diagnosis is key to solving a customer’s concern. Failure to correctly identify the source or sources of leaks (there may be more than one) will result in not only frustration on your part, but unsatisfied clients.
During the vehicle’s operational life, normal engine oil seepage or sweating, in addition to accumulated road dust, dirt, and grime in the engine compartment, can give an appearance that there is an active engine oil leak. This can be further exaggerated by residual oil that remains on the engine after maintenance services are performed — for example, oil filter changes, engine oil top-offs, etc. If this visual appearance of accumulated oil on the engine is misinterpreted as an active engine oil leak, then unnecessary gasket repairs/replacements will result.
BMW has produced TSB SI B01 10 21 to help repair shops identify which oil leaks are indeed worthy of taking action right away or should simply be noted to monitor for future evaluation. We should mention that it’s imperative to have a consistent evaluation guideline in your shop so that you can avoid the confusion of one tech stating the oil leak needs repair immediately while another says it’s not worthy of repair yet. Review of this bulletin, especially for apprentice technicians, is quite valuable to your shop.
Clean it Up!
There may be times when you can quickly identify the source with a quick inspection, but more often than not the leaks have been going on for a while and will have spread out over the engine components. Like we said, oil is slippery — get it hot, add some turbulence from the engine fan or just outside air entering the engine compartment, and you will have it coating everything. Now add gravity to the equation and a leak on top of the engine might look like a rear main seal from underneath the vehicle.
A proper steam cleaning of the engine is the first order of business. Many manufacturers recommend a leak detection powder at this point. Leak detection powders are similar to baby powder or foot power. In fact, some shops use those.
When the oil starts to leak, the powder will absorb the oil and change color, revealing the source of the leak. The problem with powders is getting them into all the nooks and crannies that hide the very source of the leaks.
We prefer a UV leak detection dye that is engineered for use in engine oil. When added to the oil for a test drive, the dye will disperse and show up at the leak site. Often a leak will only show up after the car is actually driven. The oil needs to get good and hot and the pressures need to be elevated. Otherwise you may not find any leaks.
A UV lamp will aid in the detection of the leak. These are jam packed engines so it can sometimes be quite difficult to locate the leak. You may have to begin removing parts in order to see more clearly the offending components, so be sure to allow for plenty of diagnostic time to locate the leaks. On some models, BMW recommend the use of a borescope to look into tight spots.


Common Areas of Oil Leak Concerns
Oil spillage – This is usually a customer related issue, but some sloppy shops have been guilty of simply spilling the oil when filling or topping up. In this case, the oil may also run onto the oil pan and be mistaken for a leak at this location. You can usually identify this by the stain of oil running down the filler opening. It is also recommended, when removing the oil filler cap, do not put the cap down with the sealing surface facing up. Otherwise, the oil that is in the cap may get behind the seal and, once the cap is refitted, may be mistaken for an oil leak. Also, you may note in one of the photos some oil accumulated in what looks to be the oil stand area below the filter cover. This too may be sloppy workmanship or the result of not cleaning up after changing the filter.
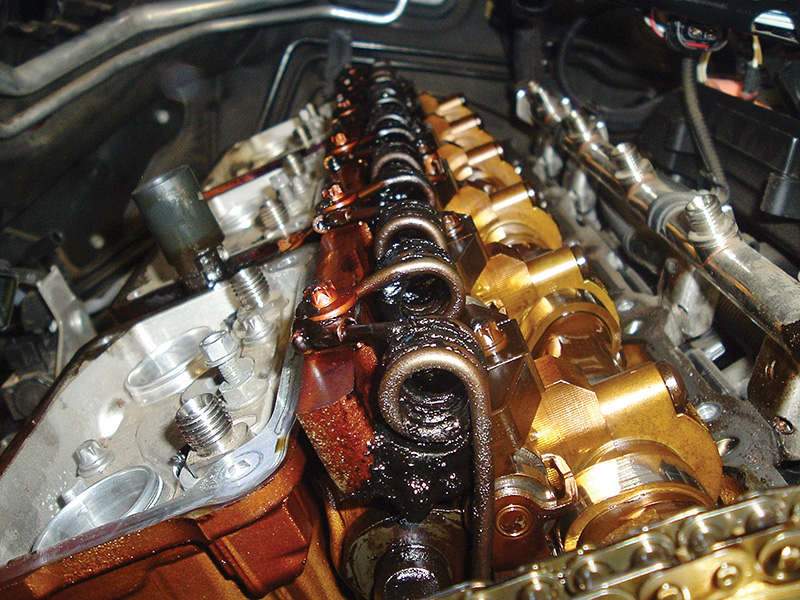
Valve Cover Gaskets – This may be found on most models, certainly those with N54 and N52 engines. Telltale signs are wet areas around the hold down bolts, the front of the engine, and along the cover’s joint with the cylinder head. Some models have plastic valve covers that develop hairline cracks over time from the heat involved in the engine compartment, expansion and contraction, etc. These often have to be replaced along with the gaskets.
Oil filter housing gasket – This is also sometimes referred to as the oil stand gasket. This is a very common area for a leak and also a messy one. Often it is ignored for too long and oil runs down the engine block, sometimes down the front on some models. It can get on the serpentine belt system and be thrown about, eventually deteriorating the belt and shredding it. You want to nip this one in the bud before that happens.
Cylinder head gasket – N54 engines use aluminum cylinder head bolts, and it’s not uncommon for them to break on high mileage engines. Sometimes you can access some of these bolts outside the valve cover, so you can try to see if you can get one to wiggle. If you can, you can bet there are others that are broken. The head will have to be removed and new bolts and gaskets installed.
Oil pan gasket – Removing the belly pan and inspecting this should be fairly straightforward, but refer to the above sections about cleaning. This is the low point of the engine and all oil runs downhill. A leak from somewhere above will eventually hit the seam between the pan and the block and migrate all the way around, making it look like a pan gasket leak. Have a good cleaning and identifying policy in place to make an accurate diagnosis and repair.
Front and rear main seals – These are also at a low point where gravity can fool you. Many issues with these seals involve hissing or whistling noises due to improper crankcase ventilation pressures.
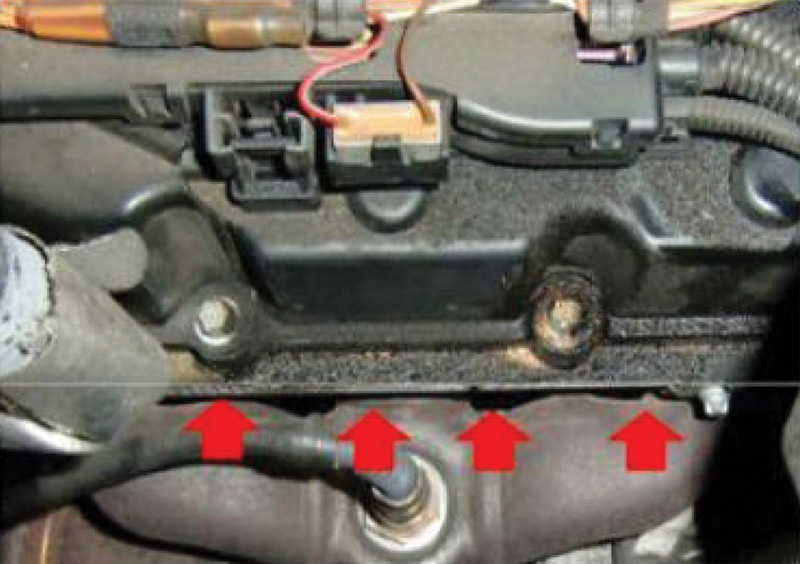
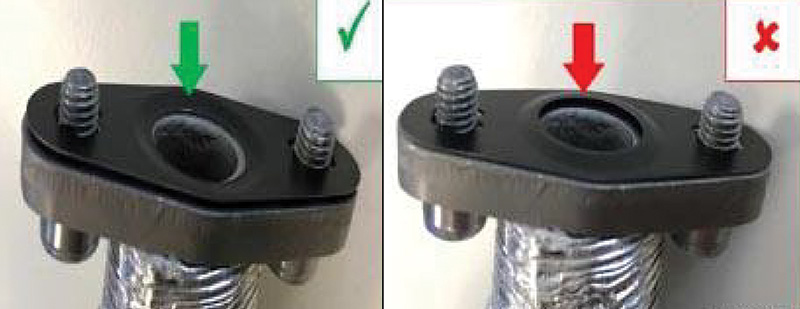
B46/48 Engines in F30 models – You may encounter an oil return line leaking at the connection to the turbocharger. There is actually a service bulletin SI B11 15 17 addressing this issue. It is possible that the gasket has been installed improperly.
N20 Engine Timing Chain Tensioner Seal Ring
There is a service action, SI B11 02 12, that describes a replacement updated seal. The original material was too soft.
Obviously anywhere you find a gasket or seal you can have a leak, but these are the most common. No matter what model you are working on, have a policy also of checking TSBs for any updates. You may find in several cases that the manufacturer has updated a part or a procedure which can simplify the job or increase the service life of the repair.
Repair Methods
Let’s look at some repair procedures for some of the common leaks:
Replacing The Valve Cover Gasket on N54 Engines
Necessary preliminary tasks:

- Disconnect negative battery cable.
- Remove rod-type ignition coils. If the cover has been leaking for some time, some or all of the coil boots will be oil soaked. You can clean these, but many advocate that while out, it’s good practice to replace them now.
- Unclip the injector wiring harness.
- Remove the injectors. Please note: This is from the BMW service manual, but some technicians have found that this step is not necessary. However, the lines do need to be removed.
- Remove the trailing link.
- E90, E91, E92, and E93 only: Remove the high pressure rail.
- Disconnect the vacuum lines running across the top of the covers. Be careful here; these lines on high mileage engines will be very brittle. Unclip the lines and lay them to one side.
- Remove the special screws holding the ground connections for the injectors and remove the valve
cover hold down bolts. - Thoroughly clean the valve cover and sealing surface of the cylinder head and check the cover for cracks. Replace the sealing gasket and torque the bolts to 8.5 Nm.
Replacing the Oil Filter Housing Gasket on N52 Engines
Necessary preliminary tasks:
- Drain the coolant.
- Undo the oil filter cover and allow the oil to drain back. It’s a great idea to combine this operation with an oil and filter service. If so, remove the filter and allow the housing to drain back into the engine.
- Remove the intake filter housing.
- Remove the intake duct work. This will help give you better access.
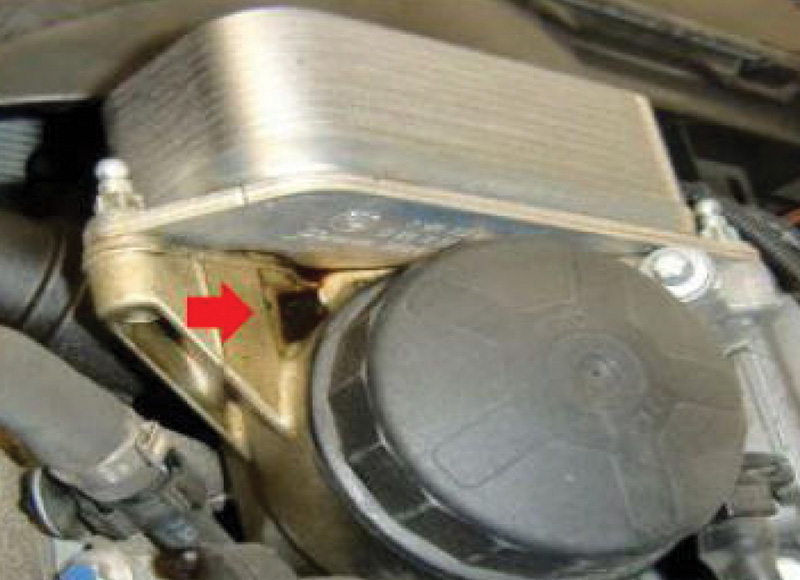
Detach the coolant hoses from the oil filter housing. Some will leave the hoses connected and just detach the cooler from the housing. The cooler may have a plastic cover over it which you can remove.
| NOTE |
| Protect the drive belt against dirt contamination. It’s a good idea to remove the belt; otherwise, you may get some oil leakage on it when removing the cooler and housing assembly. |
There are threre screws holding the cooler to the oil filter housing. Remove these and you can position the cooler aside.
The housing itself is now accessible. It also has three bolts holding it on. First, you’ll need to unplug the oil pressure switch connector. Underneath, in the front, is a difficult one to reach without removing the nearby coolant hose. The one in back is somewhat hidden by the intake manifold. A combination of a ¼ inch drive extension with a universal T10 Torx socket will reach it however. The top one is the easy one.
Now is a good time to thoroughly clean the housing and cooler. Replace both the cooler gasket and the oil filter housing gasket with new genuine gaskets and torque properly when installing. Replace the oil filter and top up the oil. Remember to fill and bleed the cooling system as per manufacturer’s procedure.
Replacing The Oil Pan or Oil Sump Gasket On N54 Engines
This procedure is for a 2009 E92; others will be similar including those with the N52 engine. Some models require removal of other components or detachment of certain components such as fan shroud, compressor, etc.
Necessary preliminary tasks:
- Remove the lower engine cover.
- Secure the engine in installation position. This means supporting the engine with a fixture from above. This step requires removal of several components to facilitate installation. Use the vehicle’s tow hook for the front support connection. Remove the upper motor mount bolts. Here again the factory workshop manual suggests lifting the engine with the support fixture about 10 mm. Most techs find that simply supporting the engine is enough.
- Lower the front axle support or subframe. Interestingly, the repair manual lists this a simple step. This is easier said than done! It can be accomplished, however, with a universal transmission jack or floor jack if you’re working on the ground. Release the power steering pump and place it to one side.
- Observe tightening specifications without fail during installation.
- Drain the engine oil.
- Remove the transmission oil cooler lines from the oil sump on automatic transmission vehicles.

Once you have clear access to the pan and the engine is well supported, you can now remove the pan bolts. Don’t forget the three bolts attaching the lower portion of the transmission to the oil pan. Make a mental (or photographic…) note of the locations of the bolts as they are different lengths. As always clean all surfaces thoroughly and replace with genuine gaskets and new pan bolts. Be sure to replace the seal for the oil level sensor. Torque in the proper sequence. Remember to carry out steering angle sensor
adjustment/adjustment for vehicles with active steering.
| Note about aluminum bolts |
| BMW uses aluminum bolts in many applications due to the dissimilar metals coming in contact with one another and the various forces acting on the torque. No steel screws/bolts should be used due to the likelihood of electrochemical corrosion. A magnesium crankcase requires aluminum screws/bolts exclusively. |
Aluminum screws/bolts must be replaced each time they are released. In many cases these will be identified with blue paint, but not always. They are non-magnetic so you can identify them with a magnet. Always replace these!
Shop Policy
As mentioned previously, it’s good to have a firm shop policy on how to properly identify oil leaks. We’ve all had that phone call: “I just had my BMW at the dealer and they want $$$$$ to fix the oil pan gasket. How much would you charge?” This can get you into a whole lot of trouble if the cause wasn’t identified properly. Many times the vehicle is brought in and the leak turned out to be somewhere else, like the oil filter housing. The customer probably isn’t going to want to pay to have it diagnosed again, and perhaps if it was cleaned properly and not driven too much, you can modify your invoicing to accommodate them. But don’t short change yourself in the process!
By David Facciuto


0 Comments