
With RWD, you’re making all that horsepower up front, but you’ve got to make it do a 90-degree turn to spin those tires. That’s got to be hard on the mechanism — downright brutal in any kind of racing. Here’s how to get started putting the pieces back together, and a set-up shortcut, too.
Suppose you were an early vehicle inventor. What would your mechancal imaginings be? You might have started with a transversely-mounted engine and a chain to a sprocket on the rear axle. To think this out further, wouldn’t an inline engine mounted longitudinally between the chassis rails be better? Then you could put a clutch and transmission behind it and route torque to the rear wheels by means of a driveshaft. The direction of rotation would be exactly wrong, though.
What would you use to turn that power 90 degrees so that it could forcibly rotate the wheels in the direction of forward progress? You might devise a simple pinion and crown wheel, as had been used for centuries in water- or wind-driven mills, and drive axles that went to both rear wheels. That wouldn’t be too satisfactory, though, because in curves and turns the rear wheels would be traveling different distances. The car would want to keep driving straight ahead and would resist turning. If you forced the turn, the tires would scuff and complain. What about just driving one rear wheel? Not good, either — that wheel would have to do all the work, its tire would wear out quickly, and it would tend to spin even when starting out straight ahead on a level road.
This is presumably the chain of reasoning that resulted in the invention of the ingenious device we call an automotive differential (the basic “averaging” concept had been around for centuries, though). With it, the rear wheels could turn at different speeds, yet all the torque could be used. Damned clever. Meanwhile, that leaves us to deal with a heavy, complex component.
Spiral bevel
The gears in the differential (rear end?) of modern cars and light trucks are of the spiral-bevel variety, although some people still refer to them incorrectly as hypoid gears, which are mostly found on heavy-duty trucks today. The spiral-bevel term came about because of the spiral shape of the teeth and the truncated-cone shape of the drive pinion. This design not only transmits power more efficiently than a true hypoid does, it’s also quieter during driving and coasting transitions, and multiple teeth are always engaged.
The main problems a diff is likely to have involve noisy bearings and leaky, clunky pinion seals and shafts. That’s in normal street use, however. When it comes to racing or high-performance driving of any kind, all bets are off — there’s no telling what you might see. Also, there’s a good chance you’ll want to change the ratio at some point, so you should know how to install a new ring and pinion set and have it live.
Spalling & brinelling
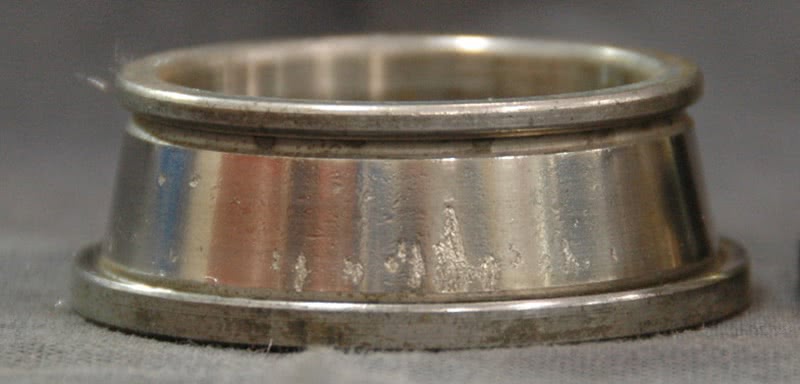
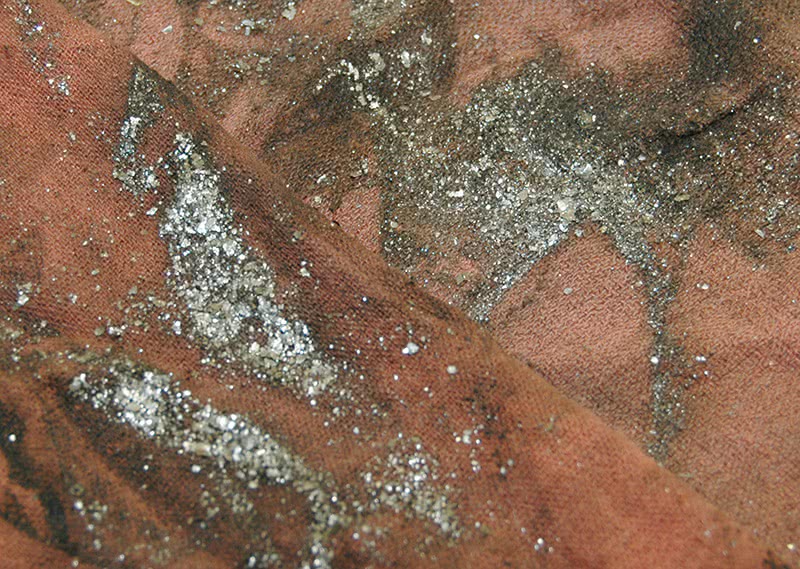
Typical bearing failures will be due to either spalling, or loss of lubrication. Spalling occurs when the surface of a bearing’s inner or outer race begins to chip out or peel. It’s mostly the result of work hardening, where the maximum shear stress occurs just below the surface of the race, loosening the bond with the surface so that the next passing roller shears the “spall” (a flake or chip) off. The ball or tapered roller of a bearing pushes a tiny wave of metal ahead of it as it rolls across the race, and the surface of the race eventually fails from metal fatigue. Spalling is characterized by irregular pits and chunks missing from the races and bearings. The type, level, and cleanliness of the lubricant, the amount of load, and the length of time in service type all help determine when this will happen.

Then there’s brinelling (after Swedish engineer Johann Brinell who invented a hardness test), which is caused by impact from road shock, or faulty bearing installation. You’ll see it as dents in the race the same length as the rollers, or that match the contact points of the balls. “False” brinelling looks similar, but is caused by “fretting,” sometimes with corrosion. This occurs when the lube is squeezed out of a loaded area by repeated shocks, motion, or vibration.
Lethal lube lack
Normally, the rollers of a bearing are separated from the race by a layer of lubricant. If metal-to-metal contact ever actually occurs, catastrophic damage will happen immediately. As our esteemed tech editor Greg McConiga has said in the past, “Although the lubricant appears to be fluid and not solid, under high pressure it acts like a solid and keeps the bearing and race separated. Think of it this way: A belly-flop into the pool from three feet up is fun, but try it from 2,000 feet and you’d be hard-pressed to figure out if you’re landing on water or on the hood of a Buick. This looks-like-a-liquid-acts-like-a-solid principle is exactly the same for any roller, ball or insert bearing and any lubricant you’ve ever used on a motor vehicle, including crankshaft and cam bearings, rocker pivots and pistons. There is one immutable rule for bearings of all types: If it touches, it’s toast.” There’s no improving on that explanation.
While we’ve used GM 10- and 12-bolt and a Ford 9-inch rears as our photographic examples here, the principles of setting up a differential properly are pretty much universal. Sure, shim locations and side bearing pre-load and backlash adjustment methods may vary, and pinion bearing pre-load procedures differ, but the fundamentals remain the same.
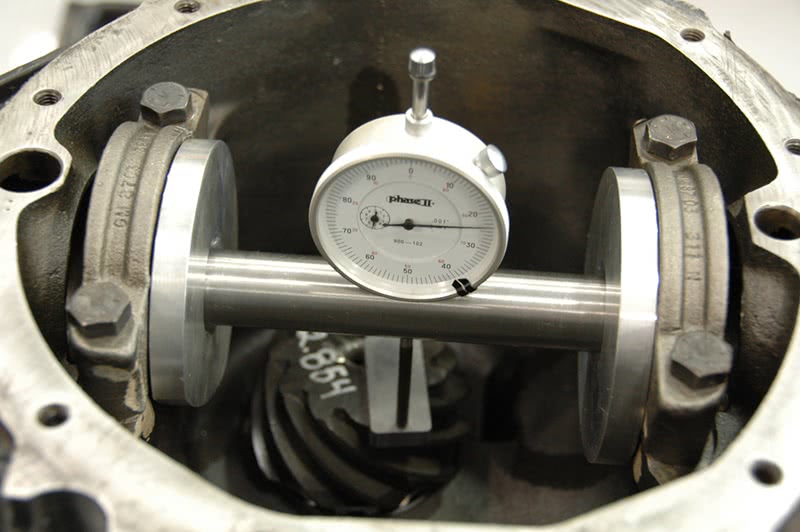
For instance, pre-loading the bearings to compensate for the force that’s trying to push them apart must be observed. Next, the top of the pinion must be a specified distance from the centerline of the ring gear. Also, some backlash between the ring and pinion gears is required. Theoretically, backlash could be zero, but in the real world it must be allowed to prevent tooth interference and binding — machining discrepancies and heat expansion have to be accounted for.
Magic shortcut nobody teaches you
Whenever you’re confronted with shredded, noisy bearings, there’s a basic principle that nobody seems to want to tell you. In almost every case, you can simply reuse the old pinion depth shim and the original cast factory side shims, and the depth, backlash and carrier preload will be on the money. Blasphemy! Don’t we need to go step-by-step through our tech school training? Well, no. Even though the bearings may be wrecked, none of the critical dimensions of the housing have changed. The carrier, drive pinion, and ring are all in the same place, and with any high-quality bearing the inner race dimensions will be within .0005 in. (that’s five ten thousandths) of the originals, which means that replacing them just puts you back at the starting point for that differential. Even if you replace a ring and pinion with high-performance parts, we can tell you that the factory-installed pinion depth shim will usually be pretty close to what you’ll need with the new setup. At the very least, it’s a great place to begin.
Nice and clean now
So, keep everything in strict order during disassembly. Clean that EP lube off the parts and identify them with an indelible marker, paying special attention to the side shims and carrier bearing housing caps.
Once you’re down to the housing, clean everything very thoroughly. We mean it. Going the extra mile here is well worth it in terms of the longevity of the job. That extends to swabbing out the axle tubes as you would a rifle barrel. You’ll understand why cleanliness is important if you think about the damaging effects of metal particles circulating through the small clearances between the gear teeth.
If you’re just putting bearings in, press the side bearings and the rear pinion bearing off, keeping track of the depth shim that’s between the bearing inner race and the back of the head of the pinion. Solvent wash and air dry everything, then inspect the ring, pinion, side gears, differential pinions and pinion shaft for wear. If it all looks good, press a new pinion bearing onto the drive pinion – don’t forget the shim! – and press new side bearings onto the carrier. Using a race driver, install both pinion bearing races and put the front bearing in behind the pinion seal and drive the seal home. Make sure to lube all bearings with gear oil before installation. Put a new crush sleeve on the pinion and slip the pinion through the front bearing. Install the flange, the washer and nut, and tighten to the correct preload.
Verify
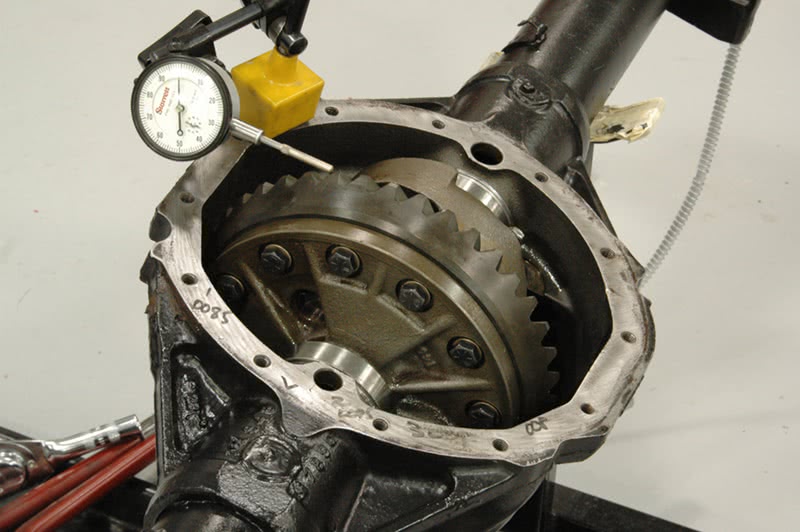
It makes sense to check and record the backlash before you take the differential apart. If you’ve got a set of depth micrometers, you can also check the distance between the ground, flat surface where the carrier bearing cap bolts to the housing and the drive pinion head before you loosen the drive pinion. Compare that measurement to what you’ve got after the new bearings are installed just to make sure that no major changes in pinion depth have occurred. In our experience, 98% of the time you won’t see enough change in depth or backlash to make a difference.
Next, install the carrier with new bearings and races, keeping the side shims on the correct sides and tighten the bearing caps to specification. Check the backlash — again, we’ve never seen a significant change with new bearings, but that doesn’t mean it can’t happen.
That’s what it takes to freshen up a differential. Next time we’ll look at the subtleties of setting one up from scratch.


0 Comments