
The heat of welding can seriously compromise the strength of the advanced materials used in the building of modern Mercedes-Benz vehicles, so adhesive bonding and riveting have become mandatory skills for collision techs. Also, cold joining has other advantages that you may never have realized.
 martensitic steel has been used in side impact beams and B-pillar reinforcements in the Mercedes-Benz M-Class for over a decade.")
Complex phase (CP) martensitic steel has been used in side impact beams and B-pillar reinforcements in the Mercedes-Benz M-Class for over a decade.
Mercedes-Benz has responded to ever-increasing fuel economy and emissions reduction goals by designing and building lighter vehicles. The high-strength steel, aluminum, composite polymers (plastics) and other advanced materials used in these lighter vehicles required new joining technologies to avoid heat-related loss of strength in joints and adjacent panels. Post-collision repairs to these vehicles require technicians to replace arc, metal inert gas, and, in some cases, even resistance spot welding with newer cold-joining techniques of adhesive bonding and riveting. There is a dizzying array of different rivet types and repair procedures, but the instructions are pretty straightforward. It is now more important than ever to use the Mercedes-Benz procedural information when planning repair or replacement of collision-damaged components made of these advanced high-strength materials.
Steel deal
Unibody vehicles have historically been fabricated primarily from mild steel sheet parts joined using resistance spot welding and, where access was limited, to one side only, metal inert gas (MIG) welding. Mild steel can tolerate brief application of heat almost up to its melting point of 2,660 deg. F. (1,460 deg. C) without losing significant strength properties.
The advanced materials in today’s lighter, more fuel efficient Mercedes-Benz vehicles, including dual-phase (DP), boron, and martensitic steels, as well as aluminum, magnesium, and plastics, although significantly stronger, are less able to resist heat damage than mild steel.
Advanced high-strength steels (AHSS) are produced using thermal techniques that result in internal chemical structures that are degraded by exposure to heat. High heat reverses, or at minimum weakens the chemical bonds that were created in the steel during the manufacturing or forming processes. The threshold at which heat can damage AHSS is well below the temperatures at which technicians have traditionally welded mild steel. High heat is Kryptonite to these super-strength materials.
For this reason, DP, martensitic, transformation-induced plasticity (TRIP) and other advanced high-strength steels are not to be joined or straightened using heat. Different joining procedures, materials and tools are specified as needed based on the type of AHSS being replaced or repaired.
DP steel is used on Mercedes-Benz C-Class and E-Class models. TRIP steel is used on S-Class, C-Class and A-Class models. Complex phase (CP) martensitic steel is used in side impact beams and B-pillar reinforcements in the Mercedes-Benz M-Class, S-Class, and C-Class models from the early 2000s. Repair instructions may not mention which steel the component is made of, but each type of advanced steel is in use on one or more Mercedes-Benz models. If you guess wrong about the type of material a structural component is made of, or deviate for any reason from the OE-recommended procedures, you risk failing to restore the vehicle to the specifications required for safety in a future collision. You absolutely have to access and follow the OE repair instructions.
The new materials spread from initial use in applications such as reinforcement of front strut towers, door hinges, and engine cradle cross members, to hood and trunk lid, roof and exterior body panels, and, ultimately, into all structural components. The broad use led to many applications that required connection of two or more different materials into one joint. This hybrid construction, or combining of different material types in one joint, led to even greater numbers of components beyond just those made of advanced steels, for which use of heat during repair is unacceptable. As carbon fiber, plastic, and other composite materials find expanded use in making automobiles lighter, heat will be used on even fewer joints.
Dissimilar metals make a wet cell
Where aluminum and steel must be joined together, the aluminum softens at a far lower temperature than steel. It cannot be welded using MIG and other high-heat joining methods. Additionally, there are currently over 400 aluminum alloy designations listed by the North American Aluminum Association, which maintains the official registry of aluminum alloys. Each has possibly different responses to heat or to specific mechanical joining technologies. To further complicate matters, an aluminum alloy may be formulated one way for a given component application, and a different way for use in another part or vehicle, even though the original alloy designation is the same. Knowing that two different vehicles use the same alloy designation for some parts does not guarantee that each aluminum part made of that alloy will respond to heat or mechanical joining technologies in the same manner.
Refer to the Mercedes-Benz Workshop Information System (WIS) or other sources of OE information for detailed replacement or repair procedures for any work on parts made of new materials. This is especially important for work on structural components, which are critical for restoration of vehicle crashworthiness.
Hot joining technologies can cause problems beyond just a generalized reduction of the strength profile of advanced metals. For example, the heating and cooling cycle that occurs during welding affects weld microstructure and the surface composition of the surrounding metal. It can make the weld area vulnerable to corrosion due to deformation of joined parts in the heat affect zone (HAZ), moisture ingress, incomplete weld penetration or fusion, porosity, cracks and residual contaminants.
Also, galvanic corrosion occurs when aluminum and steel are in direct contact with each other and there is moisture in the air. High heat may draw moisture into the weld joint. The moisture provides electrical conductivity, and enables the two different metals to behave like an anode and cathode pair. They create a battery-like electrolytic reaction that over time, corrodes and eats through the softer metal. This is especially true in coastal areas, where moisture from sea air contains salt that accelerates the galvanic reaction.
 on the Mercedes-Benz S-Class is riveted at the top and bottom (areas C1), and spot welded along the vertical sides (C2).")
The B-pillar reinforcement (2) on the Mercedes-Benz S-Class is riveted at the top and bottom (areas C1), and spot welded along the vertical sides (C2).
Resistance spot welding is often combined with adhesive to strengthen and seal the joint, and to reduce the risk of galvanic corrosion. By providing a bond along the entire length of the joint, adhesive spreads the impact load of a collision. The impact energy may be strong enough to snap a few localized spot welds, but less likely to destroy a joint that has both spot welds and adhesive. The non-metallic adhesive also provides a barrier that prevents the electrical conductivity between aluminum and steel (or any two dissimilar metals) that would otherwise allow the start of galvanic corrosion.
Unfortunately, adhesive cannot be in the immediate weld area. It would alter the chemistry of the weld nugget, and weaken the weld bond. At the factory level, precision spot welding robotics and far more sophisticated control of weld parameters than we have in the field allow vehicle manufacturers to minimize risk of galvanic corrosion. In the repair environment, the higher percentage option is to use cold-joining techniques such as riveting for zero heat damage, combined with adhesive bonding for increased joint strength, sealing, and protection of hybrid joints against galvanic corrosion.
One size does not fit all
Rivets come in different types, shapes and sizes, and must be matched to the vehicle application. Mercedes-Benz uses pop rivets, punch rivets, self-piercing rivets, flow-form and other rivet types. Hardness of the materials being joined, the required strength of the joint, compatibility with the materials for corrosion resistance purposes are just a few of the factors that determine which rivet is appropriate for the job.
For example, rivet length is decided by the panel stack thickness. Different rivets have a specifically designed break point. Choose a rivet that is too long and it will not hold the panels tightly, too short and it may break off inside of the hole and allow one or more panels to separate from the joint.
The rivet tool must also be matched to the job. Are attachments available that allow you to access the flange or panels to be joined? Different rivets vary widely on how much clamping force is required. Too little, and the tool fails to set the rivet at the correct depth for long-term durability of the joint. Too much, and the tool may deform or weaken the flange or material surface. Refer to Mercedes-Benz repair information for identification of the correct rivet and tool for a given rivet bonding application.
Riveting plus impact-toughened adhesive
 areas. Two-component adhesive is also applied on structured foam parts (4), to hold them permanently in position.")
The body and inner B-pillar on the Mercedes-Benz S-Class receives two-component structural adhesive all around the outer (cross-hatched) areas. Two-component adhesive is also applied on structured foam parts (4), to hold them permanently in position.
Its high tensile strength makes it difficult to pull a riveted joint apart vertically. Riveted joints resist peel damage during a collision.
However, a rivet is by itself less able to resist shearing under the stress of horizontal movement of riveted panels in a collision. The addition of adhesive to a riveted joint increases its shear strength by cementing the entire length of the joint. Adhesive also increases vehicle body stiffness and NVH benefits, as well as providing the aforementioned corrosion resistance and sealing.
Crash Durable Adhesive (CDA) differs from conventional structural glue in that it has the ability to stretch under impact without losing its grip. Tests of a collapsible rail with and without adhesive show that the rivet-bonded joint without adhesive ripped open, while the rail with riveting and CDA collapsed in a more controlled fashion, and did not split open.
Mercedes-Benz uses Crash Durable Adhesive (CDA) on many models, including those in its C-Class, GL-Class, and ML-Class lines. CDAs may be recommended for use in A, B and C-pillars, roof joints, and panel bonding. It works on steel, aluminum, and other materials. Failure to use the correct OE-recommended CDA can have a negative impact on repair quality and safety in the event of a future collision.
You call that clean?
Preparation for adhesive bonding is extensive and mandatory. First you’ll clamp or screw the parts to be joined into place and check for proper fit and alignment. Drill and deburr rivet holes as needed. Remove metal shavings and swarf from the work surfaces. Once you’re happy with the results of your inspection, take the parts off and clean all surfaces that are to be bonded.
To ensure a good bond, surfaces must be ground bare. You can grind steel with a steel wire brush or sandpaper. For grinding aluminum, you must use a stainless steel brush or silicate sandpaper – never regular paper. Next, clean the surfaces with the Mercedes-Benz approved solvent to ensure removal of all oil, grease or paint.
Don’t trust what you see. Apply the recommended indicator fluid to confirm that surfaces are free of any trace of contaminants. If blotches appear in the indicator fluid, repeat the solvent cleaning and indicator application steps until the indicator fluid application results in a uniform color. Once the surfaces are clean, wipe away the indicator fluid with solvent. When the solvent evaporates, the surfaces are ready for application of two-component adhesive.
Place the adhesive cartridge in your applicator gun. Squeeze out an inch or so, just enough to be sure that the two parts come out in equal amounts. Affix the mixing nozzle to the cartridge, and you are ready to begin.
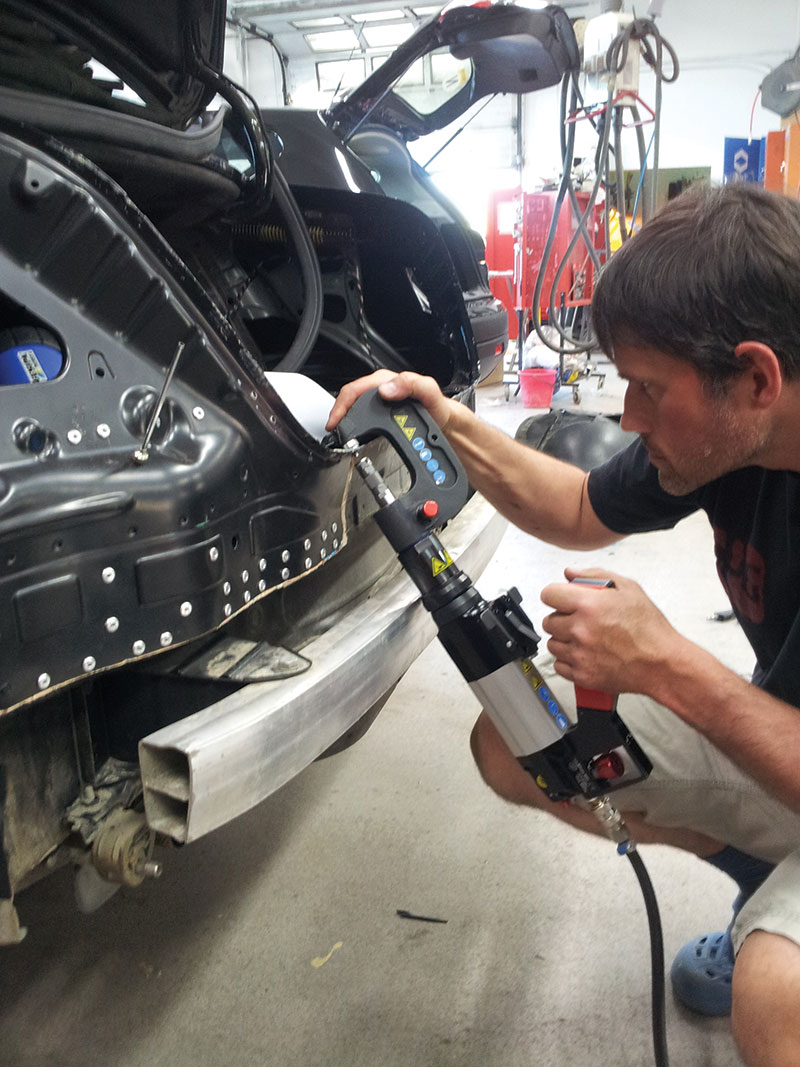
The XPress 800 Modular Rivet System is used here with a small C-clamp adapter to insert punch rivets in the rear trunk flange on a Mercedes-Benz E-Class. The Xpress 800 features adjustable operating pressure and rivet insertion speed, for complete control over setting riveting strength, with no workpiece distortion.
Using an acid brush or plastic spreader, apply adhesive to the surfaces to be bonded. Follow the manufacturer’s instructions for the thickness of the adhesive layer. Unless they are to be spot welded, cover all bare metal areas. In any areas to be welded, apply weld-through primer instead of adhesive.
When adhesive application is complete, check alignment and clamp the work together. Do not separate adhesive-treated surfaces once you have pressed them together. Insert rivets. Run a flat tool along the bonded edges of the joint, to seal the seam and remove excess adhesive. Stand back and admire your work.
Explosion, corrosion, and respiratory problems
A by-product of drilling rivet holes and grinding to expose bare metal is the creation of fine metallic dust that is light enough to become airborne. Set up partition curtains or a separate room for working on aluminum. Mask adjacent panels and nearby body parts so that dust from working one type of metal has no opportunity to settle on the other, where the combination of aluminum and steel will cause galvanic corrosion.

This aluminum work area is clean, neat — and separate!
You’ll need a wet mix vacuum to extract metallic dust and chemical fumes generated during repairs. Aluminum dust is highly explosive even in small concentrations, making it a risk for a shop environment in which sparks can potentially occur. The vacuum also helps prevent the dust settling on adjacent steel panels and components, laying the groundwork for corrosion formation. Last but not least, it will help keep metallic dust and adhesive and solvent fumes out of technicians’ lungs, where they could otherwise cause respiratory problems.
To prevent dust from sticking to tools and transferring back and forth between dissimilar metals, get a separate set of tools for working aluminum. Mark them so they are readily identified. Something as simple as wrapping red tape around the tool handles makes it easy to keep tools used for aluminum repair separate from those used on steel.
The untouchables
Some components cannot be repaired. With rare exceptions, aluminum structural components must be replaced rather than repaired. Any damaged magnesium components, structural or not, must be replaced.
Attempting to repair magnesium components using welding, cutting, soldering, grinding or any spark-producing method is strictly prohibited. Like with aluminum, grinding or cutting magnesium can create a very fine dust that has a high explosion risk. Worse, magnesium can auto-ignite at temperatures as low as 883 deg. F., and burns at over 5,600 degrees! And you can forget about putting out a magnesium fire with water. Magnesium burns hot enough to separate the hydrogen and oxygen atoms in water. You’ll be feeding the fire with hydrogen, a flammable gas, and oxygen, a gas that helps fire spread more readily. Your water hose will function like a really good flame thrower.
Say goodbye to welding heat
There are a few more rivet choices to make than there are welding parameters to set, but cold-joining is the smarter way to create durable joints with the advanced materials in today’s lighter, stronger vehicle bodies. Get rid of the Kryptonite. Adhesive bonding and riveting techniques are here to stay.
Images courtesy of Mercedes-Benz Workshop Information System (WIS), and RAE Systems, the leading supplier of Wielander+Schill equipment.


0 Comments