A beautiful finish sells more than just new cars: It can help promote a strong word-of-mouth reputation for your shop. Feed your buzz with these vehicle finish care tips.
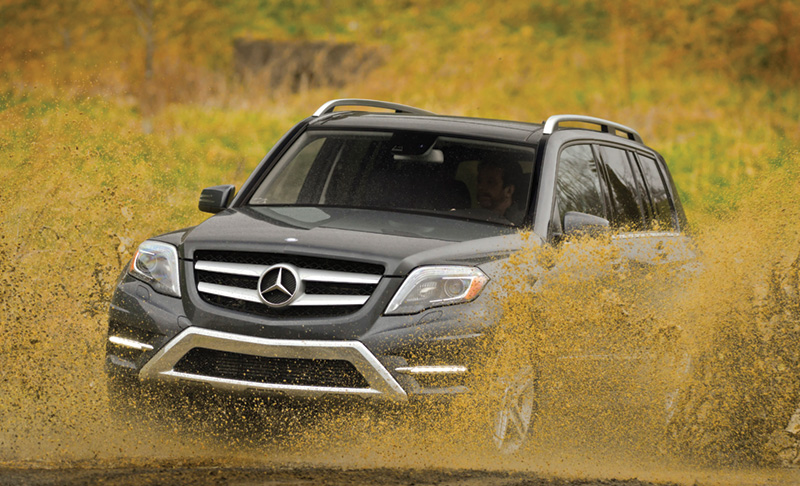
That perfect finish is subjected to continual environmental assaults. You can’t keep it in a protective bubble, but you can certainly mitigate the damage and help preserve the vehicle’s appearance, much to the delight of your customers.
Automotive finish damage is a problem that, if not addressed early, will worsen. Corrosion eats through metal. Chip damage and scratches allow moisture and wind to get under the paint film, causing flaking. Bird lime, insect secretions, and tree resin over time cause cratering of the paint surface. Road tar, de-icing chemicals, brake dust, rail dust, acid rain, and other industrial fallout bond chemically with the paint, leaving it feeling dirty and rough-textured even after washing.
If the original surface has begun to lose its gloss, it is time to come to the rescue with the Mercedes-Benz family of powerful cleaners, polishes, and preservatives. Inspect the surfaces and use tar, tree resin, and bird and insect remover products to remove any road grime or stubborn biological deposits.
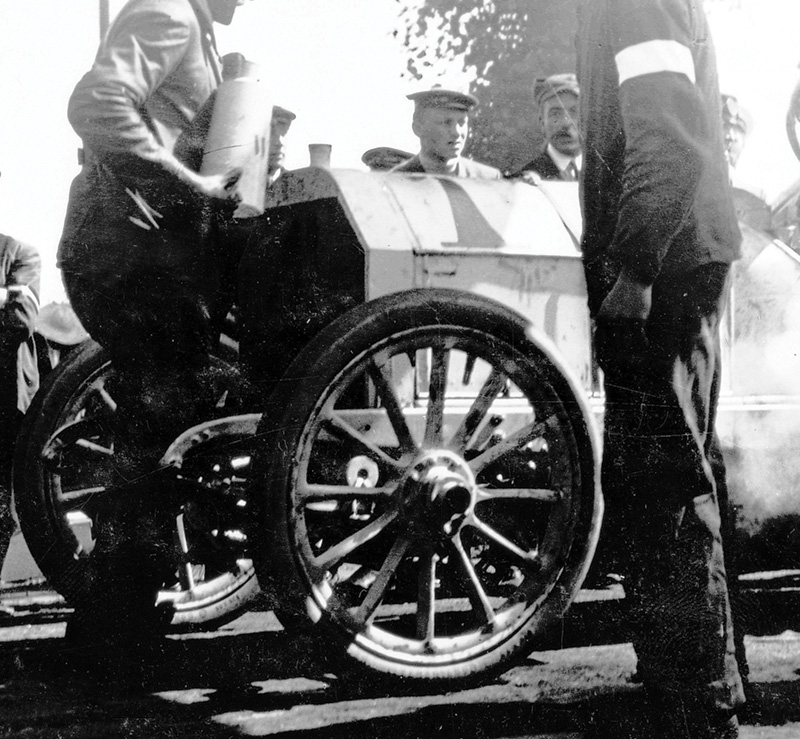
The wheel on this 1904 90 hp Mercedes race car could certainly use a coat of old-fashioned enamel or lacquer paint. Note that this is an early use of steel for rims in place of wood (varnish, anyone?).
Next, wash the vehicle with Mercedes-Benz paint cleaner. It is specially formulated with mild abrasives to remove the weather-induced fogging that has dulled the luster of the finish. Buff the finish to an even sheen, and then apply a gloss preserver. The cleaner forms only a very thin protective coating which does not last long, so a gloss preservative is good preventive maintenance for the finish.
Mercedes-Benz recommends cleaning and preservative application twice a year. For severe duty vehicles such as limousines or vehicles often parked at construction sites or industrial areas, more frequent or more intensive paint finish care is advisable.
Headlamp lens cleaning
Headlamp lenses are made of a polycarbonate (plastic) and covered with a clearcoat. Do not use scouring products or dry cloths on headlamps, as they will scratch the surface. Do not use solvents, as the plastic is not fully resistant to them. Instead, wipe the lens with a damp sponge. If these precautions are not followed, surface damage to the headlight may occur, including the appearance of a dull, milky coating that dilutes and weakens light projection, matte (glossless) spots, and scratches that may lead to strain cracks due to thermal expansion and contraction cycles.
Spot Repair
Mercedes-Benz recommends spot repair for minor paint refinish in small areas such as door edges, fenders, and lower side panels that have suffered chip damage. The diameter of the defect should not exceed 3 cm.
Sand out the damage and matt down the surrounding area. Prime and paint the prepared area with a basecoat and feather it out. When the basecoat has flashed off, cover the matted surface with clearcoat and blend it out at the edge using a fade-out thinner. Once the area is dry, seal it with a polish. The total spot repair area should not exceed a diameter of 20 cm.
Scratch-resistant clearcoat
In recent years, new automotive paint systems have been introduced that offer a higher level of scratch resistance than traditional finishes. Some of these paint systems use microscopically small silica-based particles (nanoparticles), while others benefit from optimized and increased cross-linking of the clearcoat film. Finish appearance and durability is comparable, regardless of which of the two types of clearcoat technologies are used.
The factory finish of almost all Mercedes-Benz vehicles since the 2005 model year now includes these more scratch resistant clearcoats. They are identified by a “C†in front of the color number on the code label. More scratch resistant clearcoats are also available for collision repair use. Application methods do not differ significantly from those of traditional clearcoats. Of course, follow the paint manufacturer’s instructions on drying temperature and time.
Sanding re-work on the new clearcoats is more complicated, thanks in part to the increased hardness of the film. Dust and other defects require more effort to remove from the paint, and sanding must be finer and done more carefully. Mercedes-Benz instructions recommend use of an abrasive paper of at least 2500 grain size, and preferably between 3000 and 5000 grain size.
The finish requires special polishes, and attention to details of polishing machine speed, pressure, and coverage area.
No ghosts
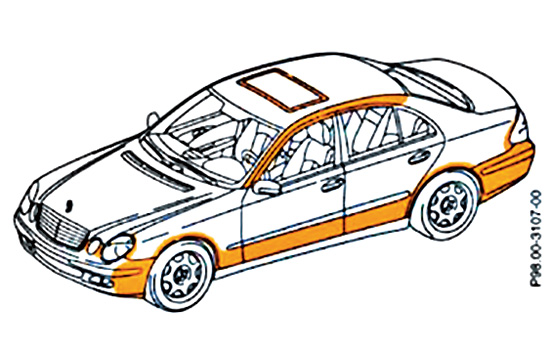
Spot repair is approved for minor paint damage around door, headlamp, and sunroof edges, and lower side panels that have suffered chip damage.
Do not attempt to polish more than one-quarter square meter of scratch-resistant clearcoat surface area at a time. Follow the polish manufacturer’s instructions on polishing time, and use the same amount of time, pressure, and polishing speed on each one-quarter meter of area. Otherwise, visible differences will appear in the different areas.
Use an eccentric polishing machine and a multi-stage polishing method. Polish the surface for at least 10 seconds at a very low rotational speed (approximately 800 rpm). Follow that with three additional polishing stages totaling a maximum of 30 seconds each. Bump up the rotational speed for each stage until by the fourth you are using 1600 rpm.
Use light pressure and uniform crisscrossing movement at each speed, in order to prevent ghosting. Because the finish is ground while being polished, a more abrasive effect is observed at the start, and an intense gloss becomes evident in the final stage.
Spray on deionized water and immediately buff with a tack rag to remove polish residues. Seal the polished area with a gloss preservation agent.
For Designo (lacquer) paint finishes, wash the vehicle with a regular cleaner, then spray on deionized water and wipe surfaces clean using a micron-grained microfiber cloth. Seal surfaces with a gloss preserver.
Gloss preserver
New and well-maintained paint is water-repellent, i.e. water droplets form beads on the surface. If water fails to form beads, this is an indication that the paint has weathered and needs re-preserving.
Gloss preserver protects against weathering and preserves the existing luster of the finish. Wash the vehicle. Apply gloss preserver onto a clean polishing cloth and rub evenly onto the vehicle surface to produce a thin unbroken film. The gloss preserver forms a white film as it dries. Buff the surface with a clean polishing wad or cloth until the surface is clear. Repeat treatment every three to six months as needed.
Nano Paint Sealer
Mercedes-Benz has a nano paint sealer that outshines and outlasts acrylic or wax coatings. The application process is a bit more demanding, but the results are noticeably worth it.
First, wash the surface to remove any grease, dirt, or other contaminants. Next, polish with Mercedes-Benz Nano Polish. Make sure there are no scratches, streaks, or ghost swirls on the surface when dry. Spray the surface with Mercedes-Benz Paint-Prepare and wipe it off with a clean microfiber cloth. If any ghostings or streaks appear, re-polish the area.
Pull the retaining ring off of the top of the can and turn the Nano Paint Sealer upside down, pressing its applicator firmly down onto the surface you are sealing. Apply the Nano Paint Sealer with a uniform pressure and crisscrossing stroke, covering only one-quarter of a square meter of surface area at a time. Allow each small area to flash off for 15 to 30 seconds, and then polish with a microfiber cloth to remove excess sealer. Any streaks or ghost images can be removed for up to one hour by applying a thin coat of nano sealer and cleaning with a microfiber cloth.
Allow sealed surfaces to cure for at least one hour, with the vehicle parked in a dry place and not touched. Write the date the sealer was applied on a sticker (supplied in the nano kit) and attach the sticker to the B-Pillar. The vehicle should not be washed for at least three days after treatment. Inform the customer not to use highly concentrated alkaline cleaning agents (bleach, ammonia, lye), as they will remove the nano paint sealer.
Light alloy wheel repair best practices
Mercedes-Benz light alloy wheels and plastic hubcaps feature a two-layer metallic paint surface. Clean them only with Mercedes-Benz care products which preserve the paint.
Do not use scouring agents, acid-containing or strong alkaline agents or a scouring sponge, as these can scratch or etch the surface. Normal dirt, including brake dust, can be removed with hand-hot water, a mild dirt solvent (similar to that used for the vehicle body) and a sponge. Use plenty of water.
Stubborn dirt
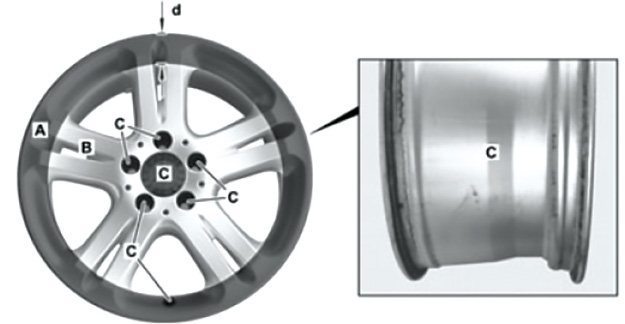
Mercedes-Benz light alloy wheels are divided into three zones for the purpose of repair decision-making. The outer rim to a depth of 25 mm (Zone A) may be spackled to eliminate scratches and gouges of no more than 1mm deep. The rest of the public-facing rim (Zone B) may only be painted. The wheel center (C) may never be repaired or painted.
When the mild cleaner is not enough, there is a Mercedes-Benz approved alloy wheel cleaner (part number A 001 986 3471) that gets rid of stubborn dirt. After cleaning, treat the surfaces with polish and gloss preserver.
If the vehicle has a clearcoat paint system with higher scratch resistance properties, see the Mercedes-Benz service information for that model for cleaning instructions.
Flash rust
There is also a Mercedes-Benz cleaner specifically for flash rust removal (part number A 001 986 1371). Flash rust appears as small holes that form where metal particles have adhered to the surface and over time, corroded the finish. Airborne metal particles from construction sites, industrial areas, and railroad tracks are the likely sources of flash dust.
If your inspection reveals that metallic particles merely lie on the paint and have not yet eaten into the topcoat, the wheel can be cleaned with metal dust remover. If in doubt, use a magnet to check whether the particles have begun to embed themselves into the metal. Do not attempt to clean metallic dust that has not yet formed rust spots by polishing, because this can scratch the surface finish.
The same recommendations for metallic dust removal apply to the finish on the vehicle body. It may be necessary to remove any wax coating from the body beforehand with the aid of a wetting solution.
Cosmetic surgery
You may repair damaged light alloy wheels, but only in the outer rim area, only when damage does not exceed a depth of 1 mm, and only on cast light alloy wheels. Forged light alloy wheels may be painted, but not spackled or processed in any other manner.
Never attempt to repair light alloy wheels that have been cracked, or that have damage deeper than 1 mm. If there is any material damage to any area other than the outer 25 mm of the rim (Zone B in the image above), including light alloy wheels whose outer or inner rim flange is deformed, replace the wheel. Do not repair or paint that wheel.
Protect yourself
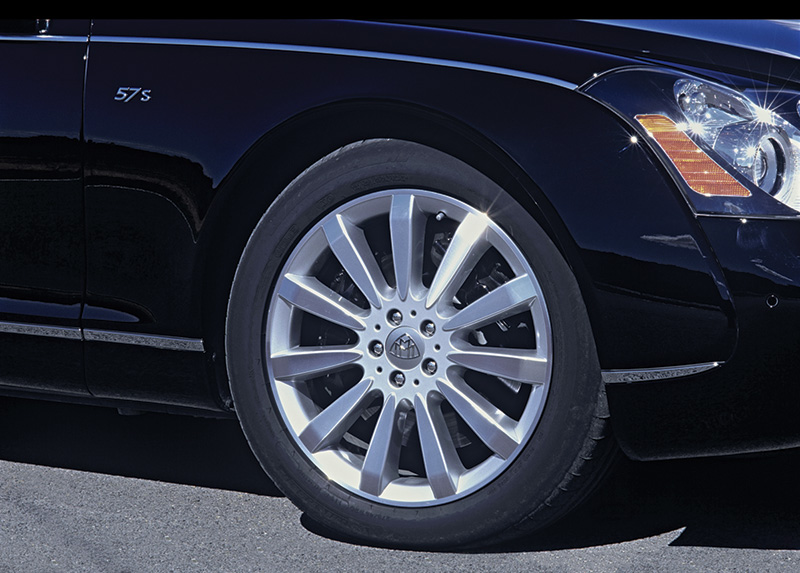
This premium Maybach wheel is beautiful, but just as susceptible to curb and other damage as lesser specimens.
Do not repair wheels that have been previously treated. This includes thermally stripped, blasted, machined or reshaped light alloy wheels. Also avoid repairs to chrome-coated wheels and those that have pure clearcoat varnish in bright-finished areas.
Only cast light alloy wheels with the designations “AlSi 7 Mg†and “AlSi 7 Wa†may be spackled. See your Mercedes-Benz repair information source for further details and restrictions.
Do not focus heat excessively at specific points using an infrared emitter, heat gun or similar device. Heat only up to a maximum of 194 degrees F, for no more than 40 minutes. Heat application should be reasonably balanced, avoiding higher temperature loading on one side than the other.
Download PDF 〉


0 Comments