Sometimes it pays to be lazy. We’re not suggesting that it’s a good idea to avoid working towards your goals; we’re only saying that it’s sometimes better to work smarter, not harder.
When faced with a car that cranks but won’t start, it’s best to do only the minimum amount of testing required to reach the correct diagnosis. If you can diagnose a crank/no-start quickly, everyone wins. Your customer will have a lower bill. You’ll be more valuable to your employer. Your shop will develop a reputation as competent. And you’ll be generating the predictable and profitable repairs that are the staples of a successful business.
So how does the lazy technician set about diagnosing a crank / no-start? Well, the goal is to do the minimum amount of testing required, but here’s the difficulty: the minimum tests required will be different for just about every case you encounter. This means you’ll have to evaluate and plan on your own, which reminds us of a very important point: time spent thinking isn’t time wasted. It’s the time spent “doing stuff†before planning that’s wasted time. Sure, the guy “doing stuff†might look good when the boss checks in, but the guy who looks like he’s daydreaming may just be on his way to finishing the car a lot sooner. Decide what you’re going to test and how to test it before reaching for tools.
Flow Charts / Trouble Trees / Diagnosis in a Can
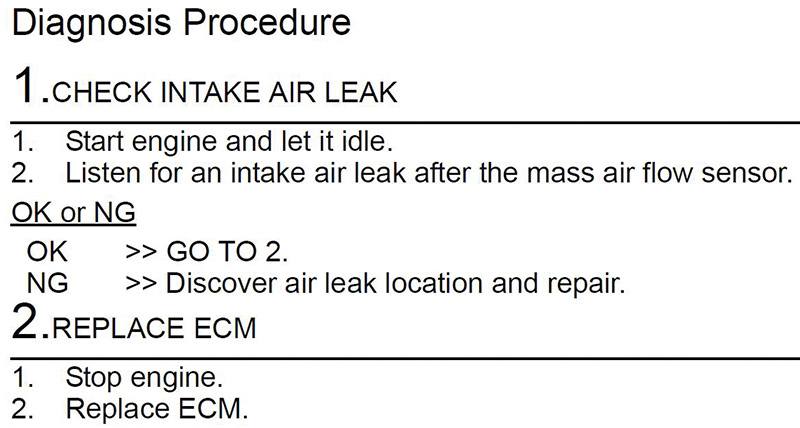
Don’t blindly follow flow charts. Instead, carefully “read between the lines†to find the original intent of the prescribed tests.
The diagnostic flow charts available on Nissan-techinfo.com aren’t bad and will lead to the correct conclusion most of the time if you follow the instructions exactly. However, following the procedures in the service manual may not be the fastest way to complete a diagnosis. Flow charts do serve a purpose. Nissan wants to make sure their cars can be repaired and they know that there are different levels of familiarity and skill out in the field. Step-by-step diagnostic instructions are basically training wheels; they allow everyone to ride the diagnostic bike. However, more experienced diagnosticians are likely to find the training wheels just get in the way.
No Tools…
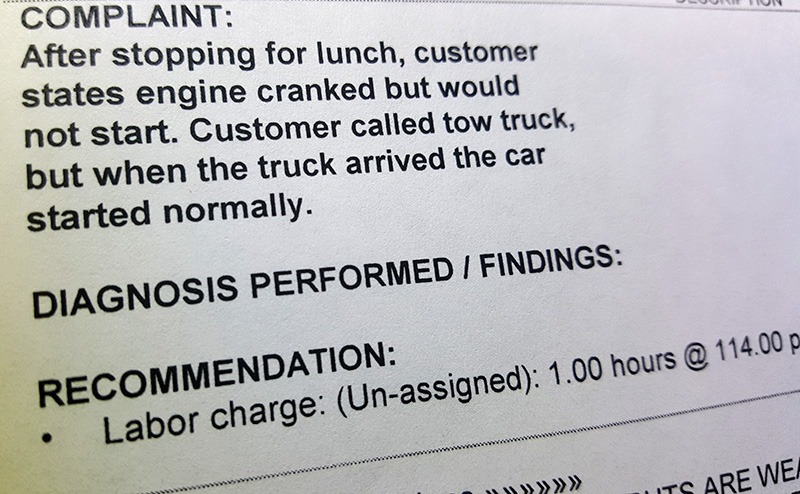
Your diagnostic planning should start before you even reach the car. The customer’s complaint on the repair order may contain information that will influence your plan of action. If you’re lucky, the repair order will contain information on how to reproduce intermittent failures. If the crank/no-start only occurs after a warm soak, or when the fuel gauge is under ½, or when it’s raining or foggy, you can tailor your plan to take advantage of this information.
Observation
Confirming the customer’s complaint is a pretty important first step, but you shouldn’t limit yourself to “just†confirming the car won’t start. Use your powers of observation to eliminate some tests and steer you toward others.
One test you can perform while verifying the complaint is a compression test. Well, not a real test with a gauge, but you can actually hear many compression problems. The starter’s load and pitch change every time a piston comes up during the compression stroke. When cranking a healthy engine it might make a sound like: gyik-gyik-gyik-gyik-gyik-gyik-gyik-gyik.
Whereas an engine with a single low cylinder might sound more like: gyik-gyik-gyik-gwok-gyik-gyik-gyik-gwok. In other words, the starter pitch will be different when it isn’t working against compression.
If all cylinders are low due to a broken timing chain, and overheated motor, or fuel washing the oil from the cylinder walls, you can hear that too; the pulses will be missing entirely and the cranking noise will sound far too even.
Your ear’s cochlea isn’t the only sensory organ you can employ to diagnose a cranky car. Your olfactory nerve is actually pretty good at detecting hydrocarbons. After the engine has been cranked for a while, you may smell fuel around the tailpipe. If you do, you might start by checking spark.
Finally, you can look for trouble too. Noticing a flashing immobilizer light will save you a lot of diagnostic time. A missing MIL during the bulb check is also a good clue. Depending on the model, a bouncing tachometer needle may be a clue that you have a CKP signal. And a careful peek under the hood may reveal a torn intake boot or disconnected ground strap or connector. Forcing yourself to look and register what’s happening while you confirm the customer’s complaint can reduce the tests you need to perform and create a shorter path to a correct diagnosis.
Codes
The check engine light won’t alert you to trouble when a car cranks but won’t start, even if the car has a code. The MIL comes on during the bulb check, and that’s normal. It may or may not go out while cranking. Also normal. Because the MIL comes on when the engine is running to indicate a fault, and the engine never runs when there’s a crank-no-start, you won’t have a visual indication that there’s a code stored.
This doesn’t mean checking for codes is a waste of time though. On the contrary, a quick scan for codes is a great idea. You might find IAT and MAF codes that lead you to a loose MAF sensor connector. You might find several codes that lead you to a common bad ground. Or you might find that you can’t communicate with the ECM, and that might lead you to a grounded 5V reference wire.
Live Data
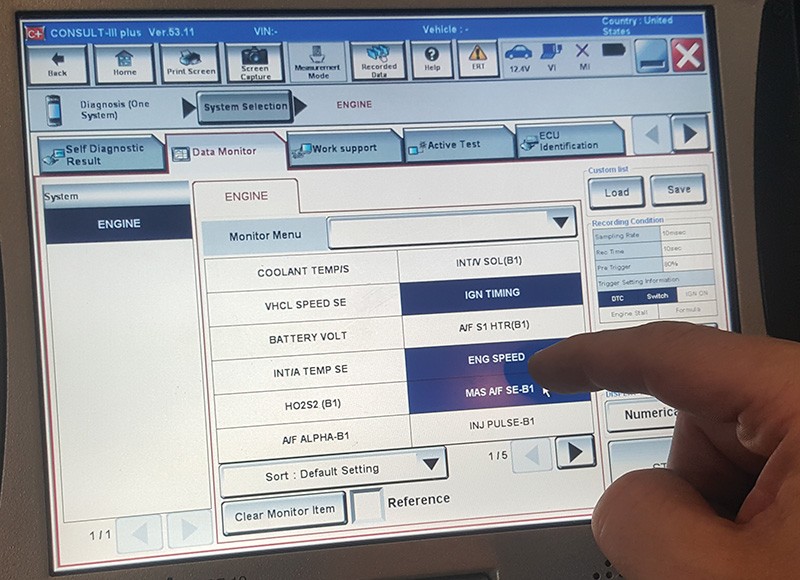
While the scanner is already plugged in to check for codes, we may as well take a look at live data. When we’re checking live data using the CONSULT III plus, it’s important to think about refresh rate. Older cars will refresh very slowly if too many PIDs are being monitored. It’s a good habit to clear all PIDs from the list and add only those you are interested in. This will improve the refresh rate on many cars and also provides a less cluttered and easier to read list. This also gives you a chance to think about what PIDs are going to be important.
Making a recording to play back is also a good idea. You can’t see all the PIDs at the same time, and cranking the engine repeatedly will deplete the battery. Making a recording is better because you can analyze the data at your own speed and replay it as many times as you need to.
So what sensor inputs does the car need to start? The most important input is RPM. Usually the ECM will look to the crank position sensor (CKP), but some cars will be able to start using data from the cam position sensor (CMP) or CKP. Regardless, when cranking the engine you should see an engine RPM PID with a realistic cranking speed, usually somewhere around 250 RPM.
The mass air flow sensor (MAF) is another PID to check, but in order to know if the reading is “goodâ€, you’ll need to check an identical car or have documented the data from previous testing. If the MAF reading is low, it may not be the sensor that’s the problem. If the ECM hasn’t learned the idle air control valve (IACV) or electronically controlled throttle (ECT) position or the IACV or ECT is sticking, air flow will be decreased. The same is true of vacuum leaks or engine mechanical problems.
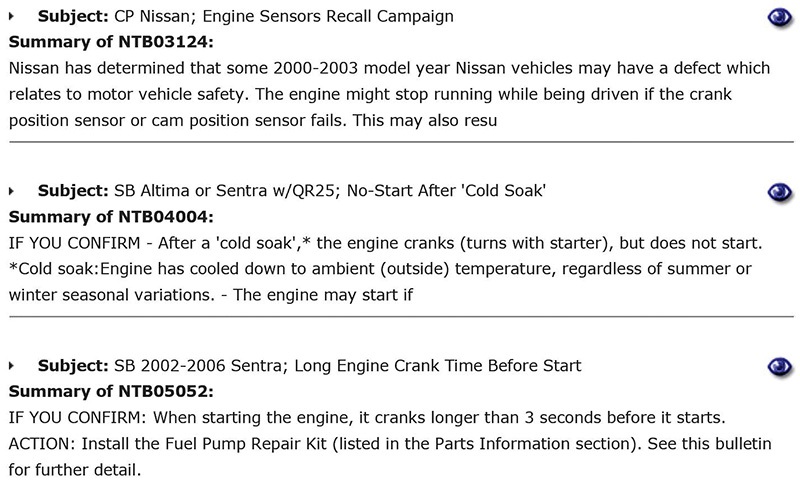
Don’t try to reinvent the wheel. Solutions to common and difficult to diagnose problems can be found on Nissan-techinfo.com
The coolant temperature sensor is another quick and easy PID to check. An open sensor may be telling the ECM that engine temperature is -40°F. This can cause excess fuel delivery and fuel fouled spark plugs and washed cylinder walls. Likewise an excessively warm reading can cause insufficient fuel delivery and a mixture so lean the spark plugs can’t get it to ignite.
Play the Odds
OK, so let’s say that you have a car that won’t start, you didn’t notice anything unusual when you confirmed the symptom, it has no codes, and there’s nothing telling in the live data. What next? Well, before deciding on what to test first, it would be a good idea to “cheatâ€.
Before choosing a diagnostic direction, why not see if anyone else has any experience with the same symptom on the same model? Often the same “weak link†will cause the same symptom on thousands of cars. You could ask “the guy who knows everything†at your shop, unless you are that guy. Checking Nissan-techinfo.com for TSBs is another way to find shortcuts. You can also check for trends on Identifix if you have access. Use whatever you have at your disposal to check for a diagnostic direction.
While it’s certainly good to work through problems yourself to build skills, we’ve got to remember that people are paying us by the hour, and whenever possible we should take the shortest route to a diagnosis. Every generation of every model will have some common failures. Always check to see if one of these pattern problems might apply to your situation before deciding what to test first.
Develop a Theory and Make a Plan
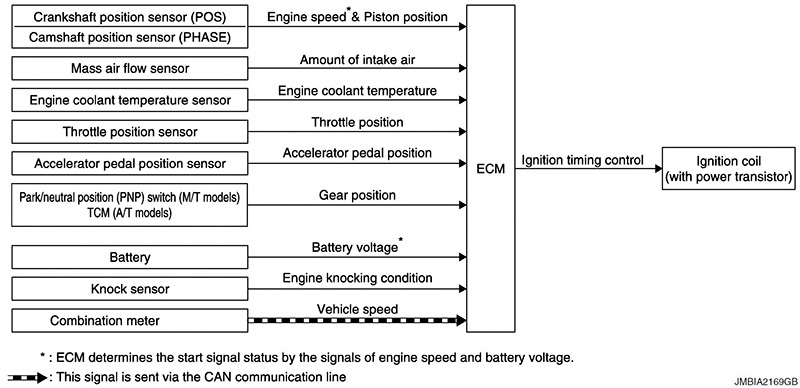
Working with incorrect assumptions can make diagnosis a real struggle. A quick skim of Nissan-techinfo.com will provide the information you need for accurate diagnosis.
Hopefully you’ve found a clue or two by now and have some hunches about what might be causing the problem. If not, it’s all right. If you’re still thinking, “It could be anything!†make a plan to start testing in the middle. In other words, plan tests that will divide the possibilities down the center as much as possible. For instance, spray some starting fluid or propane into the intake and see if the car starts. If the car starts, you’ve eliminated spark, timing, and engine mechanical problems. If not, you’ve eliminated fuel problems. The opposite of this technique would be something like starting with a fuel pressure test, followed by checking the injector pulse, and so on.
There is an exception to this rule, if you have reason to believe that there is a particular cause for a problem, then it’s a good idea to go directly to the area you suspect rather than testing from the center outwards. A blinking immobilizer light is a reason to go straight to the immobilizer or body ECU data list. A TSB indicating a rash of failing crank sensors is a good reason to focus on the crank sensor. A co-worker telling you that he just replaced two MAF sensors on the same model provides a valid reason to jump straight to the MAF PID in the data list.
Another important factor in making a plan is how difficult the tests will be. Which test should be next should be decided not only on the value of the test, both in elimination of other possibilities and the conclusiveness of the test, but also the time it will take to perform.
Know Before You Go
If you don’t know how it’s supposed to work, don’t waste time testing. Look at a system description, wiring diagram, read between the lines in a flow chart, or do whatever you need to understand what you’re about to test. That said, some systems and components are identical across many Nissan products, so the more experience you develop, the less pre-testing research you’ll need. However, even when you think you know how a system works, always take a moment to skim the manual and confirm; don’t make an assumption that it’s like the other years and models you’ve encountered.
Testing
Testing is always the final step. Our natural tendency is to reach for tools and start to “workâ€, but this is nearly always counter-productive for all but the very lucky technician. If you have a plan mapped out in your mind, go ahead and execute. If not, work on the plan before starting.
As mentioned previously, balance the quality of the test with the time it will take to perform. For instance, a fuel pressure test is far more conclusive than listening at the filler neck for the fuel pump. However, if you’ll need to remove the cowl to check fuel pressure, it might be worth trading definitiveness and time, for speed and possibly misleading results. There are many examples of this type of trade, here are a few:
- Listening to an injector with a stethoscope vs. using an oscilloscope to check the voltage and current waveforms.
- Checking cranking vacuum vs. performing a compression test.
- Checking spark from a single easily accessed coil vs. removing the plenum to check all of the coils.
Don’t Believe Everything You Think
A suspicion has a powerful influence on our thinking. If you strongly suspect an outcome, you’re more likely to find it, whether it’s true or not. How is this possible? Tests are black and white, right? There is a chance of error in any test you perform. You may make a bad connection with one of your voltmeter leads. You may rely on a sensor reading in live data, but fail to notice that the refresh rate is 8000ms and the reading you’re looking at now was from 8 seconds ago, before you started to crank the engine.
There are all sorts of ways to make mistakes, and if the result is the one you were expecting, it’s more likely you’ll accept it. The inverse is also true. When an outcome is unexpected, we start looking for reasons why it’s “incorrectâ€. The best advice is to treat every test result like it’s wrong. Always confirm a result with a different test before coming to a conclusion.
In Conclusion
You can become the go-to guy for no-start diagnosis, the guy the service manager calls when he wants the correct answer quickly. Just remember:
- Observe the symptom carefully.
- Use your CONSULT III plus to get more information.
- Use all the information resources at your disposal.
- Make a plan before testing.
- Understand how it works before making conclusions.
- Look for the easiest possible test.
- Confirm your findings with a different test to verify.




0 Comments