Tire Pressure Monitoring Systems are here to stay. Mandated for production vehicles starting in 2008, TPMS changes the way we mechanics must approach tire-related services. This article focuses on the repair methodology necessary to prevent inaccurate TPMS warning icons, the unnecessary frustrations for you and potential come-back customers, and wasted labor revisiting TPMS complaints.
Due to federal safety standards for new vehicle production, all cars sold in America starting MY2008 are equipped with some form of tire pressure monitoring. However, every vehicle manufacturer is free to design and implement TPMS as they see fit. For those of us in the service industry, this means that we may discover that repair procedures for TPMS on one type of car do not work for another. This article will help Nissan technicians identify the standard procedures for Nissan vehicles, saving time and avoiding unnecessary come-backs.
Identifying the TPMS components
At least for the North American market, all Nissan vehicles utilize wireless TPMS sensors located in the wheels. Each sensor transmits its pressure data to a receiver unit. For vehicles equipped standard with remote keyless entry, the receiver for the keyless entry will also listen for TPMS sensor data. Vehicles without keyless entry will have a dedicated TPMS receiver unit. Be sure to reference the service manual for verification.
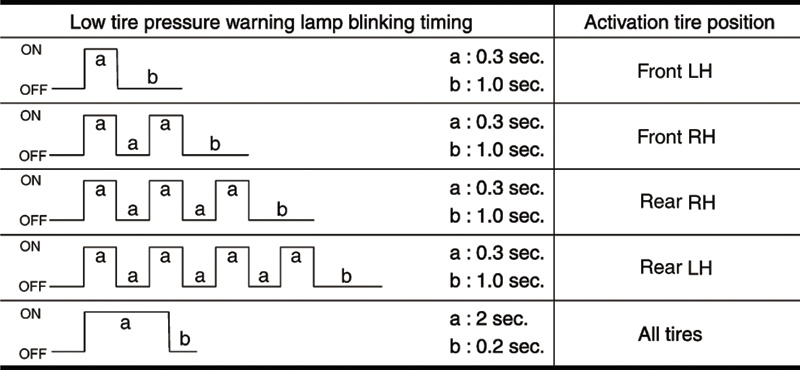
On this 2015 370Z, the TPMS icon will blink a number of times based on whichever wheel location does not have a sensor ID registered.
On all designs, the receiver unit will report to the Body Control Module (BCM) which then makes all logical considerations. The BCM commands the combination meter to illuminate the TPMS icon, and will also report data to the Vehicle Information Display on vehicles equipped with this option.
Some – but not all – Nissan vehicles are equipped with a TPMS test connector that can be used to manually diagnose and initialize the system without special service tools. Consult the service manual “WT†section to determine whether a particular car has the connector. However, this is the least efficient method of interaction. It is strongly recommended to invest and train with the appropriate Nissan special tools.
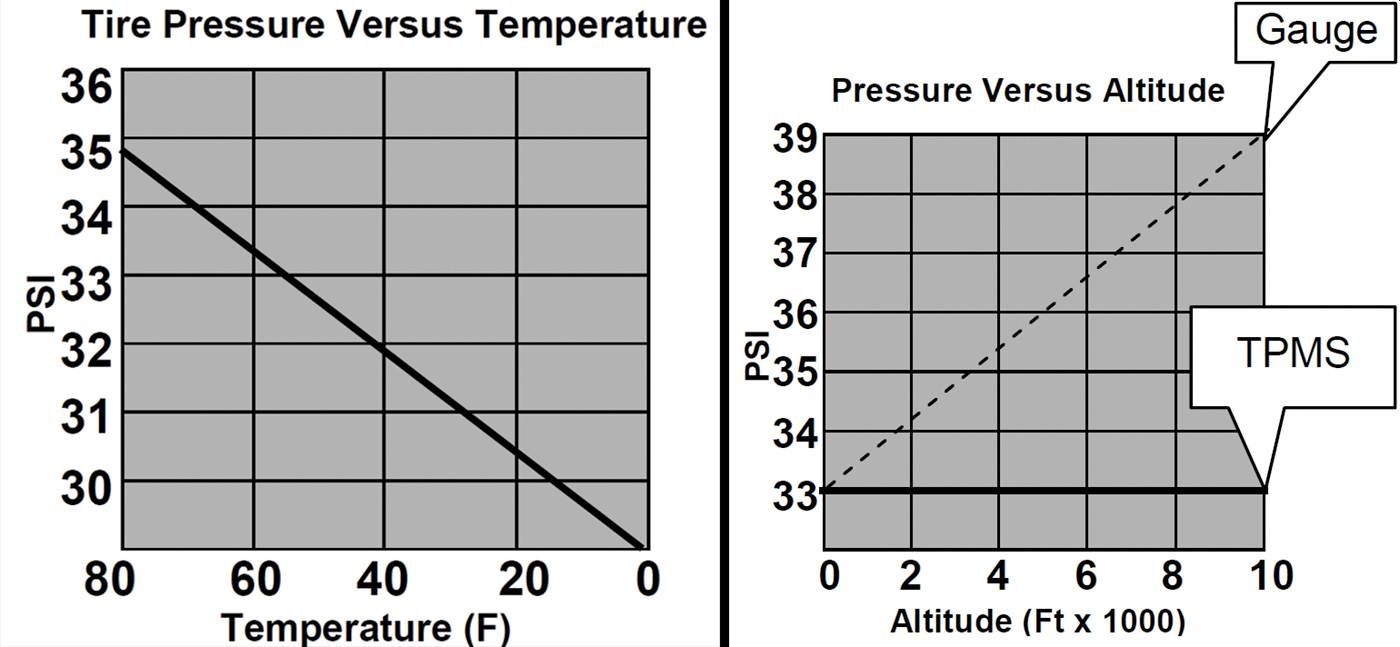
It’s 30 degrees F in the mountains at 4,400 ft. A car arrives for service at your 70 degree shop with a measured 32 psi warm; the Nissan recommendation is 35 psi cold. What do you set the pressure to at the end of the day so the car leaves with the proper cold tire pressure? (Answer: 40 psi by the gauge)
Service tools required
Any shop that expects to work on modern Nissan vehicles should have the CONSULT III Plus. This tool is recommended for diagnosing TPMS problems, and it can also perform necessary work support functions like registering new sensor IDs. In addition to the CONSULT III Plus, Nissan has two additional specific service tools to expedite TPMS-related jobs.
The Transmitter Activation Tool (J-45295-A) is a lightweight hand-held device that can quickly and easily activate (“wake upâ€) TPMS sensors. This device is used in conjunction with the CONSULT III Plus, and is one of the two preferred official methods for service.
The Signal Tech II (J-50190) is a stand-alone TPMS solution with a DLC cable for interacting with Nissan vehicles. This device can be used in conjunction with the CONSULT III Plus in the same manner as the J-45295-A, as the second preferred official method. In addition, it also can be used alone without the CONSULT III Plus to diagnose or service TPMS due to its DLC cable. The Signal Tech II has other functions like testing keyless entry transponders, and allowing advanced spread sheet data export to a PC.
All of these Nissan special service tools can be found and purchased online through nissantechmate.com.
When should the TPMS icon illuminate?
Many customers arrive at a shop with the TPMS icon illuminated. Some of these customers may even be ignoring the light because of frustration. For them, the light “has been coming on forever†but no other shop has been able to figure out why!
When the ignition is turned on, the TPMS icon should illuminate for self-diagnostic bulb check and then go out after one second. If it turns back on and remains solid, one or more tires has low pressure or a sensor ID that is not registered (depending on the fault logic; check the service manual). If the icon blinks for one minute before remaining solid, there is a TPMS DTC stored.
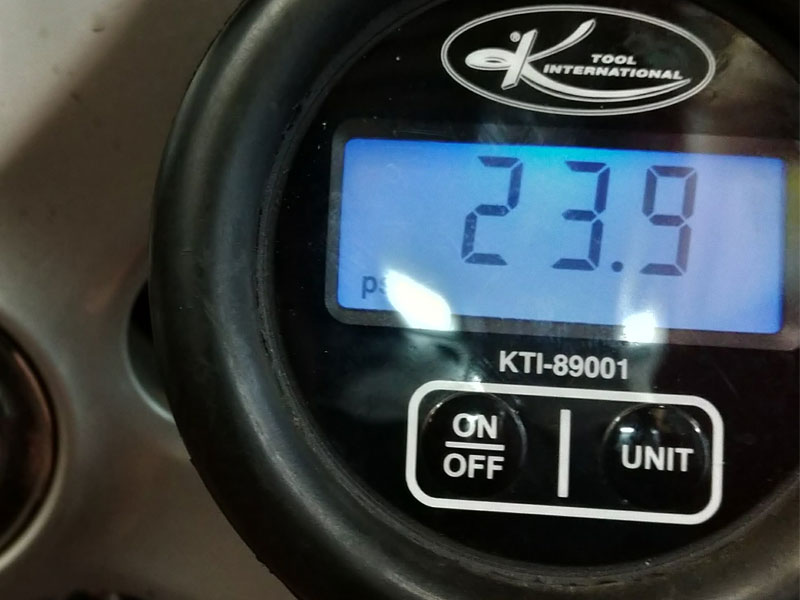
Every Nissan service manual begins the diagnostic process by recommending to check the tire pressure. This is because pressure is readily affected by environmental factors like temperature and altitude. For every 10 degree F change, the pressure will change 0.8 psi. For every 2,200 ft. above sea level, a basic pressure gauge will read approximately 1.0 psi higher than the actual pressure within the tire. Note that a TPMS sensor will report the tire’s actual pressure properly since the tire is its own sealed pressure chamber, whereas the gauge is affected by low ambient pressure. Over the course of a month, a tire will naturally lose about 1.0 – 1.5 psi.
Tires are considered cold after the vehicle has been parked for 3 or more hours, or driven less than 1 mile at moderate speeds. Refer to Nissan technical service bulletin NTB13-088a for more details. Â
Performing sensor ID registration
| Â | ID | POS | DTC | 3 |
| LF | N/A | N/A | C1709 | Â |
| RF | OK | OK | None | Â |
| RR | OK | OK | None | Â |
| LR | NEW | N/A | C1708 | Â |
| Â | OK to Write IDs\Clear DTCs | |||
|
According to this Signal Tech screen capture, the LF sensor has no ID information and a C1709 (no data found) DTC. The LR sensor has NEW ID information when compared with the vehicle’s stored data, but also a C1708 because it has not been properly registered. |
||||
According to NTB13-088a published in 2015, TPMS sensors must be initialized every time the wheels are swapped – that is, rotated or replaced. According to the service manual for some older TPMS implementations around MY2008, sensor ID registration may not be necessary. Avoid the risk of a come-back, and get in the habit of performing a sensor ID registration during every tire rotation service. Consult with your service team to communicate the importance of following Nissan procedures to customers during their service visits.
If sensor ID registration is required, there are four different ways to perform it:
- Activation tool J-45295-A + CONSULT III Plus
- Signal Tech II (J-50190) + CONSULT III Plus
- Signal Tech II only
- CONSULT III Plus only
The preferred methods
| Â | ID | POS | DTC | 3 |
| LF | OK | OK | None | Â |
| RF | OK | OK | None | Â |
| RR | OK | OK | None | Â |
| LR | OK | RT | Low Press | |
| Â | OK to Write IDs\Clear DTCs | |||
|
This vehicle had its left rear tire swapped, and its sensor reports low pressure. |
||||
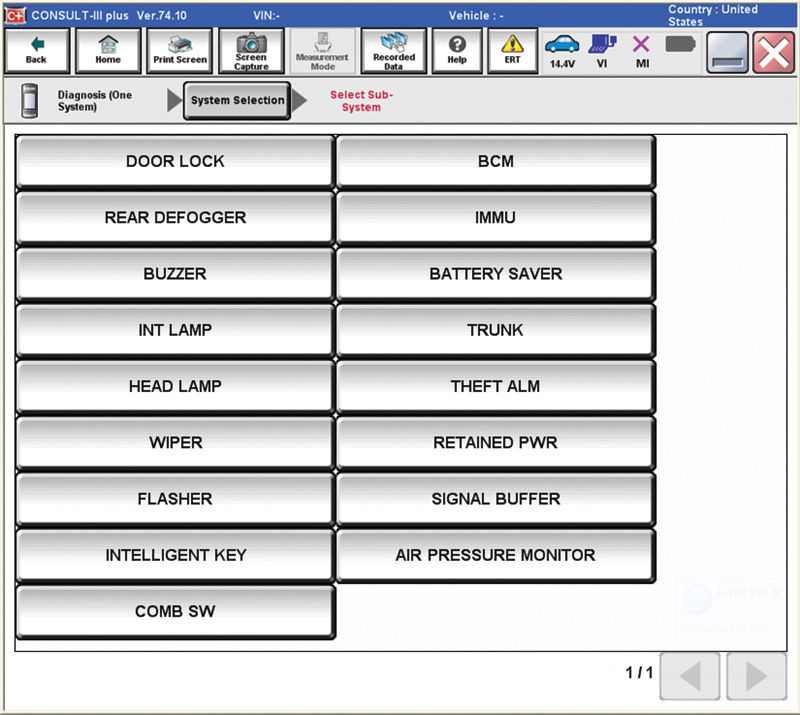
Nissan recommends methods #1 and #2, and each is executed in the same manner: Connect the CONSULT III Plus to the vehicle and choose Diagnosis (One System). Choose BCM. Choose AIR PRESSURE MONITOR.
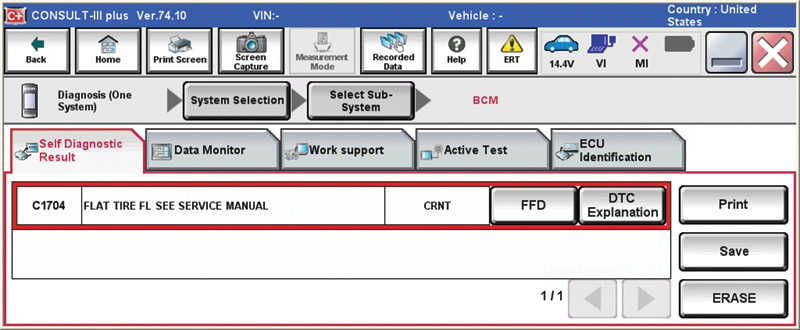
The next screen will display any current (red) or pending/history (yellow) DTCs.
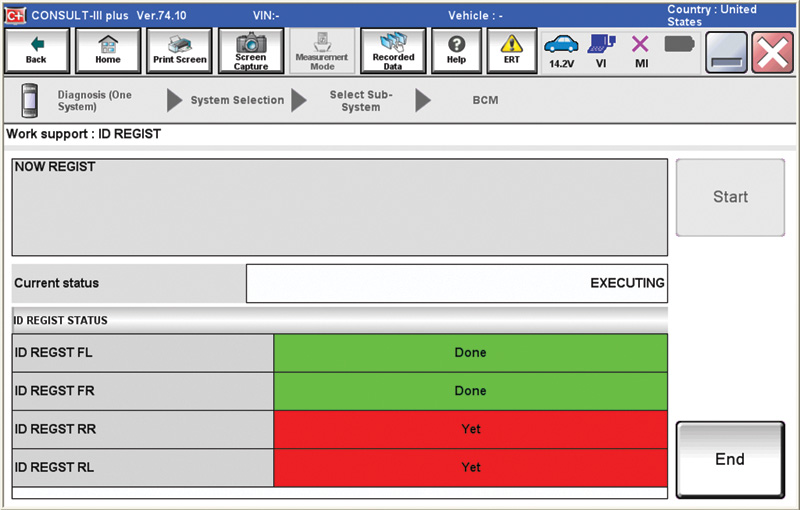
Select WORK SUPPORT to access sensor ID registration mode (ID REGIST), or view the currently registered sensors (ID READ). Select ID REGIST, then choose START to begin the initialization. After pushing start, use the Activation tool or the Signal Tech II to activate each sensor starting with the left front wheel. Proceed clockwise to activate the right front, right rear, then left rear sensor.
The ID registration is finished once all sensors have been activated, and all boxes are green. Press END to complete the registration.
Note that it may be possible to use a different TPMS tool for the activation procedure, but Nissan does not guarantee the success when using alternative tools.
Using the Signal Tech II only
When using the Signal Tech II as a stand-alone device, consult the user’s manual for specific instructions. The Signal Tech can activate and store each sensor’s data, upload the data to the vehicle via DLC cable, or perform diagnostic queries using the DLC.
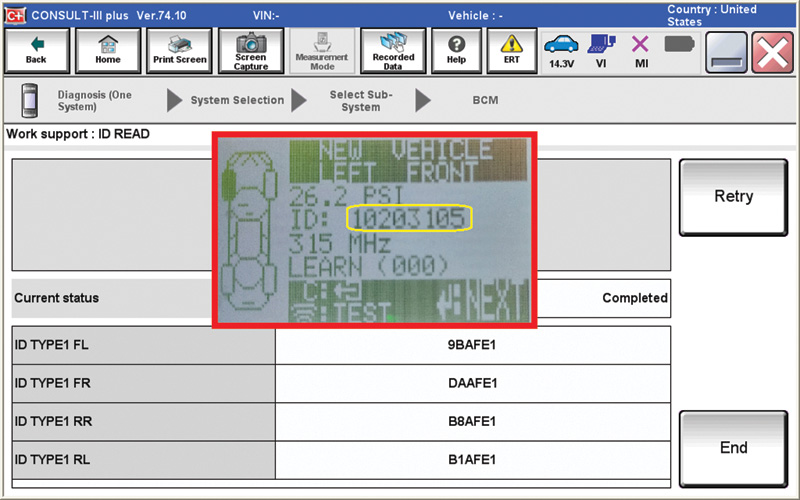
This sensor ID is in decimal form. Converted to hexadecimal, the sensor ID matches the sensor position currently registered. There are no DTCs.
Using the CONSULT III Plus only
Without an activation tool, registering sensor IDs using only the CONSULT III Plus is possible, but takes more time and requires driving the vehicle. The procedure starts by setting the left front tire pressure to a specific pressure, and then continuing in a clockwise manner to set the remaining pressures at 3 psi less for each successive wheel. Consult the service manual for the correct LF reference pressure, which appears to be the recommended cold pressure spec. For example, the 2014 Sentra’s pressures should look like this: LF 35 psi; RF 32 psi; RR 29 psi; LR 26 psi.
Once the pressures are set in this particular pattern, use CONSULT III Plus to navigate to WORK SUPPORT “ID REGIST†as described in the section above. Drive the vehicle at a speed greater than 25 mph for 3 minutes or more until the ID REGIST boxes change from red to green. Once they have all changed, press END on the CONSULT III Plus, and set the pressures to the proper level.
Remember, the registration procedure is required after every tire rotation; otherwise the TPMS icon could illuminate despite proper tire pressures!
Which sensor goes where?
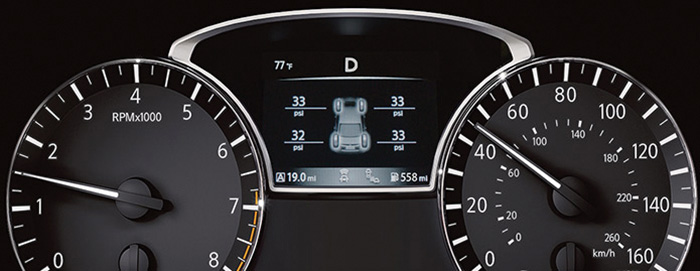
Some newer Nissan vehicles are equipped with an individual tire pressure display. This aids the driver – and mechanic! – in identifying which tire is triggering the low pressure warning system.
On cars without this feature, there is another approach to identify which sensor ID on the CONSULT III Plus belongs to which physical sensor location. Using the WORK SUPPORT “ID READ†function, the CONSULT III Plus can display the hexadecimal ID for each currently registered sensor and its alleged position. If the registered position does not match the physical position, the BCM will store a DTC and illuminate the TPMS icon. The Signal Tech II can be used to retrieve the sensor ID on its own display.
When replacing a sensor, reference the part number printed on the original sensor itself to source the appropriate part. The sensors cannot be mixed and matched, even if they appear identical. Older generation sensors are not compatible with newer systems. As always, use genuine Nissan parts when performing repairs to avoid unnecessary complications. All new sensors are shipped in a dormant state, and require an activation tool to “wake up†after being installed. This “wake up†procedure is another way of describing sensor ID registration as described in the section above.
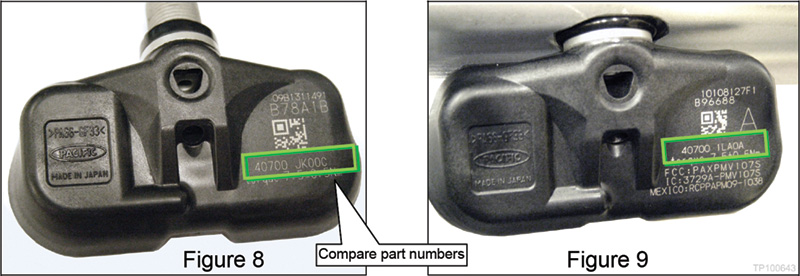
These sensors look physically identical, but they aren’t the same inside. Check part numbers to avoid wasting time re-doing a tire mount and balance!
Mounting TPMS tires
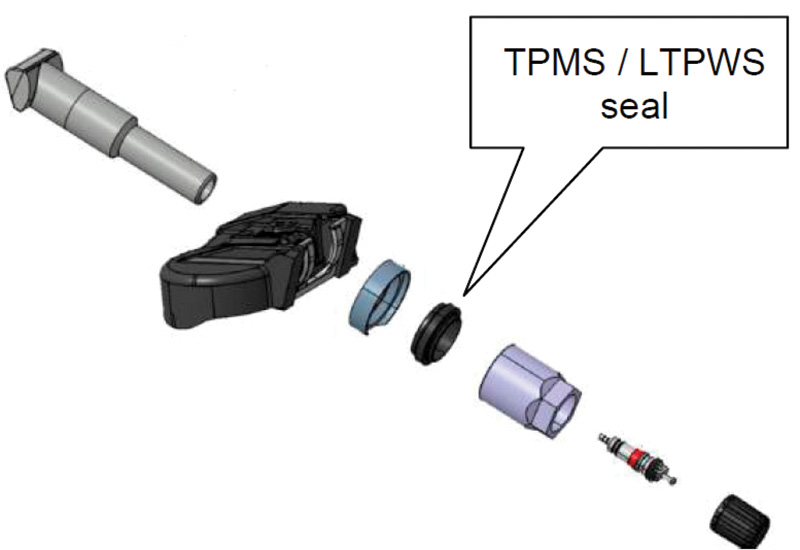
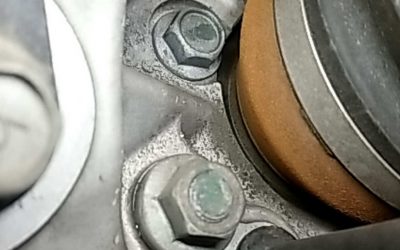
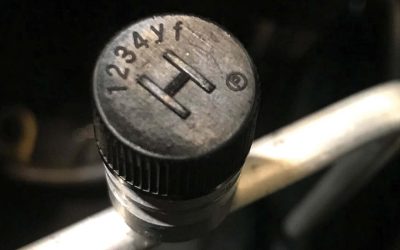
The sensor design might be different, but the seal concept is the same. Replace the seal to avoid a leaking TPMS sensor valve.
Properly mounting a tire to a rim on a vehicle equipped with TPMS is enough material for its own dedicated article. Be sure to reference your shop’s tire equipment user guide to avoid accidentally damaging the sensors when breaking the bead during tire removal or when setting the bead during tire installation. The Nissan service manual includes a few helpful tips about the process.
Easy Tire Fill system
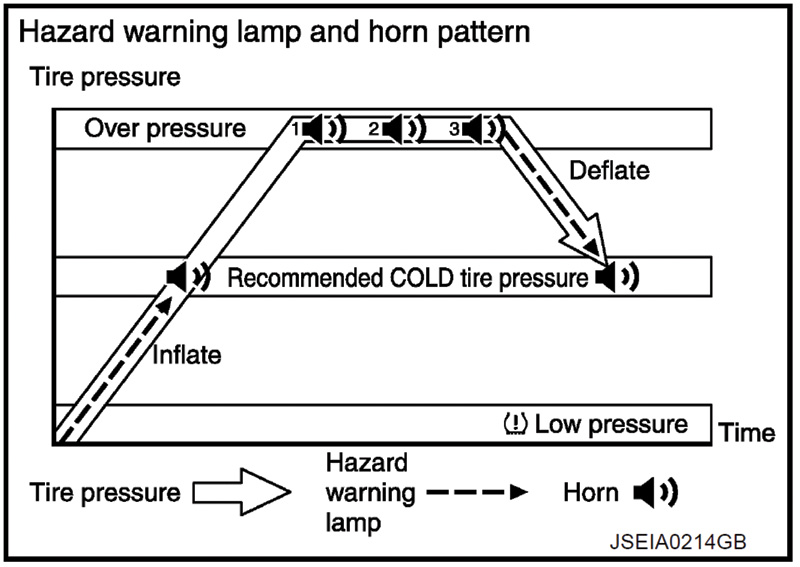
With the 2016 Altima, Nissan added an additional feature to help owners inflate their low tires accurately without a gauge. When the TPMS icon is illuminated, a vehicle owner can place his or her car in Park, and leave the ignition ON. When adding air, the hazard lights will begin to flash until the recommended cold pressure is reached. At the recommended pressure, the horn sounds once. In the event that the owner continues to inflate over 4 psi above spec, the hazards will NOT be flashing when the horn sounds repeatedly. As pressure is once again reduced toward the recommended specification, the hazards will flash until a single horn sounds when the proper pressure specification is reached.
Proper tire pressure is critical for vehicle safety, tire longevity, and fuel economy. It is an often neglected aspect of vehicle ownership, and Nissan is committed to facilitating its maintenance. As a Nissan technician, resist dismissing TPMS as unimportant or a frustrating waste of time like so many less experienced mechanics have done. Help ensure customers get the best care for their tires by learning how to properly manage Nissan TPMS.



0 Comments