

Understanding the BMW twin turbocharged N54 engine operation and diagnosing and repairing failure points
In 2006, BMW released their first twin turbocharged inline six cylinder engine. With much excitement, the engine produced 306 horsepower at 5,800 rpm and 295 ft-lbs. of torque from 1,300-5,000 rpm. This 3.0 L engine was used in BMW 335i, 535i, and 135i models up until its successor, the BMW N55 engine.
With any turbocharged engine, BMW or not, more potential failures are created. In this article, we will cover the concepts of how the BMW twin turbocharged N54 engine operates. Specifically, we’ll cover the control side of the turbos, possible failure points, methods to diagnose and isolate these failures, and how to repair/fix such findings.
Turbocharger Basics
Exhaust gases released from the engine under pressure spin a turbine. This turbine rotates on a shaft held by one or more bearings. On the other end of the shaft is another turbine that compresses fresh air for the engine intake. The volume of compressed air released from the turbo is controlled by a wastegate. The more air you can jam in the motor means you can add more fuel. Add increased air and fuel quantity to an engine, you gain more power. Simple, right?
BMW N54 engines have been setting a 30FF fault code ever since the vehicles hit the dealerships in 2006. “DME: Turbocharger, charge-air pressure too low.†This fault code can lead you down many different paths. On this specific 2009 BMW 535xi we start with the basics.
“Lack of power,†“Check Engine light on,†“Reduced engine performance message displayed,†are all common symptoms of fault code 30FF. When driving the vehicle, you will notice a gross lack of power and performance from the engine. You won’t feel any stumbles or misfires. The engine will run smoothly but feel sluggish. Our client expressed a lack of power and, of course, the obnoxious reduced power message on her i-drive screen.
After performing a vehicle scan and isolating fault code “30FF DME: Turbocharger, charge-air pressure too low,†we moved on to sensor readings and signals. Ambient air pressure reading was around 14.8 psi (normal). We checked the intake manifold pressure at idle and under load, and noticed the intake manifold pressure didn’t change much. In fact, a vacuum was pulled on the intake. The intake on a turbocharged engine should be under pressure.
This lack of pressure is what the DME (Digital Motor Electronics) is seeing and setting the fault. We removed the intake manifold pressure sensor and adapted a standard pressure gauge. We ran the vehicle at idle and under load. With a quality pressure gauge confirming no boost pressure in the intake, we had confirmation that either the turbochargers were not doing their job or boost pressure was not making its way to the intake manifold from the turbos.
We searched for obvious damage to the vehicle. The intercooler sits low, front, and center of the vehicle. This is a good place for a piece of road debris to catch. It is also susceptible to breakage with any front end damage. We noted no body work was done. The intercooler was mounted correctly and not damaged. We inspected the plumbing from the turbo to the intercooler, and from the intercooler to the throttle/intake. (The clamps that hold these pipes together can be reinstalled incorrectly. Under high boost pressure they can pop off.) We found all clamps secured correctly and no pipes disconnected. Now it was time to check the wastegates.
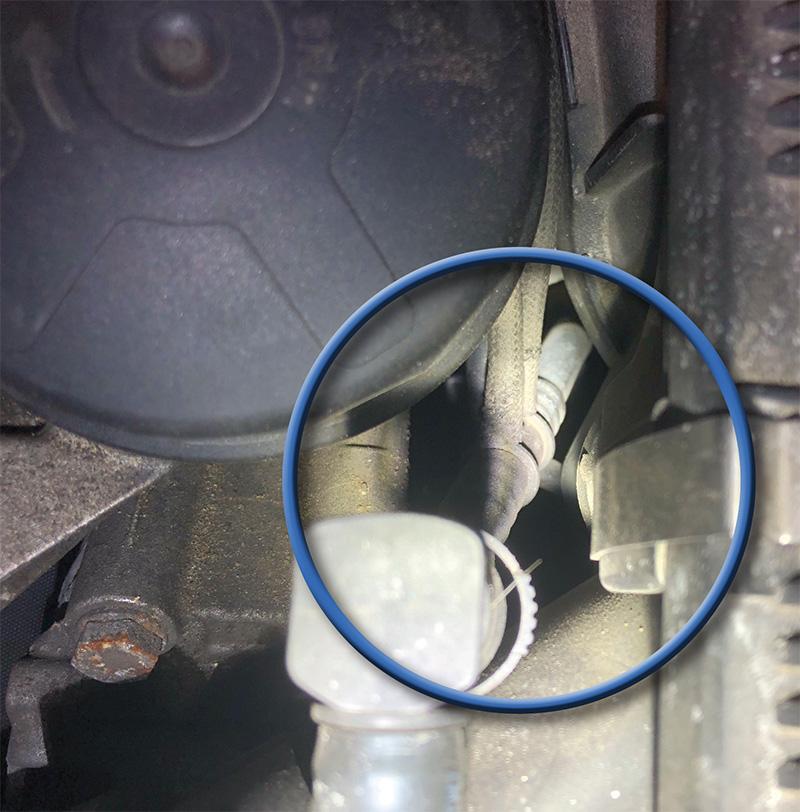
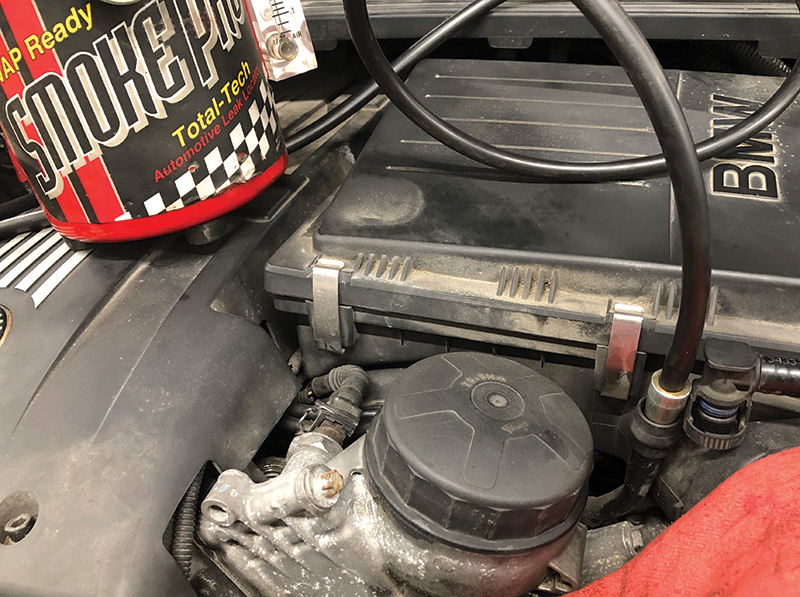
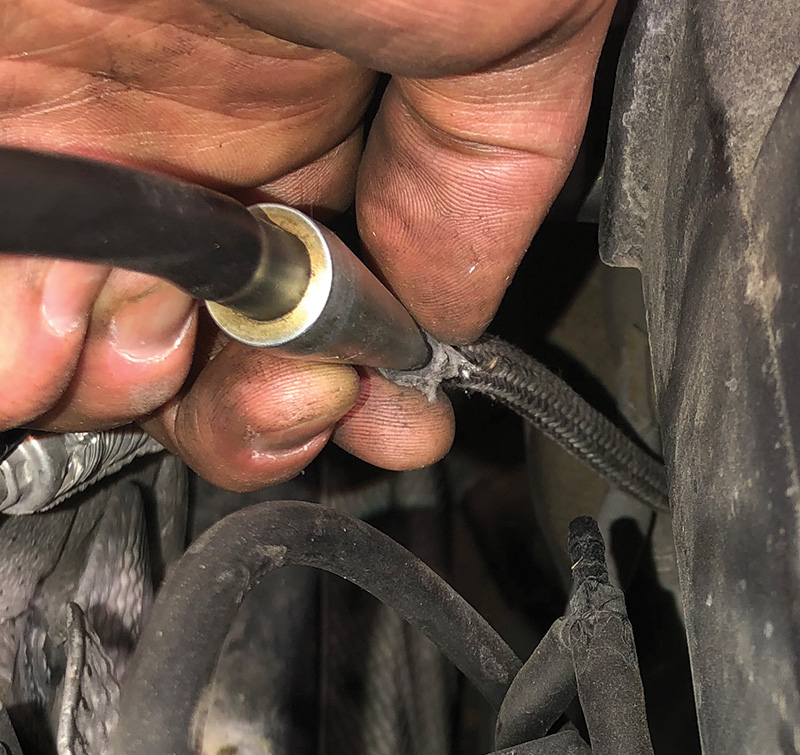
The wastegate inside the turbocharger controls the volume of pressurized air from the turbo to the intake. On the BMW N54 engine it is vacuum actuated (some engines use an electric motor). Our next step was confirming a constant strong vacuum supply to the actuators. Vacuum is supplied by a timing chain driven vacuum pump under the intake manifold. Access to a supply line is very easy to find next to the oil filter cap.
With the engine running, we disconnected the supply line. A noticeable vacuum was being pulled from the pump. We measured 29+ Hg (normal operation). Now that we knew our vacuum source was good, we could work downstream. From this supply line, we could smoke test all the vacuum lines for the turbo wastegates.
We forced one to two psi of smoke and pressurized air into the vacuum lines. This is a great way to find a leak in any of these old vacuum lines. These lines can also be pinched or kinked. Carefully follow each line from the main supply. If the line has a kink or pinch you could have the same issue as a leak (30FF fault). Keep in mind that a kinked line will prevent your smoke from running to all vacuum hoses and components.
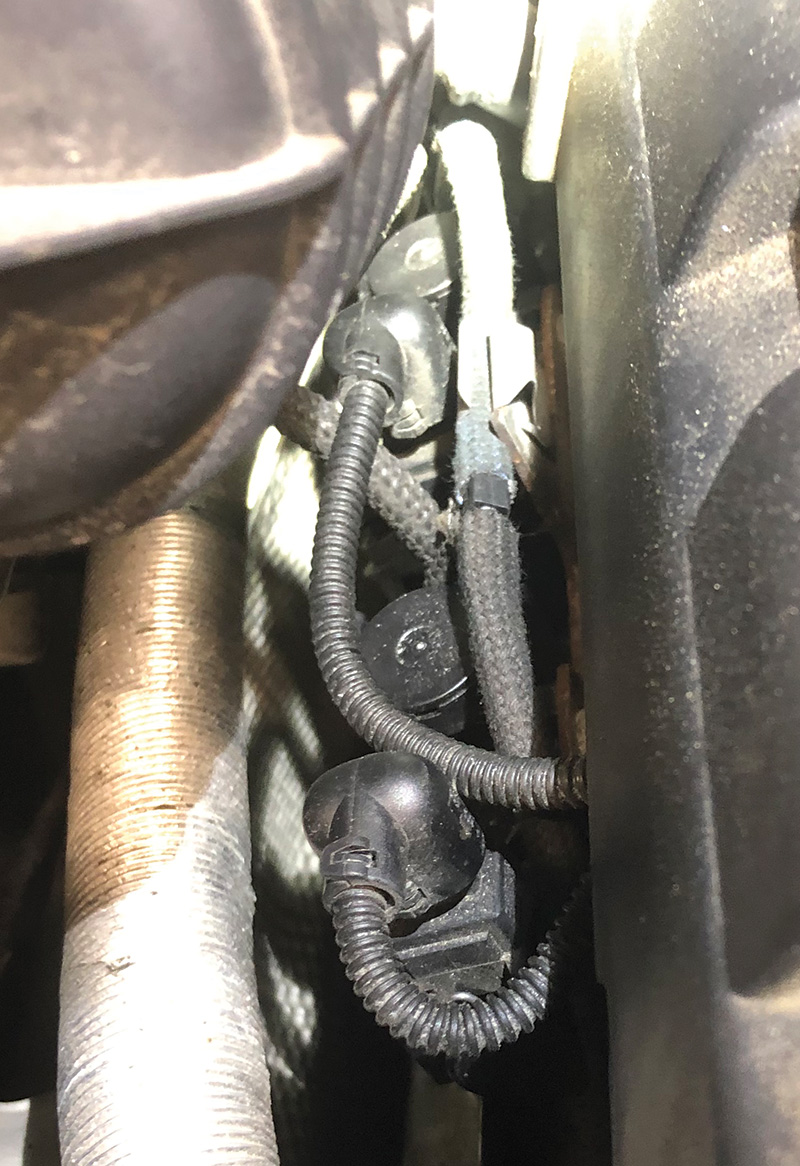
The lines run across the valve cover into two vacuum storage tanks. From these tanks, the lines run into an electric solenoid (something that will need to be checked later). This solenoid is closed off when it is not charged (activated). If no smoke is spilling out of the lines from the main supply through the storage tanks to the solenoid, then a second smoke test will be needed on the output side of the solenoids to the wastegates.
It is very common to find a broken line. These vacuum hoses are rubber with a fabric covering. You will notice the fabric deteriorates and flakes away. If you find deteriorated fabric, the rubber hose underneath has also been compromised. In most situations, it would be best to replace all these vacuum lines once the defective hose has been isolated. We were not so lucky on our 535xi. (No leaks were found, no kinked or pinched hoses.)

The second place to apply pressurized smoke is from the electric solenoid to the wastegate. Inside the wastegate is a diaphragm. If no vacuum is making its way to this diaphragm (via rubber hoses), the wastegate will not close allowing boost to feed the engine.
At this point, we pressurized the vacuum supply line (with engine off/not running) to the solenoid. No leaks were found. We disconnected the vacuum hoses from both electric solenoids. More pressurized smoke was applied to each line, one line to each turbo wastegate. No leaks were found. Another possibility could be a kinked vacuum line. If evidence of other repairs around these vacuum lines is found, you will need to follow the lines and inspect for twists, kinks or even pinches. We found none of these issues on our vehicle at this point.
With confirmed vacuum supply from the vacuum pump and quality lines running to and from the electronic wastegate control solenoids, we needed to question the solenoids. Were they not actuating? Was the vacuum running to the solenoids but not to the wastegate?
These control solenoids can be actuated with BMW factory scan tools as well as some aftermarket scanners. If you have your smoke machine still handy, put it back to work. Pressurize the supply side of the solenoid with smoke and disconnect the output vacuum line. While pressurizing the system, activate the solenoid. You should hear and feel the solenoid activate, but also see it with the smoke. We performed this test and found both control solenoids activating correctly. By activating with the BMW tester, we know the wiring is good and the DME is supplying and grounding the solenoids as it should.
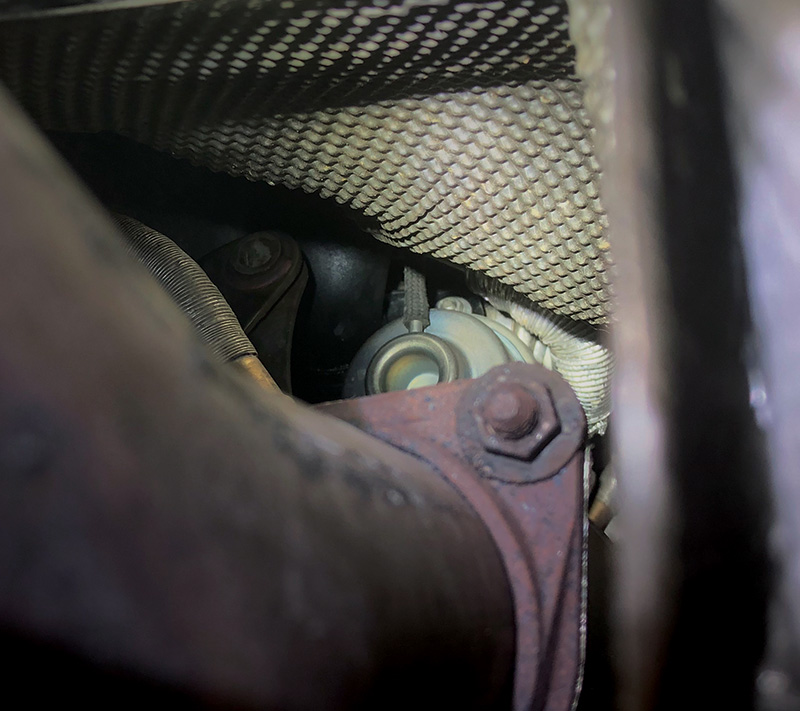
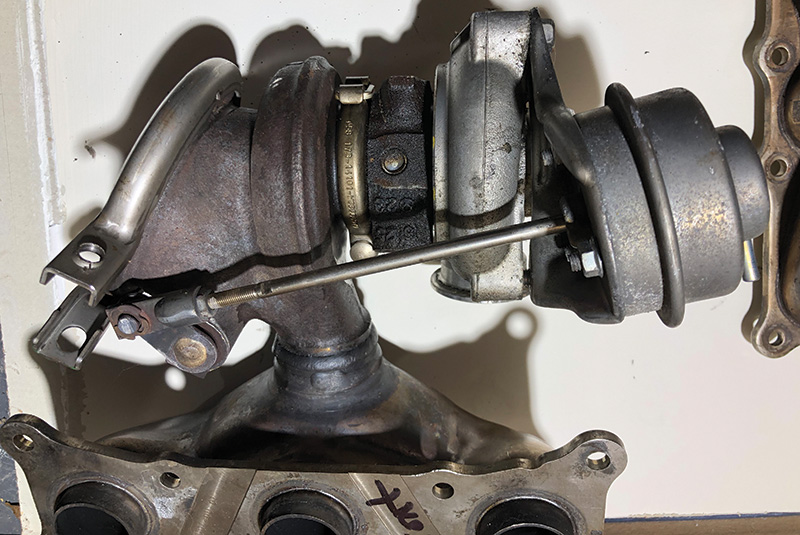
At this point, we applied our own vacuum to the wastegate to watch for movement. It is possible that the diaphragm inside the wastegate had deteriorated. If so, more than likely, we would have seen smoke leaking from the wastegate during our smoke test if this were the case. But we wanted to double check. A deteriorated diaphragm would cause the internal valve (inside the turbo housing) not to close and prevent boost pressure from reaching the intake. With a hand held vacuum pump we were able to manually activate the wastegate. We watched the push rod movement from the diaphragm to the turbo. This was performed on both turbo wastegates. Both push rods moved freely.
Our BMW had roughly 138,000 miles on it. Could it be possible the turbos were no longer spooling up and creating the boost pressure we needed? We knew that we had no pressure in the intake under load. The vacuum supply was good. The electric wastegate control solenoids were activating and allowing vacuum to reach the wastegate actuators. And we had manually activated the wastegate with a hand held vacuum pump. This led us to believe something was physically defective inside the turbo assembly.
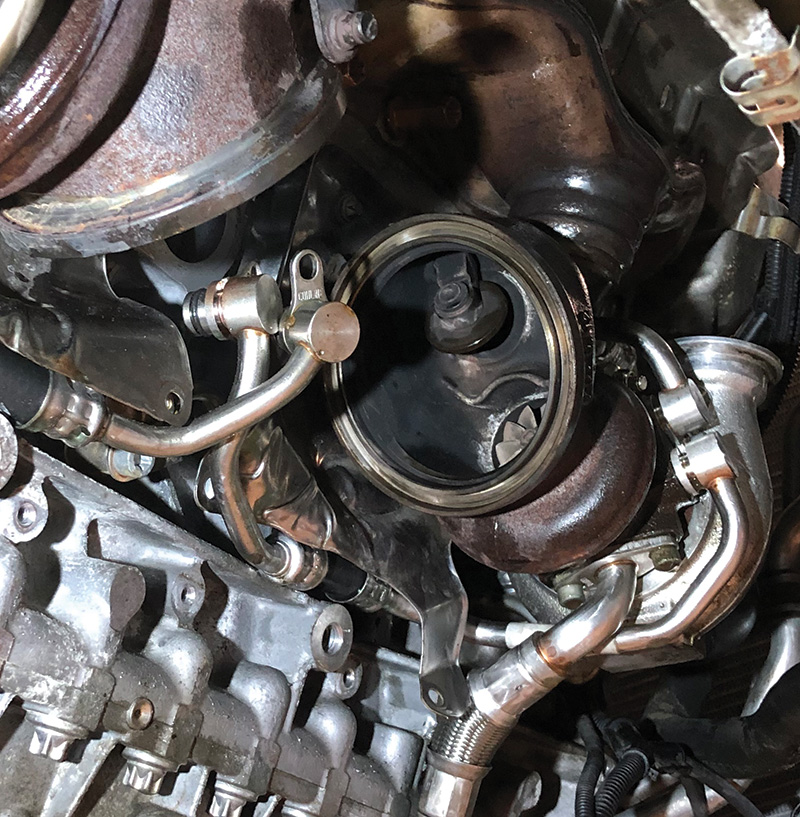
We removed the output hose from the Bank 1 turbo to access the turbine inside the assembly. With a borescope and a pick, we gently rotated the turbine. We found no signs of binding or wobble. There were no visual clues of overheating or damage from foreign debris. However, the Bank 2 turbo is very difficult to access this way. Keep in mind this is a twin turbo system. Even if only one of the turbos is failing, you will still receive the 30FF fault.
At this point, we needed to pull down the much-avoided exhaust and catalytic converters. This would provide access to the wastegate valves inside the turbo and the other side of the turbines.

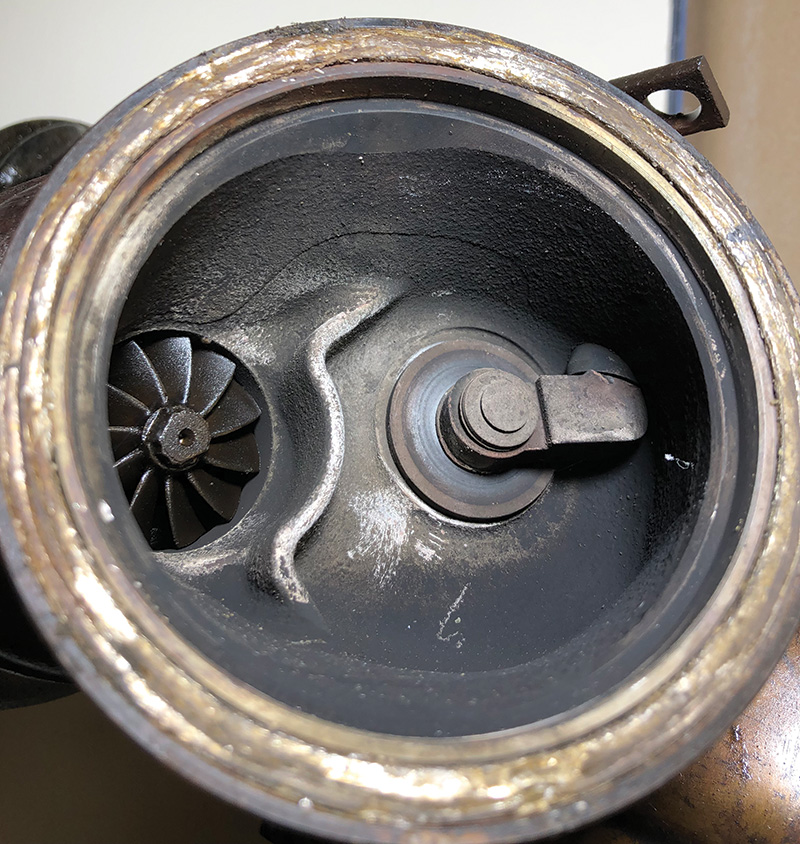
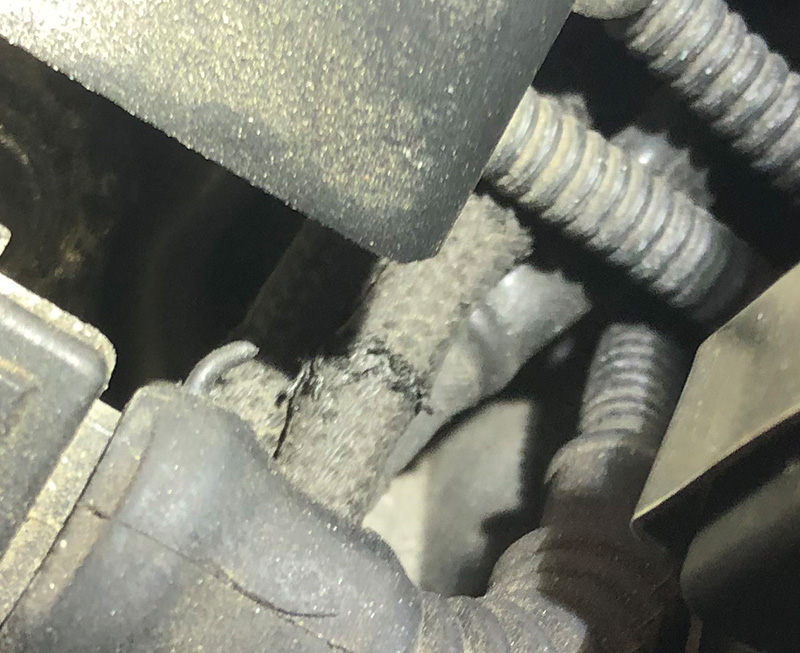
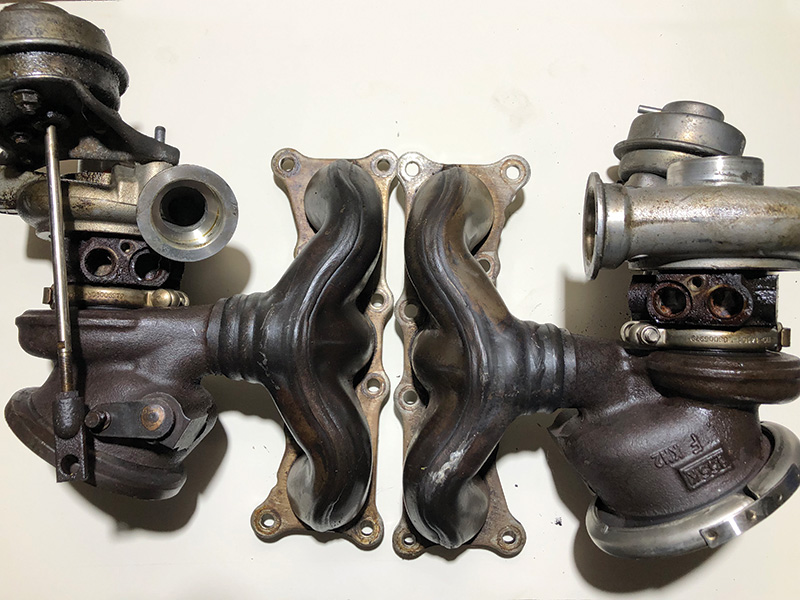
With the catalytic converters out of the way, we discovered a very obvious issue. The wastegate valves on both turbos were incredibly loose. When actuating the wastegate diaphragm with our trusty hand vacuum pump, the valve barely touched the exhaust port on Bank 2. And Bank 1 wasn’t much better. The turbines spun free on both turbos and showed no signs of wear.
To remedy this issue we had three options. The first being an adjustment of both wastegate actuators by pulling a vacuum on the diaphragm and tightening the wastegate valve until it fully closes on the exhaust port. You will want the valve to contact the port but be able to spin with minor force. Both wastegates will have an adjustment nut on the push rod. Depending on the age of the vehicle and climate that it lives in, this can be difficult to impossible. The push rods aren’t very thick or strong metal. A small amount of corrosion could prevent any adjustment.
The second option would be to replace the wastegate actuators altogether and adjust correctly. This will involve removing both turbocharger assemblies. With both turbos removed, you can perform a thorough inspection of the housings. Possible cracks or hot spots have been found on the housings. A quality inspection of the turbine bearings can be performed on a bench.
The third and most expensive option is to replace the turbocharger assemblies (they come with new wastegate actuators installed and adjusted). Complete replacement takes a lot of stress out of the repair.
After double checking the integrity of our turbo assemblies, turbine bearings, and overall condition, we decided to simply replace the wastegate actuators and adjust correctly. Parts are readily available and affordable. The diaphragms had aged and worn out with heat cycles of the engine. All the coolant lines were in rough condition and were replaced as well. The oil feed lines appeared to be in good condition, but we felt it would be best to replace those while we had everything apart.
After the vehicle was reassembled and faults cleared, we were back to full boost pressure from the turbo assemblies and were all smiles on acceleration. After any repair on these turbos, multiple lengthy drives are recommended. This is helpful not only to ensure that the vehicle is repaired completely, but also to burn off any fluids from the repair and bed in new gaskets. No customer/client would appreciate the smell.
These twin turbo engines can seem intimidating to diagnose. But once you break them down into smaller systems, you’ll find they are not difficult. Visually inspect for obvious failures. Isolate subsystems. Perform basic testing. The defect/failure will eventually present itself.
By Andrew Hueter


0 Comments