Now that they’ve gone modular, replacement is an even more expensive proposition than before. Better be real sure.
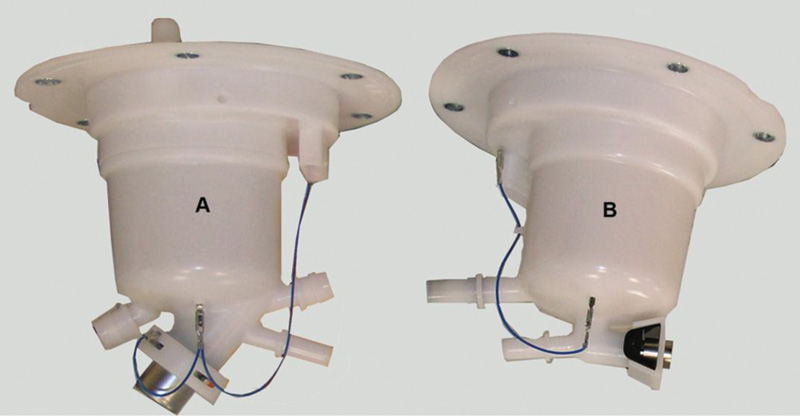
While fuel filters may look similar, you’ll be frustrated at installation if you got the wrong one.
Most of us who have been servicing vehicles for the last several years have become quite familiar with the fuel pump module concept. Mercedes-Benz has been using this for some time, but some of us “seasoned†technicians remember when it wasn’t always so. Fuel pumps were introduced in the 1920s — many cars up through that decade still used gravity to supply the carburetor with gasoline rather than a pump. As technology progressed, gas tanks moved to the back of the vehicle to improve safety. This required the use of a mechanical fuel pump to move the flammable liquid forward and up to the carburetor. When electronic fuel injection arrived, mechanical fuel pumps became inappropriate, so high-pressure electric pumps took over. Mercedes-Benz vehicles at one time had what was called a rail pump mounted in the fuel supply line. This would “suck†gasoline from the tank, pump it up to pressure (which was regulated for the system), then return excess fuel to the tank. To increase efficiency, pumps were soon placed in the tank, operating in much the same way as a submersible well pump.
Electric fuel pumps in late models spin continuously as the engine runs, and over the course of their lifetime will circulate thousands of gallons of gas. Since not all of the fuel that is sent forward is used to run the vehicle, as noted before, the regulator returns the excess to the tank on most systems. One of the drawbacks of this, other than circulating a lot of gasoline, is that the fuel picks up heat from the engine, which is transferred to the fuel pump and reduces its lifespan. In newer “returnless†EFIs, the regulator is part of the fuel pump system and eliminates the need for a return line, thus helping the pump run cooler. When it is combined with variable speed control, the volume of fuel the pump has to move decreases greatly, thus improving its longevity by reducing wear.
Why do they fail?
Rust, dirt, or debris in the gas tank can kill a fuel pump very quickly. Rust can occur in older steel tanks, while with plastic tanks the material can start to break down after long use. The fuel filter does almost nothing to prevent debris from entering the fuel pump since it is mounted after the pump. Its primary function is to protect the fuel injectors and lines. The only protection for the pump comes from the inlet screen, and this only blocks large debris and cannot keep microscopic particles from wearing a pump out over time. When a pump gets worn, it may become louder and spin at a lower rpm, which draws more current and increases heat, causing starting, drivability, and performance problems. A weak fuel pump may work at idle, but fail when under load. If a pump is really weak, the engine will not start.
Repair or replace?
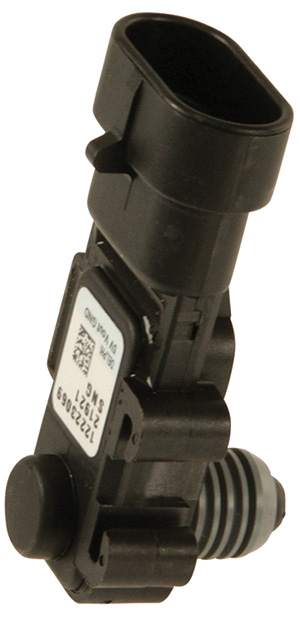
The pressure sensor is sometimes at fault either reading too high pressure or too low. Scan data should match the actual reading on your mechanical fuel pressure gauge.
It is pretty much a given that we replace electric fuel pumps these days, but that wasn’t always so. To illustrate, the W113 series of cars used one of two types of pumps:
Early (tall) electric fuel pumps were common on late ‘60 Mercedes-Benz cars including the 230, 250, and the early 280SL. The later (short) electric fuel pump was used on W113/W108/W112/W111. These pumps were actually repairable — they could be serviced. M-B once sold a repair kit containing new brushes and three O-rings, but you will only see these on collectors’ cars now.
Replacing a newer-model fuel pump module is fairly straightforward in terms of removal and installation. The location and particulars can be found on XENTRY, or in WIS. It should be noted some modules come as a complete unit including the fuel tank assembly, so the expense involved makes diagnosing the problem properly even more critical. If you find yourself replacing just a pump, be sure the tank is clean. It would be a shame to replace a pump only to have it fail in six months due to dirt or debris in the fuel tank.
Theory and Design
Let’s take a look at how a modern pulse-width-modulated fuel pump module operates in a typical late model Mercedes-Benz. For the purposes of clarity, please note that when referring to a fuel pump module in this article we are speaking of the fuel pump assembly, which is located in the tank. Some Mercedes-Benz models also use a fuel pump control module, which is a separate unit entirely.
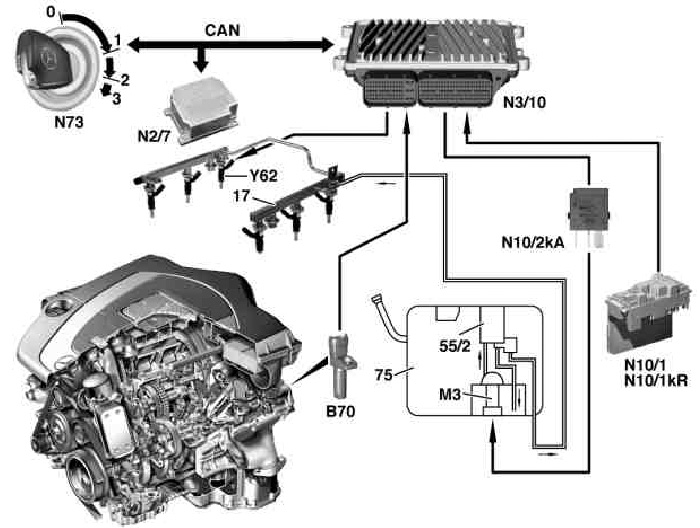
Using models 216 and 221 as an example, the fuel supply is controlled and monitored by the ME-SFI control unit (N3/10), and the fuel pump control unit switches the fuel pump on via the discrete signal “EKP run†from the ME-SFI control unit to the fuel pump control unit. The ME-SFI detects the fuel pressure via the fuel pressure sensor (B4/15) and transmits the PWM signal “fuel requirements†representing the current fuel requirements to the fuel pump control unit. This analyzes the PWM signal and actuates the fuel pump appropriately, single phase. The fuel pressure is regulated to be variable from between 4.6 and 5.5 Bar (70 to 82.5 psi), depending on the fuel pressure regulator.
Many Mercedes-Benz cars will have a left and right pump assembly. In those cases, there is a left and right fuel pump control module. The signals, however, mirror each other so, barring a wiring issue, the diagnosis will be identical for left and right.
Input signals consist of:
- Terminal 15
- Circuit 30
- Circuit 31
- Discrete signal “electric fuel pump run†(from ME-SFI control unit)
- PWM signal “fuel requirements†(from ME-SFI [ME] control unit)
Output signals are:
- Fuel pump – (for model 216, 221 three-phase — 3x+)
- Fuel pump
Pinpointing the cause
It is important to follow some basic “rules of engagement†here:
- Identify the true underlying cause of the complaint.
- Be sure the problem is not the result of a different trouble elsewhere.
- Look for incorrect version coding.
- Consider overloaded mechanical or electrical components. For example, make sure the battery and charging system are okay, fuel quality is good, etc.
- Think about a possible software error.
Some customer complaints associated with a faulty fuel pump may include, but are not limited to: lack of power, engine cranks, but won’t start, engine starts and dies immediately, and gasoline smell after refueling.
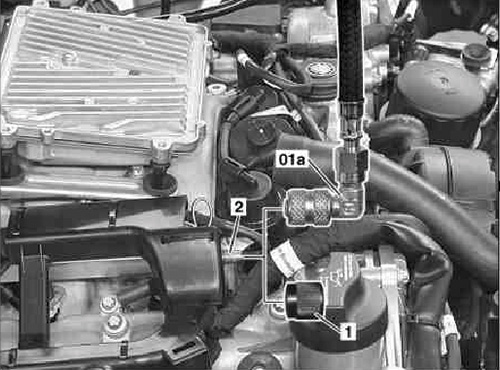
Initially, you may find fuel trim or fuel pressure codes. Begin with a short test or quick test of the vehicle, and ensure that the battery and charging system are okay. Obviously, if it’s a no-start the latter won’t be possible, but good battery voltage is imperative. Hook up your fuel pressure gauge — there should be an accessible Schrader valve test point at the fuel rail in the engine compartment, while older models have a banjo fitting.
The following test steps should be taken:
- Turn the ignition on. At this point, the 12V discrete circuit 15 input is on and the fuel pump control (EKP) signal jumps to approximately 11V for the fuel rail pre-charge function. This is only active on the first ignition cycle after a previous engine start. The set pressure will be based on the engine temperature and other variables. The electric fuel pump running (EKP) signal switches to ground for one second, then back to ignition-on status. The fuel pump demand (PWM) signal will pulse as needed to reach calculated pressure. Observe your fuel pressure gauge to see if it reads within specifications. If you have good pressure, then the fuel pump may not be culprit. We will look at scenarios with no or little fuel pressure first, then discuss what to do if pressure is good, but you still suspect trouble in the pump.
Assuming you have little or no fuel pressure, the next step would be to take a closer look at the fuel control system. This is where it is best to have a XENTRY Star Diagnosis tester, or a factory-compatible scan tool. In your menu screen, you should see something like FSCU (Fuel System Control Unit) actual values. Compare these to the specified values and note any discrepancy. You’ll want to pay particular attention to the voltage at the pump, current consumption, and fuel pressure. Also, the requests from terminal 15 and the ME-SFI control module for the pump should be on.
You can now go to activations and command the fuel pump(s) on. The menu might read something like “empty fuel tank†and you will have to choose left or right. You are commanding the pump “on†via the SDS activation. This is currently limited to about 25 seconds and will allow you to compare both pumps’ performance. If all your data PIDs are within specifications, but the fuel pressure is low or zero then you will want to actually verify your readings before you condemn the pump.
Locate the fuel pump or pumps, get out your DMM (Digital Multi-Meter), and check for voltage at the pump. Consult the wiring diagram to be sure you are checking the correct pins. A DMM with a lab scope function is ideal for this test. As we mentioned before, this is a pulse-width-modulated system and you will be able to see what is happening more clearly with a lab scope. In any PWM system, the voltage is not regulated (it remains at battery voltage), but the pump is “pulsed†using ground side control. Watching your scope can confirm that you have a good pattern and the voltage has been verified as specified. If all is normal and the pump still is not running, we believe you should do one more test to assure that the new pump has a normal life expectancy: Voltage drop from the positive battery terminal to the positive connection at the pump, and do the equivalent on the ground side. Remember back to your early electrical theory classes about how excessive resistance causes motors to overheat and fail. This is a good time to check the pins very carefully for corrosion and bad connections. A poor connection will cause your new pump to fail prematurely.
So, you have a poor or no signal to the pump
What’s next? Again, XENTRY or an upscale aftermarket scan tool is going to make your diagnosis much easier. You should see on your menu screen an FSCU fault codes readout. Here is a typical menu readout and possible explanations:
- The fuel pump has a short circuit to ground (pump or wiring to pump is faulty). Check wiring and connections for problems.
- The fuel pump control unit is malfunctioning (FSCU control module is faulty). You pretty much have to rely on your data here, assuming voltages and connection are good.
- Implausible signals from component N3/10 ME-SFI control module (EKP or PWM signals from ME-SFI control module faulty). You could possibly have a can bus issue here. Check the wiring between these components.
- The software is incompatible with the fuel pump control unit (incomplete control module programing). Reprogram the control unit.
- The control unit software is missing or faulty (incomplete control module programming). Reprogram the corresponding control unit.
- The control unit has an internal hardware fault (FSCU control module is faulty). Replace the FSCU control unit.
- The voltage supply is too low (local under voltage at PCM). Check the battery and charging system.
- The voltage supply is too high (local over voltage at ECU). Check the battery and charging system.
- The fuel pump has been switched off (usually due to local over voltage at the ECU). Check the battery and charging system.
- The control unit is overheated (excessive pump current consumption or loose ECU attachment point). The pump may be drawing too much current. Check the wiring and connections, replace the pump, and retest.
Current ramping
We talked earlier about a scenario that goes something like this: The vehicle is towed in and dropped off at your facility with an “engine cranks – no start†concern. You turn the key and the vehicle starts right up, it runs fine, and you drive it into your bay. We’ve all experienced this at one time or another, but how to address it? The customer had a valid concern, but you just weren’t able to verify it. You will want to approach your diagnosis the same as if it still were a no-start. Start with your scan tool and see if there are any related fuel pump codes. Even though the pump is running at this point it doesn’t necessarily mean it is working to its full potential. Scan data to pay attention to will be:
- Voltage at component M3 fuel pump
- Current consumption of component M3
- Fuel pressure
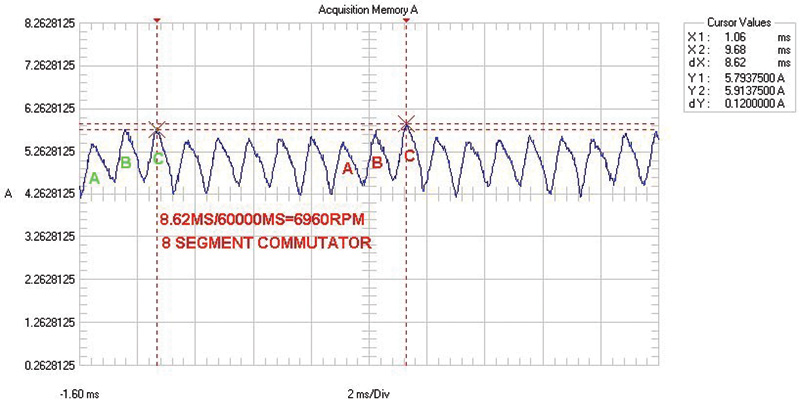
This is where it is a good idea to conduct a current ramp test. You will need a low-amp probe and a lab scope to perform this test. Use the 20A setting at 10ms. What you are looking for is some sort of sign in the pattern that indicates the pump is struggling to operate. Remember, you are working on a PWM system and the humps frequency will vary, so don’t be as concerned with that as the amount of current the pump is drawing.
Fuel smell
We mentioned plastic tanks and components deteriorating over time. All fuel pump assemblies are plastic and you may get some complaints of a fuel smell in the vehicle particularly when filling the tank. There is a recall of some S-Class models with stress fractures in the pump and filter mounting flanges that can cause leakage and pressure drops. Consult the TSBs for the vehicle and perform a visual inspection of the pump and filter flanges.
Quality control
Here are some steps to assure that your repairs have solved the customer’s concern and keep your come-back ratio down. Be sure to perform a version coding if necessary when replacing parts. Road test and perform a final short test on the vehicle for pending issues. Eliminate any effects from the repair – learn-in any new values etc.
We’ll bet that all of us have been brought a no-start vehicle with no fuel pressure — and no fuel in the tank. Embarrassing for the customer, but more embarrassing for you if you miss it. And don’t forget the fuse panel. Sometimes a simple blown fuse is the culprit, but now you will be tasked with finding out why that fuse blew. Remember to keep it simple!
Download PDF 〉





0 Comments