
 No, the telltale dribbles of oil on the garage concrete wouldn’t do at all. Maybe the owner might have been money ahead in the long run to just pour in more engine oil to offset the leak and sop the fluid up with oil-dry or cat-litter, but you weren’t going to convince the fastidious owner of this 420 SEL (126) to do such a thing. The car might be a bit long in the tooth, but everything still worked, and it was still a pleasure to drive.  Â
You’ll find this same engine (116.96) in the 107 SL, but gasket replacement in that car is more work because access is tighter. You’ll have to remove most of the front suspension on the roadster, for example. We were luckier having a 126 to repair. There are also minor layout and fastener differences between the older cast iron and the later aluminum versions of the 4.2-liter V8 engine. This one had an aluminum block.
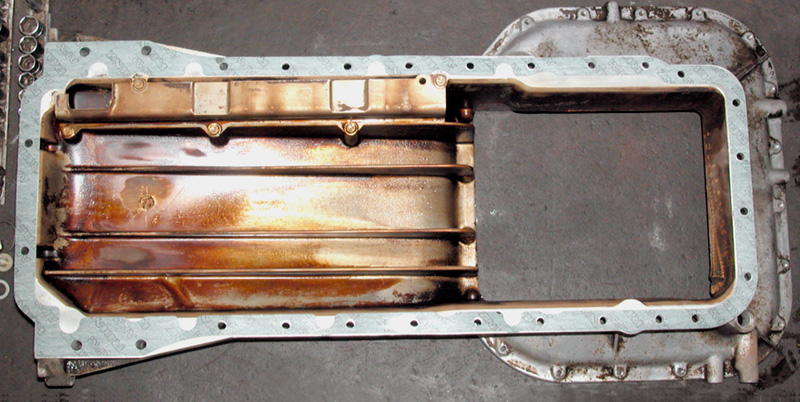
Many of these engines use a two-piece oilpan, with a lower pan and second, smaller gasket just for the sump. Replacement of a leaking lower sump gasket is both easy and obvious, so you probably won’t find one that leaks. The upper gasket is another story; it covers more than one separable metal part on the block, and it’s significantly longer, so the chances of a leak are proportionately greater. While this gasket is harder to replace, there is also some safety factor involved since an oil leak high enough to come close to an exhaust pipe represents a small but real risk of fire. That gasket was where our 420 oozed, though onto the floor, not onto the sometimes-hot Y-pipe.
First, drain the oil from the sump. Take a close look at the drainplug and its sealing washer. These are not infinite-life components: The plug is not a short, fat bolt. It’s made of softer metal than the oilpan threads so a stripped thread calls for a new plug rather than a new oilpan. The crush-washer distorts with each use and should be replaced before it starts to allow a leak. You certainly don’t want to save a dollar or two in parts, only to have a continuing though smaller oil leak you have to explain later.
 Pitch the old oil filter, too; this is probably going to be the most complete oil change in the useful life of the car, so don’t leave any of the old stuff in the lubrication circuits. Once you have the lower sump pan and the filter off, it would be a good idea to leave a wide drainpan under the car and go do something else for about an hour. Oil is going to drip from every surface inside the crankcase about that long, and there’s no sense catching any more of it than necessary on your head.
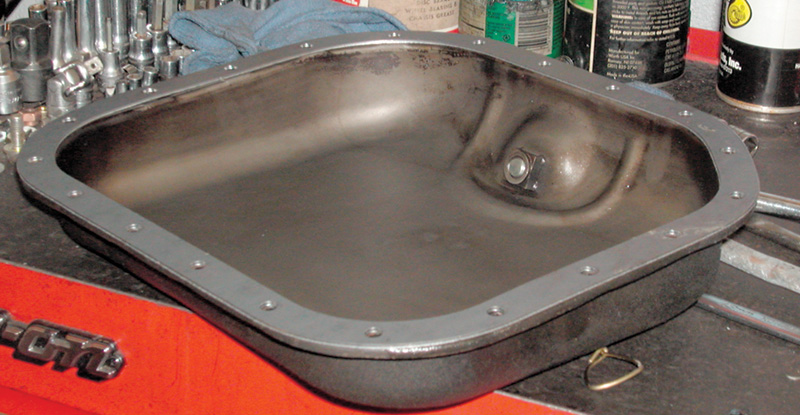
Put the sump pan in the parts washer for cleaning in the meantime. It’s amazing to see how much oil stays at the bottom of the sump even with the plug out, amazing enough to make you realize the advantages of vacuuming oil out the dipstick tube in later cars. Even on an engine that’s had careful, regular maintenance, oil changes at least as often as the book calls for, you’ll find unappealing particulates on the bottom of the sump pan. That, of course, is the very point of having a sump pan, a place to collect the worst of the impurities in the fuel, any sludge formation from cold short-tripping and whatever else you don’t want to recirculate through your engine’s lubrication system.
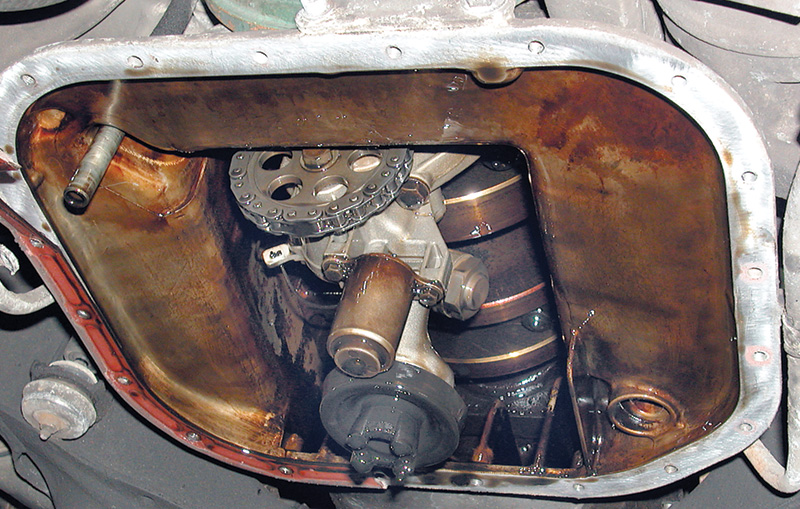
There are three difficult steps to replacement of the upper pan gasket: removal of the oil pump, removal of the air conditioner and its bracket and finally, release and support the engine from above while you detach the pan itself and snake it out. The job is tight but possible: You don’t need a double-jointed elbow or tentacles with tweezers for fingers. You don’t need to lift the engine out of the car or lower the front suspension subframe from the 126 chassis.
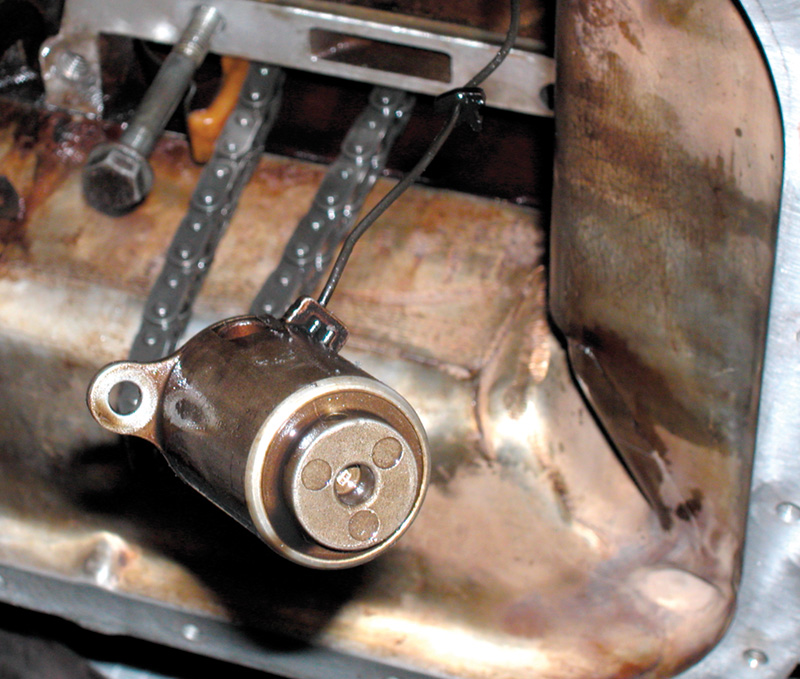 The oil level sensor, a float in a container triggering a switch that works the dash light, bolts to the oil pump. It’s important, working with the relatively robust and heavy components around the oil pump, crankshaft and oil pan, to be careful and gentle with the level sensor. You have to toggle for the moment from your heavy-duty, oil-and-steel mode to your more delicate electronic mode. As long as you’re alert to its delicacy, you can leave the sensor hanging by its wire while you replace the gasket. It’s not an eggshell, but it’s not a hammerhead, either.
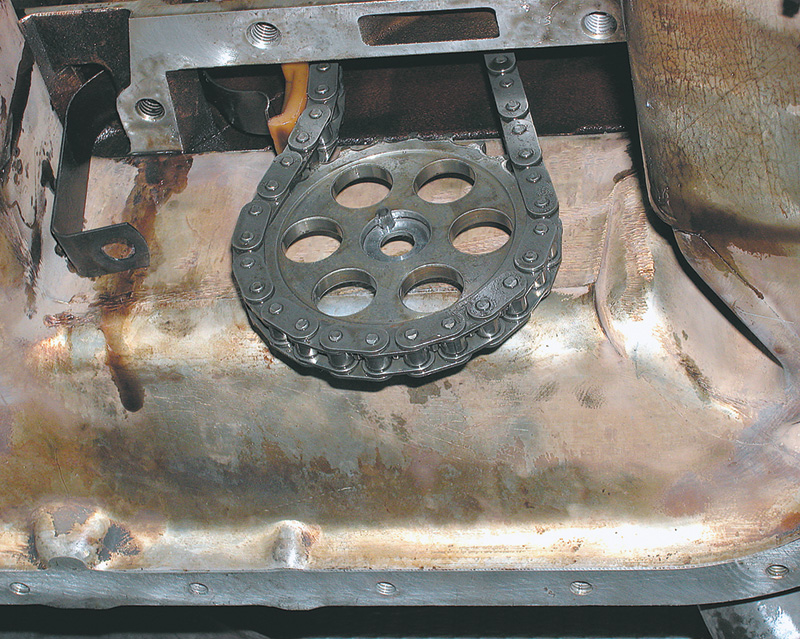 A chain from the crankshaft sprocket drives the oil pump, and the easiest way to get the pump and theoil level sensor out is to release the sprocket from the oil pump shaft first. This holds the sprocket fixed to the crankshaft while you loosen and then later tighten the nut while putting things back together, and it saves wrestling the pump around to disentangle the sprocket both out and back in. Just leave the sprocket hanging in the drivechain, if you want. There’s enough room to pivot the pan around it.
 There are a few ancillary components to separate. The AIR-injection pump and its brackets, on such vehicles as have them, can be loosened and slung from a wire in some handy position out of the way. Since you’ll have to lift the engine above the subframe crossmember, you should unbolt either the fan shroud or the radiator fan itself so there’s no plastic damage when you lift the engine. It’s a reasonable precaution, to protect your fingers and whatnot, to put a 2×4 block between the engine and the subframe crossmember once there’s enough space. This can prevent the engine shifting unexpectedly.

Inspect all the compressor fasteners carefully; there are many of them, and not all in obvious places.
On either side of the engine, you’ll find a small shock absorber/vibration damper that smoothes the torque production of the engine under low-speed loads. These need not be removed, but you should remove the nuts, brackets and rubber cushions on the lower ends of the shafts to allow the engine to rise beyond the range of the dampers. Immediately adjacent to each damper is the access bore for the engine mount bolt. Remove these bolts to allow sufficient vertical engine movement. When reassembling these dampers, don’t go beyond a reasonable torque on the nuts. You want to compress the rubber washers, not crush them. Check carefully: This may be a good time for a replacement; after all, who will check them again over the next 100K? They should be snug, but not so tight as the nut atop a suspension shock absorber.

The compressor bracket uses many bolts, not
all of them the same size and not all of them in the same orientation because it must handle vibration and resonance stresses. Make sure you have them all out before you pry it loose, and make sure it’s flush to the block and has all the bolts in place before you tighten them.
If you haven’t replaced this gasket before, what will give you more trouble than anything else is the air conditioner compressor and its bracket. There’s nothing particularly tricky about it, just extensive. Why? The engine block generates a good deal of vibration; the air conditioner compressor does the same. The combination of the two vibration frequencies could loosen bolts or crack the support bracket. Such a result would be unacceptable, so the designers sketched out a compressor bracket so robust and held by so many fasteners the chances of resonance fracture are minimal.
 But don’t make the mistake of prematurely supposing you’ve removed all the bolts and reaching for your long pry bar to pop loose the bracket. A good portion of this step in the job is careful eyeball- and finger-work, making sure there is not another bolt or two lurking around a corner in the shadows. These brackets are different for different model years, eventually changing from steel plate to machined castings. Inspect the bracket carefully and make sure all the bolts are in and tight when you reassemble things. Use an inspection mirror to make certain the matching surfaces of the bracket and the block match for a proper fit. The best way to do this is to turn in each fastener finger-tight first and tighten all of them only once everything is in the proper place.
The dipstick tube is held at the upper oilpan and by a bracket higher on the engine. You’ll find it simpler to release each point than try to worry the dipstick loose just at the bottom. While it’s unlikely you’ll be doing more than one 116/126-oilpan gasket job at a time, it’s worth knowing that there are several different dipsticks and dipstick tubes for this engine, depending on the model year. Keep the original with the engine you’re working on or there could be a problem getting and measuring the proper oil volume for the engine.

The old gasket failed right at the parting surface between the block and the rear cover. Proper positioning and the judicious use of seam sealer can reduce the chance of that happening to your work.
The main, upper section of the oil pan is held secure to the engine block with 28 Allen screws in two different sizes plus a couple that pitch in as bellhousing bolts. Most of them are directly accessible; a few require a U-joint between the socket and your extension. As with the compressor bracket, the best strategy is to carefully inspect that you have every single one out before you pop the pan loose from the block, breaking the hold of the gasket and the glue. When you’re putting the pan back in place, put all of the fasteners in loose first and tighten them all in criss-cross patterns later. A major reason for starting all the pan screws first before you tighten any is to make sure the new gasket is in the correct position.

There are four parting surfaces between the block casting, the rear plate and the timing cover. If you put a small dollop of sealer right at the joint, the chances of heat cycles gradually cutting through the new gasket are lower.
If you look carefully at the old gasket, the one with a crack that required the replacement work here, it looks likely that the gasket was pulled between the surfaces on either side of it. That stress, over many years and countless temperature cycles, allowed a crack to propagate from the inside to the outside, eventually forming a flowpath for the oil from the crankcase to the garage floor. To prevent that from happening to the gasket you install, make sure to put a bead of sealer at the parting surfaces where the block and the rear plate join, as well as the similar parting surfaces at the front of the engine where the timing cover meets the engine block. Besides sealing the joint more securely, this provides a small amount of variation in the location of the gasket, reducing chances of propagating another crack.
We think of gaskets as bonehead parts, as nothing more than paper partitions that must exist because it’s not economical to machine engine mating surfaces to perfect flatness. In unreflective moments, we may suppose that with a bit of time, a large-enough grocery bag, a ball-pein hammer and a Swiss Army knife we could make any gasket for any car.
And we could, if useful life played no role in our work. A head gasket made of newspaper might well last for hundreds of yards, perhaps a mile before the engine locked up. An oil pan gasket of the same wood-fibrous stuff might last even longer, ten or twenty times as far. Most of us, however, would like customers to get farther away than just out of sight of the shop before a gasket fails, in fact, we’d like that gasket to go undisturbed and fluid-tight to the landfill in ten or twenty years. To achieve that kind of useful life, you need the best gaskets available.
The odd thing is that neither parts cost nor availability plays much role here. The oil pan gasket we’re talking about here retails to the motorist for under $15, and you surely get it from your Genuine Mercedes-Benz Parts source for less. The oil and the filter you’ll replace in the course of the job cost much more than that. Is the factory part magical? Of course not, but it is certainly more than just satisfactory; it has passed more rigorous tests than you’re likely to imagine for a gasket.
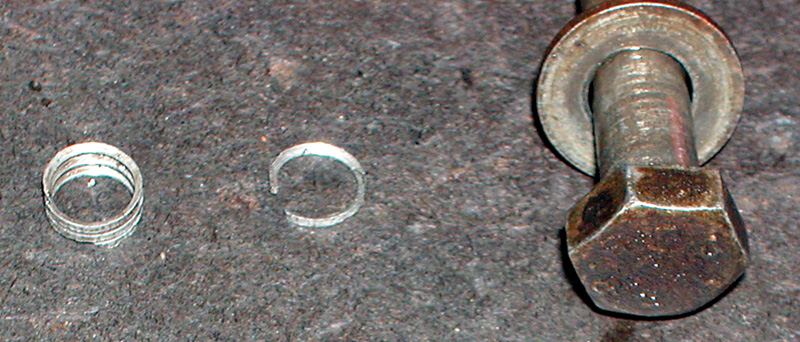
Some unwelcome spirals of metal, one of the pump fastener bolts brought out several rounds of block thread with it. The pump held until now, but it wouldn’t again without a threaded insert.
It isn’t that the factory never makes a mistake or never builds a part that lasts shorter than forever. If they did, we’d all have to turn our hands to something else. When replacing this 420’s oilpan, as the bolts for the oilpump came out, so did a few turns of aluminum thread from the block. The bolt had held securely for many years, but it surely wouldn’t without those threads doing their part, so it was time for a dose of Helicoil. There may be some times and some positions on a car when you might be willing to risk not rethreading a stripped hole, but not for one of the two-and-only-two bolts holding the mating flange between the oil pump pressure output and the block gallery. If one of them loosened once you were finished, the engine would lose oil pressure at all speeds and sustain reduced useful life.

Be careful tapping a new bore in aluminum. It’s particularly important to keep the tap exactly square with the surface, which can be more difficult in an awkward position. Clean and oil the tap repeatedly, and blow all the chaff from the hole.
If you’re a regular reader of this magazine, you know the drill, of course. Carefully bore the hole out oversize but dead straight; retap it with the special tool; thread in the insert, and make sure you torque the bolt properly according to the specs. Many rethread inserts call for threadlocker between the outside threads of the insert and the metal of the casting. A rethreaded repair is actually stronger than the original metal because the insert thread spreads the load over a wider circle of the block casting, so if the job is done correctly there’s nothing to worry about once the car leaves. Doing it correctly does take some care, though, particularly where there is an oil passage nearby. Make doubly sure there is no drilling or tapping chaff leftover in the hole. Blow it out with compressed air and then check it visually to confirm the hole is empty before going to each next step.

With the upper pan retightened, torque the pump and the oil level sensor to specifications, being careful to route the sensor wire correctly.
Putting the pan back up involves some additional steps. You’ll recall the previous gasket split presumably because of tension pulling the edges of the gasket gradually apart. Three techniques can reduce the chance of that happening for a replacement: Grease the gasket with something that will allow it to find the proper micro-position later; daub with sealer the parting surfaces of the castings where the rear engine cover fit over the pan gasket (the very point where the crack started) to insure any subsequent movement of these plates can’t start another gasket crack, and start all the pan attachment bolts before you tighten any of them, so you can draw the pan up against the block gradually and evenly, leaving no stress in the new gasket.

Lubricating the new gasket on the pan before installation allows slight adjustments once it’s in place without damage to the gasket.
Refill the crankcase with oil and prime the filter. Because so much oil drained from the engine, it will almost certainly need more before you release the car to the customer, but don’t fill it above the fill line in anticipation of this.
Disable the ignition before you crank the car for the first time after the pan gasket replacement. In fact, it would not be a bad idea to remove all the spark plugs also. The object is to reduce the wear on the bearings, which will have only the residual oil until the oil pump picks up the fresh lubricant and pressurizes the system. This step is not strictly necessary, but you’d probably do it if the car were yours, and that’s the way your customer would probably choose, even for a few more labor dollars on the bill. You won’t have to pack the oil pump with grease since it rides submerged in the oil, so there should be no need to prime it.


0 Comments