Before antilock brake systems, brake flushing was a simple, if widely ignored, maintenance procedure for most cars, including Mercedes-Benz
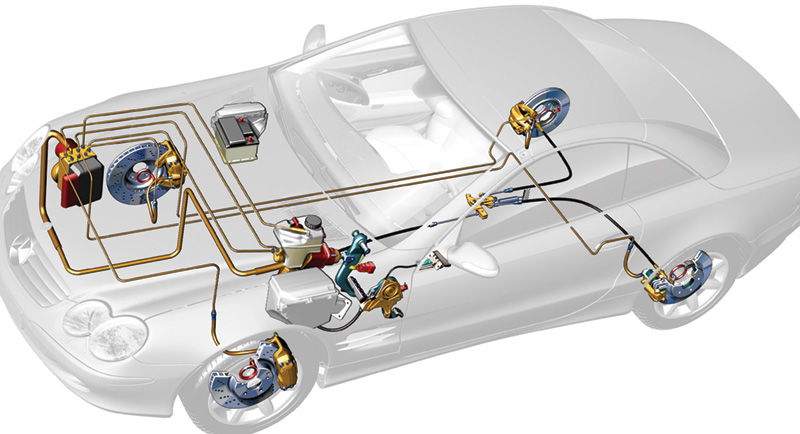
All hydraulic braking systems, from the oldest and simplest to the latest and most complex like this Sensotronic brake system from Mercedes-Benz shown in conceptual X-ray here, require the complete removal of all the air in the system to maintain hydraulic application force. They also all require periodic replacement of the fluid with new, both to remove any small debris that may accumulate and because the fluid itself changes boiling temperature over time.
Though everyone in the profession has long known that you should flush brake fluid at least every two years (ideally in the spring) to avoid moisture absorption, internal rust and a lower boiling point of the hydraulic fluid, few motorists agreed to the routine with that regularity. Most felt, as long as a dramatic brake failure or wheel lockup wasn’t present, their worst concern might be the need to rebuild or replace a leaking caliper or wheel cylinder because of that internal rust.
However, with ABS and even more so with later, comprehensive traction and stability control systems such as ASR and ESP, a car’s brake plumbing includes electro-hydraulic units of intricate complexity and corresponding cost. Vehicle performance and safety standards of such subtlety and flexibility critically require control mechanisms of corresponding subtlety and flexibility. It’s bad enough if you have to replace one of these components because of damage from an accident, but much worse if you have to do so unnecessarily, only because someone deferred the inexpensive maintenance of a regular hydraulic fluid flush. Price one of these usually very long-lived components, and you won’t need further persuasion to flush the brake fluid as routine maintenance. If it were your car, you’d do it every time, every other year, no questions asked.
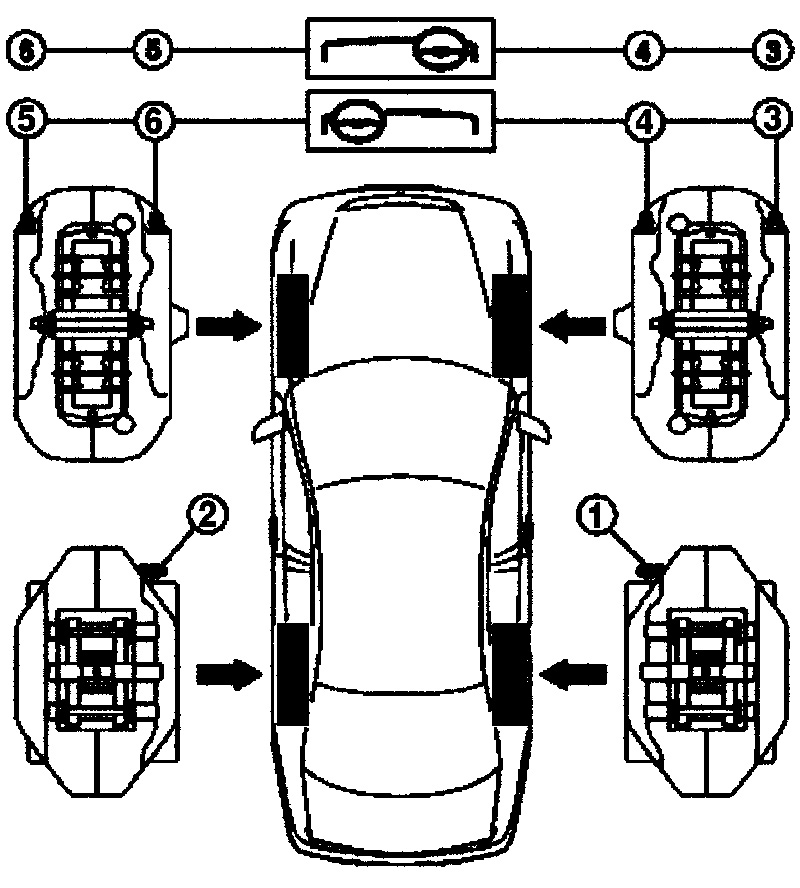
Every vehicle has a proper bleeding sequence to insure removal of all entrained air in the system. For virtually every Mercedes-Benz, start at the bleeder farthest from the master cylinder and work back closer one bleeder at a time. Make sure each circuit is flushed and without any bubbles before moving on to the next.
Traction controls, from the earliest and simplest in ABS to the latest and most complicated in ESP (except for early, all-hydraulic 4MATIC), involve hydraulic control units with valves, solenoids and hydraulic passages. As long as the brake fluid is uncontaminated with moisture, these control units can have an indefinitely long useful life. Let water in, and the car owner is quickly in the market for a replacement unit. The moisture allows internal corrosion and rust to form in the system, and there is no way to turn the clock back and remove it. Also, the ABS might not work when you need it, and there’s the question of reduced brake fluid boiling temperatures (which we’ll explain later), so this becomes an important safety issue
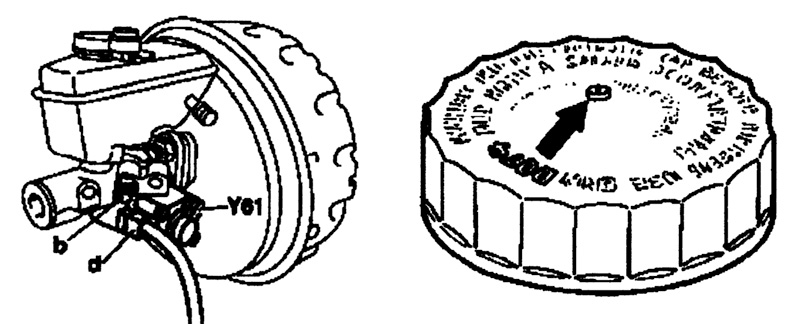
The master cylinder comes first in every brake bleed – not necessarily to bleed it unless you’ve replaced it or opened the adjacent hydraulic lines, but to draw most of the old fluid out by vacuum and replace it with fresh. On many Mercedes-Benz brake systems, check the reservoir cap to confirm the vent is open.
But there is a very economical way to avoid these problems: regular, timely brake fluid flushes. While this maintenance is not as simple as it once was, it is still relatively straightforward even for the most complex of Mercedes-Benz brake systems. Note, however, that for some of the very latest models, you cannot properly bleed the brake system without a special tool to actuate the traction control solenoids. This article contains no information about those systems. Once those cars are out of warranty, StarTuned will cover how to work on them.
Fluid Flush Step-by-Step
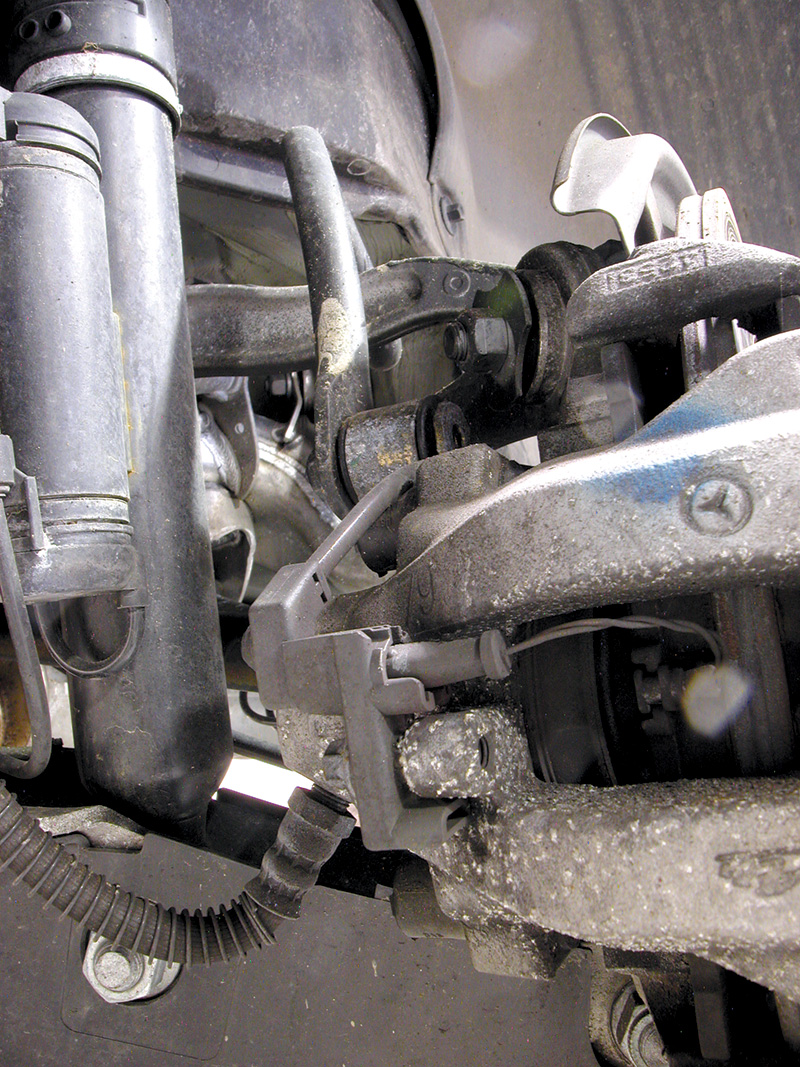
The bleed sequence proper starts as far from the master cylinder as possible, at the right rear caliper on most cars. Once you have clear fluid flowing from this bleeder, with no bubbles, you have a solid hydraulic path all the way back to the master cylinder reservoir. Then, move to the left rear.
Flushing the fluid from a brake hydraulic system aims to replace all the old fluid with new, without introducing any air into the system. That last part can be a problem whenever you’ve opened the hydraulic system to replace something, say a brake hose or a caliper. We’ll get to that in a moment.
Take care to have some water nearby whenever you’re flushing or bleeding brakes. Water works quickly to remove spilled brake fluid and in particular to cancel its notorious hostility to paint. If you just wipe brake fluid off with a rag, the thin film that’s left can still peel paint off the car later. Don’t underestimate the importance of being ready to neutralize and remove brake fluid immediately: it would take the profits from many a brake flush to offset the cost of repainting a damaged hood or fender. Safe practice is always to use a hose over the end of each bleeder to direct the fluid into a container. Some still seeps around the threads, but that ooze doesn’t spurt or gush and dribble down the side of the car.
Be alert to brake fluid’s danger to your eyes, too. You already know how quickly it can turn the skin of your fingers to zombie claws. The lens of your eye has much less callous than any finger and can die immediately and permanently with a squirt of brake fluid. Use goggles, or, even better, a full-face shield, and don’t be too lazy to hook up hoses to the bleeders and route them into a catch bottle, which you’ll typically hang from a suspension or steering component.
The first step in any brake fluid flush is to draw most of the old fluid out of the master cylinder reservoir with some sort of vacuum device. You can even use an old suction-type turkey baster for the job (make absolutely certain that it’s not contaminated with even a trace of oil, any other fluid, or dirt — just a drop of motor oil, or a fragment of debris, can ruin a hydraulic system), provided you label it so that there’s no chance anybody will ever uses it for cooking again.
Clean the area around the master cylinder cap with a shop cloth before opening to keep any damaging particles from getting in, then draw the fluid down to just above the bottom of the reservoir, where the fluid enters the master cylinder piston. Why do this? Because the point of fluid-flush maintenance is to replace the old fluid with new, not just to cycle some fluid through the system. Remove as much of the old as possible as a preliminary, and you have that much less to flush through later. What ’s more, since there’s less of the old fluid in the reservoir to begin with, the new fluid gets less contaminated.
There is a certain proper sequence to follow in flushing brakes to get all the old fluid and air out, but if you understand the reason for that sequence, you don’t have to memorize it and can flush or bleed brake systems on cars you’ve never seen before.
Fundamentally, you’ll flush or bleed the point farthest from the reservoir first, the next farthest second and so on. The only exception to this is when you replace a master cylinder and are bleeding the system with the brake pedal rather than a pressure system. You’ll have to bleed the master cylinder first to get a way to bleed the rest of the system. When you flush the farthest bleeder first — the right rear for most cars — consider what’s happening: By the time you have clean, clear, new brake fluid flowing from that (with no bubbles), you have a complete hydraulic path of new fluid all the way back to the master cylinder reservoir. The only possible remaining locations for old fluid and air are in the branch circuits to the other wheels. Bubbles are not likely to float down in a hydraulic system. You can drive them down, of course, if there’s no other way to get them out. But generally, a bubble will stay put or slowly rise. Once you flush a brake fluid hydraulic circuit and close the bleeder, though, no more air or old fluid can enter that circuit from upstream unless you push it down.
Next, you move on to the left rear, the next farthest wheel and caliper from the master cylinder. If you flushed the right rear properly, the only possible place for old fluid and air in the left circuit is from the juncture block to the bleeder, so that should be a straightforward piece of work.
When you move to the front axle, bleed the right caliper first, since it’s slightly farther from the master cylinder. Front brakes do more of the braking than rears and those wheels encounter more road debris, so check the condition of the brake rotor, pads, hydraulic hoses and metal lines, and all the surrounding hardware for security. While you’re in place, make sure all the suspension and steering parts are functional and check for any fluid leaks from the coolant, lubrication or power steering systems.
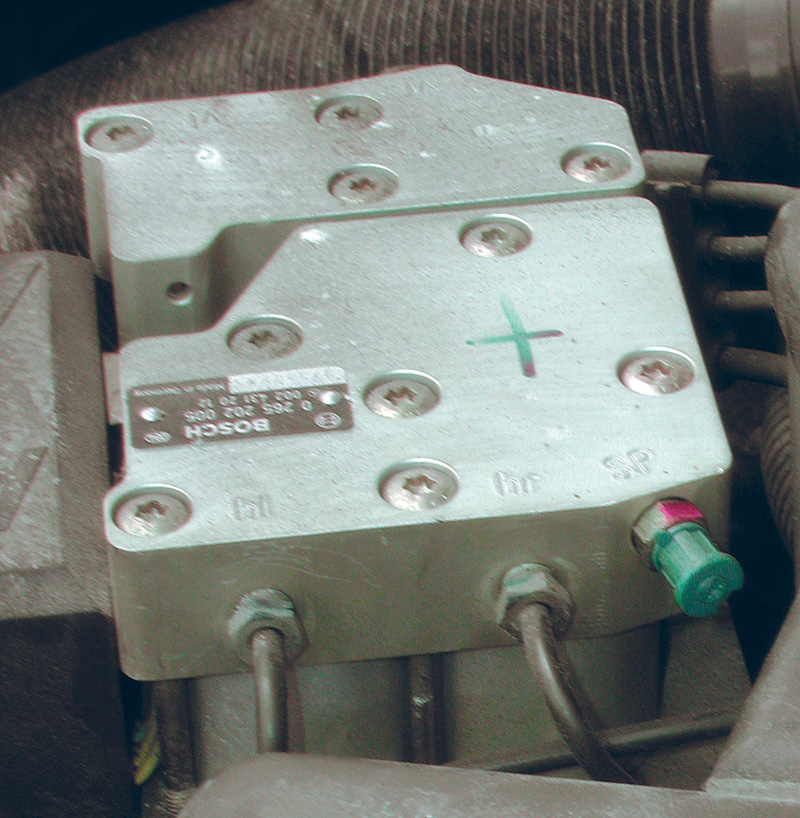
Although we aren’t covering ASR or ESP in this article, if you see a unit anything like this, you can eliminate some old fluid by doing the following: Look for the outlet marked “SP.” Sometimes, as here, it ends in a stub; sometimes there’s a pipe. In either case, set up a drain tobe to vent the fluid into a container (it will come out with considerable force and speed). Loosen the fitting and start the engine. The ASR/ESP pump comes on and forces fluid through the valve block. When there are no bubbles, close the outlet and once the pump stops turn the engine off. Top up the master cylinder reservoir and check the brakes for reliable function. You’re done flushing brakes for this car for a couple of years.
Why Flush Brakes?
“If stuff ain’t broke yet, don’t fix it” has been a mantra of traditional mechanical wisdom forever.
And like most gnarled chunks of traditional wisdom, a crackpot mantra at that, even if “everyone knows it.” Would you defer oil changes until an engine throws a rod, since there “ain’t nothin’ broke yet?” Without maintenance, there will be damage soon enough. Would you wait to check and correct tire inflation until a tire turns to ragged black strings around a smoking wheel? For that matter, would you wait until the fuel tank runs empty to fill up? Rational maintenance is “fixing stuff before it breaks.”
For most people, whatever they say otherwise about acceleration and performance, what really counts for the most important dimension of automotive performance is dependable, useful life, durability. You can’t have that by waiting for something to fail and then replacing that piece; you can’t have it by not “fixin’ what ain’t broke ” until something is. The none-too-mysterious, none-too-dramatic non-secret of vehicle durability (assuming good engineering design and construction in the first place) is intelligent, attentive, regular inspection and maintenance.
To make a Benz last, you don’t have to change the oil every Saturday morning, but you should change it before the car goes beyond the prescribed mileage limit or the recommendations of the oil maintenance reminder program. The lubricant properties of engine oil fall off rapidly after that time-point. You do have to look closely at all the vehicle components while you’re doing routine work, because that’s the only way you’ll spot a leaking shock absorber, a worn ball joint, a split suspension bushing or a cracked exhaust hanger before it becomes a “drop everything,” “right-now” problem –or worse still, a road-side breakdown or even an accident.
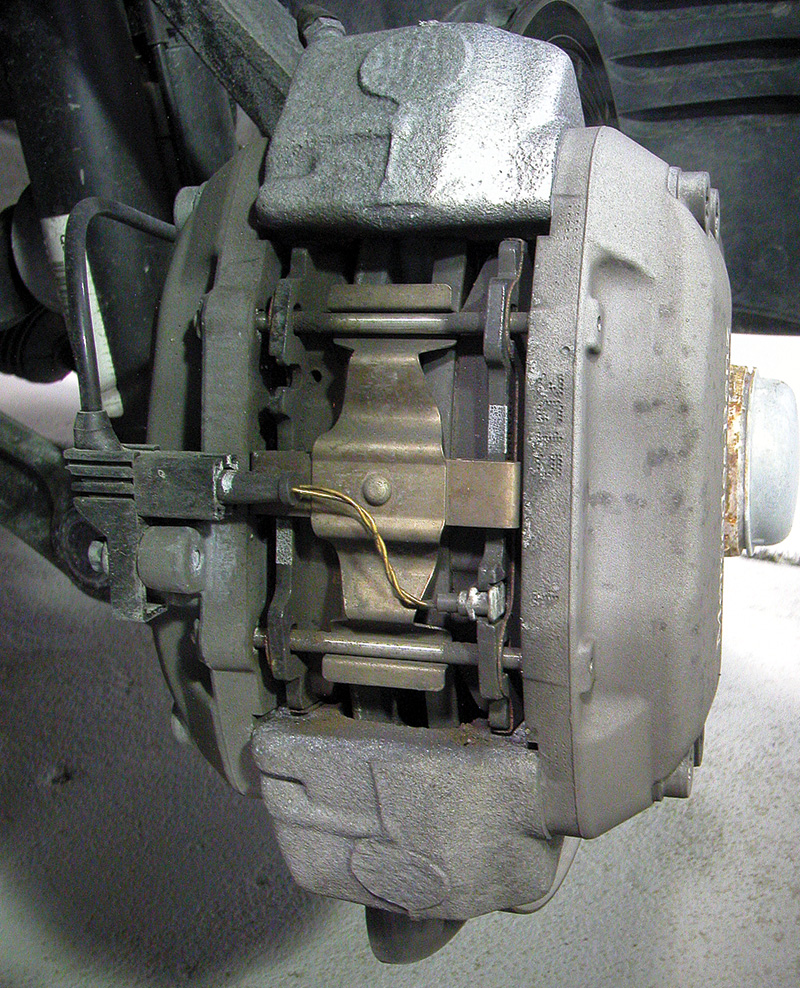
Bleed the front calipers next, keeping in mind that some late-model cars have more than one bleeder on the front calipers. While you’re at work, carefully inspect pads, hardware and nearby suspension components. Don’t wait for something to break.
The main reason brake flushing falls into this routine-maintenance category is that brake fluid is hygroscopic: It draws moisture out of thin air. Since there’s no visible change, this is very hard to believe unless you were to test it –but just take our word for it rather than run the actual test, which is dangerous since the fluid is flammable and could (with some difficulty – its flashpoint is high) catch fire under extreme conditions. To reiterate: DO NOT ACTUALLY PERFORM THE THEORETICAL TEST WE ARE ABOUT TO DESCRIBE AS IT WOULD PROPOSE A FIRE HAZARD. JUST USE YOUR IMAGINATION.
Here ’s how to run the test in your mind as a thought experiment: Imagine that you’ve got a cup or so of leftover new brake fluid (you don’t save it, of course, because you use a fresh, unopened new bottle for each job unless you have one of those special, sealed-pressure flushing machines or bleeders — a very worthwhile purchase, indeed), and you pour it into a beaker over heat and measure its boiling temperature. Good quality brake fluid boils somewhere between 500 and 600 degrees Fahrenheit. That’s pretty toasty, but the friction surfaces of brake disks and pads get very much hotter, conducting much of their heat through the piston and caliper to the fluid.
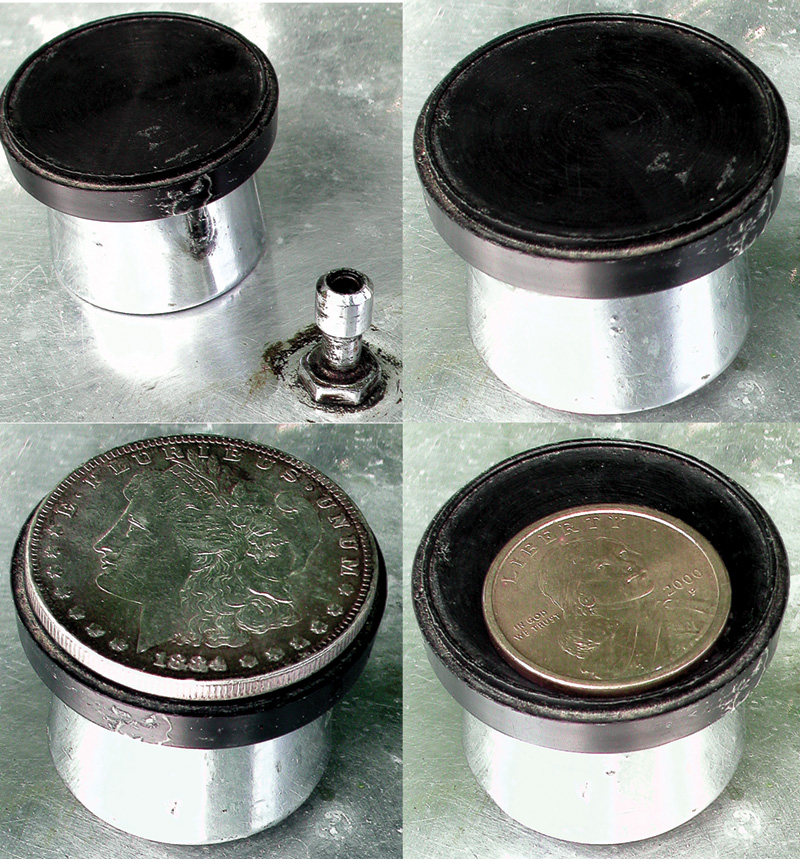
A pressure canner with the weight removed from the steam vent boils water at 212 degrees at sea level. Put the weight on, and the boiling point rises to about 240 degrees. Add some extra weight (the 2000 Sacagawea dollar), and the temperature rises to perhaps 250. With the still heavier 1884 Liberty dollar, the temperature must rise to above 260 before the pressure (and thus the boiling point) rises high enough to lift the weight and vent the steam. You’ll notice, we didn’t actually tamper with an active steam-pressure safety release because that would be dangerous. Neither should you. The point is the correspondence between boilpoint temperature and vapor pressure. This correspondence is just as true for brake fluid in a brake caliper as for water in a pressure canner, but at higher numbers.
Now, suppose you left the rest of your sample in the bottle, open or cap-ajar, for a week or so (if you ever actually leave brake fluid around for any reason, put it out of the way so there’ll be no paint or other damage if someone bumps it over), and then imagine repeating the conceptual boiling-point test. The fluid would look identical. But it would start to bubble at just above 300 degrees. What happened over that week or so? The hydraulic fluid absorbed moisture from the air, and it only needs to absorb about three percent of its volume to drop the boiling point several hundred degrees. The now-dissolved water begins the lower-temperature boil. The same absorption occurs (unavoidably but much more slowly) in the brake system, drawing moisture around the piston seals and reservoir cap. It can happen very quickly, however, if a car in the work bay sits with the cap open for any appreciable amount of time on a humid day.
So? Big deal. What’s the difference? Who cooks brake fluid in a pot? Wrong questions! Ask instead, what boils brake fluid in a car and what happens then? Let’s go back to the hot friction surfaces of the pads and disks, the source of all the heat. The heat travels, mostly by conduction, but partly by radiation, to the calipers and the brake fluid inside them.
Let’s suppose the brake fluid temperature exceeds its boiling temperature in a caliper during an extended, hard brake application, say down a long mountain slope. What happens? The surprising answer is, at first, nothing. Brake fluid, like all fluids, has a boiling point at a specific pressure. When you boiled the sample in a pot, the ambient pressure was ordinary atmospheric, about 14.5 psi or 1,000 mBar, at sea level. We speak of water boiling at 212 degrees, but that’s at the same sea-level atmospheric pressure.
What is the boiling point of water in a pressure cooker? It depends how much pressure there is. For reasons of safety (we don ’t want scalding steam bombs exploding in kitchens), most pressure cookers release steam at 15 or 20 psi above ambient atmospheric. The water in them boils at perhaps 250 or 260 degrees. But at 240 degrees under the same pressure, it’s not boiling. In fact, pressure and temperature correspond directly up to the temperature/pressure at which the safety release weight starts to dance on a plume of steam. Use a heavier weight, get a higher temperature. And vice-versa. That’s why people at the top of the Rockies have to use pressure cookers to cook potatoes – their water boils at about 185 because of the low atmospheric pressure present at their altitude, but potatoes take hours to soften at that temperature.
What would happen if you were foolhardy enough to release the pressure with the water at, say, 240? (DO NOT ACTUALLY TRY THIS — IT IS ANOTHER THOUGHT EXPERIMENT). Suddenly it boils furiously – explodes, actually. That sudden, superheated steam release would be a very dangerous experiment, one to avoid strenuously because of the serious risk of scalding. You wouldn’t be able to re-cap the steam blast without burning your hand. Let us repeat: All of our steam pressure comments here are about thought-experiments – don’t actually run them yourself. Superheated steam can cause much more tissue damage much faster than open flame.
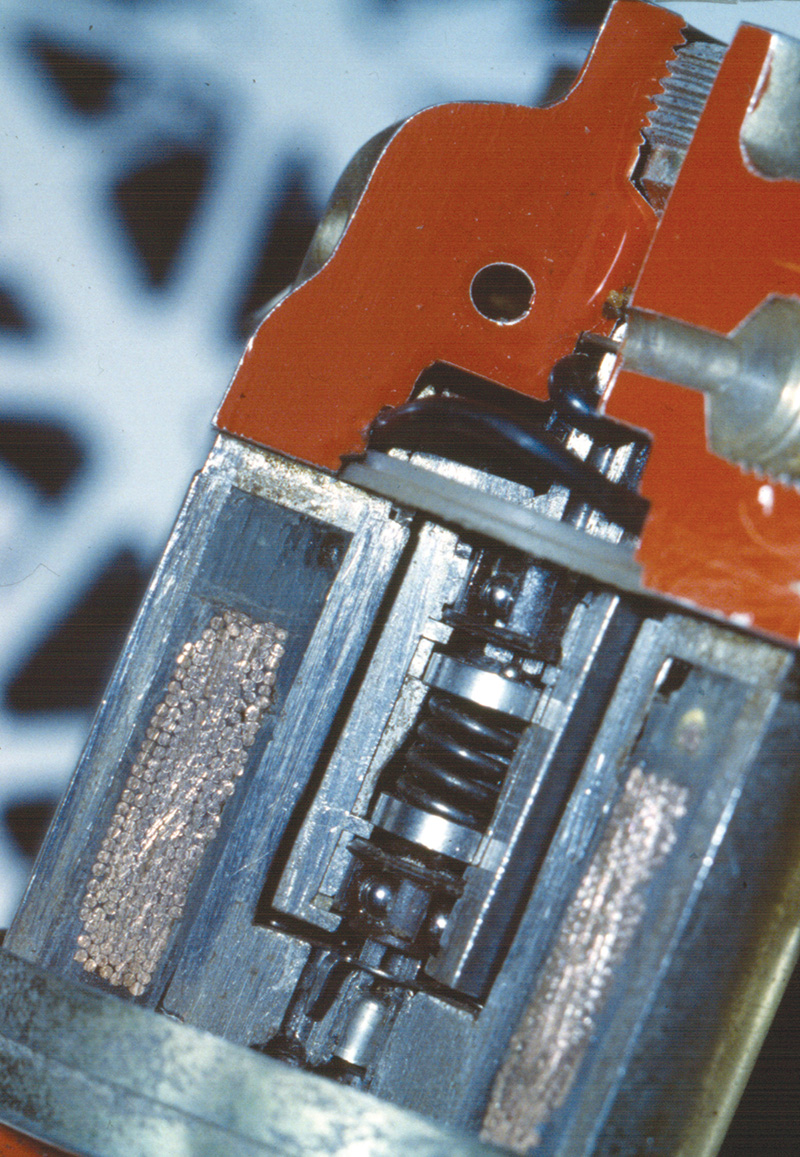
The sophisticated electronics of ABS won’t be able to do their job if the tiny hydraulic passages and the electro-hydraulic components are gummed up.
Now think about the hot brake fluid in the caliper during a sustained, hard brake application. Let’s assume the temperature also goes above the fluid’s boiling point at atmospheric pressure – let ’s even assume it goes far above. But the fluid in that caliper just then is most certainly not at ambient, atmospheric pressure; it could be as much as 1,500 psi higher, not just the dozen or so psi you can get in the canning pot with Sacagawea or Lady Liberty jiggling on the steam weight. It all depends how hard the driver can press the brake pedal. Brake fluid doesn’t boil at that high pressure. But next, the driver reduces or releases pedal pressure, or he attempts to pump the pedal, or the ABS cycles the pressure down to prevent an imminent wheel lockup. You see what must necessarily happen. Now, at the exact moment of pressure release, brake fluid in the caliper boils furiously. The boiled fluid blasts back through the lines toward the master cylinder. Now the caliper and adjacent brake lines change from an incompressible hydraulic system to a spongy pneumatic one. Now, instead of the tons of clamping force you could apply hydraulically between pads and caliper, you can only deliver pneumatic ounces. Now you’ve effectively lost most braking power and can’t slow the car. Now, you have serious brake failure that can only correct itself when the system cools.
Unfortunately, that may not happen in time to avoid an impact. If you still have half a mountain to descend without brakes, you may tragically discover the control limits of engine braking and steering traction alone. Now the economy and convenience of skipping a regular brake fluid flush may not loom so large.
Let’s put the question more precisely: What is the dynamic difference between a hydraulic and a pneumatic system? Don’t be misled thinking about air brakes on big trucks, which are technically, of course, pneumatic, but in a substantially different sense. Those brakes use huge pressure diaphragms – half a square foot or more, not the inch or two square at the typical brake caliper. And they don’t use a few ounces of applied pressure, but as much as 120 psi. And they don’t apply that pressure directly to the friction surfaces; instead, they push levers that rotate cams that, in turn, pivot the shoes – all of this with mechanical advantage compounded multiple times by leverage at each juncture. So, truck pneumatic airbrakes can apply many tons of force between shoes and drums.
But a car with hydraulic brakes overheated to the vapor point can barely apply the brakes at all, with mere ounces of clamping force, not even enough to resist turning a wheel by hand. The pedal will sink to the floor alarmingly, and you’d have to pump it frantically to re-pressurize the system above the boiling point again. That is serious brake failure. We flush the brake system every other year with fresh fluid so we can read about that kind of bone-chilling occurrence rather than experience it ourselves.
Let’s consider the simplest possible hydraulic circuit: a piston, a tube and another identical piston at the other end, all filled with fluid. Push the drive piston an inch, and the driven piston moves an exactly corresponding inch. Or does it? What if there’s a load or some other resistance at the driven piston? Well, that resistance will be equal at the drive piston, so it will resist drive-piston movement in exact proportion to the resistance at the driven. If the driven piston encounters an immovable object halfway through its travel, so does the drive piston, and it stops. This relationship endures perfectly up to the limits of the tube’s and piston seals’ capacity to hold pressure, and the resistance corresponds to the relative surface of the working hydraulic face of each piston (so a drive piston one-inch square can push a two-inch driven piston half its travel distance with twice its own force, or a half-inch driven piston twice its travel distance with half its own force).
So how much pressure can an inch of drive piston travel build? It could be thousands of psi, if there is sufficient resistance and the system can hold it. A hydraulic system is almost as rigidly mechanical as if the pistons were either end of the same steel rod. Think diesel injection lines, which routinely transmit pressures of several thousand psi.
Now consider a pneumatic system, exactly the same plumbing as before, but the tube and working volume of the pistons are full of a gas instead of a fluid. The fundamental difference is this: A gas is compressible; a fluid is not. A fluid can carry pressure hydraulically, of course, but it does not itself compress. Do not mistake the capacity to carry pressure with compressible – the hydraulic fluid has the first without the second; the pneumatic gas has both, but not in a parallel way.
How does this apply to a brake system and fluid flushes? The brake system is, of course, hydraulic. But if nobody flushes the fluid, it eventually absorbs enough moisture through the piston seals and master cylinder cap to boil at 300 degrees. The brakes can reach that temperature quickly in a hard deceleration, and if they do, they’ll boil the fluid in the caliper into vapor. A sealed system with both fluid and vapor in it is essentially pneumatic, because the vapor has the critical property of compressibility.
What happens then is an effective reduction of pressure at the calipers. The length of the bore limits master cylinder travel, and if there is suddenly a lot of vapor in the system at the calipers, it is impossible to increase or even sustain the clamping pressure at the pads without pumping.
So, flush the brakes by the recommended schedule. In the case of Mercedes-Benz, that’s every two years in the spring. Not only does the motorist save the cost of a hydraulic control unit, he or she may still be alive next time to have the job done again. And the next time someone tells you “Don’t fix it if it ain’t broke,†point him or her to a mangled wreck. That could be the result of his or her suggestion, whether he or she understands it or not. Don’t wait until “somethin’s broke.” You, not the motorist, are the professional who knows what to do. Tell your customers what’s needed, and expect them to take what you say seriously.


0 Comments