By Phil Fournier

I don’t know about you, but I don’t much enjoy working on my own vehicles. I’m pretty faithful about my preventative maintenance, but I don’t like it when lights show up on the dash, indicating I’ve got to fix something. So, when the SRS (Supplemental Restraint System) light came on in my wife’s 2000 Honda Accord, I conveniently back-burnered the job (for 191 starts according to the scan data). But my conscience started bothering me about letting my wife drive around with a (possibly) non-functional air bag, so I decided to make it into a learning experience. This article is the result of that OJT.
Smarter and Smarter
First off, I decided it wouldn’t hurt to do some research on air bag systems and their evolution over the years. I learned that much has changed since air bags were first introduced, probably due to injuries suffered by drivers as a result of the violent inflation that was supposed to protect them. My wife’s Accord was built with only one of the improvements, namely a two-stage passenger side air bag. This has two igniters triggered by the SRS module. The main input to the module for the igniters is the passenger side seat belt switch. Depending on the speed of the vehicle, the force of the impact, and whether or not the passenger has fastened his or her seat belt, the SRS module decides whether or not to trigger both igniters simultaneously, and perhaps to fire only the passenger side and not the driver’s side. Optional on this model were side air bags (not on my wife’s), and their presence can be determined by an identifying tag on the side of the seat. Later systems added gas cylinders with igniters on the shoulder strap, and, in some cases, the lap strap of the belt assembly. These added to the sophistication of the assembly by giving the SRS module the ability to take the slack out of the seat belts. Naturally, the price to replace all of this single-usage stuff in the event of a collision beggars the imagination, but it beats the potential medical costs, or, worse, the cost of a funeral.
Bogus Code
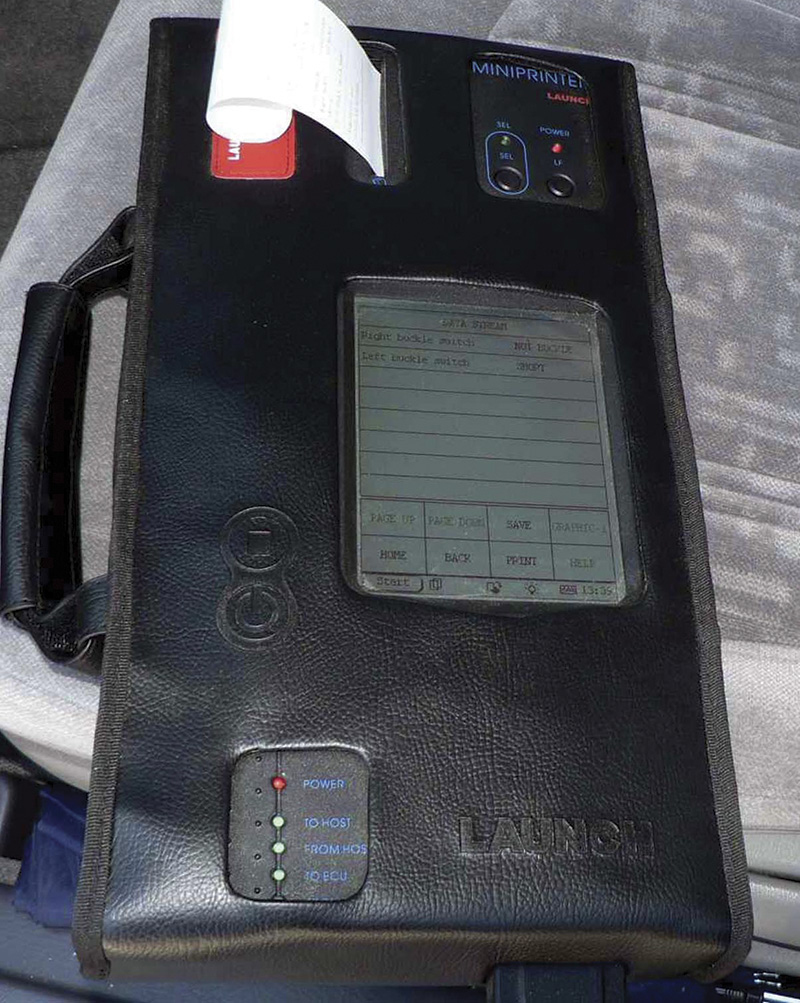
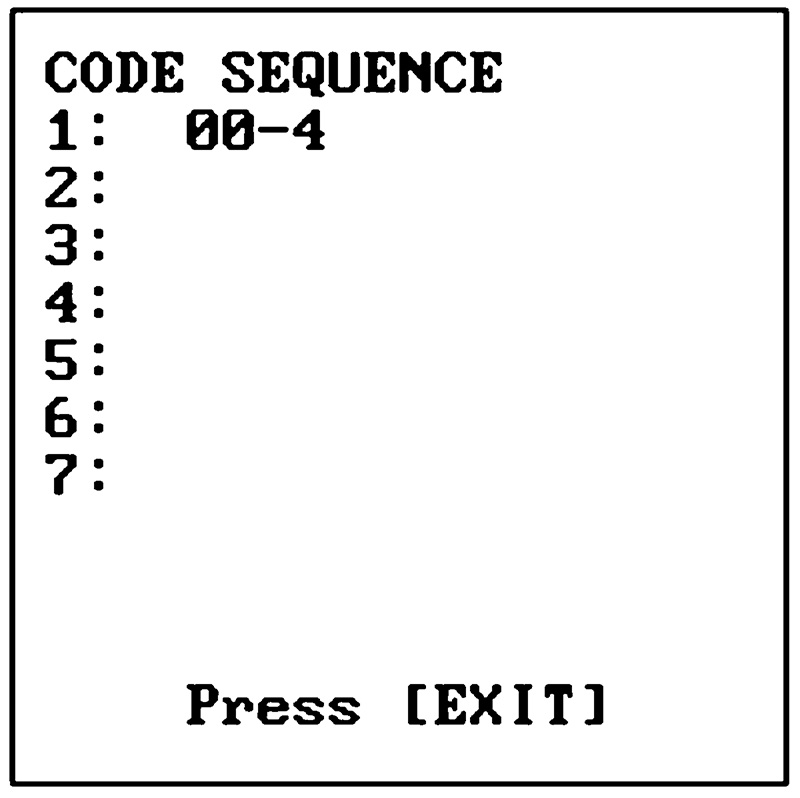
Troubleshooting faults in the air bag system, according to the information in Alldata, requires a factory scan tool. As it turns out, this is not really true. In fact in this case the factory scan tool was virtually worthless. The diagnostic procedure calls for connecting a MasterTech (Honda was still using the Vetronix tool through 2003) and pulling trouble codes. I decided to try out my Launch, a Chinese-built aftermarket scan tool that has proved very useful for non-OBD II applications on import vehicles, such as resetting oil change lights on Euro cars, shutting off air bag lights accidentally turned on during repairs, and so forth. I connected the tool to my Honda and extracted a non-existent code 00-4. When I couldn’t find any such code on the chart, I hooked up my MasterTech with the Honda cartridge, only to find that it recovered the same bogus code. So, I decided to do a little Internet research.
First, I went to the iATN archives and found a variety of failures and suggestions on pulling codes without a scan tool. But there were two or three different suggestions made, which I later found out depended on whether the car was an Accord or a Civic. At this point I looked up the appropriate section in the Identifix online database that I subscribe to. There I learned that through 2001 the Civic would flash the SRS light to read out codes when the SCS connector (right side of the dash under the glove box) was shorted. In the Accord, the appropriate wire is brown, usually on pin 9 of the ALDL or DCL. I grounded pin 9 and turned on the key. To my pleasure, the code that flashed out (9-3) corresponded to the one inexpensive part in this system, the driver’s side seat belt switch.
Wiring
Before I got too excited over this apparently easy fix, I naturally figured that I should confirm the SRS module’s self-diagnostics. I pulled the wiring diagram, which reflected both the standard system with only two air bags (three total igniters) and the system with side airbags, which incorporates several extra sensors including a sophisticated sensor in the passenger seat to determine the height and weight of the passenger (the OPDS or Occupant Position Detection System). I never like it when wiring diagrams are “multi-system,†but there seemed to be no help for it as I checked three different sources, including the Honda website, and all of them had substantially the same diagram. At any rate, the seat belt switch circuit was the same on both systems, with a three-wire connector under the respective seats connecting to the seat belt buckle assembly. I figured that the scan tool might help me by giving me data PIDs for the seat belt buckles, and in fact the Launch showed PIDs (left and right seat belt buckles), but they appear to be bogus since their data did not correspond with reality. No PIDs showed on the MasterTech for the seat belts.
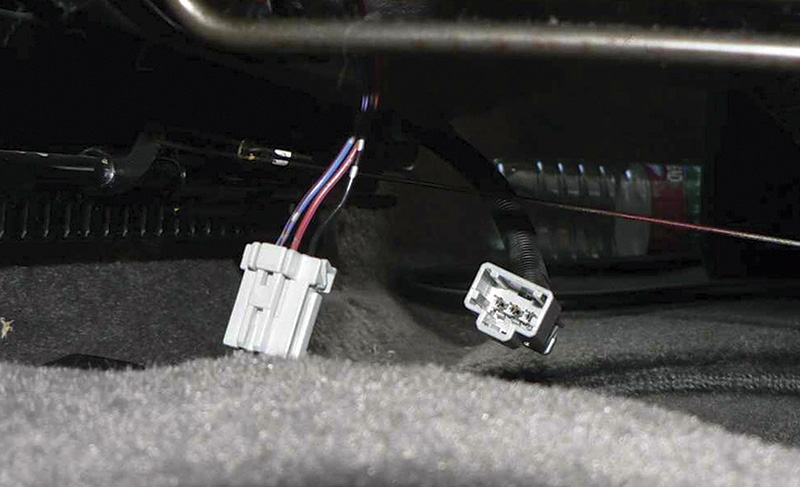
The seat belt buckle switch connectors are easy to reach, if you don’t mind standing on your head.
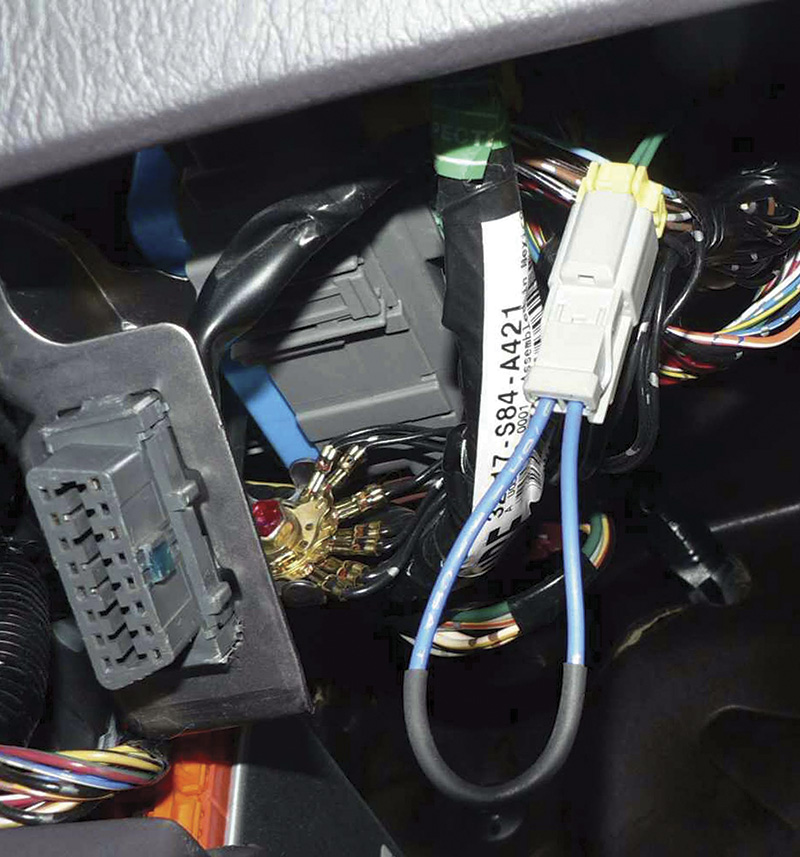
At this point I decided to attempt to follow the factory flow chart, a practice I normally avoid as the charts usually have me fiddling with an ohmmeter instead of a voltmeter. This chart was no exception. First, it told me to attempt to clear codes via the scan tool or the MES (memory erase connector, a two pin connector located in the fuse box above the driver’s feet). I found the code would not clear with the scan tool, so I had to use the MES connector and a special jumper supplied with my MasterTech (see the code clear procedure at the end of the article).
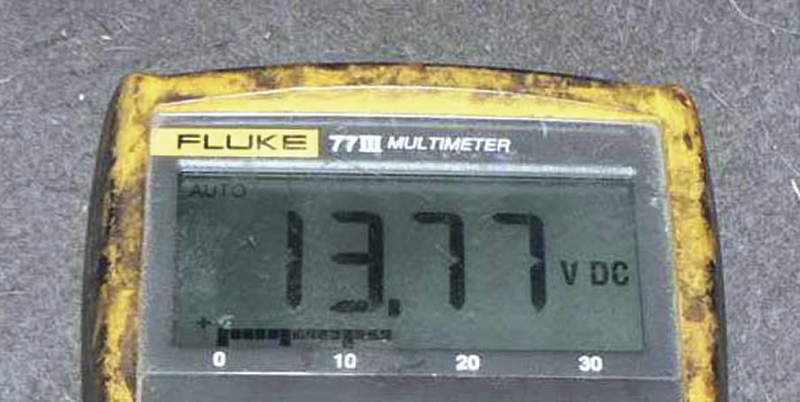
The light came back on after several buckles and unbuckles. Next, it wanted me to use an ohmmeter across the seat belt buckle switches. There are three wires on these buckles, and the switch is a toggle between pins 1 and 2 or 1 and 3, depending on whether the buckle is fastened or unfastened. So, they wanted infinite resistance between 1 and 2 buckled and 1 and 3 unbuckled, and only one ohm of resistance between 1 and 3 buckled and 1 and 2 unbuckled. If you find that confusing and cumbersome (head upside down reaching under the seat with ohmmeter leads trying to connect to tiny pins), then you know why I prefer testing with voltage drop, circuit connected and live. After finding that the resistance was okay, I back-probed the wiring. I found pin 3 had zero volts buckled and 4.5 volts unbuckled. I moved to pin 2 and was disconcerted to find that this one toggled between battery voltage buckled and 0 volts unbuckled.
I suspected I was on to something. The seat belt assembly had passed all the tests, but then again, the code was an intermittent. Second, I had a funny voltage on one of the two wires. So I switched to the passenger’s seat belt switch. Disconnected, both of those wires had 4.5 volts on them. Connected, they toggled to zero volts as indicated. Then I noticed that the “Fasten Seat Belt†warning light worked with the driver’s seat belt, going off when the driver buckled up just like it was supposed to. I disconnected the three-wire connector under the seat and, bingo, the “Fasten Seat Belt†light went off. I concluded that the battery voltage was coming through the filament of the seat belt light even though the wiring diagram does not show that wire. The “Fasten Seat Belt†light finds a ground through that same switch! So, the battery voltage on the one wire was a red herring.
Eureka
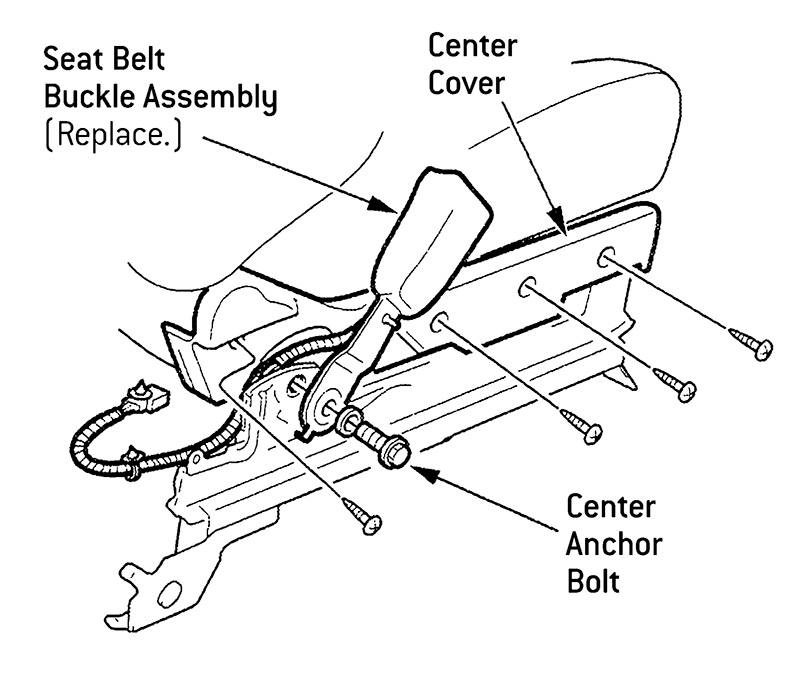
The fix itself was simple. But, as is often the case, making sure before you replace a part wasn’t.
I went back and examined the wiring diagram and put on my thinking cap. This SRS module is looking for one of the two wires to be low at all times, buckled or unbuckled. It has no way of knowing if there is anybody sitting in the seat, and no back-up for the position of the seat belt. The only way it could set the code is if it sees both wires with high voltage (above some kind of threshold), or low voltage at the same time. This could only happen if the seat belt switch goes open or the wiring loom has an open or short. I concluded I should watch the voltage on both pins 2 and 3 and see if they both went high or both went low while the seat belt buckle was actuated. Sure enough, after multiple attempts both stayed high and I had nailed my problem.
What made this job difficult was the following: Nowhere could I find information that told me the voltage on pins C3, C6, and C7 was supposed to be 4.5 volts with no load, and that pin C4 has battery voltage through the “Fasten Seat Belt†light. Also, I couldn’t tell from reading the factory scan tool that I had not really cleared the codes. The Chinese scan tool, however, made me suspicious because it complained of a failure to communicate during code clearing. If I had only had the factory flow chart to go by, I don’t know if I would have ever figured out what was wrong. The secret is to be able to trust your training and your intuitive thinking capacity because much of the time a factory flow chart is going to leave you short on information.
A couple of tips for your restraint system troubleshooting pleasure: Code flashing is possible right up through 2005, although it gets a bit dicey since you can’t flash letters, only numbers. What this means is that you will probably have to spring for a scan tool that is Honda-capable soon if you want to do something more than engine controls with a generic data stream. Second, it helps a lot to have the proper connector for clearing codes with the MES. The procedure for doing it really means what it says — in four-second intervals.
Clear Code Procedure With the MES
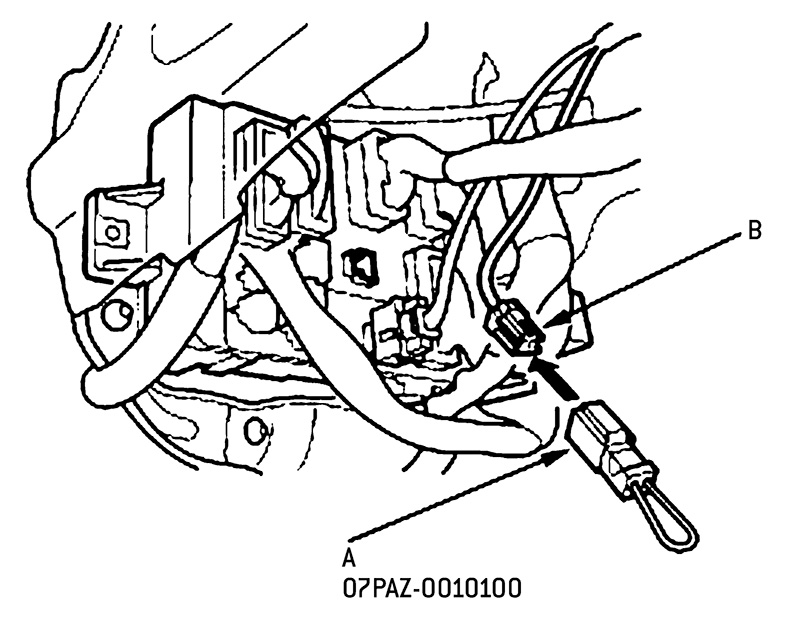 Jump the connector.
- Turn the key on.
- In three seconds, the SRS light will go off.
- Remove the jumper within four seconds, and the light will come back on.
- Reconnect the jumper within four seconds, and the light will go off.
- Remove the jumper again within four seconds, and the light will blink twice.
- Turn the key off, and wait 10 seconds before turning the key back on.

0 Comments