By Vince Fischelli

Don’t overlook charging voltage – it’s too important. Obviously, it’s important because the “generator†(now becoming the standard term even though most of us think of it as an alternator) provides the charging voltage (“Eâ€) and charging current (“Iâ€) to operate all electrical and electronic circuits while the engine is running. At the same time, the generator must have enough power left over to keep the battery up.
Think about it and you’ll realize that the battery doesn’t provide any electrical power to operate the vehicle while the engine is running as long as the generator is doing its job. There are only two roles for the battery while the engine is running:
- to provide a voltage reference point to assist the generator in maintaining the correct charging voltage for a given ambient air temperature
- to allow itself to be recharged.
Should the generator fail to produce the electrical power required, the battery has to step up and relieve the car’s electrical famine, powering the ignition and fuel systems until the car can reach a repair facility. These days, the car can’t be driven very far on battery power before there is a complete electrical failure. It’s time to get out and push.
But there’s more to the story. Properly monitoring generator output becomes a very important parameter to ensure a car’s overall electrical and driveability performance. Unfortunately, not enough attention is paid to this when diagnosing electrical and driveability problems. Many times it is ASSUMED the charging voltage is within proper limits because the charge indicator on the dash is not ON and there’s no DTC for the charging system. Some techs seem to think that the maximum current a generator produces indicates everything they need to know about the charging system. Both are wrong.
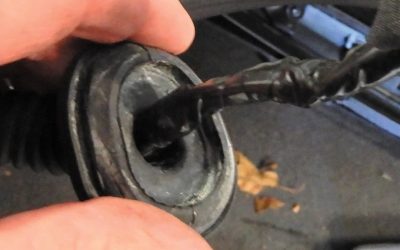
Let’s start with Figure 1. The components for the charging system are shown connected together. The generator and battery are drawn to look like their actual appearance rather than as traditional schematic symbols.
On the left a “box†is shown, “All Vehicle Electrical Loads†which is sufficient for the purposes of this article to represent the entire electrical system as it receives electrical power from the generator/battery (B+) and ground (B-). The basis of understanding electrical systems is Ohm’s Law, where “E†is voltage in volts,“I†is current in amps and “R†is resistance in ohms. So, E = I x R.
As we explore charging voltage (“Eâ€) and charging current (“Iâ€) issues, it’s crucial to understand what the charging voltage is and how it can be anticipated to vary under changing driving conditions. It’s also important to understand generator/charging current and how to correctly test the charging “I†apart from charging “E.†We must test charging voltage and generator current separately. They are not the same parameter, but two distinct tests of charging system performance. Testing one, either charging voltage or charging current, does not verify the other.
All tests should point to whether or not the charging system is functioning properly in the shortest possible time with no errors in diagnosis.

Figure 1
Basic VOLTAGE Concepts
Generator testing can be performed on the car without the need for expensive test equipment. Simply start the engine and do some simple voltage and current checks and you can determine if the charging system is okay. All you need is a few minutes, a DMM, and a current clamp capable of reading from 1.0-200 DC amps.
Before we start testing, however, we should review charging system basics by asking some pertinent questions. This will give you an opportunity to evaluate your knowledge. Note that some questions focus on charging voltage (“E†in volts) and others focus on charging current (“I†in amps). Don’t get charging voltage and charging current issues confused as you answer each of the following seven questions:
| Question #1: | Which of the following two options is the better way to test a vehicle’s charging system?
(1) Test generator voltage (“Eâ€). |
| Question #2: | What effect does high ambient temperature have on generator output voltage (“Eâ€)? |
| Question #3: | What effect does low ambient temperature have on generator output voltage (“Eâ€)? |
| Question #4: | What effect does high electrical load have on generator output voltage (“Eâ€)? |
| Question #5: | What effect does high electrical load have on generator output current (“Iâ€)? |
| Question #6: | What effect does low electrical load have on generator output voltage (“Eâ€)? |
| Question #7: | What effect does low electrical load have on generator output current (“Iâ€)? |
Got you thinking? Good.
Answers that Make Practical Sense
Question #1: Which of the following two options is the better way to test a vehicle’s charging system? (1) Test generator voltage (“Eâ€). (2) Test generator current (“Iâ€).

Yeah, we know. You’ve been seeing this graphic representation of Ohm’s Law ever since high school. That doesn’t make it any less helpful in understanding the essential electrical relationships, however.
Answer #1: Testing the charging voltage (“Eâ€) is the best way to verify the condition of the generator and the charging system. It’s important to differentiate between voltage and current tests when discussing generators and testing charging systems. Voltage follows current, not the other way around. To have generator current, you must have generator voltage. Without voltage there is no current. You can’t get current to flow if there is no voltage to push/pull electrons through circuit. You can’t get charging current from a dead (0.0V) generator. That’s why we focus first on the charging voltage when testing the system.
Test the generator by monitoring the output voltage under all operating conditions of the vehicle’s electrical system. If the electrical loads are drawing their normal load current and the generator output voltage is within the proper range the generator is doing its job. You have verified that the correct charging voltage is present and all vehicle electrical loads are receiving the proper current by their correct operation. The actual total current the generator is producing is not the issue. The real issue is the charging voltage. If the electrical loads work and the charging voltage is within acceptable limits, the current has to be there if the loads are operating properly. It’s Ohm’s Law, and Georg Simon Ohm knew what he was talking about when he stated E = I x R.
Question #2: What effect does high ambient temperature have on generator output voltage (“Eâ€)?
Answer #2: High ambient temperatures lower generator output voltage (“Eâ€) because the battery charges easily when warm. If the charging voltage did not decrease, the battery would be severely damaged from overcharging and overheating. The only reason the charging voltage changes with temperature is to meet the battery’s charging needs, which decrease as ambient temperature rises.
Question #3: What effect does low ambient temperature have on generator output voltage (“Eâ€)?
Answer #3: The opposite applies at low ambient temperatures. Batteries don’t charge very well when cold, so the charging voltage rises in cold weather to compensate.
Question #4: What effect does high electrical load have on generator output voltage (“Eâ€)?
Answer #4: High electrical load lowers generator output voltage. It’s just like placing a load on a battery and watching battery voltage decrease. If the electrical load is very heavy, charging voltage may be lower than normal, which indicates weak output that will result in an undercharged battery.
Question #5: What effect does high electrical load have on generator output current (“Iâ€)?
Answer #5: High electrical load increases generator output current and generator heat increases.
Question #6: What effect does low electrical load have on generator output voltage (“Eâ€)?
Answer #6: Low electrical load decreases generator current, which allows generator output voltage to rise to the set point determined by the voltage regulator.
Question #7: What effect does low electrical load have on generator output current (“Iâ€)?
Answer #7: Low electrical load on a generator lowers generator output current and generator heat decreases.

Figure 2
Testing “Eâ€

This high reading with the engine off is the effect of a recent, and temporary, surface charge.
The general idea is to measure the charging voltage at the battery terminals as shown in Figure 2. The battery terminals provide more convenient connection points than trying to attach test leads to the generator.

Hold rpm at 1,500 while performing the voltage tests.
Once the DMM is connected, load the charging system by turning ON selected electrical loads, then see how low the charging voltage drops with each load. If the generator’s strong, it’ll maintain sufficient output voltage under the vehicle’s full electrical load. Next, take the load off the generator by turning all electricals OFF and let the output voltage find its normal high charging voltage limit to make sure the voltage regulator is doing its job. The following simple steps will help you evaluate good/bad charging system voltage:
1. Connect DMM test leads to the battery terminals. Battery open circuit voltage is the first reading obtained. It should be very close to 12.66V. It may be slightly higher in the range of 12.80-13.00 volts if the engine has been running in the last few hours because of normal positive surface charge. If a little lower, say 12.45V, the battery is less than fully charged, but proceed anyway.

We’d just installed a new alternator (all right, generator) in this car, and got this nice, high reading at idle. BTW, the last digit in the display was just changing from “4†to “5†when we clicked the shutter.
2. Start the engine and run it at 1,500 rpm. Note the charging voltage as read at the battery terminals. This is the initial value of charging voltage. It should be in the range of 13.80 to 14.80 volts depending on ambient temperature. It will be near the upper limit of 14.80V in colder weather and near the lower limit 13.80V in hotter weather. The actual charging voltage value will be somewhere in between this upper and lower limit in moderate ambient air temperature. If you checked five cars of identical make and model at the same time you might find the charging voltage to be different by a few tenths of a volt. The important thing is it should be within the one-volt range mentioned.
If the charging voltage isn’t between 13.80-14.80, it’s likely that a problem is present, so continue testing for the complete picture.
If the charging voltage is less than 12.66V, there’s no point in proceeding further. The generator is “dead†and the vehicle is running on battery power. Troubleshoot a dead generator.

At idle with all loads on, this charging system is holding well at just 4/10s of a volt less than the 13.10 that indicates a very strong generator.
3. If the charging voltage is 13.80 to 14.80, maintain 1,500 rpm and turn ON and leave ON the following electrical loads while watching the decrease in charging voltage:
- Head lights on high beam
- A/C and high speed blower
- Windshield wipers
- Radio
- Rear window defroster (the Big One)
When each load is turned ON, the charging voltage will decrease as the generator delivers current to each load, and the total load adds up. The voltage should stay above 13.50 volts with all loads ON with a healthy charging system at 1,500 rpm. A reading below 13.50 volts indicates a weak charging system. Before you start ordering any parts, make sure that the problem isn’t simply a loose generator belt, or a corroded connection in the wiring.
If the charging voltage drops below 13.10, you can be sure the battery isn’t getting enough voltage to charge while the defroster is ON. Most defrosters have a built-in timer to shut off before the lower charging voltage affects battery charging. So, if charging voltage drops below 13.50V while the defroster is ON, it should not be considered a problem with the generator/charging system. It is a common condition with many makes and models.
4. Let the engine come down to idle with all electrical loads still ON. On most vehicles, this amount of electrical load on the generator at idle rpm will pull the charging system below 13.10V. If the charging system can hold above 13.10V, it’s got one strong generator.
Now apply the brakes to increase the electrical load still more at engine idle. The charging voltage at this point is what the battery will get under heavy electrical load while sitting at a stoplight. The voltage may fall to less than 13.10V and the CHARGE light may turn ON or flicker indicating that the charging system is at maximum output – and it’s not enough. This is also a common, yet normal, condition with many makes and models.
If the voltage drops below 12.66 volts, the battery is actually discharging in this situation in order to supply electrical power to the vehicle circuits. If the driver does a lot of stop-and-go driving with all the loads ON, a dead battery will eventually result, especially in cold climates. This doesn’t mean there’s necessarily a bad generator, connection or battery. It’s just a generator/charging system that’s doing all it can, but is being outrun by demands. Similar makes and models will consistently do this, so you know there is no problem other than a generator/charging system that’s maxed out.
Don’t be surprised to see quite a few vehicles drop below 13.10V at a stoplight with a heavy electrical load because the generator simply cannot provide that much electrical power at idle speed, especially on smaller cars.
5. Turn OFF all electrical loads turned ON in Step (3).
6. Run the engine at 2,000 rpm and watch the charging voltage rise. It should rise no higher than 15.10V if the weather is very cold. If the weather is very hot the voltage may only rise to about 13.80V. How high the actual charging voltage gets at this point is determined by the engineers who designed the vehicle for a specific OEM battery. The voltage regulator, which is temperature sensitive, determines how high the charging voltage should be. Higher in cold weather and lower in hot weather is the rule.
Vehicle make and model also is a factor and the reason a tech should perform this charging voltage test on every vehicle he services to learn what voltage readings to expect on a given make and model. If the charging voltage continues to rise past 15.20V the vehicle is overcharging. The voltage regulator may be defective or there is a bad connection between the generator and the battery. Check battery water and add distilled water if low. Remember to consider ambient temperature when evaluating the charging voltage. In hot weather the charging voltage should be lower than in cold weather.
Try this procedure on several vehicles and write down the DMM readings to learn how the charging system performs on different vehicles at different ambient temperatures. A little practice makes perfect at checking charging system voltage.
In the next issue of Master Technician, we’ll take a look at charging current.
Ripple Voltage
Testing the charging system for “ripple voltage,†which is a minor amplitude variation in the DC charging voltage, is important. Too much ripple can cause the PCM to misinterpret sensor signal voltages, or cause it to make incorrect calculations resulting in driveability problems. Ripple voltage is often called an AC voltage, but that’s not correct. It’s actually a minor amplitude variation in the DC charging voltage as a natural result of how the voltage is produced.
Figure 1 shows two waveforms. The bottom one displays the generator’s three stator winding waveforms, 1, 2 and 3, repeating in rapid succession to create the DC charging voltage, at, say, 14V DC. Each independent stator waveform has a moment in time when it reaches its positive peak, while the other two stator waveforms are either approaching, or have just past, their peak. The top waveform in Figure 1 shows the resulting “ripple pattern†from the overlapping three-phase stator signal that presents a fairly smooth DC voltage (again, at something like 14V DC) with some slight amplitude variations we have come to call “ripple.â€
Low ripple content riding on the DC charging voltage is good, and the PCM as well as other electronic components are designed to compensate for a small amount of ripple using their own internal DC voltage filter circuit designed for this purpose.
High ripple content occurs when one stator winding is either OPEN or SHORTED, or one of the diodes in the generator’s diode bridge network fails to pass its share of electron current. This reduces the stator signal to a two-phase signal and significantly increases the ripple amplitude variations since one phase is missing, which leaves a big gap between the remaining two phases.
What to Do?

Figure 1
Notice Figure 2. A DMM is shown set up to measure AC voltage and is connected to the generator terminals while the engine is running. A DMM on its AC voltage range blocks out DC voltage from the measurement and is able to “see†only amplitude variations in the DC voltage. The DMM interprets and indicates the DC voltage variations as “AC Volts†since that’s the DMM function selected. The DMM reads .042, which is a normal low reading. The lower the ripple, the better.
Since AC Volts is selected on the DMM, “ripple†has become known as “AC riding on the DC charging voltage†instead of DC voltage variations, which is what it truly is. Industry standards tell us that ripple content should not exceed 0.50V “AC Volts†for a sufficiently clean and pure DC charging voltage. More than 0.50V “AC†may confound a PCM’s brain (CPU) and cause pesky and intermittent driveability problems. A driveability problem due to excessive AC ripple is only solved by replacing the defective generator. There may be DTCs, or not. It depends on the amount of ripple present and how a make/model PCM responds to ripple. It’s a learning game — experience helps. Don’t forget to check generator ripple before you start changing parts when attempting to repair a driveability problem.
In a future MT article, we’ll discuss the impact of voltage spikes.

Figure 2


0 Comments