
Mercedes-Benz Magno Matte paints create a soft sheen instead of a mirror-like shine. The matte finish is popular because it is both beautiful and unique. Heads turn when a matte-finish car goes by!
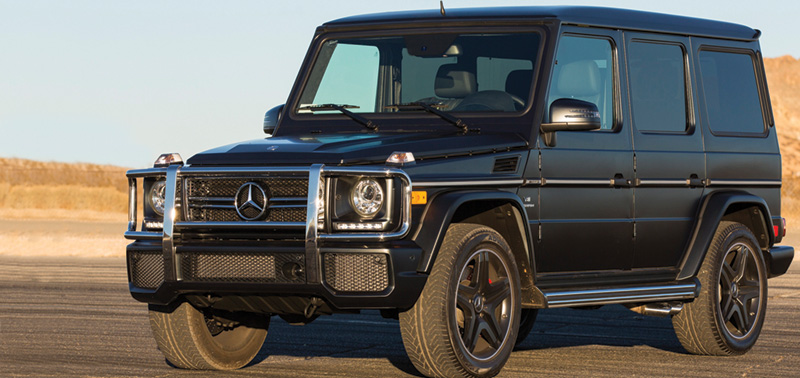
This G63 makes a unique, individual statement with its matte black finish. The soft sheen gives a subdued, classy appeal while retaining its standout “Look at me, I’m the leader of the pack†attitude.
As more and more people are wowed by that stylish Mercedes-Benz matte finish, it’s logical to assume that you’ll soon be seeing this type of paint in your collision shop. Here’s what you need to know to maintain that distinctive appearance when repairing this type of finish.
To begin with, regular gloss paint reflects 90% or more of the light that hits it. The reflection is uniform and mirror-like. Matte finishes reflect only 20% of the light. The remaining 80% is so diffused that the reflection of an object is not recognizable on a matte-finished surface.
In the clear
Don’t let the dramatically-different appearance of the Mercedes-Benz matte finish intimidate you. You’ll be happy to hear that the matte effect is entirely in the clearcoat, and that the other paint layers are similar to those of traditional gloss finishes. The low sheen is obtained by the use of different hardeners, reducers, application methods, film thickness, and drying options. Polishing a flat finish results in significant differences in luster compared to non-polished areas, so any final coat errors cannot be buffed out. Dirt in the application of the clearcoat, mottling or striping due to improper spray technique, variations in film thickness, and other visible defects require complete repainting of the final topcoat. For this reason, Mercedes-Benz strongly encourages the use of the procedures and materials recommended by matte paint system manufacturers.
Matching: More than just a formula

Color test panels are absolutely critical to match both color and gloss level to the vehicle being painted. Prepare several test panels, each featuring different mixing ratios of matting agent and clearcoat, and different wet/dry spraying methods.
Of course, the paint manufacturer’s recommended mixing formula is important. Even minor deviations from the recommended ratio of hardener and reducer to the clearcoat paint itself will lead to significant changes in the level of “matting†(gloss reduction).
But matching a matte finish is more than just formula numbers. It requires careful visual inspection. You must pay attention to both color and gloss level. Different areas of the vehicle body may require different gloss levels. Film build can cause a color shift if painting over OE clearcoat.
Additionally, the gloss level for the vehicle being painted may have changed due to its age and cleaning history. This may, for example, necessitate painting the entire side of a vehicle instead of just the damaged panel in order to produce a matched gloss appearance on that side.
Other factors affecting the degree of gloss in your finished job include whether the hardener and reducer are slow- or fast-acting, whether you use a relatively dry or wet spray method, dry film thickness, ambient temperature, flash-off time, and drying method. Different combinations of these factors can alter gloss level by up to 20%.
This variability makes color/gloss test panels mandatory. After looking up the color formula recommended by the matte paint system manufacturer, spray at least three test cards with different ratios of matting agent (flattener) and clearcoat.
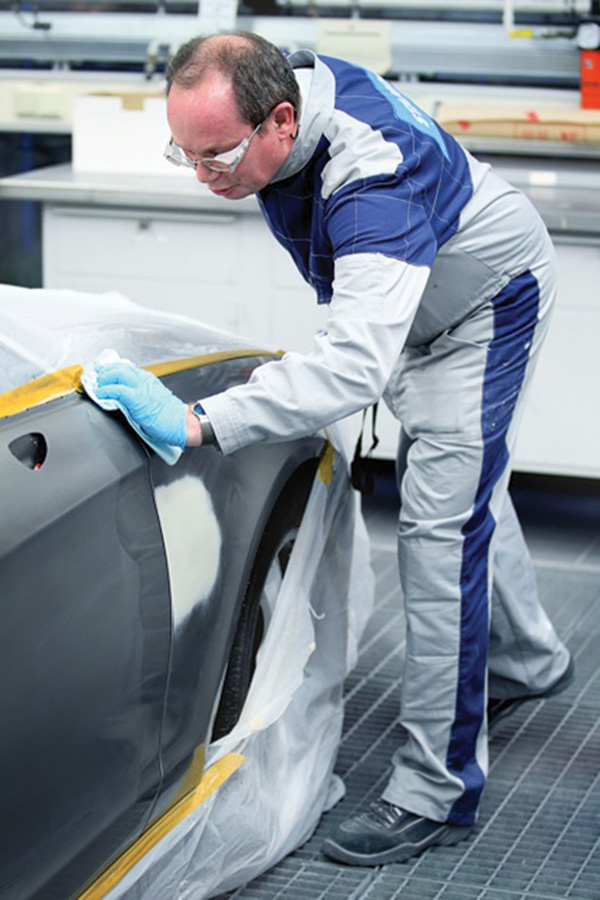
Preparation is your quality assurancePaint will not stick to dirt or oil-based contaminants. Before and after sanding and between undercoats and topcoats, pre-clean the surface with wax and grease remover. Proper preparation for a matte refinish is necessary to the success (and efficiency) of your paint job. Because you cannot sand or polish a matte finish, removal of any dirt or imperfections in the topcoat requires a complete re-do. Even before you start sanding to level and prepping the surface for paint adhesion, you must remove any oil-based contaminants by wiping the surface with the wax and grease remover recommended by the approved matte paint system manufacturer. Do not substitute thinner or reducer in place of the wax and grease remover as this is likely to cause fisheyes when you apply the paint. After sanding, remove any dust and residue with the cleaning agent recommended by your matte paint system manufacturer. |
After drying (colors will appear significantly darker when dry), compare each test card to the vehicle, and evaluate both color and gloss level. Check in natural daylight. Hold the card against the vehicle surface to ensure that your viewing angle and light source are the same as for the area being repaired.
Spray consistency is key
“Mottling†describes a finish that looks streaked, spotty, or striped. It is often the result of an unbalanced spray pattern, or not observing the proper flash time between basecoat and clearcoat. For example, if one pass is heavier than the others, that area may appear glossier after curing. Try to spray so that you maintain a wet edge, but that no one pass is heavier than the others.
Tilting the spray gun can place more paint at the top or bottom of the pattern, making film thickness uneven in that area. If you paint while too tired (don’t expect sympathy from the boss), you may inadvertently allow your arm to drop while spraying. This tilts the spray fan up, resulting in more paint being deposited on the bottom portion of the pass than at the top, and, bingo, you’ve created a horizontal stripe in your finish.
Experiment with overlap. If a 50% overlap leaves light streaks between passes, try 75%. Be sure to maintain consistency with each pass.
To further reduce the appearance of striping, spray in two different directions in the same coat. After you’ve completely covered the panel with horizontal passes, cover again in that same wet coat using vertical strokes.
You can also help prevent mottling by using the correct spray gun settings (needle/nozzle/pressure), holding the gun perpendicular to the surface being sprayed, and following the matte paint system’s recommended flash and dry times.
Spot repairs? Polishing? Not with matte paint!

Evaluate test panels on the surface to be painted. Try to judge the test panel’s color and gloss level at the same light angle and intensity as the finish on the vehicle.
All manufacturers of matte paint systems recommend edge-to-edge application of matte clearcoat on panels being repaired. Differences in film build, paint age, cleaning history and other factors make a spot repair likely to reflect light differently from surrounding areas. The blended section stands out, which is by definition unsatisfactory with matte or flat finishes.
There can be no de-nibbling or polishing of matte or flat finish topcoats. Any rubbing or polishing to eliminate imperfections will increase the gloss level in the area where mechanical pressure is applied.
Dirt can be removed at the basecoat stage, or after the first coat of clear has flashed off. If inspection reveals any dirt in the final clearcoat, the job must be re-prepared, and the full repair area clearcoated again.
Lovin’ from the oven

Matte clearcoats flash off faster than traditional gloss paint, so you must maintain a wet edge as you spray. Experiment with the amount of overlap in each spray pass.
Matte finishes are often baked or air dried. Oven-dried finishes may have slightly more gloss than those that are air-dried, so be sure to follow the paint manufacturer’s drying recommendations. Never use infrared (IR) drying as it does not allow the proper solvent die-back. For the same reason that you don’t like die-back in a traditional paint job – it flattens color by reducing gloss – you want it in a matte or flat finish.
Similarly, be careful not to spray your clearcoat too wet. A heavy spray may leave too much solvent remaining during the curing process, which prevents gloss die-back to the proper level for the desired soft matte sheen.
You won’t be able to tell if you have too much gloss until curing is complete. The clearcoat goes on glossy as normal and dries flat. By then, if you notice too much gloss it is too late for anything but a removal and re-spray of the last clearcoat application.

Matte painting requires edge-to-edge application on the panel being repaired. A blended section would reflect light differently compared to surrounding areas, making the repair unsatisfactory.
Pay attention to the paint manufacturer’s recommended flash-off and drying times. These companies invest a lot in research and field testing to make sure that their recommended mixing, spraying, and curing techniques produce the best finish.
Passing inspection
The final matte finish should have a uniformly low gloss. The surface may appear on close inspection to have small patterns and a slight texture, but these are normal matte-finish characteristics.
Looking down on the hood and then across the roof from the same standing position, the gloss level of the two different surfaces will appear different even if they are not. Viewing the surface at approximately 60 degrees reveals less gloss than at a flatter angle. To judge gloss level, try to view an entire side of the vehicle at a consistent angle. Do the same for all horizontal surfaces. When you get it right, seeing that classy matte finish you just applied is very satisfying.
Finally, it is important before embarking on this new procedure (or any other, for that matter) that you carefully read everything about it in WIS, the ultimate authority.Â
Mercedes-Benz Approved Matte Paint System Manufacturers
Refer to the After-sales Paint Technology Guide at Factors Affecting Degree of Gloss
(Source: Adjusting the Degree of Gloss of Permasolid 2K Clearcoats, Spies Hecker) |
Procedural photos courtesy DuPont Performance Coatings


0 Comments