Whether you call them draws or drains, tracking them down isn’t as easy as it once was. These procedures and tools will help.
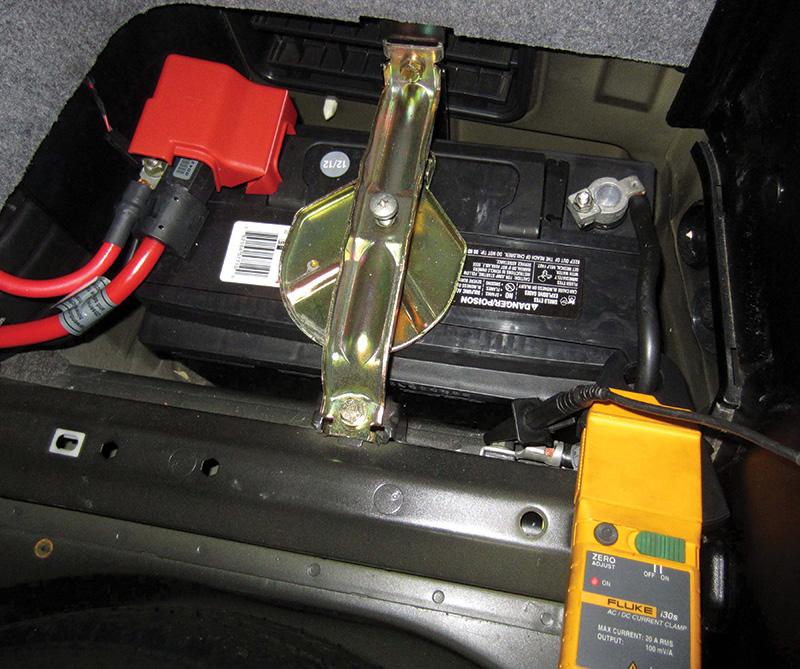
Forget about putting a digital multi-meter in series with the feed side cable as per the BMW TSB. The quick and easy way to is to put a sensitive and accurate amp clamp over the negative battery cable.
Diagnosing battery draws can be time consuming, especially when the draw is intermittent. We are going to discuss different methods of finding battery draws and the importance of using the right tools. The more strategies you have to attack a parasitic draw, the better.
Square one
The first step to diagnosing a battery draw issue is to always check the basics. Test the battery and the charging system. Any amount of A/C ripple more than a few dozen mV should raise an eyebrow, although theoretically speaking the vehicle should handle several hundred V AC without burning up. If you measure even a small amount of AC ripple, it shows that the diodes in the alternator are damaged, making it possible that they are drawing power when the engine is off.
Another basic step is to do a health check and see if there are any codes stored in modules that indicate an internal defect or communication issue. A battery drain problem can often be symptomatic of an issue that is setting DTCs in the vehicle.
Furthermore, when trying to discern whether or not you even really have a battery draw or just a really weak battery, expect to find a DTC. If an E6X, for example, has a KOEO (Key Off Engine Off) draw of more than 80 mA, the DME will set a DTC.
Also, always remember to check for TSBs for service instructions and module software updates for issues you might not know you’re dealing with.

Here, a lab scope and an amp clamp are connected to a 2005 BMW 330I to test how long it takes the modules to power down. Lab scopes offer us the opportunity to “set it and forget it.†We can see at what time intervals modules go to sleep by putting the lab scope into deep record.
Lastly, keep in mind that you are working on a BMW! One of the things we need to understand when diagnosing a battery draw is that it might take half an hour or more for all the loads that the vehicle’s computers may be keeping alive to be turned off. Depending on which model you’re working on, KOEO battery drains will vary. Having the right tools and equipment such as an amp clamp and lab scope can make diagnosing a parasitic draw easier.
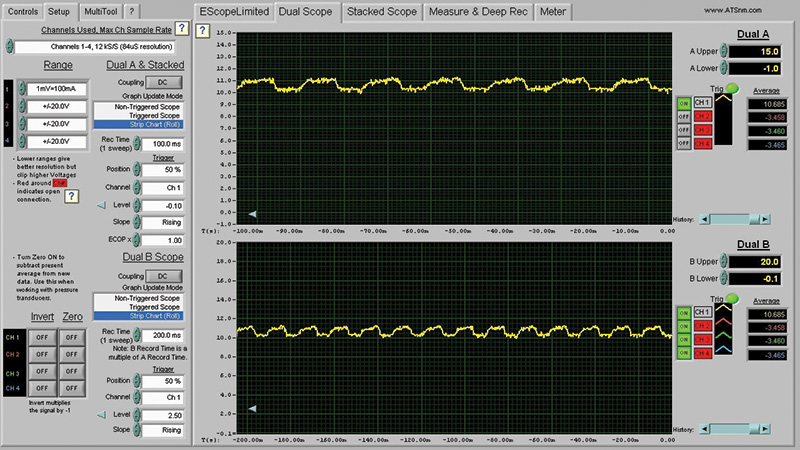
Is this a good or bad KOEO battery drain? Take note that each mV equals 100mA on the scale, so we have over a 1 amp current draw.
Testing for parasitic draw after setting up the lab scope is easy. Simply check amperage and start pulling fuses. While using a lab scope, when you pull out a suspect fuse check to see if the excessive amperage goes down. Don’t forget to take the alternator out of the equation if necessary, as a shorted diode can create a parasitic draw.
Obviously, use your equipment correctly. Be sure to zero the amp clamp on the scope and the scope channel so that you can get an accurate reading of amperage. Remember, a few mV of inaccuracy can make it look like you have several hundred mA of draw that you do not have.
If you don’t own a lab scope, you can use your DMM (Digital Multi-Meter) on the Min- Max DC scale and record the draw the same way you would using a lab scope. However, the meter cannot sample as fast as a scope can and it does not give you a pictorial representation of amperage, which can make diagnosis confusing. A meter cannot be as efficient as using a scope because it is too slow to catch a sudden spike. For example, oftentimes a module has an increase in current to about 500 mA before going down to 50 mA or so.
E46-specific diagnostics
If you are diagnosing a parasitic draw on an E46, the following are known good specs that we have measured: The draw will start at 15 amps and one minute later go down to about 10 amps. In a little over eight minutes KOEO, current draw should halve to about 5 amps. In another seven minutes amperage drops like a rock, all the way down to 29 mA. So, in a known-good vehicle, nearly everything should power down in less than 20 minutes.
E6X to E70-specific diagnostics
Let’s cover a few tips. When you are working on an E6X or E70, don’t be surprised if you see amperage spikes between 300 to 500 mA when you are measuring KOEO battery draw. They should last no more than a minute. Expect the draw to eventually settle at 32 mA. The factory manual will specify about 50 mA, but this is higher than what would be found on a known-good vehicle.
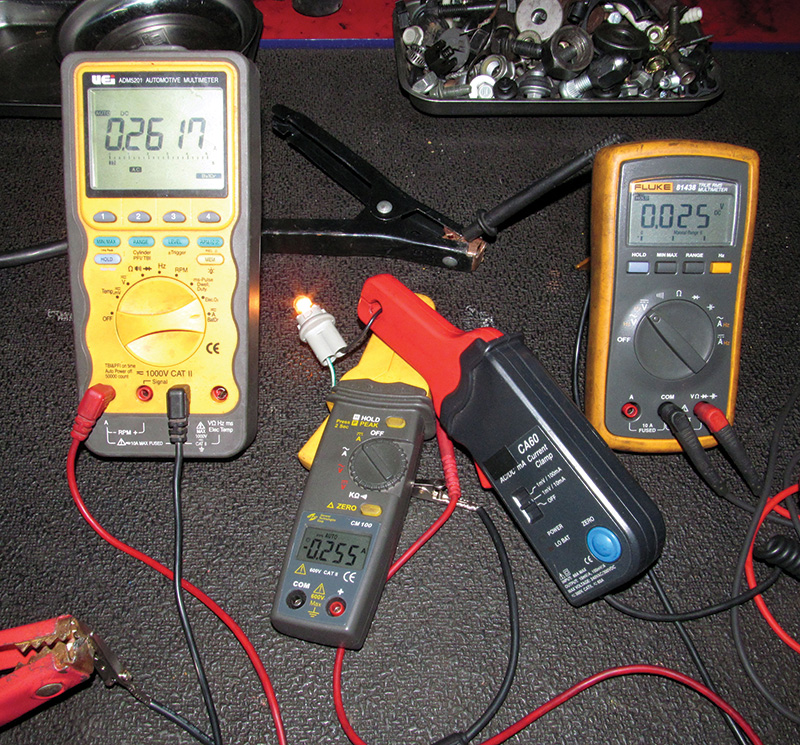
As you can see, a 260 mA draw, as seen on the Fluke amp clamp and UEi meter connected through the amperage jack, is nearly identical regardless of which tool is used. Using the Fluke meter, the 0.025V/25mV voltage drop is about 1/10th of the average amperage. Voltage drop testing offers technicians a quick technique of finding a parasitic draw on any vehicle.
Quite a few of these models suffer from problems in the electronic battery master switches. These switches regularly control everything from the rear window heater (HHS) to the trunk lid soft close motor (SCA). The shifter, door latches (also a big failure item in 3 Series), driver seat module, and the visors also tend to go bad.
Brand new KOEO battery draw diagnostic techniques
Even though BMW recommends using the tried and true “pulling fuses†technique, it is possible that you may run into an issue on the newest models when you pull a fuse. Often, cutting power to one module will inadvertently wake up related modules. In other cases, pulling a fuse or relay will cause a temporary amperage spike, which in turn temporarily “cures†the draw, forcing you to wait yet again until the problem reappears. Obviously, this will complicate your diagnostics.
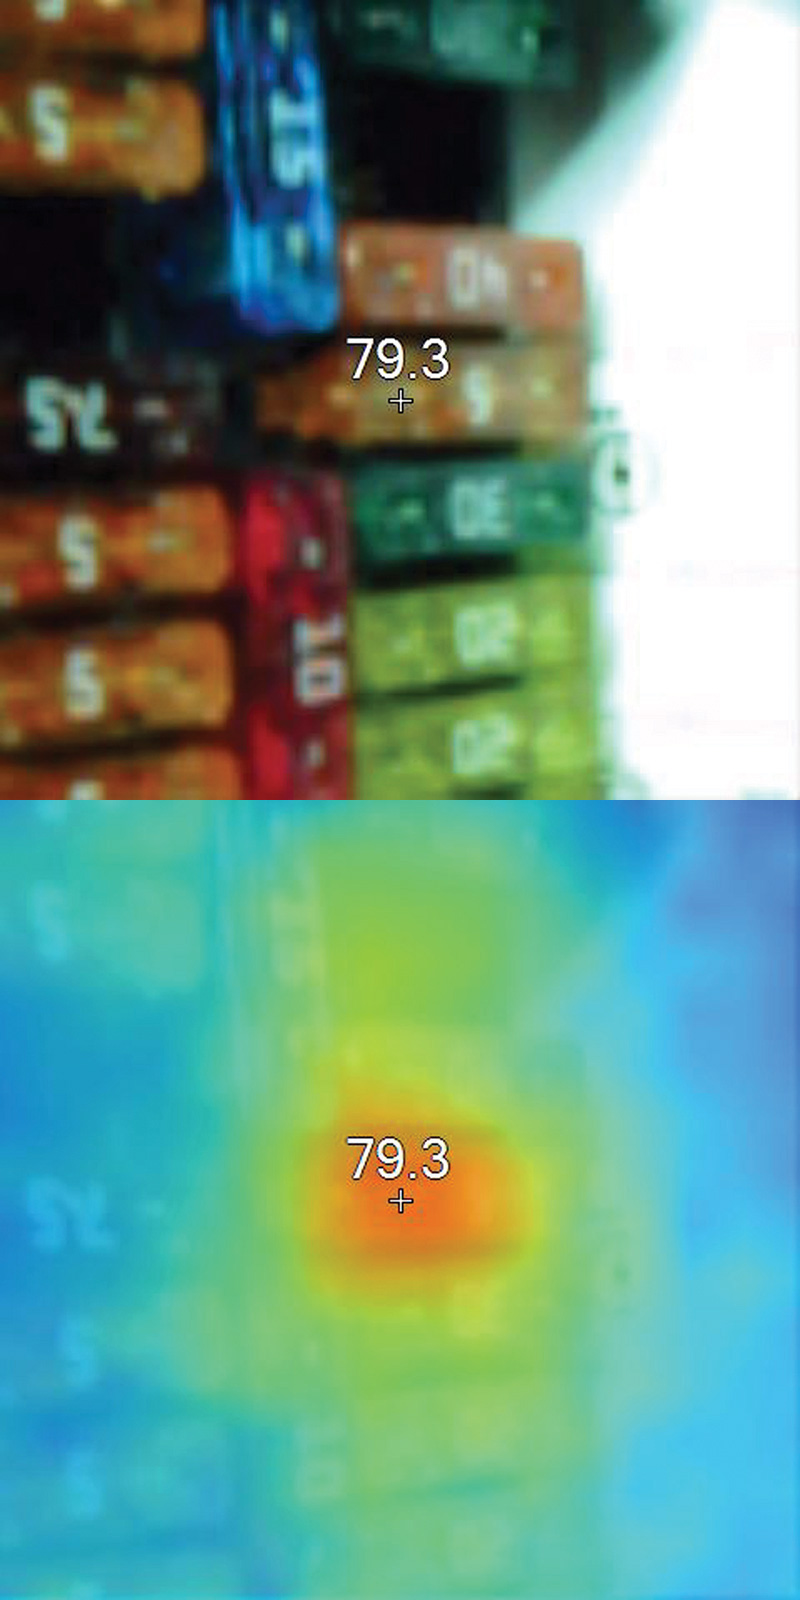
A view of a suspect fuse using a Fluke VT02 thermal imager. This tool allows the user to select between different settings that blend the real picture with the visual heat signature.
Thankfully, there is a really easy strategy you can use that only requires a DMM. It should be noted that this technique was contrived by Audi/VW to diagnose their parasitic draw issues.
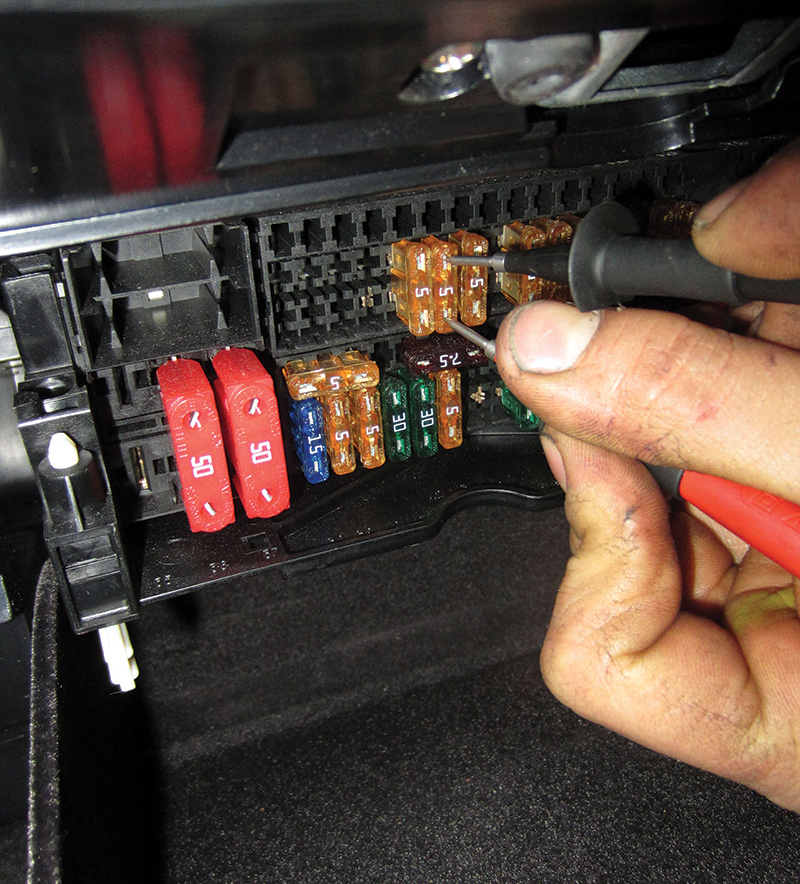
The test is checking voltage drops across fuses. Why? Think about it. You cannot have a voltage drop unless a load is being powered on, which in this instance is the parasitic draw. Simply put, your readings for all the fuses should be zero outside of the fuse that is connected to the circuit that has the parasitic draw.
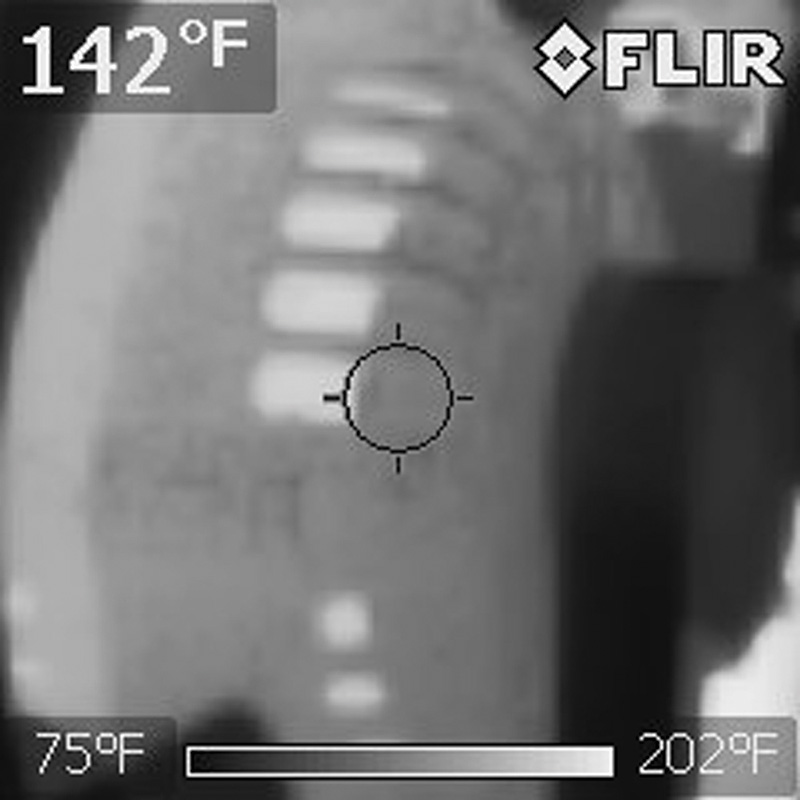
Here, a FLIR black-and-white thermal imager nails a bad alternator. It is “glowing†because an amperage draw is making it hotter than the rest of the engine compartment KOEO.
So, with the meter on the DC mV scale, place the leads across the fuse. It is important that you have a good connection on the metal protruding parts. Any voltage drop reading that you locate will indicate the circuit that has the draw.
Interestingly enough, there is about a 1mV to 10mA relationship between the measured voltage drop and the expected amperage draw. For example, a voltage drop across a fuse that has 25mV equals about 250 mA.
Now, this test can’t always nail down exactly what’s wrong with the vehicle any more than pulling fuses. However, it helps you find out which circuit is suspect without throwing off your readings by inadvertently waking up other modules.
Another technique is made possible by new tools that use thermal imaging. Here, using a Fluke VT02, you can quickly spot which fuse is hotter than the others without an amp clamp, meter, or scope. It’s a simple measurement and doesn’t require the technician to take anything apart on the vehicle, aside from removing the fuse panel lid. An ordinary non-contact infrared pyrometer would probably not be sensitive or accurate enough to identify such small differences in temperature.
In situations when the alternator is suspect, simply put the thermal imager over the alternator case and see if it’s hotter than the other underhood components.
If it is “hot,†then you’ve diagnosed an internal shorted diode. When under load, fuses heat up rather quickly, so this technique takes little effort or skill. All you need is the tool.




0 Comments