
Our friend Bill wants to make sure we’re clear on the essentials.

We are occasionally asked about the proper means of tightening critical fasteners. Critical fasteners are generally considered to be those with a definite tightening procedure that is specified by the engine manufacturer.
It’s important to understand that fasteners are elastic in nature. As they are run down and tightened, the steel fastener elongates, creating tension in the joint. This tension is what keeps bolted joints from coming apart by creating friction on the sides of the threads that prevents engine vibration from loosening the parts. Parts that are, by nature, elastic have a desire to return to their original length when the load is removed. It’s this elastic tension that also provides the load that seals a head gasket and it’s the elastic nature of the fastener that allows it to compensate for head lift-off as well as thermal expansion of the parts.
Elastic Limit of a Fastener
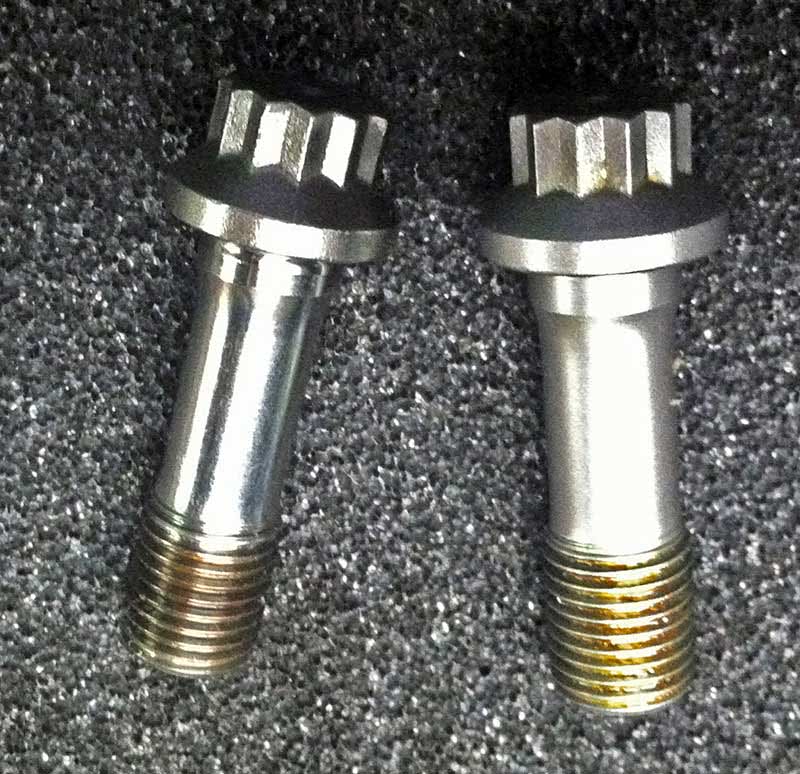
All fasteners have an elastic limit, and when that limit is exceeded the fastener will not return to its original length when the load is removed. We refer to this as being permanently elongated or “yielded.†If we stretch a fastener far enough into this yield zone, it will actually fail, breaking into two pieces!
As we’ve learned more and more about fastening technology over the last two decades, we’ve realized that maximum load on the joint can be achieved by stretching the fastener to just short of its yield point. Commonly referred to as â€torque-to-yield†fasteners, these bolts, used in this manner, are very common in the automotive industry.
Tighten Methodology– Torque Wrenches
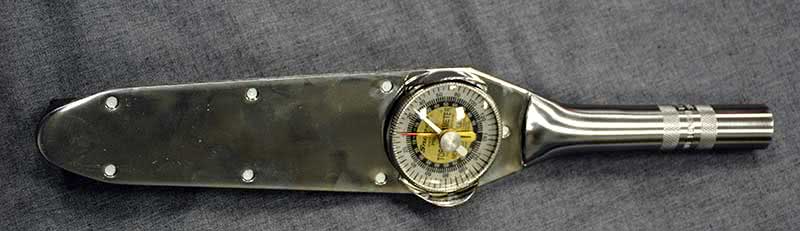
Prior to torque-to-yield fasteners, the torque wrench was the tool of choice for tightening critical fasteners. It is still commonly used in non-TTY fastener applications. It is important to note that all a torque wrench does is measure the resistance to turning that a given fastener exhibits. In theory, this resistance to turning would indicate that we’re stretching the fastener and that the harder it became to turn the fastener, the more we’d stretched it. We now know, from extensive studies, that this resistance to turning is mostly friction between the the threads of the bolt and those in the hole in the mating part, and friction under the head of the fastener as it rotates against a washer or the actual casting. As a matter of fact, 90% of the effort applied to the torque wrench is used to overcome friction, only 10% to elongate the fastener! This friction can vary greatly from fastener to fastener, even in a given engine. The condition of the threads and lubrication are both very important in influencing this friction.
Some useful tips for using a torque wrench:
- Calibration of the wrench is critical.
- Unless otherwise specified by the manufacturer, 30W engine oil is the standard automotive lubricant for threaded fasteners.
- Lubricate both the threads and the underside of the head of the fastener.
- Chase the threads in the block to insure uniform friction from hole to hole.
- Make the final pull on the wrench in one smooth motion covering approximately 120 degrees of rotation and stopping at the desired torque setting, “click,†or vibration of the wrench
- Do not go back and re-check each fastener after completing the above. Re-checking results in over-tightening and can cause a yielded fastener to break.
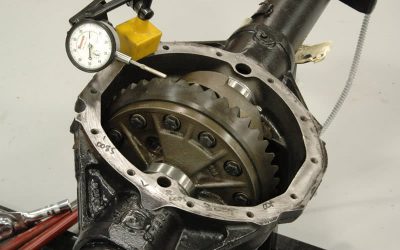
Angle Turn to Tighten
As torque-to-yield fasteners became the desired industry choice, a new methodology was required to insure fasteners were at the threshold of yield without going beyond it. A method was devised that eliminated the friction variable mentioned above. The procedure is to use a light torque load to perform what we call “run down†of the fastener and joint. This is simply squaring things up and removing any slack in the joint or fastener. After this, the torque wrench is set aside and the joint is loaded by turning the fasteners a specified angle of rotation, perhaps 120 degrees or whatever the engineering team at the manufacturer has determined loads the fastener to the yield point. If you think about it, we’ve removed the friction variable completely. Whether the 120 degrees of turn is easy or hard, we’ve stretched the fastener the desired amount. A big benefit of this methodology on head gaskets is that every fastener is stretched the same amount, making the load across the gasket extremely uniform. This provides very good sealing and reduces the possibility of bore distortion that would be present if we used only a torque wrench as our tool.
Replacing Fasteners
As the industry moved to torque-to-yield fasteners, it became a commonly recommended practice to replace the fasteners with new ones when the engine was being reassembled after repairs. The theory behind this is that if we pull the fasteners to their elastic limit during engine assembly, some of these same fasteners may have already reached their maximum yielded state from the cycles of engine expansion and contraction. If reused, this could result in either failure of the fastener, or improper or uneven load on the joint. This theory could also be applied to non-TTY fasteners, and many of the more progressive engine builders have established a finite or useful life for a fastener, and regularly replace those that have reached that finite life.
by Bill McKnight, Team Leader – Training, MAHLE Clevite, Inc.
0 Comments