In part I we covered the benefits of track width, lowering your center of gravity and adjusting your corner weights. In part II we will show you how. You don’t need to know chassis dynamics to enjoy a spirited drive down the road. But if you’re on a track and being timed then you may want to know the changes you can make to drop that .1 of a second.
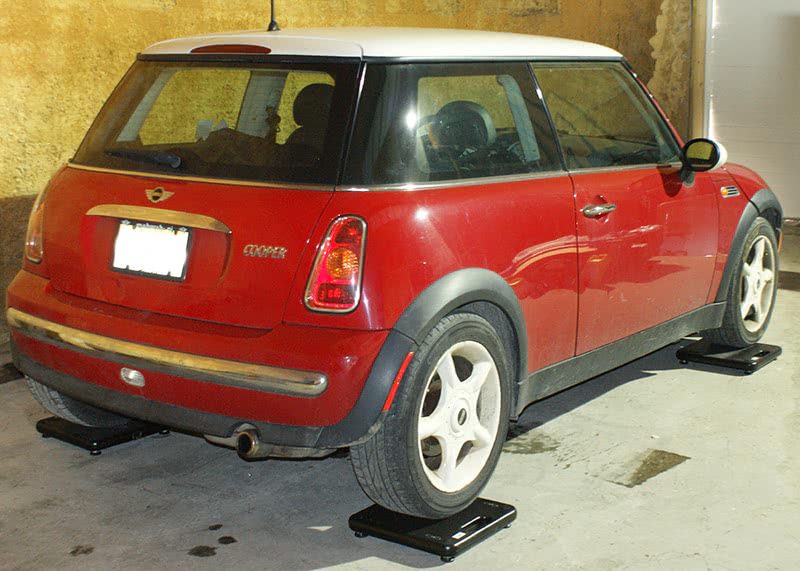
Here we have the car up on our race car scales, which give the individual corner weights, plus the total weight of the car. We are going to need this information to perform our calculations.
For the most part we all enjoy driving. If you didn’t you probably wouldn’t be reading this. Now going out for a Sunday drive you don’t need to know what your lateral weight transfer is but you may simply want to learn what your car is doing while you are driving around a corner as you feel the ‘g’s. If you’re on a race track and you are trying to drop lap times the more information you have about your car can lead you to make changes that may not feel right at the time but the stopwatch never lies. Keep in mind that you are probably the driver of the car you are setting up. You are going to feel the changes you make to the car. You will definitely need to make some adjustments to your driving style to take advantages of the changes you’ve made. So what do I need to know to calculate where my car setup is now?
Speed Cost Money, How Fast Do You Want To Go?
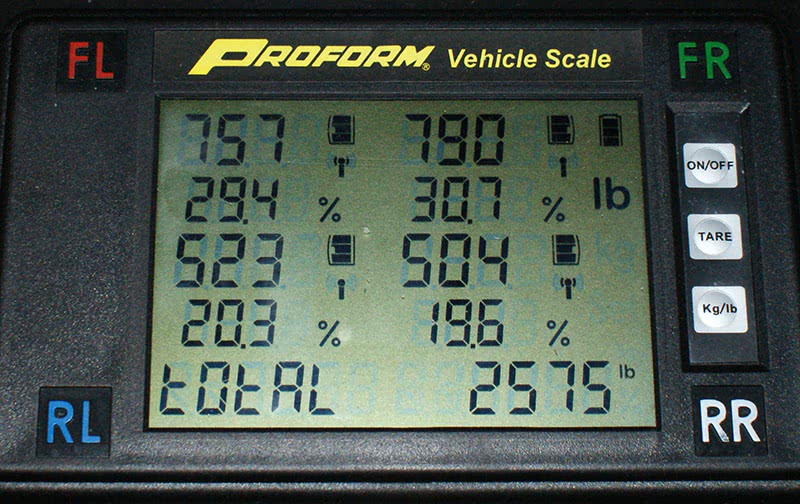
As you can see on our scale display, the overall weight of the car is 2,575 lbs. with a nearly-empty gas tank. You can also see that the individual corner weights are not as even as you might expect. We can use these numbers for calculating the front-to-rear weight bias.
Generally on older V8 sedans the center of gravity is right around the level of the camshaft on an overhead valve V8 that has the camshaft in the V of the block. With modern engine designs, front wheel drive and modern chassis construction we can no longer assume this is true. So if you are tuning Asian or Euro cars you are going to need to take the measurement and perform the calculations. The first thing you need to know is the overall weight of the vehicle. You are also going to need the individual axle weights and individual corner weights. These weights in pounds will be put into equations to calculate the center of gravity. You will have to make a decision of how much time you want to invest in calculating your center of gravity. We covered in part I how the fuel weight drops throughout a race and depending on your racing series, can have an effect on handling as the center of gravity moves.
My personal suggestion is to perform these steps with a fuel tank of fuel, a half a tank of fuel and with a totally empty tank. This is going to take time and effort and time is money but too much information never hurt anyone. It may be a tremendous benefit to know how much the center of gravity changes as you use up your fuel supply. If you think about it knowing how much the drop in fuel weight changes the center of gravity should affect your chassis set up. You may set up the car to handle better with a low level of fuel this way you can have a strong finish. You may want to set up the car with a heavy load of fuel on a tight and twisty track so you can have a strong start on tracks where it is difficult to pass. Either way you are in control of the situation.
Not the Two Step but Step Two
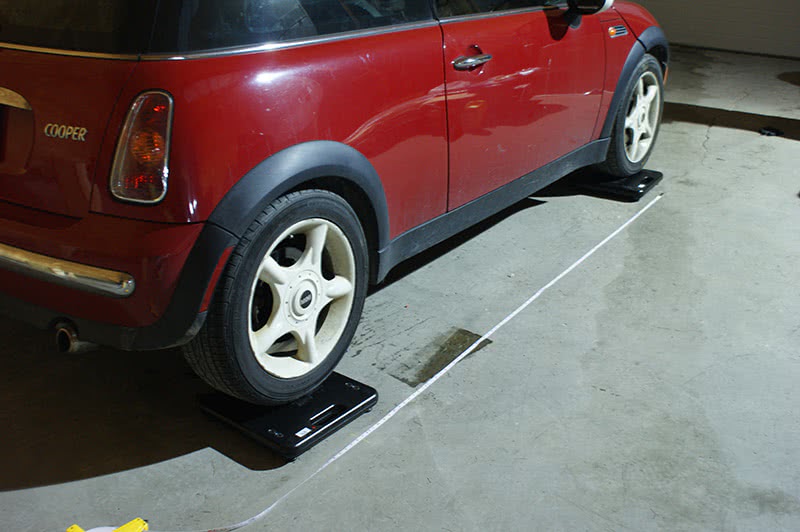
We need to establish the wheelbase of the car. Here, we measured approximately 81 in. from the centerline of the front axle to the centerline of the rear axle. With this figure, and lifting the car 24 ins., we can calculate the wheelbase off the ground to about 84.5 in. We can now plug in these numbers and calculate our CG (Center of Gravity).
In part I we suggested the fuel cell be as close as possible to your center of gravity to minimize the effect of the change in fuel weight but the rules of your racing organization will probably have a greater effect on where your fuel cell is mounted. Now that we have the weight of the car on each corner on level ground you can move on to the next step. Before that you are also going to need to know the wheelbase of your vehicle. That is the distance from the center point of your front axle to the center point of your rear axle. It is difficult to measure in the wheelbase at the axles themselves and the more accurate you are the more precise the reading are going to be. You can drop a plumb from the center point of your axles and mark where they hit the ground. Use a tape measure to measure the distance in inches.
The next step is going to be jacking up one axle of the vehicle at a time while the car is on scales. I suggest you do this for both axles although calculating your center of gravity will be the same no matter which axle you pick. It is just a good way to double check your work. Now there is some difficulty in achieving accurate readings. Tire deflection and suspension deflection can change the weight load on one axle. Ideally you want to keep the suspension in the same position as the car was on the ground. This can be achieved by making blocks and resting on of the axles on the blocks to allow the suspension to settle on its weight. If you are well equipped you can fabricate straight bars in place of the suspension shocks or struts, but I think the block are much easier to use.
What Are We Looking For?
You need to jack up the vehicle at least 24 inches for an effective measurement. Jack up one end of the vehicle and rest the suspension on blocks at least 24 inches high. Look at the change in weight on the scales with the vehicle off the ground. The weight will increase once you have jacked up the car. Subtract the weight of the axle on level ground from the weight of the car while it is raised to get the weight transfer difference. You also need to measure the new wheelbase at ground level and add that to the equation. You should have already measured the cars wheelbase while on level ground. Now you should have all 5 numbers you need to calculate the center of gravity. Multiply you level wheelbase by your raised wheelbase by the weight difference and you will divide that by the distance you raised the car multiplied by the overall weight of the vehicle. The equation looks like this:
| Ctr. of Gravity Height = | added weight X level wheelbase X raised wheelbase | ||
| distance raised X overall vehicle weight |
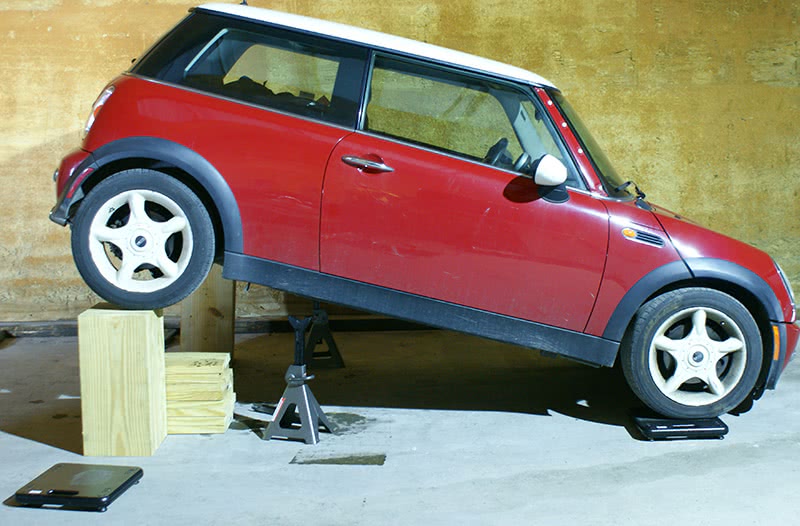
Lifting one end of the car 24 in. is no easy task with conventional equipment. Always be safe and use wheel chocks on the axle you are leaving on the ground, plus jack stands. We saw these blocks to 24 in. so we can rest the weight of the body of the car on the springs and not allow suspension droop to throw off our calculations.
As an example let’s keep the math simple. If your car weighs 4000lbs and 1000lbs at each corner; let’s also say the car has a 100 inch wheelbase. We can use the Pythagoras Theorem which states the square root of the side opposite the right angle is equal to the sum of the squares of the two other sides. With a 100 inch wheelbase and lifting the car 24 inches out raised wheelbase would end up being approximately 97 inches. If we plug all of these numbers into our equation we get:
| C of G Height of 10.10in. = | ||||
| 100 lbs. X 100 in. X 97 in. | = | 970000 | ||
| 24 in. X 4000 lbs. | 96000 | |||
We now know the center of gravity is just above 10 inches, which is pretty low on our theoretical vehicle. To calculate the front to rear weight bias you need to divide the weight of the rear of the car by the overall weight and multiply that by the wheelbase. The equation looks like this:
| Center of Gravity behind front wheels = | weight of rear axle | x wheelbase | |
| overall weight |
If we plug our measurements in we get:
| Center of Gravity from the front axles 50 inches = | ||||||
| ( | 2000 lbs. | ) | x 100 in. | = 0.5 x 100 in. | ||
| 4000 lbs. | ||||||
I’ll Bet You Wish You Paid Attention In Math Class.
So our center of gravity is the midpoint between the axles of 50 inches and the height is just over ten inches. If you want to calculate the center of gravity from one side of the vehicle to the other the formula is:
| Center of Gravity side to side = | |||||||
| track width | – | ( | lighter side | x track | ) | ||
| 2 | overall weight | ||||||
For the moment we are going to assume the track width is 75 inches. If we plug in our measurements we get:
| C of G side to side = | |||||||
| 75 in. | – | ( | 2000 lbs. | x 75 in. | ) | ||
| 2 | 4000 lbs. | ||||||
C of G side to side = 37.5 in. – 0.5 lbs. X 75 in. = 37.5 – 37.5 
= 0 in. off center
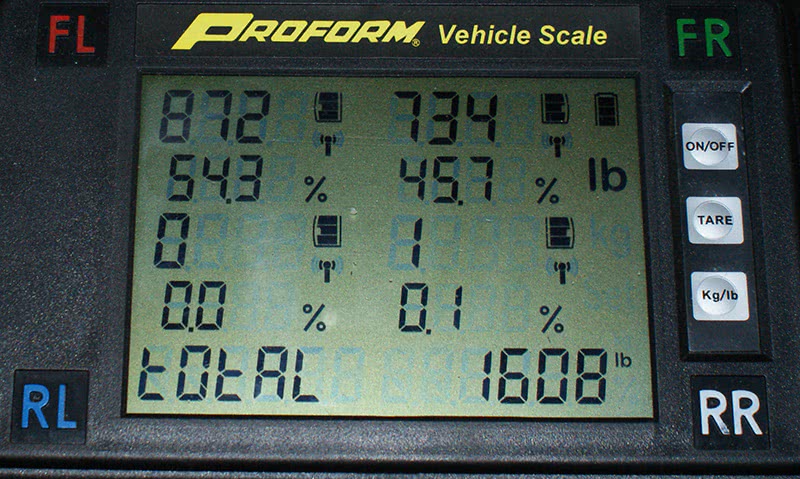
With the car up in the air, we can measure the weight on the axle that’s on the ground, in this case 1,608 lbs. Our starting weight was 1,547 lbs., giving us a difference of 61 lbs. Plugging this into our equations for CG, we get 6.75 in. This is impressive, but not surprising for a Mini Cooper, a car renowned for having a low center of gravity and go-cart-like handling.
Our theoretical vehicle’s center of gravity has no offset one way or the other so we have a perfectly balance car from one side to the other which is great for road racing but not so good for circle tracks. In any event you should now be able to calculate your cars center of gravity for both front to rear and side to side. This gives us a three dimensional view of where it is located in the car. If you allowed to make modifications to the car you may want to move around something like the battery to help manage weight distribution. You can also add ballast at specific locations to control this as well. Knowledge is power.


0 Comments