

by Greg McConiga
Can you have too much compression? You bet. At compression pressures over 15:1 the gains to be made are very small. There are gains, but they tend to become increasingly smaller with each step up in ratio. A second thing to consider is how difficult the engine becomes to tune with higher compression ratios and how fuel demands become more specific with higher cylinder pressures — the higher the compression ratio the fussier the engine. Last, you still have to have enough volume to contain a compressed air-fuel ratio. At some point there is just not enough room to squeeze the mixture without going into hydraulic lock-up.

Here’s our old school big block Chevy piston tucked up into the cavity of the Smokey plate. The dome volume is the difference between the tool volume and the fill volume with the dome in place. To avoid doubling up the volume above the ring, you’ll need to install the top ring, pack the area above the ring with petroleum jelly and push the piston up against the plate once it’s bolted on the block. The Performance Trends software calculates and includes that volume based on the bore, piston top diameter, and ring depth. As you can see, you do not need any induced errors.
Higher ratios are good because they increase thermal efficiency and if they are the result of engines built with small combustion chambers and lots of quench they tend to be more detonation resistant. BUT there are always compromises and complex interactions that you have to be mindful of during the design phase. Also, remember that your compression ratio has a huge effect on cam selection. Settle on the compression number and work on the cam design to best fit the cylinder head flow rates, valve sizes, and operating requirements. Everything affects everything — it’s all interdependent.
It’s Not Right — How Do I Fix That?
So, how do you fix a high or low compression ratio? You can add head gasket thickness, but that comes with a penalty in the form of increased quench. Opening the quench distance results in a less turbulent mixture at TDC, which in turn makes the chamber more prone to detonation. You can reduce head gasket thickness, but that has complications as well because you have to have a minimum distance to the head to allow for rod stretch and piston rock at operating temperature and rpm. In general, you need a minimum of .040 in. to the head with steel rods and around .060 in. with aluminum rods, but these are guidelines and I have run more or less. Also bear in mind that some engines like a touch more or less than these figures to produce peak power, so that’s another variable to consider.
Other options include sinking the intake valve, installing new intake seats and raising the valve (the intake has the greater area and therefore the greater effect on chamber volume), opening up all the chambers an equal amount, or machining the deck of the block or the heads. There are limits to all these methods, of course. The amount of piston progression or regression determines how far you can deck the block and there are limits to how much of the cylinder head deck you can remove. Some aftermarket aluminum heads will have the thickness pad cast into them, a recessed circle that indicates how far you have to go to minimum deck thickness. When the recessed area disappears you get to buy new heads . . . and aren’t we are having some fun now!

If you do any serious cc work, you’ll need a good selection of plates in different sizes to cover all your needs. The good news is that they are cheap and easy to make. The Smokey Plate is available through any of the speed merchants or directly from Moroso.
Helpful Hints to Make it Easier
Treating the chamber and the plastic plate with silicone breaks the surface tension and makes it much easier to get the space filled without bubbles. It takes very little error in the chamber measurement to make a big difference in the compression calculation.
I’ll give you a few helpful hints for doing your cc work because once again accuracy counts. The closer the cylinders are to identical the better off you’ll be because you’re always tuning to your worst hole.
I use a silicone grease to treat all my cc plates. I discovered that it reduces bubbles trapped in the cylinder heads in the tight spaces between the plate and head. I wipe a coating of the grease in the chambers and on the plate and wipe or polish it, if you will, to leave a slight film on both. The silicone breaks the surface tension and fewer bubbles will form or stick in the chamber.
 and measure it again after you hold it in your hand for five minutes. Same with your measurement tools. Buy and use mic stands.")
I know this is a tough one, but working in a temperature-controlled environment is critical when measuring volumes and dimensions. It should be your goal to end up in a temperature-controlled workspace to avoid variations in measurements. If you want to see how critical it can be, just measure a wristpin (you’ll need 1/10,000th of an inch gear) and measure it again after you hold it in your hand for five minutes. Same with your measurement tools. Buy and use mic stands.
Don’t get carried away with the grease used to seal the plate to the deck or the head. I use petroleum jelly and it only takes the lightest film to seal the plate. I’ve seen people induce an error by using a big glob of grease that then gets squeezed into the chamber changing the volume readings. You only have to use enough to just make the plate leak proof, and it’s not near as much as you think it would be. Just a tiny bit gets the job done.
I use windshield washer fluid for my cc work. It’s cheap, readily available, and it’s dyed a nice blue to make it more visible. It contains alcohol and it dries quickly with a blast of compressed air. It’s also something that you already have an MSDS for, so that’s one less thing to worry about.
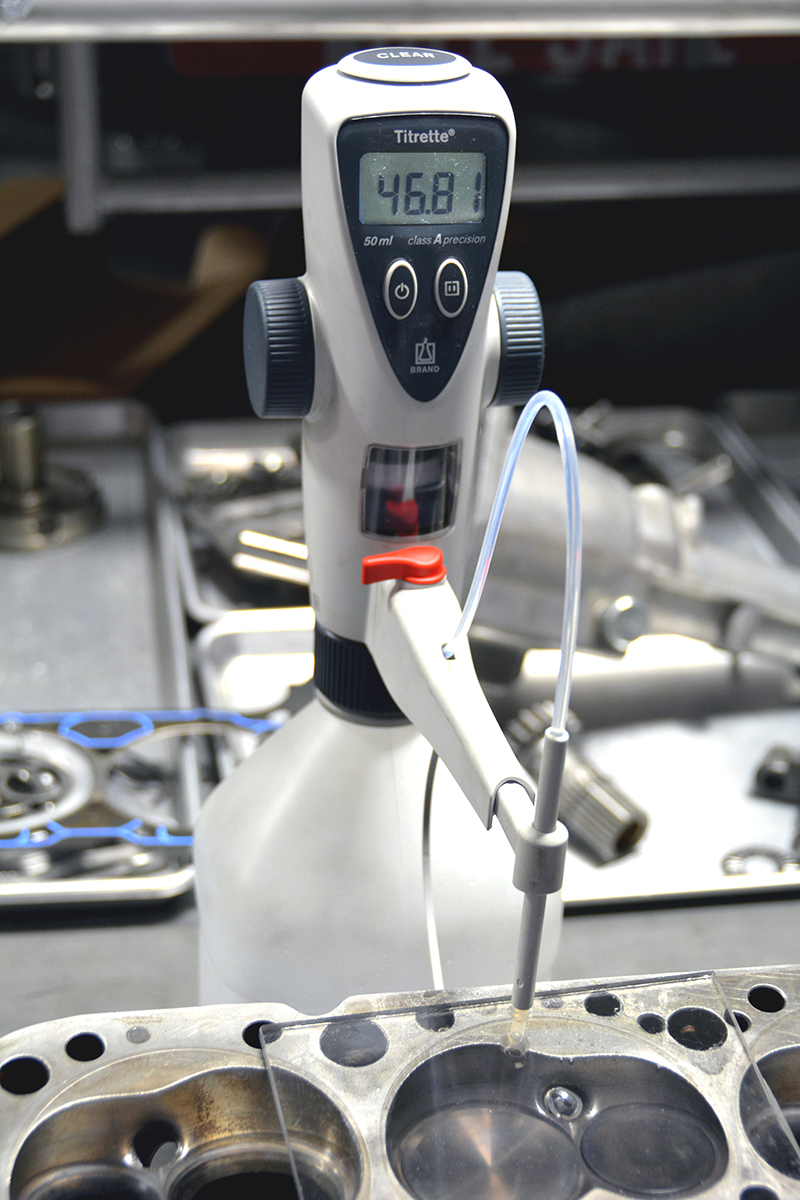
If you’re going to be doing a lot of cc work, you’ll need to invest in a good burette or an electronic one like the Brand Titrette. A good grade-A glass burette will set you back $175 or so. A grade-B will be about $135, and a burette stand will set you back between $85 and $220 depending on which model you buy. The Brand can be found for $750 (and up) depending on the day and the deals that are out there. The Brand is my personal choice because it’s accurate and repeatable and reads out to .01 cc. A glass burette is fussy to read and delicate, so think about how many you might break it, or the time spent filling and zeroing the starting point and suddenly the Brand becomes more affordable. If you do opt to go with the glass burette, you must remember to read at the bottom of the little curve of the liquid layer. Surface tension causes the fluid to ride up the tube walls slightly, so your reading is taken at the lowest part of the curve, called the meniscus.

Purging the dispensing chamber of air is something you do every time your break out the electronic burette. It’s an “A†graded instrument, but it’s only as accurate as your technique.
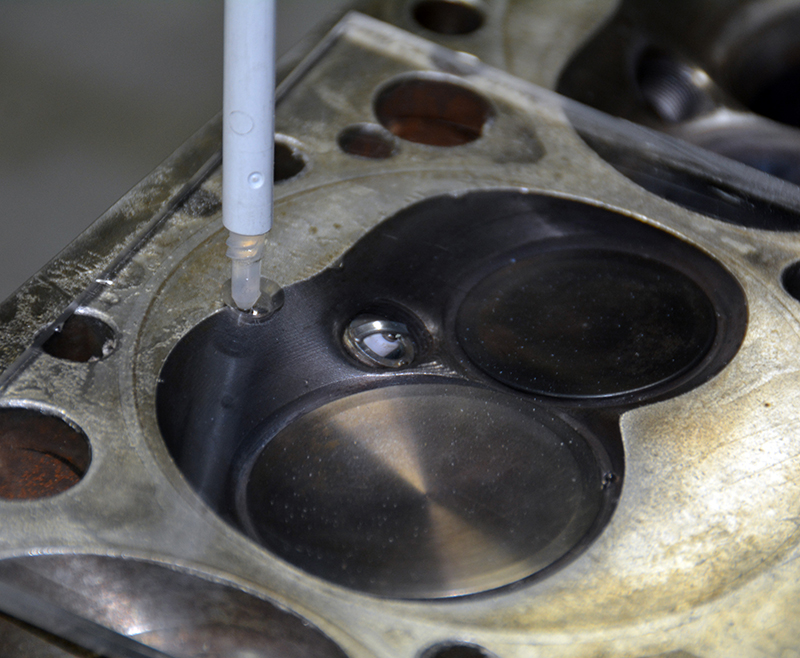
If you are using the Smokey Plate (named for the late, great Smokey Yunick), you will first have to measure the plate volume and engrave it into the plate for future reference. Treat the cavity with silicone grease or paste and seal the plate to a piece of Plexiglas, fill the cavity, and record the cavity volume. Now any piston volume you measure with or without a dome will be a snap. When using the plate, just put the top ring in its groove, load the piston into the bore without a connecting rod on it, put a light film of petroleum jelly in the bore above the piston, mount the plate and shove the piston up against the plate. Remove the plate, clean off any excess petroleum jelly, clean the plate, and remount it. Then verify the piston is at the top of the bore and measure the volume it takes to fill the tool. If you do this you don’t have to worry about duplicating the deck height or piston head-to-ring crevice volumes in your clearance volume calculations.

Pick a spot in the drilled hole and use that as your fill reference point every time. I’ve drilled the chamfer fairly deep so I use the transition between the chamfer and the straight portion of the hole as my fill reference point.

One of the big mistakes I see is putting a big glob of grease around the chamber to make the plate seal. It’s not needed. You only need the lightest coat to make the seal. It can even have a few random voids in it. In this case the surface tension of the liquid works for you. Just a wipe will do the job. Experiment with it and see how little you can get away with — and that will be just right.
If it takes more to fill the tool than the tool cavity volume you first measured, then you have a negative net dome volume and if it takes less volume to fill the plate you’ve got a positive net dome volume. While the piston supplier often tells you the net volume, I always measure it because the “nominal†value recorded may be an average taken over a large run of pistons. With the large valve reliefs dictated by the big valves we typically run, it’s impossible to know if you are net positive or net negative unless you measure it directly.
Other Helpful Things
- The formula for bore volume is “Ï€r2h”, where “Ï€” (pi) is equal to 3.14159, “r” squared is half the bore diameter multiplied times itself and “h” is the stroke. If you use inches you can convert by using the following.
- To convert cubic inches to cubic centimeters multiply cubic inches by
16.387 - 1 cubic inch is equal to 16.387 cc’s
- 20 drops equals 1 cc
- 1 milliliter equals 1 cc
- 1 ounce is 29.574 cc’s
- 1 pint is 473.176 cc’s
- 1 quart is 746.353 cc’s
- 1 gallon is 3785.412 cc’s
- If you find yourself measuring large volumes, you can simply weigh out a known volume of the fluid you use and then weigh the total amount used. For example, if you wanted to measure the total intake manifold volume, you could measure out and weigh 100 cc’s of washer fluid, weigh a gallon of washer fluid, subtract the empty jug weight and you’d have an easy conversion of weight to volume.
 Seeing the meniscus takes a little practice. I’ve drawn a reference line so you can see it. See the little silver-looking sliver below the white line? That’s the meniscus… it forms because the fluid “sticks†to the walls of the tube while the center dips down. Take your readings at the bottom of the meniscus. |
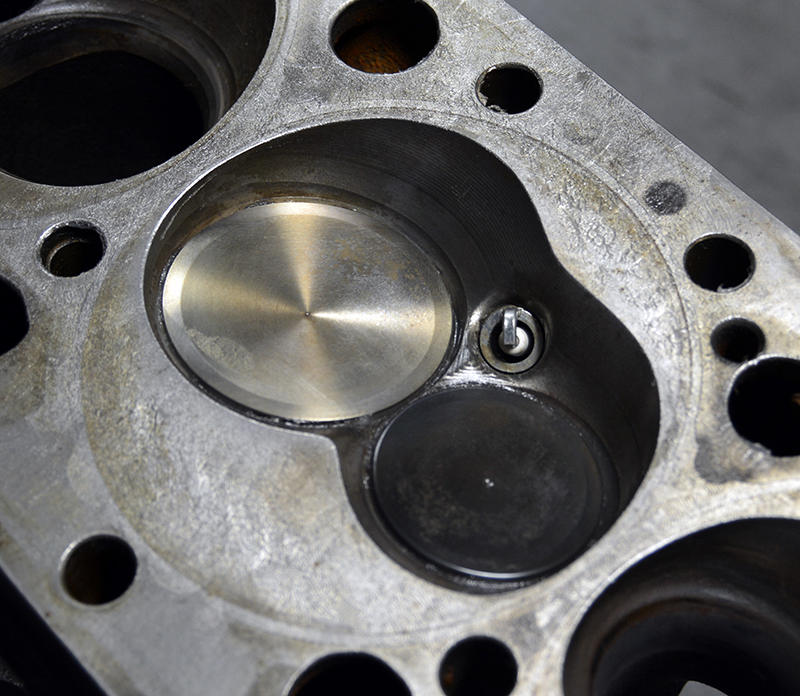
 Here’s some old-school technology — and a perfect example of why you’ll find a Smokey plate so handy. In the bad old days we had chambers as big as a bath tub and the only way to get the compression up where we needed it was to stuff a big dome up into the cavity. It gets the job done, but not without drawbacks. The dome interferes with flame propagation, so you’ll notice a big notch in the right center of the dome that provides plug clearance and a ditch for the flame to spread out into the shrouded part of the chamber. |
 Resolution is about 2/10 of a cc |
 Resolution is 1/1000th of a cc |
| Burettes are rated or graded by accuracy as “A,†“B,†or “Câ€. This grade “B†has a resolution of about .2 cc, as opposed to the Brand Titrette electronic grade “A†model, which measures in hundredths of a cc. It’s overkill, but the electronic unit is also fast, fast, fast and as accurate as you’ll ever need. Stone reliable, too. | |
| Â | |
 Small block Chevy smokey tool scribe the volume |
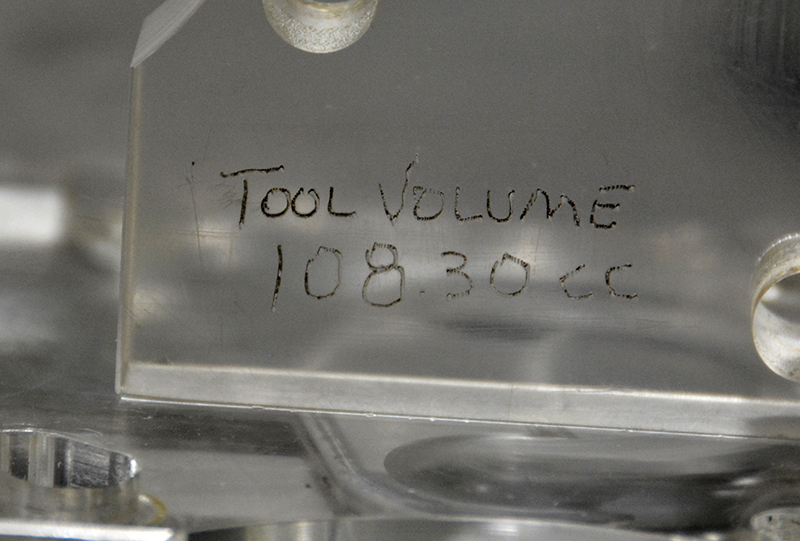
 Big block chevy scribe the tool volume |
| When you first get your new Smokey Plate, you have to measure the machined cavity volume so that you know the number you must add or subtract from when you measure the piston. I’m a big believer in writing everything down or scribing it where it can be found. In this case, I fill the tool to the top of the drilled fill hole. You can buy tools for both the big block and small block on standard bore centers, but you can see how easy it would be to make whatever you need for whatever application you’re working with. | |
 This is just before mounting the plate. You’ll have to look closely to see the layer of petroleum jelly that’s been applied. Don’t do what some do and smear on a big glob on. It’s like Brylcreem: “A little dab will do ya.” Just dated myself, didn’t I? |
 Any kind of silicone lube will do the trick, but it’s important to coat the plate and chamber with a little silicone to keep bubbles from sticking to the surfaces. You can dislodge them by tapping the head or the plate, or rolling the head around so that gravity does the job, but it’s a hassle you can avoid with a minute of preparation. |
 As the chamber fills, you may have to tip or roll the head slightly to move the bubble up under the nozzle. After you’ve done enough heads, you’ll get a pretty good feel for how to position the plate for the best possible fill. Gravity never fails — fluid goes downhill and trapped air goes uphill! |
 A nice clean fill. The silicone applied to the plate and chamber stops air bubbles from forming and the tiny bit of petroleum jelly seals the plate. No muss, no fuss. |
 A Plexiglas or Lexan plate, a little petroleum jelly, and a burette and you’re ready to begin the process of calculating the static compression ratio. |
 The Brand Titrette discharge nozzle extends and can be raised and lowered so it’s easy to put it exactly where it’s needed. If need be, I’ll use a wood block or a 4-5-6 block to raise the jug up on a steady platform if the heads are on stands, for example. |
 Once the chamber is cleared, the burette is ready for use. Just power it on, zero it out, and put the red valve handle in line with the nozzle and start your cc’ing work. |
 When the red valve handle is crossways to the nozzle the fluid is bypassing the discharge nozzle and returned to the jug. Since this burette is used in medical and industrial chemistry it wastes no product during the purge. |
 If the burette sits a while, it may gather a little air in the discharge chamber. Purging is as simple as running the plunger to the bottom of travel a few times and watching the chamber to ensure that all trapped air is cleared. |
 |


0 Comments