Do you have a solid understanding of how these systems work? If not, your diagnosis and repair efforts will suffer.
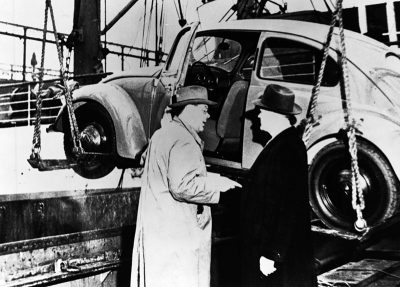
Early motor vehicles didn’t offer much in the way of climate control. A woefully inadequate amount of heat was typically ducted from over the exhaust manifold, and air conditioning didn’t even appear until the late 1930s — that is, unless you count placing a bucket of ice on the floor in front of a vent.
We’ve come a long, long way. The need for the defrost function so you can see where you’re going in icy weather was the first impetus for making decent heating mandatory, then common humanity impelled the car makers to do whatever was necessary to relieve the suffering of motoring mankind.
Have we become spoiled? Perhaps so. On the other hand, is there really any good reason why we should have to freeze or broil in the cabin of a car? Not when such great HVAC systems are standard equipment in modern Volkswagen vehicles. Besides, studies have shown that people drive more safely when car interiors are kept within a comfortable range of temperatures.
We’re not going to get into the theories of thermodynamics and refrigeration beyond mentioning that the Second Law of Thermodynamics states that heat always travels from a warmer object to a colder object. What we intend to share with you here are some of the subtleties of controlling and maintaining heating, ventilation, and air conditioning in common Volkswagen models of years past, which is what you are probably working on now.
Hot box
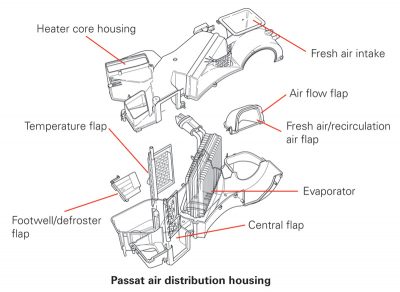
All modern Volkswagen models have what’s known as a “hot box.†In other words, coolant is always flowing through the heater core in the air distribution housing. Combined with the action of the blend doors, this makes for much more precise control of cabin temperature than the old-fashioned idea of restricting flow through this heat exchanger, and it’s also less prone to problems such as stuck or leaky coolant-control valves.
All the air that reaches the vents has passed through the evaporator whether it’s for heating or A/C.
Clean air
Over a decade ago, VW adopted a big advance in clean cabin air: a dust, pollen, and odor filter. All fresh outside air entering the vehicle for both heating and air conditioning passes through this filter. It is constructed with an activated charcoal layer between the dust and pollen filter elements. The activated charcoal removes odors and some pollutants such as ozone, which is converted to oxygen. The filter should be replaced according to the maintenance schedule, or more often if the vehicle is driven in dusty conditions.
While you’ll probably be able to endure sweltering in a car without A/C, you might not survive frigid weather unless the heating function is working. So, keeping the interior above that at which frostbite occurs is the HVAC engineer’s top priority.
Although the low heat-rejection of hyper-efficient Volkswagen diesels and FSI® gasoline engines make harvesting enough excess Btus to keep the cabin warm more difficult than it was in the fuel-wasteful past, Volkswagen has come up with ingenious designs that help maximize this process, providing more than enough heat for even Arctic conditions — when they’re operating properly.
Complaints of inadequate heat are typically caused by:
- Low coolant level
- A faulty thermostat — or perhaps it was removed altogether
- A heater core plugged with deposits or debris (trying to remove these either with air pressure, or by twisting a flexible cable through the coils is usually not successful).
- An inoperative blower, either from electrical problems, or because something has jammed the fan. Acorns? A mouse nest?
- Blocked air flow from a clogged cabin filter, or, again, a rodent’s nest.
- A blend door that doesn’t move to the proper position for whatever reason
- Check out these basics before you embark on any sophisticated electronics troubleshooting.
Manual? Well . . .
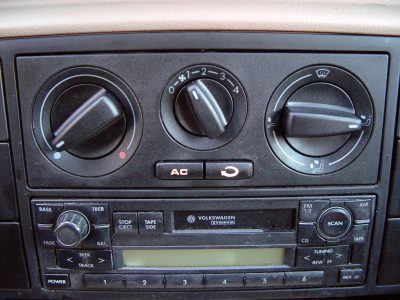
Most Volkswagen models sold over the years have had manual HVAC systems. Despite what the name implies, modern manual HVAC systems don’t rely just on levers, cables, and vacuum switches. There’s plenty of wiring, too. They’re called “manual†because cabin temperature isn’t computer-controlled. The humans aboard simply twist a knob to request a level of heating or cooling, and the system puts out what it can to achieve it. Some electrical inputs are used to help protect the compressor, however. There are ambient temperature, refrigerant pressure, and coolant temperature sensors to make sure conditions are right for engaging the electro-magnetic clutch (the clutchless variable-displacement compressors found on some late models are another story altogether, which we’ll cover in a future issue of TechConnect). Starting with the 2000 model year, a cooling fan control unit monitors all these sensor inputs and manages the compressor clutch circuit as well as the cooling fans.
With a manual system, all of these inputs need to be working properly to activate the compressor. If any input were to fail, the compressor clutch circuit would open. Without a control unit with self-diagnostic capability, this means each input needs to be checked using pin voltages. Whether you want to check the voltage signals at the cooling fan control unit, or each individual sensor is up to you. The unit is usually mounted on the driver’s side front frame rail. On a New Beetle, that would be under the battery tray, not all that easy to get to. Some cooling fan control units have strip-type fuses secured to the top, some don’t, depending on the application.
Input verification
Consider a 10-year-old Jetta VR6 with manual A/C. Its coolant fan control unit has two connectors, one four-pin and another 14-pin. On the four-pin connector, you will have the relay’s power supplies, a 6.0 mm solid red in Pin #1, and a 2.5 mm red/white tracer in Pin #3. They should have battery voltage at all times. In Pin #2 (2.5 mm red/white tracer) is the power supply out of the relay for low-speed fan operation. The final 6.0 mm red/white tracer is the power supply output for the high-speed fan.
The 14-pin connector is the source of activation for the internal relays, not only for the cooling fan, but also for the A/C compressor clutch. Pin #6 is a brown ground wire, and constant battery voltage comes in on pin #4, red/green tracer. Power from the ignition switch comes in on in pin #9, usually black with a blue tracer.
In order for the compressor to turn on, you need to see some inputs. The first check you should perform is on pin #8, black/red tracer. When the A/C button is pressed and the blower is commanded on, you should see battery voltage. Next, look at pin #2, a white wire. This is an unusual signal in that it is a five-volt square wave created by the refrigerant pressure sensor. The duty cycle of the signal will change with refrigerant charge. This is here to indicate if the charge is too low or too high to turn the compressor on and off, and perhaps damage it. Another signal that may inhibit compressor activation is that of the ambient temperature switch. Test for voltage between pins #5 (black/red) and #14 (green/black). If the signal indicates the air temperature is too low, it will not allow the compressor to run. Check these inputs to the cooling fan control unit whenever the compressor clutch won’t engage.
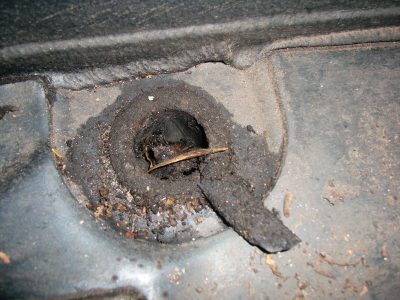
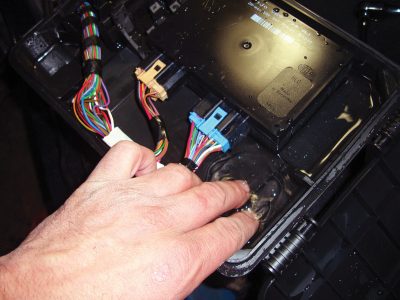
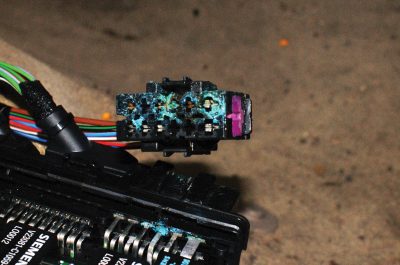
Whether with the manual or the automatic system we’re just getting to, one common source of trouble is water infiltration. It gets into connections and causes corrosion that will introduce resistance into the circuit, or interrupt it completely. There are lots of ways this can happen. For example, a sunroof or cowl drain can plug up allowing H2O to soak the interior, and there are often branched connections under the carpet that will corrode away if soaked. Or, a module or one of its connectors can fail in the same way. It makes sense to check for this before you start spending time doing electronic testing.
Full auto and the scan tool
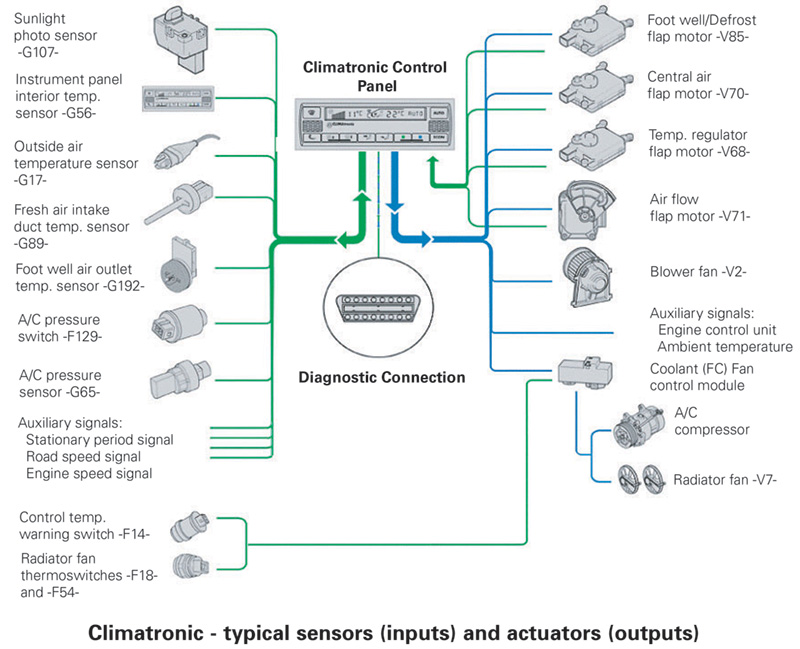
Climatronic® Automatic climate control system adds automation in that after setting the temperature to a number of degrees in the cabin, an electronic unit monitors both outside and cabin temperature conditions and uses a programmed plan for how best to achieve and maintain the chosen setting. These settings vary from full defrost heat to MAX A/C. Once a temperature is set, the control unit will automatically manipulate mode doors, temperature blend doors and the recirculation door. There are manual overrides the passengers can select to control positions of the mode doors, cabin air recirculation, and A/C compressor operation. Since these electronics are overseeing system operation, Volkswagen has implemented the same self-diagnostic features found in conjunction with other control units.
You may not realize what your current scan tool is capable of. You may not even realize how much useful information you have at your fingertips. By improving your skills with this most helpful piece of equipment, you will reduce your diagnostic time and maybe get ahead of the “cost-effective diagnosis†game. Volkswagen automatic climate control systems are endowed with the same extensive self-diagnostic features as are found in powertrain control systems. While the scan tool-based diagnostic features in auto-HVAC systems are extensive, the interface is proprietary, so without knowing what you’re looking for it will be difficult to interpret the data being displayed. So how does this work?
For many years, VAG® has been the factory proprietary scan tool for Volkswagen vehicles. Even if you purchase the European bundle for your aftermarket scan tool, you should still be able to display this “factory†software. The software in the scan tool allows you to communicate with all of the various control units in the vehicle. Each control unit is programmed to use the same software architecture, so what we’re about to describe will work also work on ABS and SRS.
You can enter the self-diagnostic feature with your scan tool by simply picking the address word you need. So, what’s an address word? With the factory scan tool, a series of numbers is used to identify the various systems you can enter. These numbers are called “address words†in your technical literature.
Where do you want to go?
Each system has its own address word. On the Volkswagen factory tester, you need to know what address word represents each system. Aftermarket diagnostic tools give the address word as well as a description of the system. In the case of automatic climate control, the address word is 08 (Auto-HVAC). Once you’ve selected the system, you will be asked to choose which function you’d like to perform:
- Function 01 identifies the control unit.
- Function 02 is for pulling codes.
- Function 03 is for actuation mode.
- Function 04 provides ‘basic settings.â€
- Function 05 clears codes.
- Function 06 ends communication with the control unit.
- Function 07 allows you to code the control unit to the particular car it is in.
- Function 08 is for reading data.
There are a few other functions to choose from, but we’re going to focus on the most important ones.
Starting with function 01, you will see that this merely identifies the control unit in the vehicle as well as its version coding. This information is useful if you think the coding may have been changed in error, or that a used control unit was installed and may not match the requirements of the original one. Providing the control unit is the proper one, you can correct coding if necessary.
Function 02 is pretty self-explanatory. Auto-HVAC units are capable of self-diagnosis, and can identify faults in one or more components. These components are either sensor inputs or actuator outputs. In the case of actuator outputs, you don’t always have to access the component and start your testing there. The other option is scan tool activation.
Function 03 is the mode where you can take advantage of the capabilities of the scan tool and request that the HVAC control unit activate various outputs. You can listen for the activation, and/or perform electrical testing on the component being activated. This allows you to verify that the control unit’s driver is capable of turning on any component in which you may suspect a fault.
Function 04 is referred to as “Basic Settings.†In general, this provides a “reset†or ‘re-sync†of computer-controlled features. The automatic climate control system needs to know the positions of the various temperature and mode doors in order to manipulate them if a change is requested by the occupant or detected by a temperature sensor. Basic Settings runs the control unit through the re-learn process, but more on this later.
Function 05 simply clears codes, and once you’re done communicating with the HVAC control unit, you should shut down this communication by selecting Function 06. This helps prevent corruption of software in the unit. Function 07 allows you to change the version coding. Version coding is a way for you to “tailor†the control unit to the vehicle it’s in. Vehicles come with more than one option. Each control unit must be made aware of these options in order to perform properly. This comes in handy when installing used parts. Although the replacement control unit may have the same part number, the coding must be changed to accommodate the requirements of the vehicle being repaired.
Finally, Function 08 (sometimes referred to as “data blocks,†or “measuring blocksâ€) allows you to look at data, such as a temperature sensor reading, or actuator position. The tricky part is that these data blocks are also identified with numbers and are displayed in blocks of four. You must look up in a table what the data blocks indicate for each display group. This information can often be found in your information system, or by purchasing books from aftermarket scan tool manufacturers.
Reset
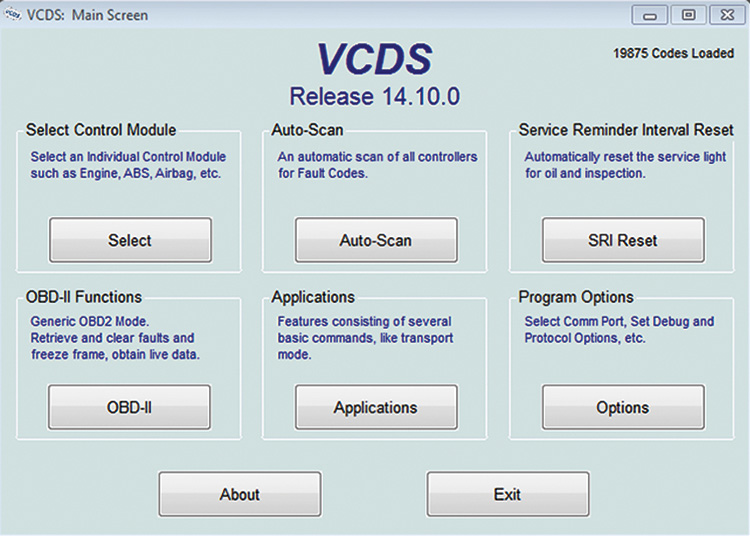
Once you have pulled codes, diagnosed a problem, and done a repair, you may need to reset the climate control system, especially if a mode door motor was replaced. This can be achieved through the “Basic Settings†feature. You will be prompted to enter a three-digit code. Leave the code “000†in the display and enter this mode. The positions of the doors are recorded, and they will then cycle to their respective end stops. Now, the control unit knows what the maximum and minimum positions are for each mode/blend door. When it needs to make a temperature adjustment as a result of changing conditions, it can make the correct change. Without knowing the current position of the doors, it will make the wrong adjustment and output the wrong temperature.
We hope that knowing the above information about typical Volkswagen HVAC systems will help you keep your customers happy with their cars — and with your work.
Download PDF



0 Comments