
Don’t Take Chances
Since VW vehicles are engineered for people who enjoy sporty driving, a higher percentage of them are built with manual transmissions than is the case with most other makes. So, clutch service isn’t uncommon in your shop, and this work must be done precisely using only the highest-quality parts, or you may end up doing it over.

The first automotive clutches were relics of the Industrial Revolution, nothing more technical than leather belts that were engaged gradually as an idler pulley took up the slack. When the engine and transmission were first placed in-line around the turn of the 20th century, sometimes with a self-centering cone clutch, the basic pattern was set that prevailed until front-wheel drive took over.
The multiple-plate wet clutch, as you might be familiar with from motorcycles, came next. It had its own drawbacks, including a tendency to drag. It wasn’t until asbestos friction material reached a reasonable stage of development in the early 1920s that we got the single-plate dry clutch – leather just couldn’t cut it in this design.
The next big thing was the introduction of the diaphragm-type clutch in the mid-1930s, which simplified the pressure plate, although Long and Borg & Beck® types continued to be used also. Except for the inevitable refinements, that’s where it stood for half a century or so.
Way better… and more demanding
Today’s clutches may look much the same as their forebears, but there are important differences both in the way they’re made and in replacement procedures. They have to take much higher rpm and much more power per cubic inch and per pound than ever before, so they incorporate numerous subtle improvements in materials and design.
Motorists are keeping their cars longer than they did in the past. So, after an extended period of faithful service, clutch work may be needed. On all makes that have adopted FWD, that design changed the service picture, with replacement typically taking several hours more than it used to on older rear-wheel drive vehicles. That makes it critical that you do the job right the first time and that you use genuine Volkswagen O.E. parts. Otherwise, you could be risking the waste of a considerable amount of time to handle a comeback. We hope the following helps you avoid that.
Release me!
We’d better make an important point right off: release distance has got to be just right. Seemingly inconsequential wear on parts, air in the hydraulics, or assembly mistakes can make the job turn into a disaster. On constant-contact automatic adjustment designs, for instance, the throw-out bearing is spinning whenever the engine is running. If the preload is too heavy, the bearing may overheat, seize, and destroy the diaphragm fingers.
Depending on the year and model, Volkswagen clutches may be actuated either hydraulically or by means of a cable. Also, the cable may be adjustable or self-adjusting. Examine all the parts involved in release action as you remove them. That means fork, pushrod and ball stud pivot wear surfaces, cable and automatic adjuster condition, and cylinder seals. Take some time to understand how the release set-up works so you’ll remember how it goes back together.
While it may seem logical to assume that a case of slippage in a car with lots of miles on it is due to nothing more mysterious than worn-out friction material, it makes sense to check the release mechanism before pulling the transaxle.
Shaky and noisy
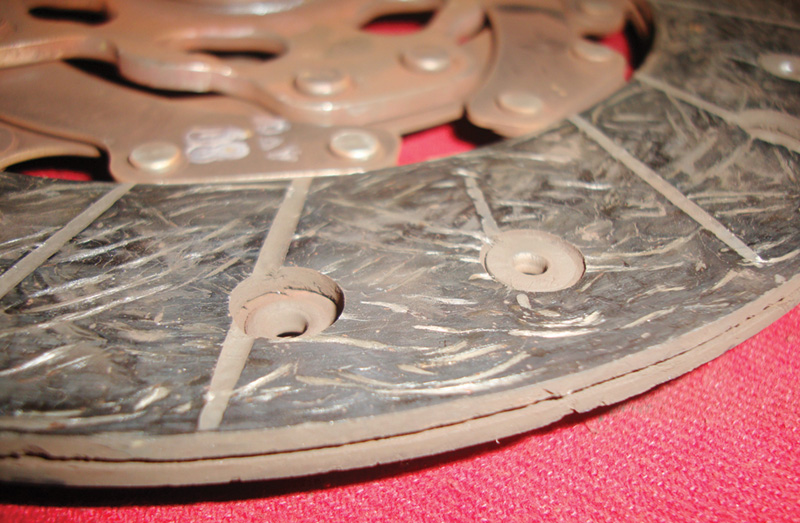
If chatter is the complaint, again don’t automatically blame the friction components. Deteriorated motor mounts or loose motor mounts could be the culprit – a quick look and a little pushing and pulling will let you know. A typical cause of this condition is oil contamination from a leaky seal or gasket. Also, what kind of a release/engage input is the clutch getting? If it’s jerky because of a worn throw out bearing guide tube or fork pivot, you can’t expect the other components to work right.
With the clutch disengaged, grinding and crunching whenever you move the shifter out of neutral and into a gear is a definite indication that you have a problem.
This indicates one of four things: you have a clutch malfunction, you have a clutch control malfunction, you have a synchronizer/gear failure, or you have a fluid concern. We’ve focused this article on the first two – a clutch malfunction or a clutch control malfunction.
There were many advantages: better handling and highway tracking, great traction, packaging efficiency, etc. A more involved clutch replacement procedure was a small price to pay.
A spin-down test will confirm the condition – you should be able to engage reverse (which has no synchronizer) without clash within no more than 10 seconds after depressing the pedal. No? Then there’s excessive drag, possibly due to a dry and/or corroded pilot bearing. Another thing to think about is corrosion on the spline that keeps the disc from sliding freely.
A lack of release is sometimes encountered after a clutch is replaced, and this is commonly due to an assembly mistake or failure to properly bleed the hydraulic release mechanism. Clutch experts maintain that air is one of the main causes of release failure.
So, if you think you’ve got the system bled, but still can’t achieve release, or if the pedal has a soft, spongy feel, keep bleeding.
The opposite situation is lack of engagement. The release mechanism is the first place to look, and faulty assembly could be the cause.
Friction surface
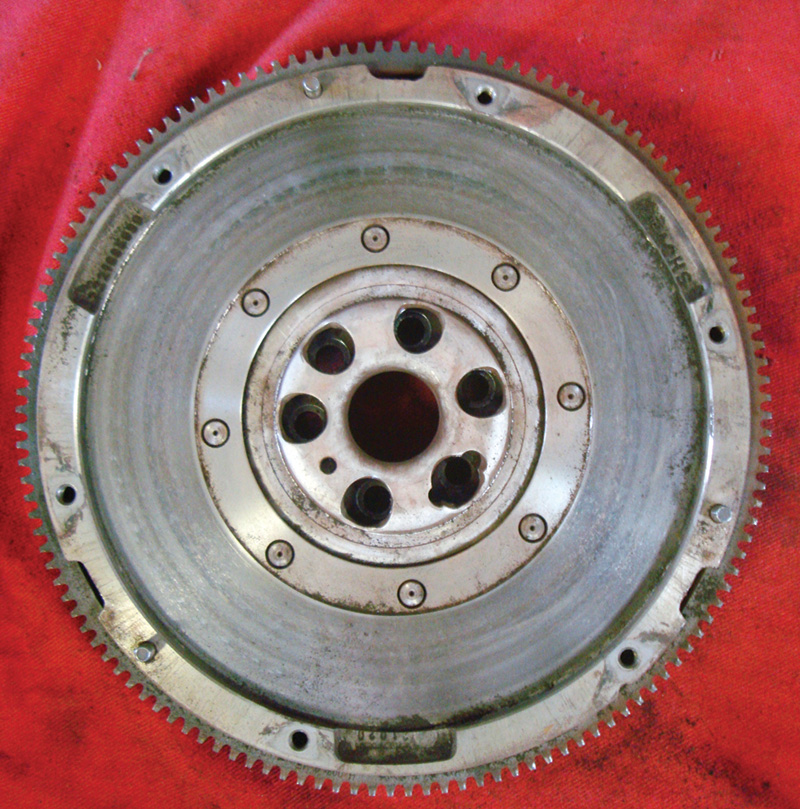
Traditionally, flywheels have been reground to make sure both the contour and surface finish are in the proper condition to allow smooth clutch operation, but replacement is often the better choice. Examine it under a good light. If you see any stress cracks or hot spots (blue/purple discoloration) on the contact surface, a new flywheel is in order. Accumulations of facing material or slightly blued areas can be eliminated with fine sandpaper. The universal rule of thumb for maximum runout is .003 in., but there is no practical way in the field to judge the miniscule taper a flywheel’s friction surface is supposed to have.
Where flywheel finish concerned, it may seem sensible that a rough surface will provide the best grip, but that’s completely wrong. What’s wanted is as much microscopic contact area as possible, which translates into a very smooth finish.
Volkswagen vehicles use a “stepped†flywheel design. This means if you have the inner portion machined, you are actually moving the pressure plate away from the flywheel. This increased gap will help reduce the grip, the pressure plate and flywheel have on the fiber plate. In order to help maintain factory specifications for flywheel depth, the upper step will have to be cut the same amount as the friction surface, requiring the removal of the pressed-in alignment drive pins.
It often makes more sense to simply replace the flywheel with a new one from your local Volkswagen dealer’s parts department. Some late-model Volkswagen vehicles may have a dual-mass flywheel, which absorbs torsional vibrations from the crankshaft. This benefit is achieved with a primary mass bolted to the crankshaft, a secondary mass on which the clutch is mounted, and a spring and damper assembly between them. When removing a dual-mass flywheel, you must line up the bolt holes so the bolts can pass through. Do not use an impact gun to remove the bolts. These units should be replaced, not ground.
Hands-on
When it comes to performing the work of clutch replacement, there are numerous important procedural points to integrate into your craft. The first is simple, yet crucial: try that disc on the splines before you bolt anything up. On older Volkswagens, for instance, the regular 1.8L uses a 24-tooth 13/16ths spline, but the 16-valve version has 28 teeth and a 7/8ths diameter. You won’t be able to see the difference.
Don’t measure diaphragm finger height with the pressure plate sitting on the bench. This dimension only has significance with the plate bolted down.
Get the input shaft spline nice and clean, and then apply some wheel bearing grease. A thin coating is all that’s required, and too much can cause trouble. Anti-seize compound is decidedly NOT the proper lubricant here. It doesn’t have sufficient friction-reducing qualities, and it would tend to fly off onto the facings.
With hydraulic release set-ups, be careful not to depress the pedal with the pushrod disconnected or you’ll pop the slave cylinder. This will require replacement of the slave cylinder and bleeding of the system. When it comes to replacing or rebuilding the clutch master or slave cylinder Volkswagen does not have a procedure for rebuilding the master or slave cylinders.
After replacing any parts of the hydraulic system flushing and or refilling the system will be required. Never use old fluid or any fluid that has been left open on a workbench from a prior repair. If the system uses brake fluid it may be contaminated with water since brake fluid is hygroscopic and can retain moisture from the air. Always use a new unopened bottle of fluid and make sure you are using the correct type of fluid. There are lots of different ways to bleed a clutch system, some of which require special tools. However, make sure you refer to erWin® for the correct bleeding procedure for the vehicle and transmission you are working with.
There’s a development that’s made replacing the clutch assembly more convenient: the availability of clutch kits. That means you get the disc, pressure plate, release bearing, and a plastic alignment tool in one package. Some even include a pilot bearing and flywheel. These kits can be purchased from your Volkswagen dealer’s parts department.
Bolts and pilots
When installing a Volkswagen’s flywheel, new mounting bolts must be used. That’s because they are of the torque-to-yield type – they stretch when tightened. They weaken and will continue to stretch if used a second time, possibly causing bolt failure.
Another part that is often overlooked when doing a clutch job is the pilot bearing. It supports the input shaft of the transmission and can wear to the point that it allows the shaft to move around. This can lead to input shaft bearing wear and unusual noises during shifting. You should remove the pilot bearing with an internal puller and press in a new one with a bearing/race installer. Not all Volkswagen manual transmissions use a pilot bearing. Refer to erWin® or your local Volkswagen parts department for additional information.

Armed with a new pilot bearing, flywheel mounting bolts, flywheel, pressure plate, clutch disc, and throw-out bearing, you can start the reassembly process. Apply high temperature grease to the pilot bearing. Install the flywheel using the new bolts (and take note of the offset bolt pattern when reinstalling the flywheel. Two bolts will be closer together than all of the rest).
Center the clutch disc using the proper tool, and bolt down the pressure plate to the recommend torque specifications and in the proper torque sequence. Now replace the throw-out bearing.
With the throw-out bearing and the fork in the proper position, you can now install the transmission. Bolt on or lock back in the axles, attach the shift linkage, and install the starter. Self-adjusting release cables should be reset, and the plain type adjusted. Bleed the hydraulics, as outlined in erWin®.
Sometimes customers may notice that pedal effort is lighter after a clutch job than it was before. Explain that by getting rid of friction in the release system through cleaning and lubrication, that this is how the clutch felt when it was new. They may have never noticed the gradual increase in the force required.
Download PDF


0 Comments