The causes range from internal engine problems and vacuum leaks to improper spark plug gaps.

This 1957 300C wagon had a rock-solid idle. Why should your customers’ late-model cars be any different?
So, you have a vehicle in one of your service bays and the work order says, “Customer states poor idle quality.†This is where good service writers earns their keep. Perhaps this is you — many independents have to wear a lot of different hats. We must try to find out as much as information from our customer as possible. Does it occur all the time? Is it intermittent? In gear, or only in park or neutral? Does the vehicle drive normally otherwise? If we have determined that indeed the problem only occurs when the vehicle is at idle, then the next question to ask ourselves is, “What is different about the vehicle when at idle as opposed to when it’s driving down the road?†Air flow is one part of the answer. The vehicle rpm is substantially lower, so it fits that the air flow into the engine is much lower as well. Keep this in mind as we work through some logical steps to address the problem.
On solid ground
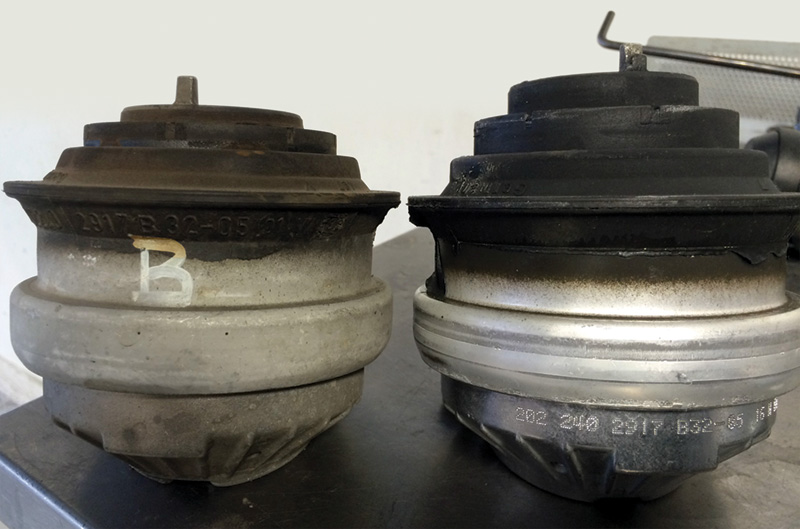
Note that the mount on the left is shorter than the new mount on the right indicating that it has collapsed.
Your customer or service adviser has informed you that the concern of poor idle quality only takes place when the vehicle is in gear. Verify the complaint and road test. Faulty or leaking motor mounts can be felt as excessive vibration in the cab or steering wheel. This can mask itself as an engine idle problem when indeed the customer is feeling the normal vibrations of the engine without the proper dampening. After confirming the customer’s concern, check for weak or broken motor mounts. Most Mercedes-Benz motor mounts are hydraulic, meaning oil-filled. Such mounts give you a smoother ride and feel compared to the solid rubber type. A visual inspection may reveal a leaking mount, which would indicate a need for replacement. Have an assistant power brake the engine while in gear and watch for excessive movement. Be sure to check in both forward and reverse. Lifting each side of the engine with a hydraulic jack (use wooden blocks to prevent damage) can also reveal a broken or weak mount. Always replace the mounts in pairs, and don’t forget to check the transmission mount.
Cylinder contribution

If a quick visual inspection doesn’t reveal anything obvious, it makes sense to enlist the power of XENTRY, or whatever scan tool you have available. Even OBD II Mode 6 can help you zero in on problem cylinders.
Before modern technology took over, when addressing idle-quality concerns one of the most important tests was of cylinder power balance. We could hook up an analyzer to the ignition system and, using the technology we had then, have the analyzer either manually or automatically cancel one cylinder at a time to try to determine if one or two are weak. Today it is known as a cylinder contribution test, or smooth running values. Using your scan tool, take a look at the smooth engine running PID and see if you have a cylinder with weak contribution compared to the other cylinders.
We should mention that the OBD II Mode 6 is also useful here as it provides misfire counts for each individual cylinder.
Once you have identified the cylinder or cylinders, you can logically proceed with solving the problem.
Spark, fuel, and compression
As much as automobile technology has advanced in the last few decades, any gasoline-burning internal combustion engine still needs three essentials in order to run: FFC — fire (spark), fuel, and compression. Of course, all of these ingredients must be present at the right time. Let’s take a look at the spark part of the equation.
What comes to mind when you think of a tune-up? In older model vehicles, a tune-up could have referred to replacing spark plugs, spark plug wires, the distributor cap and rotor, and adjusting the timing and carburetor. With modern vehicles, fuel delivery and timing are controlled electronically via the vehicle’s Engine Control Unit (ECU), or, according to SAE, the Powertrain Control Module (PCM). This brings one question to mind: What does a proper tune-up consist of on today’s vehicles? Basically, a tune-up now consists of nothing more than replacing spark plugs and checking the condition of other critical ignition and emissions-control components. Older vehicles used conventional, non-precious-metal spark plugs that required replacement at least every 30,000 miles. Now, all manufacturers have switched to long-life precious-metal platinum and iridium plugs. Not only do they provide longer service life, they also provide additional benefits, such as improved fuel economy and reduced emissions. The advancements in air/fuel ratio technology (and, of course, the big shift to unleaded gasoline, which occurred in 1975 — 42 years ago!) have also improved spark plug life. Ignition systems have undergone advancements since the days of the distributor cap, rotor, and high-tension cables. All late-model Mercedes-Benz ignition systems have eliminated plug wires and the distributor cap and rotor with COP (Coil On Plug, or Coil Over Plug, depending on the source) technology. COP ignition coils are typically non-wearing items, which are replaced only if one has failed. Using four, six, or eight coils instead of one means each of the individual coils has more time to energize between firings. This improved coil saturation time increases the available voltage, which helps mostly at higher rpm where misfires are more likely to occur.
COP delivers about 30% more spark energy than the old distributor, single coil, and spark plug wire system, but a weak, corroded, open-circuited, or otherwise defective individual coil will cause a misfire. Be sure to check the connecter for looseness, broken lock tabs, or oxidation. The PCM will send the signal for the coil to energize and discharge, expecting the spark to occur and ignite the air/fuel mixture in the cylinder. But the plug does not fire.
A misfire causes unburned gasoline to enter the exhaust system. This increases the temperature of the catalytic converter, which could damage it. To prevent this, the PCM generally shuts off the fuel injector on a cylinder that misfires more than a certain number of times and under certain conditions. COP boots on the ignition coil fit tightly around the spark plug insulator, and these boots can become brittle and lose their moisture-tight seal when exposed to years of heat and chemical action. Cracked or damaged boots should be replaced whenever new spark plugs are installed if available separately from the coil. Remember the silicone ignition grease.
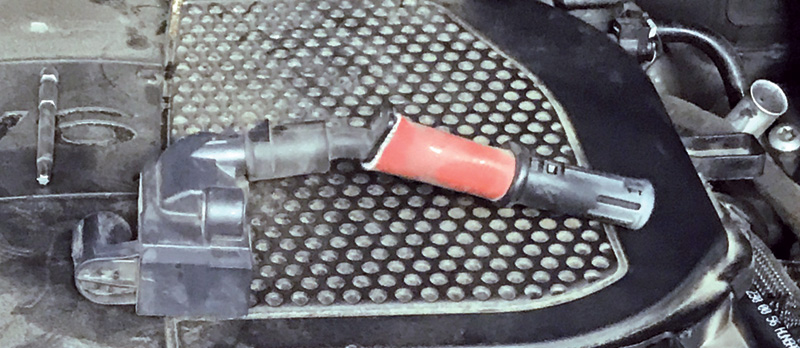
Note the white discoloration on the end of this COP boot. This could indicate spark leakage along the spark plug insulator to ground.
Incorrect heat range choice and electrode gap setting can have an effect on how efficient combustion is. What makes the heat range of the spark plug important is the reliability and longevity of the spark plug. A too-hot plug can fracture due to excessive heat, and, more critically, can become a hot spot in the combustion chamber that will cause pre-ignition and detonation, both destructive conditions. However, a certain amount of heat is required to prevent the spark plug from fouling even with today’s gasoline. A cold spark plug will be prone to carbon deposits and fouling. Once the electrode nose is fouled, it will become less effective and its spark quality will fall off as voltage bleeds away via “shunts.†Never vary from the recommended spark plug part number — even if you think you know better than the engineers.
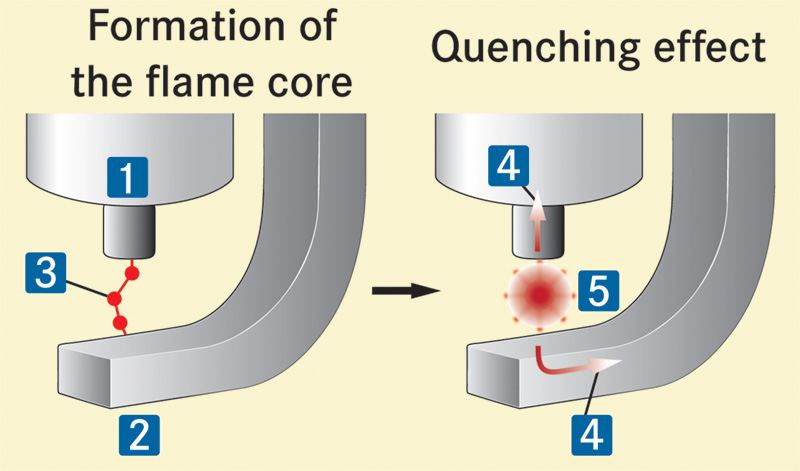
An Incorrect spark plug gap can create its own set of problems. Even though the manufacturers pre-gap plugs from the factory, it’s important to check them as they might not be gapped to Mercedes-Benz’s specifications, or may have been altered in shipping. If the gap is wide enough, the flame core and the quenching effect will be right, so reliable ignition can be expected. But if the gap is too wide, a large discharge voltage becomes necessary, and the limits of coil performance are exceeded, and discharge becomes impossible, or the coil will kill itself trying to do its job.
Pull the spark plug from the offending cylinder and check it for fouling, proper gap, and heat range. Be sure that it is Mercedes-Benz’s recommended spark plug for the application. Many technicians have been tempted to use plugs from an interchange and end up having issues with engine-running values. (NOTE: Certain engines, such as M276 and M278, use indexed spark plugs, so the gap must face in a particular direction when installed or running problems may result.) Stick with the genuine article.
Now swap it with another spark plug (on cars with waste-spark ignition, don’t swap with the companion cylinder as sometimes the misfire counter will not “see†it) and return to your scan tool to check the smooth engine running values again. Has the misfire moved? If so, then you have found the problem. If not, you still need to eliminate spark from the equation. Is it COP, or does it have wires? Swap the coils or wires in the same manner and recheck until you have eliminated spark as the problem. Now to move on to other possible causes of poor idle.
The squeeze
At this stage you’ve already been dealing with spark plugs, so now is a good time to check on the compression of the cylinder, paying special attention to any that you suspect of being weak (cylinders). This used to be the first part of a normal tune up, but considering the advancements in engine technology we are seeing far fewer issues with compression today than in the past, unless, of course, maintenance has been neglected, or the number of miles on the odometer is in the hundreds of thousands. Check compression in all the cylinders so that you have a good base line to compare against. Consult the Workshop Information System (WIS) for the proper specifications, but what’s really important in idle concerns is the relativity to the other cylinders. A mechanically sound engine should have no more than a 15% variation among cylinders. In the case of a cylinder that’s weaker than it should be, further testing is called for.
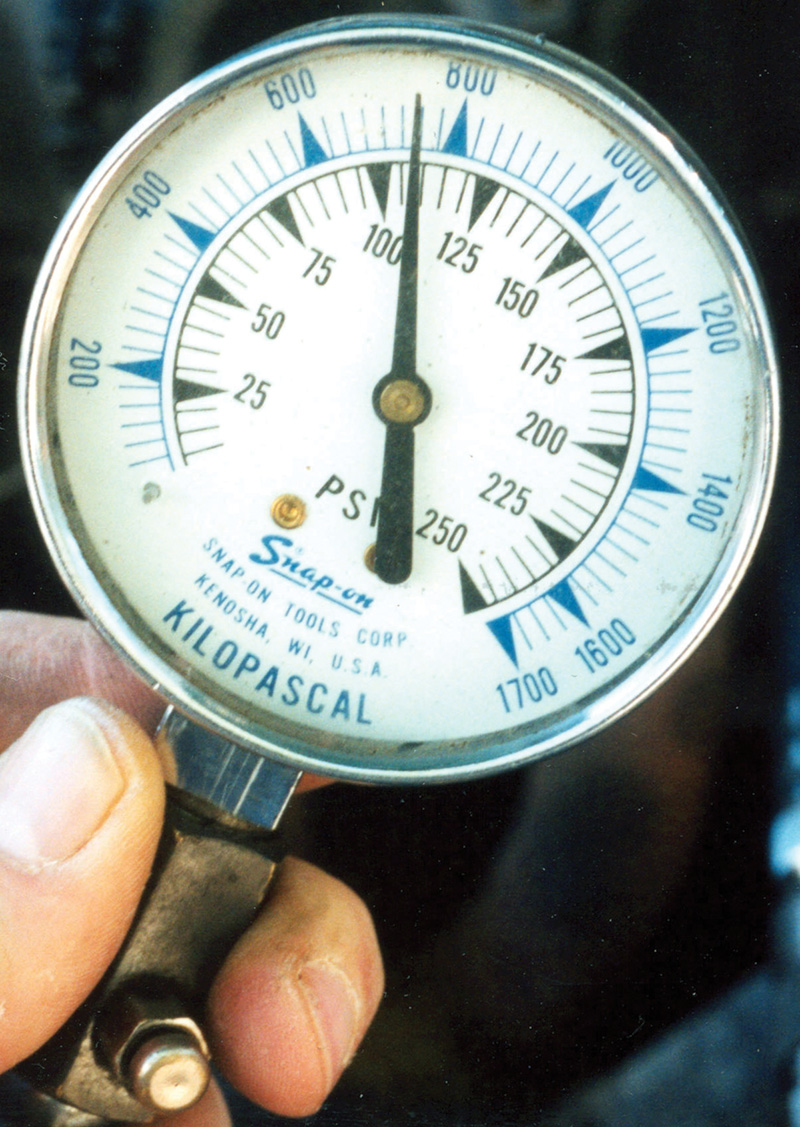
Nothing’s more direct than a dry/wet compression test, but the procedure outlined in this article will tell you even more than the traditional way.
Now it is important to get as much data as possible to understand the cause of a weak cylinder. A wet compression test can be helpful in determining if the compression is escaping through the rings or a valve (no improvement in the latter case). Another valuable test to run here is dynamic compression, also known as a running compression test. When you do a normal compression test, you are checking cylinder sealing, not cylinder breathing. This test looks at the breathing of an individual cylinder. Put all spark plugs but one back in. Ground that plug wire or unplug the coil to prevent module damage. Disconnect that injector on a port fuel system or deactivate the fuel pump if you haven’t already done so. Put your compression tester into the empty hole. The test can be done without a Schrader valve, but most people recommended leaving the valve in the gauge and releasing the pressure on the gauge every five or six “puffs.†Start the engine and take a reading. Write it down. Give the throttle a “snap†acceleration. The reading should rise. Write it down. What you are trying to do is open, then close the throttle as fast as possible without actually increasing rpm. This forces the engine to take a “gulp†of air. Now write down your readings for at least the bad cylinder (if there is a single bad cylinder) and maybe for two or three good ones. Running compression at idle should be 50-75 psi (about half cranking compression). Snap throttle compression should be about 80% of cranking compression.
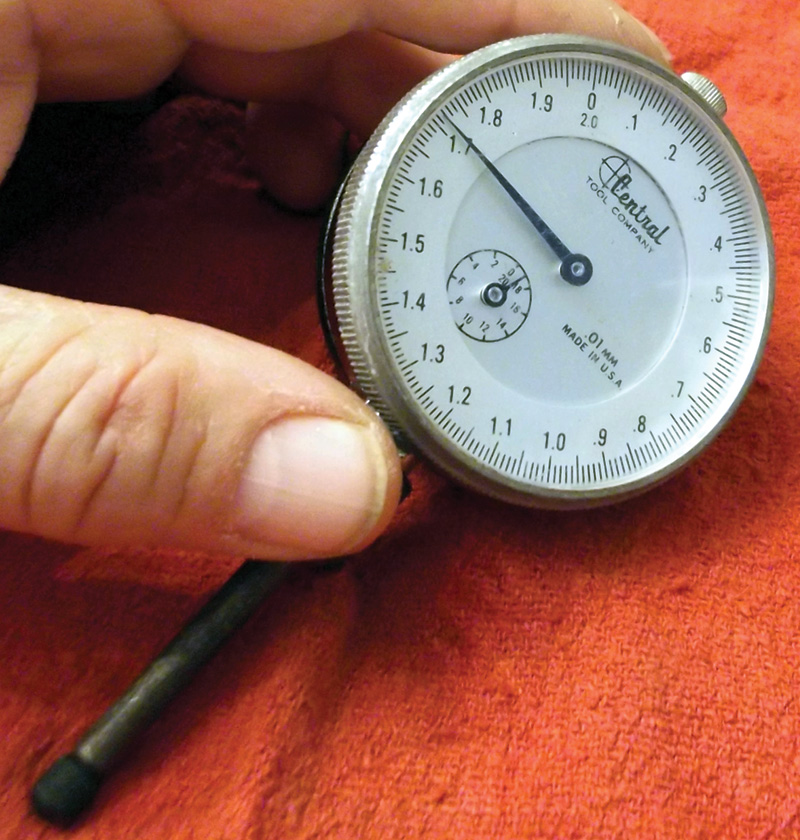
A worn-down cam lobe can prevent sufficient filling or exhausting of a cylinder. You can check for proper lift with a dial indicator on a suitable fixture if you suspect such a condition. Also, look for a collapsed lifter.
Here are two possible scenarios:
- Example 1, restricted intake: Static – 150 psi. Running – 75 psi. Snap – 80 psi. If the snap reading is low (much less than 80% cranking compression), look for restricted intake air due to a severely carboned intake valve, a worn cam lobe, a rocker problem, and possibly stuck shutters in variable intake systems.
- Example 2 restricted exhaust: Static – 150 psi. Running – 75 psi. Snap – 180 psi. If snap measurements are significantly higher than 80% of cranking measurements, look for restricted exhaust on that cylinder, which may be caused by a worn exhaust cam lobe, or a collapsed lifter. Or, if they are all high, look for a clogged catalytic converter.
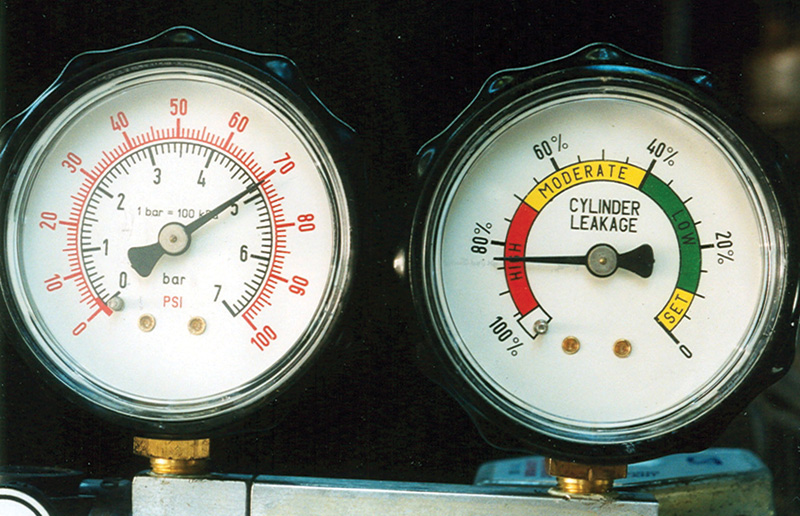
A cylinder leak-down test will round out the evaluation if you indeed have a low cylinder. This simple test will allow you to “hear†where the leakage may be occurring (intake, exhaust, or crankcase) along with the percentage of leakage occurring. Cylinder leakage of 8% or less is considered acceptable, the lower the better. Check for bubbles in the cooling system as well — you may be dealing with a blown head gasket.
Fuel and air flow concerns
Assuming you’ve eliminated spark and compression faults as possibilities, fuel and air flow volume need to be checked. Concerning fuel, connect your pressure gauge and look for proper specifications. Although a lower-than-spec reading would most likely affect all cylinders, it is important to confirm this basic requirement. Once you’ve established good fuel pressure and volume, check the injector of the weak cylinder. Use your lab scope and look at the waveform to be sure it is getting the proper signal. Bad injector commands can be caused by many things from faulty drivers in the PCM to a cracked reluctor for a cam or crank sensor, which we won’t go into in this article.
Current ramping is a useful test for a faulty injector. A good signal is an indication that you may have a faulty injector. Pull the connector while running to confirm you have no change in rpm in that cylinder. An ohm check with your multimeter can be used for finding excessing resistance. Use the reading from one of the known-good injectors as your base line. An open or shorted injector will need to be replaced, of course. Sometimes the injector can check out electrically, but still be faulty for mechanical reasons — it could be plugged or stuck. With your pressure gauge attached, use a scan tool to energize the suspect injector and watch for a pressure drop, then compare that to the other cylinders. If you have little or no pressure drop, you’ve found the problem. Swapping injectors is also a good way to check for mechanical problems, although it’s more labor intensive.
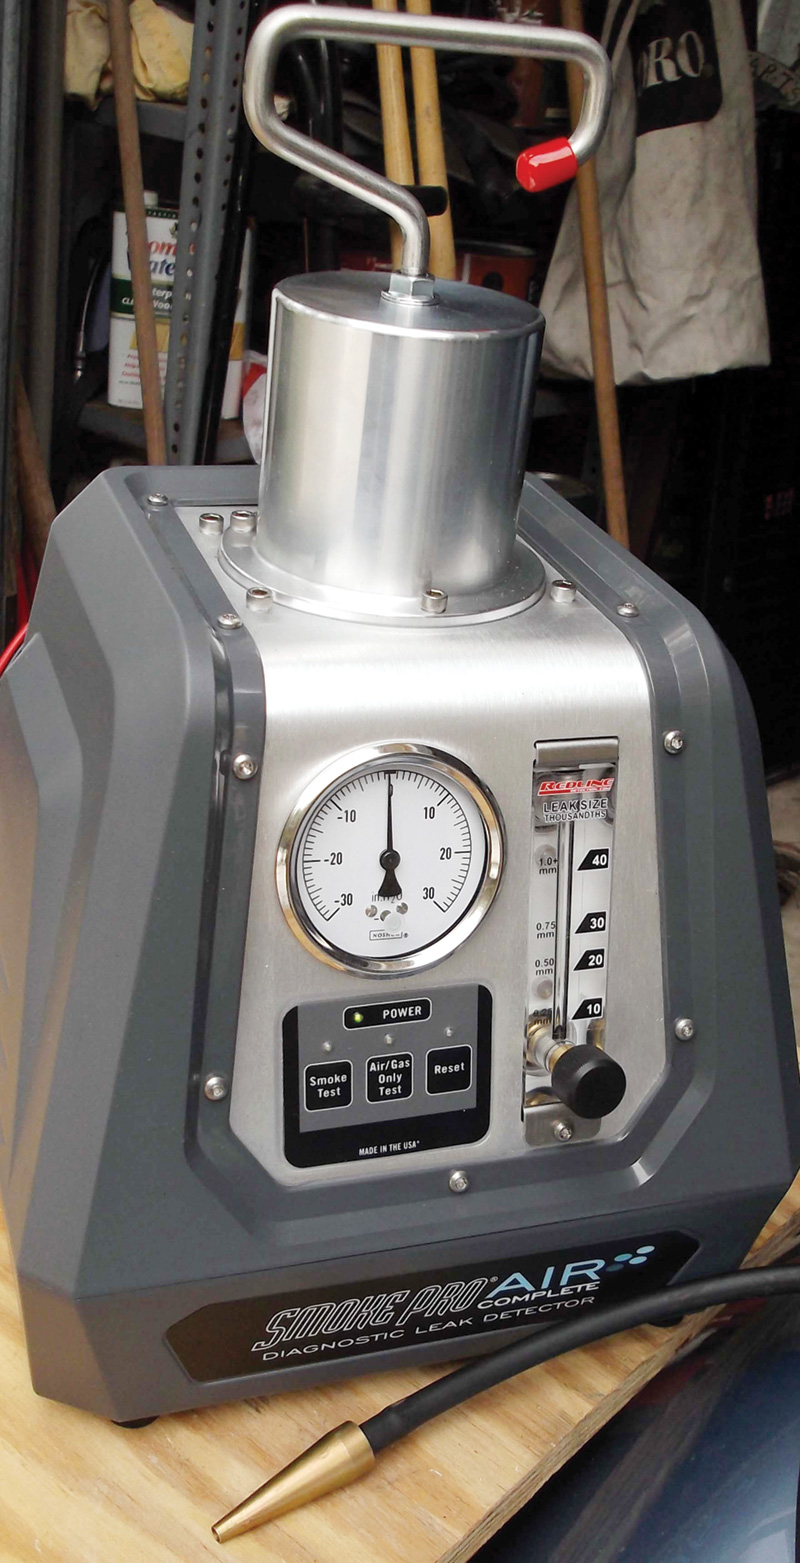
A smoke machine is great for finding intake leaks, and we’ve even identified a burned-through piston with one.
How about air flow? Remember, we talked about there being less air flow at idle than at cruise, hence just a small amount of dilution or diminished air flow can cause poor idle. Smoke test the intake system and check for intake leaks. Any unmetered air will cause idle problems and will usually be accompanied by high fuel trims.
Don’t forget to check the crankcase ventilation system for internal leaks. PCV problems usually show up as internal leaks and won’t be revealed by a smoke test.
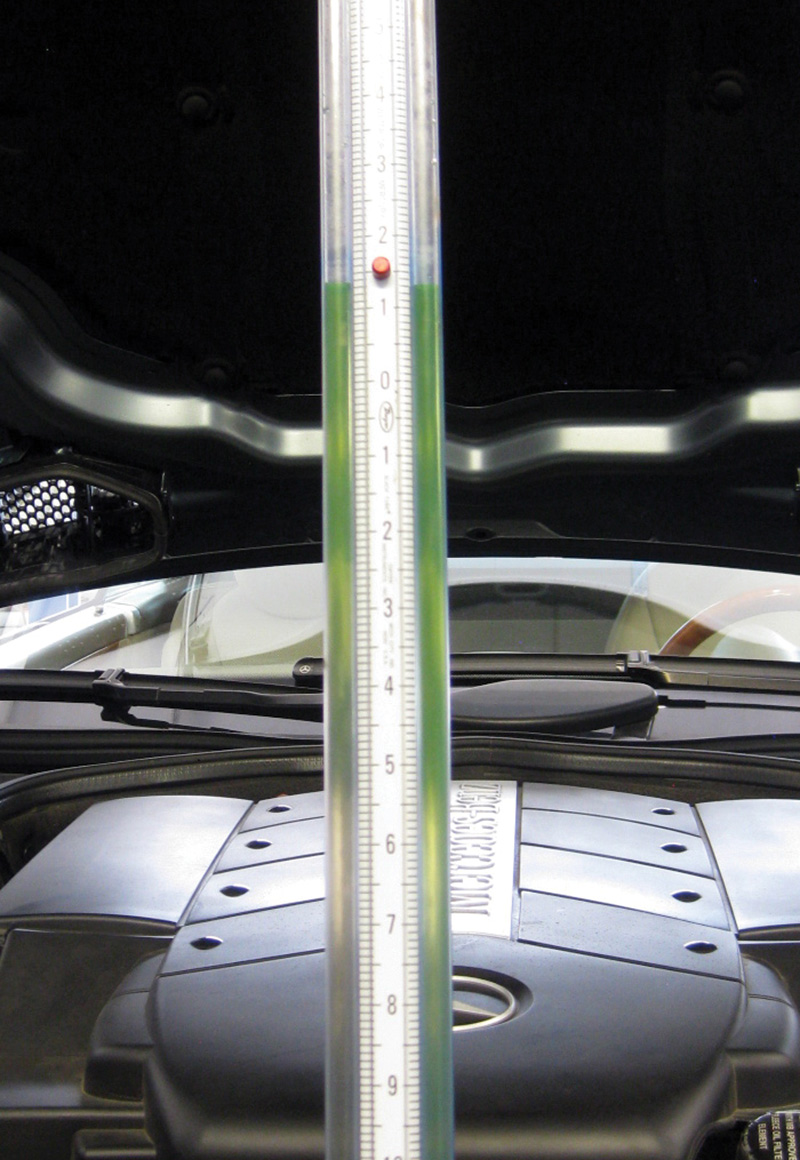
Using a slack tube manometer is handy for checking this. Manometers operate on the hydrostatic balance principle: A liquid column of known height will exert a known pressure when the weight per unit of volume of the liquid is known. This test is most easily done at the dipstick tube or the oil filler cap.
Check your scan tool data PIDS and watch the air flow through the MAF sensor against specifications.
Overlooked?
By now, we hope you’ve learned to look for a perforated or otherwise leaking duct downstream of the MAF, which admits what’s called “false air†that causes such a lean mixture that massive misfiring can occur, especially at idle.
There’s another possibility that’s often overlooked: A vacuum leak in the intake manifold runner that leads to the misfiring cylinder that leans it out to the point of idle misfire. Remember, an O2 or A/F ratio sensor is an averaging device, so it won’t cause the PCM to richen the mixture enough to that cylinder to produce a burnable blend. We remember numerous examples of this, mostly in the form of a gasket leak at the intake manifold-to-cylinder head interface, but sometimes just a cracked hose that’s connected to a tap in that runner. A propane wand is one way to find the gap.
An EGR valve that’s stuck open, or causing a vacuum leak, is not unusual. Smoking the intake may reveal this, or you can open and close the valve’s pintle with long-nose pliers.
These are all logical steps to take when addressing idle quality problems. Remember to start simple, and stick with the basics. Use a logical approach to addressing the customers concerns and try to keep a mental flow chart in your head as you move about your diagnosis.
Download PDF 〉




0 Comments