Acceleration, Deceleration, and Brake Hold
The Nissan LEAF combines hydraulic braking, regenerative braking, and traditional accelerator technology into one device: the e-Pedal. You’ll have to keep the system calibrated so key components can function together.
The Nissan LEAF allows the driver to perform three primary functions — acceleration, deceleration, and holding the vehicle at a full stop with one device: the revolutionary e-Pedal.
Once the e-Pedal is activated, the driver presses his or her foot down on the pedal to begin acceleration. However, releasing foot pressure off of the e-Pedal not only stops acceleration. It also initiates braking, all without depressing a separate brake pedal.
Not that the LEAF doesn’t have a traditional brake pedal. It does, and it functions as expected. It just is not necessary under most driving conditions. As the driver gradually reduces pressure on the e-Pedal, the vehicle ceases acceleration and begins deceleration. In normal stop-and-go driving, e-Pedal use allows a smooth transition from acceleration to braking and back, without constant switching between an accelerator and a traditional brake pedal.
The more rapidly the driver removes foot pressure from the e-Pedal, the sooner the system transitions from acceleration to braking. When driving conditions require a faster stop, such as in an accident avoidance situation, drivers are advised to use the separate brake pedal.
Drivers must also exercise caution on icy roads, steep downhill grades, or when the vehicle is heavily loaded. There may not be sufficient regenerative braking force to decelerate quickly or fully stop the vehicle under these conditions.
Even on an uphill slope, e-Pedal-initiated braking will keep the LEAF still, including after the vehicle ignition is turned off.
The e-Pedal is standard on all 2018 and newer LEAF models.
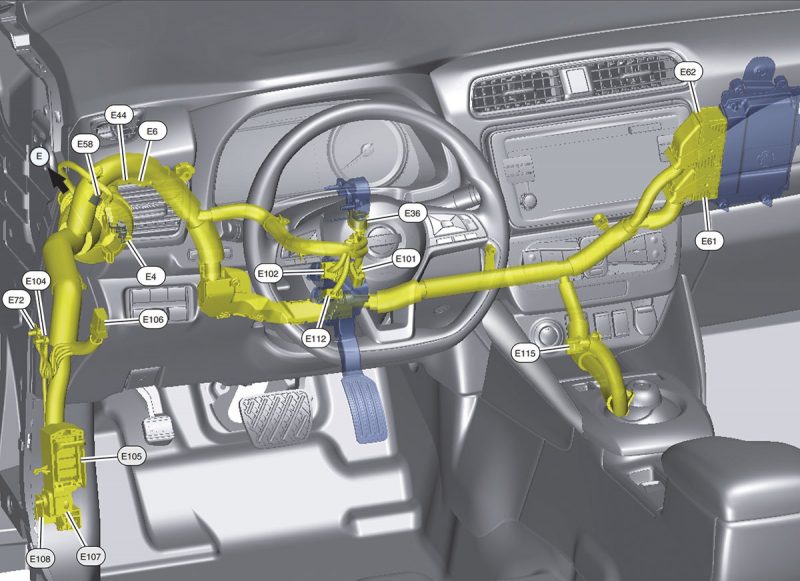
Additional e-Pedal basics
When deceleration begins, the e-Pedal system illuminates the rear brake lights to alert other drivers to the fact that the vehicle is slowing. These lights remain illuminated after the vehicle comes to a full stop.
The e-Pedal system operates the same in Reverse as in Drive. The e-Pedal does not function when the shift lever is in Park or Neutral, when cruise control is on, or when Automatic Emergency Braking begins. It also does not function during operation of ProPILOT Assist, for vehicles so equipped.
Regenerative braking
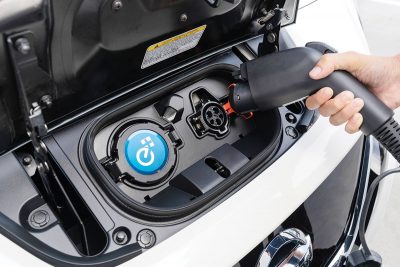
The regenerative brake system converts the kinetic energy of braking into electricity, which the system then uses in two ways. First, when the driver releases the e-Pedal, the traction motor reverses its rotational direction and uses the electricity from regenerative braking to decelerate and stop the vehicle. Second, excess electrical energy not needed to stop the vehicle re-charges the batteries.
Under normal smooth and gradual braking conditions, regenerative braking supplies the majority of stopping power. Hydraulic brake pressure is minimal, although it is immediately accessible should an emergency stop or slowdown be required. A panic stop situation flips the system priority, and hydraulic pressure becomes the dominant source of stopping power.
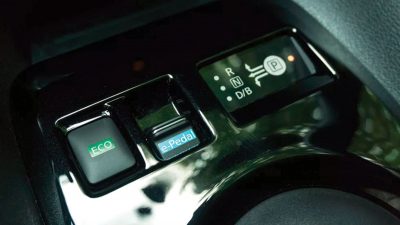
The driver presses a switch located in the center console to turn the e-Pedal on or off. If the e-Pedal is not on, regenerative braking functions, including deceleration and battery charging, are not activated.
High voltage system safety
High Voltage (HV) system cables are colored bright orange to differentiate them from traditional 12 volt system wiring. Blue cables are used in 36-42 volt systems.
Check for torn or worn out insulation before you touch any HV cables. Do not disconnect service plugs or HV cables until at least ten minutes after turning off the ignition. This allows any HV charge in the system to dissipate fully before you begin repairs.
Make sure to store the wireless key at least 16 feet away from the vehicle after turning the ignition off. If anyone accidentally presses the remote while it is within 16 feet of the vehicle, the engine could start. Not good if you’ve put the vehicle on a lift, have your hands close to any moving parts underhood or undercar, or any number of other repair scenarios.
Remove the Service Disconnect Switch
High voltage circuits in the LEAF include not only the HV battery, electric motor, inverter, and AC-to-DC converter, but also the AC compressor, electric heater, and other components you may be used to working with on internal combustion vehicles having only 12-volt systems. To avoid the risk of electric shock, remove the Service Disconnect Switch (SDSW) before working on these or other components on the HV circuit.
Note that the HV battery circuit includes a high voltage capacitor that may hold residual electricity for a few minutes after removal of the SDSW. Wait ten minutes after SDSW removal before working on any HV component. Refer to the safety precautions section of the LEAF repair manual for SDSW removal instructions.
High Voltage system auto-start
The LEAF’s vehicle charging and climate control systems can each be activated automatically by a timer that is pre-set by the vehicle owner. If either timer is set, the vehicle high voltage system could start automatically even if the power switch is in the OFF position.
Your technician may not be aware that the owner set his or her vehicle to begin charging at 9:30 AM after they arrive to work, or to start cooling the interior at 4:00 PM every afternoon. The best protection against a potentially harmful situation is to check to make sure that both the charging system and climate control timer settings are turned off before you start any diagnostic or maintenance work on the LEAF.
Similarly, if the LEAF needs to be plugged into Electric Vehicle Supply Equipment (EVSE) for charging, make sure that neither the charging system nor climate control timers are active before you connect the vehicle to an external power source.
Always use high voltage safety equipment when working on vehicles with HV systems.
e-Pedal activation
The driver can turn the e-Pedal system on or off by pressing down on the e-Pedal switch in the center console. The vehicle will not move until the accelerator is pressed. The e-Pedal can be turned on or off before or during driving. An e-Pedal icon illuminates on the dash to let the driver know the system is active.
Set the vehicle to READY mode and wait for the WELCOME animation in the Vehicle Information Display (VID) in the dash to end, and watch for the DRIVER ASSISTANCE SYSTEMS status screen to appear. Look for the “e-Pedal†icon in the DRIVER ASSISTANCE SYSTEMS menu and click on it to set the e-Pedal in RETAIN mode.
When RETAIN mode for the e-Pedal is set to ON, the e-Pedal automatically activates each time the ignition is cycled off and back on. If RETAIN mode is OFF, the e-Pedal will remain off after an ignition shutdown and startup, and will operate only after the driver activates it by clicking on the icon in the VID.
When diagnosing or repairing the LEAF, turn the e-Pedal RETAIN mode OFF, unless otherwise specified in the repair manual. Some repairs, diagnostic tests, and routine maintenance procedures require the e-Pedal system to not be ON. You can change the default mode using CONSULT III Plus.
e-Pedal trouble alert
If an e-Pedal system malfunction occurs, the driver must use the traditional hydraulic brake function. An “e-Pedal System Malfunction!†error message appears in the in-dash display and alerts the driver to press the traditional brake pedal to slow or stop the vehicle.
e-Pedal fault diagnosis
The e-Pedal system receives inputs through CAN communication from three devices: the Body Control Module (BCM), Vehicle Control Module (VCM) and Electric Brake Control (EBC) unit.
A light should be illuminated in the Combination Meter when the driver presses the e-Pedal switch in the center console. This illumination alerts the driver that the e-Pedal is in Operation mode. If the light does not come on, there may be a fault in the e-Pedal system. A damaged or faulty e-Pedal must be replaced, not repaired.
The e-Pedal switch, which turns the e-Pedal on or off, can be repaired. Check the e-Pedal switch circuit for damaged cables or connectors, inadequate voltage supply, or missing ground. Refer to the e-Pedal switch DIAGNOSTIC PROCEDURE in the LEAF repair manual for additional information.
Check e-Pedal switch power supply
With the e-Pedal power OFF and the switch connector disconnected, check the voltage between the e-Pedal switch harness connector and ground. If the switch is receiving power, you should see battery voltage.
Check e-Pedal switch signal circuit
With the VCM disconnected, you should see continuity between the switch’s harness connector and the VCM harness connector. If no continuity, repair or replace the appropriate harness or connectors.
Check e-Pedal switch ground circuit
Check for continuity between the e-Pedal switch harness connector and ground. If there is no continuity, repair or replace the appropriate harness or connectors.
Cooperative control
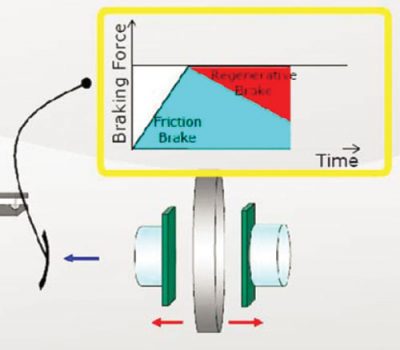
Because hydraulic and regenerative brake power may each be used in the same braking event, the stroke sensor and e-Pedal work together even though they are parts of separate systems. Without an engine, an all-electric vehicle cannot generate the intake manifold negative pressure needed for a conventional vacuum brake booster function. Regenerative braking functions as a brake booster to assist the hydraulic system.
The stroke sensor measures how aggressively the driver presses the conventional brake pedal. The sensor sends brake pedal application speed and travel (from partial to all the way to the floor) data in the form of a voltage signal to the Electrically-Driven Intelligent Brake Unit. The information is used by the controller to calculate the rate of deceleration requested by the driver.
As the driver increases pressure on the brake pedal and deceleration begins, the LEAF’s electric traction motor reverses rotation and functions as a generator. The generative braking torque of the electric motor begins to take over the deceleration of the vehicle. Friction braking declines and the brake pistons and calipers gradually move away from the rotor. This transition during which the two braking types are both active is called regenerative cooperative control.
Conversely, the traction motor cannot generate holding power when the vehicle is stopped. When the traction motor shuts off, the Electrically Driven Intelligent Brake Control unit uses the actuator to apply hydraulic pressure from the master cylinder.
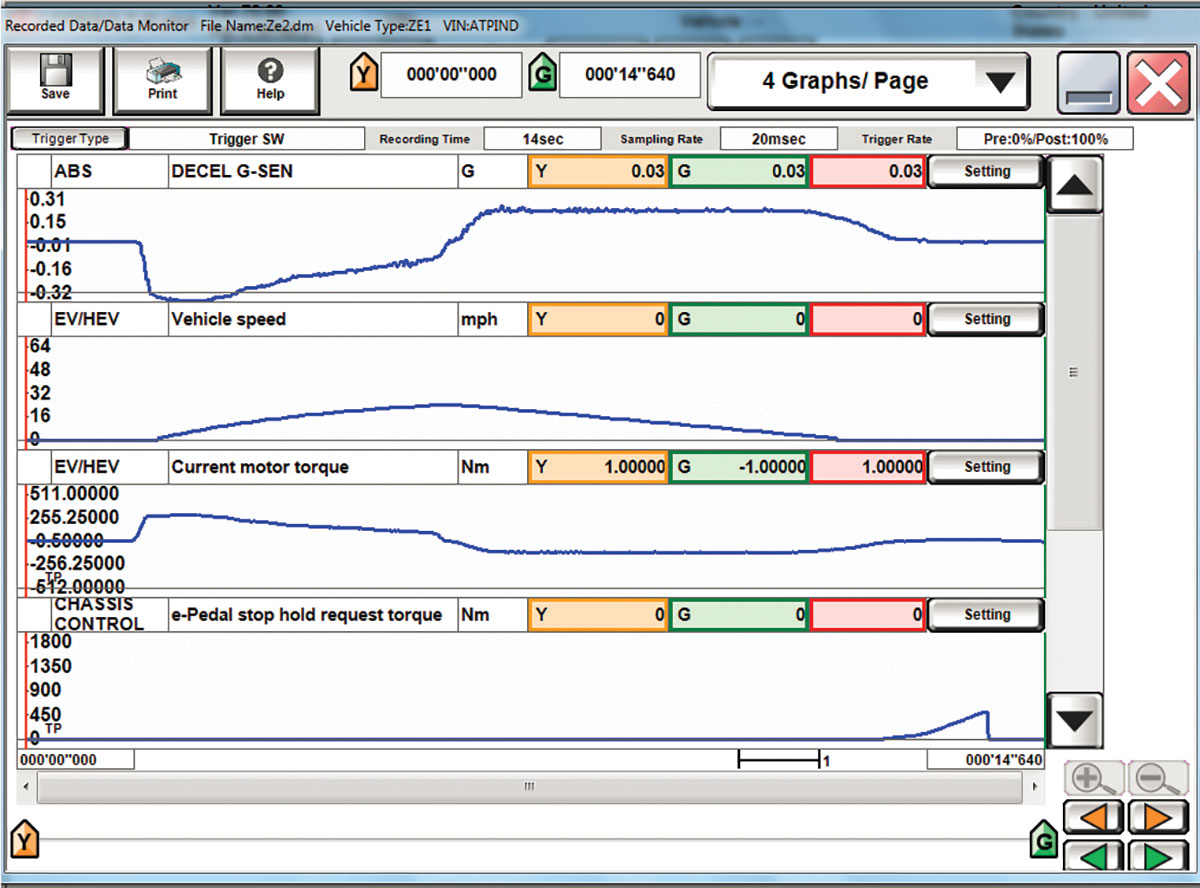
Stroke Sensor 0 Point Learning Procedure
A stroke simulator in a regenerative braking system re-creates the resistance to foot pressure that the driver would feel from a conventional brake pedal. The result is that the driver notices no difference in pedal resistance as regenerative stopping power takes over from hydraulic braking.
Correct stroke simulator function relies upon accurate information from the stroke sensor about the location of the conventional hydraulic brake pedal. You must perform a stroke sensor zero point learning procedure after disconnecting or replacing either the Electrically Driven Intelligent Brake Unit or the Stroke Sensor. Check for diagnostic trouble codes before beginning zero point learning.
The procedure is easy. Verify that the ignition switch is ON and battery power supply is more than 12 volts. Do not depress the brake pedal. Using CONSULT III Plus, touch “Start†in the STROKE SENSOR O POINT LEARNING screen.
Once the zero point has been re-established, CONSULT III Plus will show it as “COMPLETED.†CONSULT III Plus will show the stroke sensor as having “NO STATUS†if zero point learning is not successful. Checking for trouble codes prior to starting the learning procedure helps you catch and eliminate faults that could cause an unsuccessful zero point reset.
e-Pedal re-learn
If you replace the e-Pedal, or disconnect its harness connector or the connector of the Vehicle Control Module (VCM), you must perform an Accelerator Pedal Released Position Learning cycle.
This accomplishes two goals. First, the re-learn procedure monitors the Accelerator Pedal Position (APP) sensor output to confirm that the accelerator (e-Pedal) moves through its operating stroke as specified and reaches the correct height when fully released. Second, it sends the accelerator pedal released height information to the VCM, which uses the data as a reference for comparison against ongoing APP readings.
The Accelerator Pedal Released Position re-learn procedure is straightforward. Make sure that the accelerator (e-Pedal) is fully released. Cycle the e-Pedal power switch on and off four times (refer to the Nissan LEAF repair manual for the specific number of seconds to hold the power switch on and off during each of the four cycles). NOTE: Do not perform any vehicle function, even something as simple as opening or closing a door, during or between the power cycling steps. If any vehicle function is initiated, you must re-start the re-learn procedure from the beginning. After completing four uninterrupted cycles, turn the e-Pedal power switch off and wait at least 90 seconds before performing any other vehicle function. Refer to the Accelerator Pedal Released Position Learning WORK PROCEDURE in the LEAF repair manual for additional details.
We call mashing the accelerator to speed up “flooring it.†Now that Nissan has created the e-Pedal, we’ll have to come up with a name for releasing the accelerator to stop quickly.
Download PDF




0 Comments