
A step-by-step walk through of a major service on a 2014-2017 Model 906 Sprinter van
Routine maintenance is the bread and butter of the automotive service industry. You could call it the “sine qua non†of your business, arguably the most essential aspect of the services you provide. It’s usually not glamorous or highly technical, but there is great satisfaction in keeping your customers mobile by being able to provide a proper scheduled maintenance routine for their vehicles, as well as keeping an eye on the whole vehicle to help ward off future problems.
One of the plusses is that there is rarely anything to go wrong with doing a routine service—no major problems to troubleshoot or customer concerns, although there may be some listed separately on the work order. Having the proper Mercedes-Benz service schedule and following it is paramount to giving your customer the service they deserve.
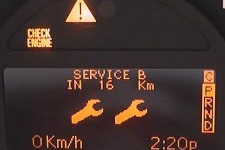
To help drivers manage service visits and costs, the Sprinter uses the Flexible Service System (FSS). This means alternating Service A and Service B routines are needed after a certain amount of time or distance to maintain vehicle performance and reliability. With the Active Service System (ASSYST), the maintenance computer tracks distance driven and the time elapsed since the last service. The maintenance service needed is shown in the multifunction display in the instrument cluster. Approximately one month before the maintenance service is due, the multifunction display shows a message. It indicates when the next maintenance service is due in miles or days. The icons or letters on the service indicator show the type of service that is due: A single wrench or letter A means an Oil Service Plus is needed, while two wrenches or the letter B means a Maintenance Service. In addition, there are some time-based recommended service intervals: Every 24 months replace the brake fluid and cabin air filters, every 120 months replace the rear axle fluid and every 180 months (15 years) replace the engine coolant.
Here are the step by step procedures for the B or Maintenance Service for a 2016 Mercedes-Benz Sprinter 2500 Base Model; others are similar.
Maintenance Service
Drain
Diesel Exhaust Fluid (DEF): Drain the DEF fluid from tank and refill. DEF does break down chemically over time, so draining and replacing older fluid is necessary.
Inspect
These inspections are to ensure that any potential issues are recognized early enough to prevent them from becoming a problem.
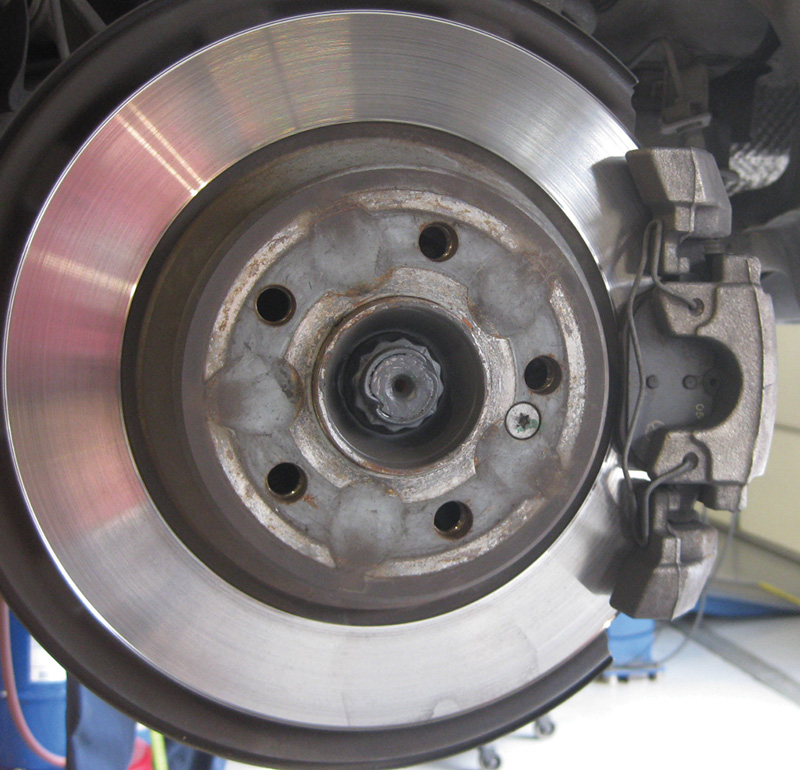
Brake System: This includes inspecting fluid level, parking brake, all lines and hoses for leaks or faults, and condition of friction pads and rotors (image next page).
Chassis Components: Check vehicle for corrosion, accident or paint damage.
Diesel Particulate Filter (DPF): This service is due every 4th maintenance (B) service. Internal inspection is not possible without removing the filter but you should look for any signs of external damage that might indicate an internal issue. If there is a blockage you can expect to have a code set in the control module. Short trip driving can lead to failed regeneration attempts, clogging the DPF.
Door Check Straps: You should also inspect the sliding door hardware and water drains.
Exterior Lamps: Check all bulbs for proper operation and note any lens damage, etc.
Fluid and Lubricant Levels: Inspect for proper fill level and general condition. All assemblies: engine, transmission, transfer case, axles, steering, power steering pump and brakes. If there is fluid loss determine the cause and correct it.
Lines and Hoses: Inspect all lines, hoses and sensor cables, particularly on the underbody. Observe line routing and check carefully for chafing.
Leakage: Inspect all systems including engine cooling system (corrosion inhibitor/antifreeze), hydraulic brake system, power steering, auxiliary battery in the engine compartment, windscreen washer system. If a leak is detected, it must be corrected.
Parking Brake: Check the lever for travel, and the system for effectiveness.
Poly-V-Belt: Inspect for signs of wear and damage.
Seat Belts: Check front and rear seat belts (cuts, abrasions, etc.), seat belt buckles (condition and function), seat belt buckle extensions (if installed). Check for any TSBs on this, there may be some SRS recalls as well as service bulletins to check the tightness of the anchor bolts. (Indeed, it should be standard procedure to check every vehicle for any Recalls).
Steering Mechanical Components: Inspect tie rods, steering lever, rubber sleeves, and dust caps.
Suspension System: Inspect all reservoirs, shock absorbers, front axle joints, covers, sleeves, dust caps, auxiliary rubber springs.
Tire Pressure: Check and correct tire pressures, including spare wheel.
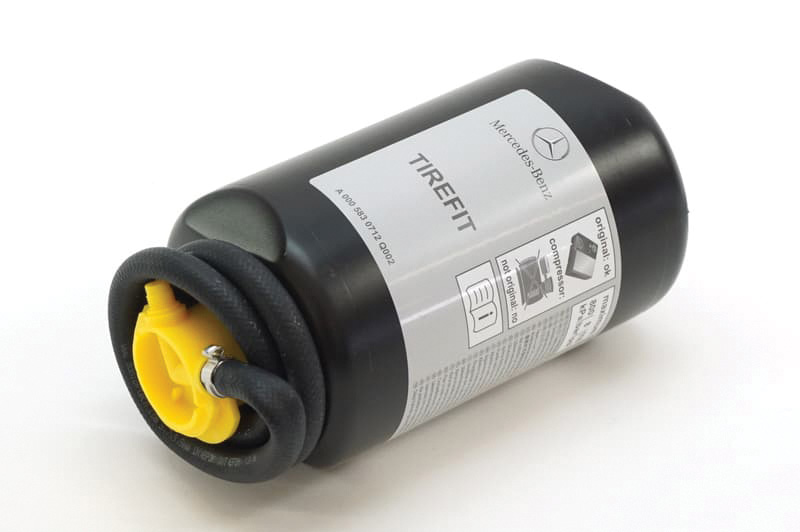
Tire Sealant: Some models may be equipped with TIREFIT. TIREFIT is a tire sealant that can be used to seal small punctures of up to 0.16 inches (4 mm), particularly on the tire tread. Check the expiration date on the canister.
Wiper/Washer: Inspect windscreen wipers, rear windscreen wiper, windscreen washer system and headlamp cleaning system.
With all of these inspections, be sure to note on the repair order both what was checked, and what your check found. Your customer depends on your expertise to ensure everything is as it should be, and for you to recommend repairs or replacement when something isn’t quite right.
Inspect/Lubricate
Trailer Tow Hitch: Lubricate, check function, play and attachment if installed.
Lubricate
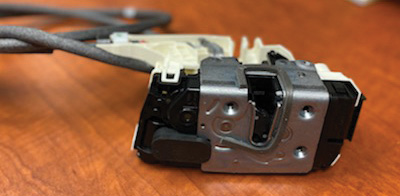
Hinges and Door Checks: Be sure to also lubricate the hinges on the rear doors, as well as the hood and hood latches.
Replace
Air Cleaner Filter: This service is due every second maintenance service. (Inspect it first. You don’t want to replace it if it’s just been changed. Advise your customer on the importance of a genuine Mercedes-Benz air filter if by chance they had it replaced with an inferior brand.)
Automatic Transmission Filter and Fluid: This service is due every second maintenance service.
Cabin Air Filter: Replace the dust filter for the rear-compartment air conditioning system. Replace the dust filter for the heating/ventilation or the activated charcoal/combination filter for the air conditioning (see notes for air filter above).
Engine Oil: Be sure to use only Mercedes-Benz Approved oils. Visit the Mercedes-Benz BeVo website bevo.daimler.com to find a list of approved engine oils.
Engine Oil Filter: This isn’t the place to save money. Genuine Mercedes-Benz filters are competitively priced and offer superior performance. The StarParts line is an excellent option for price-sensitive customers.
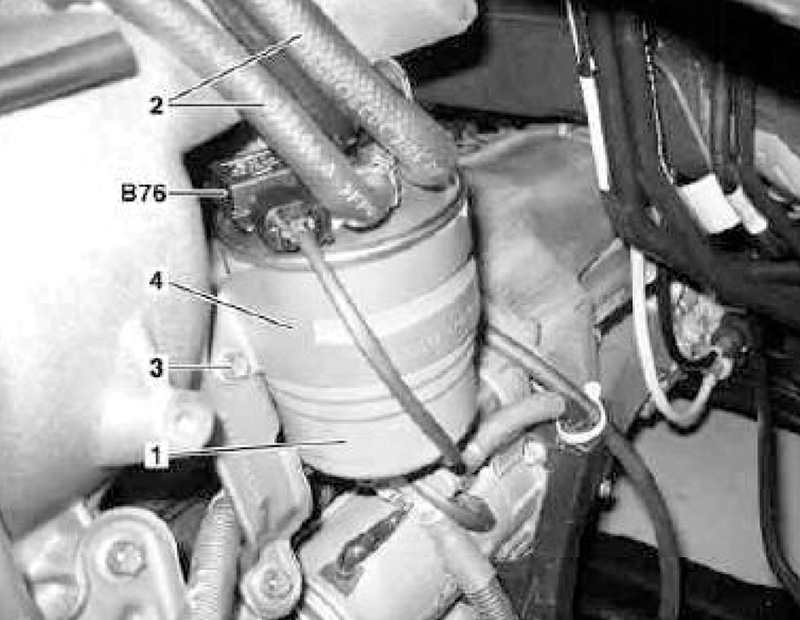
Fuel Filter: Replace the fuel filter with water separator.
Poly-V-Belt: This service is due every second maintenance service.
Reset
Warning and Indicator Lamps: See notes below on reset procedures.
Rotate
Tires: The useful life of tires will vary and is proportional to tire type, speed rating, ambient conditions, tire loading, tire inflation pressure, road surfaces, and individual driving style. Tire rotation recommendations will likely need to be done at least at every Oil Service Plus/Maintenance Service.
Time-bound Tasks
Brake Fluid (Every 24 Months): Brake fluid absorbs moisture from the atmosphere, Possibly decreasing brake performance and allowing corrosion within the brake system. Use a pressure bleeder for this task.
Cabin Air Filter (Every 24 Months): Replace the dust filter for the heating/ventilation or the activated charcoal/combination filter for the air conditioning. Again, stress the importance of using genuine Mercedes-Benz filters for superior performance.
Rear Axle Fluid (Every 10 Years): This service is due every sixth maintenance service or every 120 months.
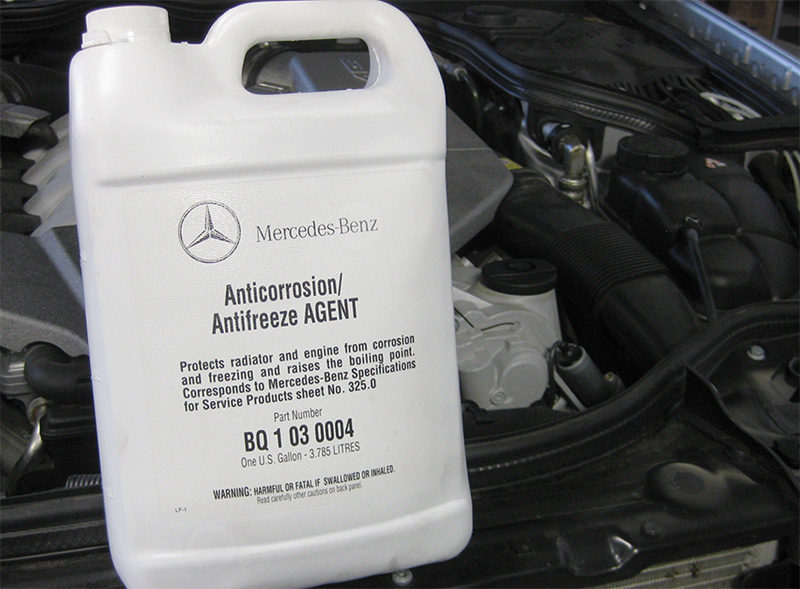
Engine Coolant (Every 15 Years): This service is due every sixth maintenance service or every 180 months. Be sure to observe coolant mixture ratio. Be sure to use only Mercedes-Benz coolant that meets specification 325.0. (A list of approved coolants is found on the Daimler BeVO website.) It should be noted that the older Mercedes-Benz antifreeze was a goldish yellow in color. The new antifreeze is blue. They can be mixed in small quantities (a few ounces for topping up) but should be completely replaced if more is needed.
Use only the Mercedes-Benz antifreeze meeting specification 325.0, or risk corrosion and other problems in the cooling system.
What’s Missing Here?
You may have noticed but conspicuously absent from the published list of service recommendations is a thorough test of the main battery. The auxiliary battery is mentioned only. Perhaps this is understood but it is worth mentioning here. Using a high quality tester such as Midtronics or other high quality machine is important during this service. Nothing would be more embarrassing than to get a phone call a week after you’ve performed a B service from the customer stating that their battery is dead.
Reset Procedures
Below is the procedure for resetting the maintenance reminder if you have a Star Diagnosis, XENTRY or factory compatible scan tool.
- Connect Star Diagnosis.
- Enter through “Control units view†in “IC – Instrument cluster (A1).â€
- Select “Actuations†tab.
- In “Selection†choose the “Reset general maintenance†work procedure.
- Conduct “Reset general maintenance†work procedure.
- Change from “IC – Instrument cluster (A1)†back to “Control units view.â€
- Disconnect Star Diagnosis
If you don’t have access to a XENTRY Diagnostics system, you can use one of these procedures (depending on the Instrument Cluster version) for resetting the maintenance indicator:
Without Multifunction Steering Wheel (AP00.20-D-0040-01HA)
- Switch ignition ON.
| NOTE |
| If the maintenance interval shown in the display has been exceeded, wait until the readout in the display automatically jumps over to total km/mi. Only then is it possible to get into the service menu. |
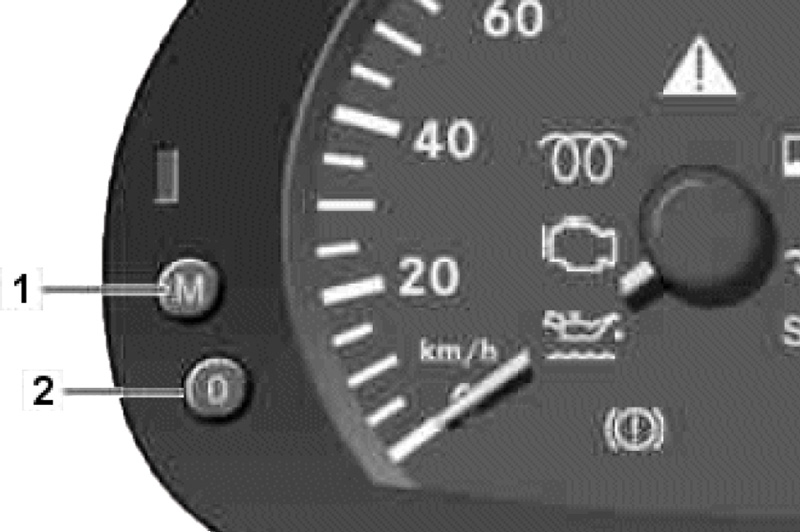
2. Press button 0 on the instrument cluster for approximately 30 seconds, until a beep sounds.
3. Press the button M on the instrument cluster until “rESEt xx†is displayed along with an oil can symbol. Select which type of oil (the ‘xx’) that you plan to use. Gasoline engines use oils meeting specification 229.3 (short oil change interval) or 229.5 (long oil change interval), while diesel engines use oils meeting specification 229.31 (short oil change interval) or 229.51 (long oil change interval). (Note that some older instrument clusters show these diesel oils as 229.3/229.5). Be sure to select the correct oil quality you are using.
4. Press button 0 on the instrument cluster for approximately 30 seconds, release and press again.
Should the wrong oil type have inadvertently been selected when resetting the maintenance computer, proceed as follows:
- Switch ignition OFF/ON
- Press button 0 on the instrument cluster for approximately 30 seconds, until a beep sounds.
- Press button M on the instrument cluster until “rESEt StoP†is shown on the display, together with the oil can symbol.
- Press button 0 on the instrument cluster for approximately 30 seconds, release and press again.
- Repeat steps 3 and 4 of the previous procedure.
With Multifunction Steering Wheel (Code CL4)(AP00.20-D-0040-01HB)
- Switch on ignition. The total distance (km or miles) must be displayed in order to reach the “service scope x in xxx km†menu. Should the total distance not be shown in the display, press the system selection button in the lower control panel (S111s3) until the total kilometers are displayed.
- Press the upper control panel on the scroll forward/back button (S111s1) several times until “service scope x in xxx km†appears in the multifunction display of the instrument cluster.
- Press button 0 on the instrument cluster for approx. 30 seconds until a beep sounds.
- Press the lower control panel of the system selection button (S111s3) once.
- Press the upper control panel of the scroll forward and back button (S111s1) until “Service in xxx km†appears in the multifunction display of the instrument cluster.
- Press button 0 on the instrument cluster. The menu “Carry out†(Carry out as display in the multifunction display) appears in the multifunction display of the instrument cluster.
- Press the upper control panel on the scroll forward and back button (S111s1). The selection menu “Oil types†appears in the multifunction display of the instrument cluster.
- Press the upper control panel on the button + and – (S110s1) repeatedly until the desired oil type is marked in the multifunction display of the instrument cluster.
| The following oil types appear in the multifunction display of the instrument cluster: |
| Diesel engine with long oil change interval: Qual. 228.51 (older instrument clusters show 229.5) Diesel engine with short oil change interval: Qual. 229.31 (older instrument clusters show 229.3) Gasoline engines with long oil change interval: Qual. 229.5 Gasoline engines with short oil change interval: Qual. 229.3 |
9. Select mark oil type with the upper control panel of the scroll forward and backward button (S111s1).
10. Press button 0 on the instrument cluster for approx. 3 seconds until the display “Service confirmed†appears in the multifunction display.
11. Press the upper control panel of the scroll forward and back button (S111s1). The newly adjusted service scope appears in the multifunction display.
Should the wrong oil type have inadvertently been selected when resetting the maintenance computer, proceed as follows:
- Press button 0 on the instrument cluster. The menu “Carry out†(“Carry out†as display in the multifunction display) appears in the multifunction display of the instrument cluster.
- In the menu “Carry out†(“Carry out†as a display in the multifunction display) mark the menu item “Full Service back†(“Full service back†as a display in the multifunction display) with the upper control panel of the + and – button (S110s1).
- Select marked menu item “Full service back†with the upper control panel of the scroll forward and back button (S111s1).
- Press button 0 on the instrument cluster for approx. 3 seconds until the display “Service confirmed†appears in the multifunction display.
- Press the upper control panel of the scroll forward and back button (S111s1). The service scope to be corrected appears in the multifunction display.
- Press button 0 on the instrument cluster. The menu “Carry out†(Carry out as display in the multifunction display) appears in the multifunction display of the instrument cluster.
- In the menu “To be carried out†(“To be carried out†as a display in the multifunction display) mark the menu item “Full Service†(Full service as display in the multifunction display) with the upper control panel of the + and – button (S110s1).
- Repeat steps 7 to 11 in the previous procedure.
Other models are similar and you can reference the WIS to find procedures for those. As you can see this is a fairly complicated procedure so having a factory compatible scan tool or XENTRY is a game changer.
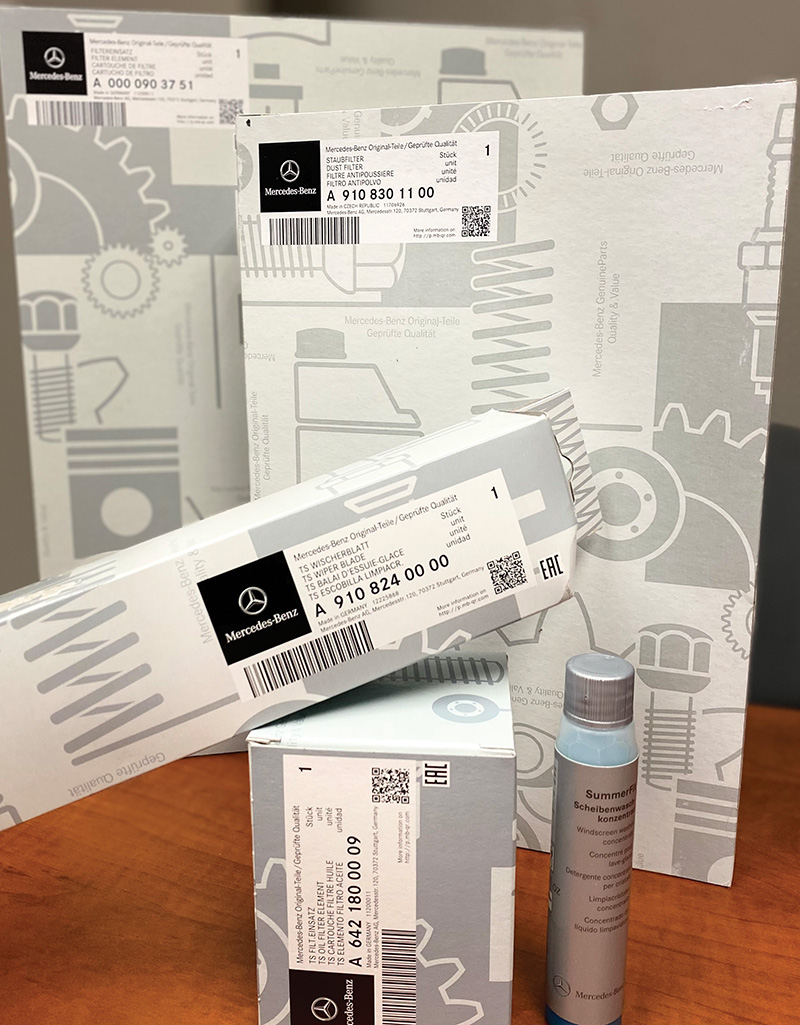
Genuine Parts
It should go without saying that use should only use genuine Mercedes-Benz service parts when taking care of your customer’s vehicles. Contact your local dealer and talk with them about carrying the StarParts line of service items. It will help with your bottom line as well as providing your customer with peace of mind knowing that you use the very best parts to service their vehicle.


0 Comments