

There needs to be a solid diagnostic plan in place and solid understanding of the systems being tested to quickly and accurately determine the cause of the no start condition.
A no start condition is still a fairly common complaint on today’s vehicles. No starts can come in a variety of shapes, sizes, flavors, and colors. There are no-crank no starts and cranking no starts. There may be one single click when the key is turned, or the engine may crank over unusually fast, indicating low compression or jumped timing. The no start conditions may be intermittent, happening only at specific times, or they may be constant—the result of a failed fuel pump or engine sensor.
Whatever the symptoms, there needs to be a solid diagnostic plan in place and solid understanding of the systems being tested to quickly and accurately determine the cause of the no start condition. The following vehicle studies are non-starting Nissans that required a variety of troubleshooting methods to get them running and back on the road.
2010 Frontier Intermittent Cranking No Start
The owner of this 2010 Nissan Frontier had been experiencing a cranking no start issue for several weeks. Initially, it would only act up once or twice a week, but it was getting more frequent. The condition had now become bad enough for the truck to be brought in for repairs. The Check Engine Light (CEL) had also turned on.
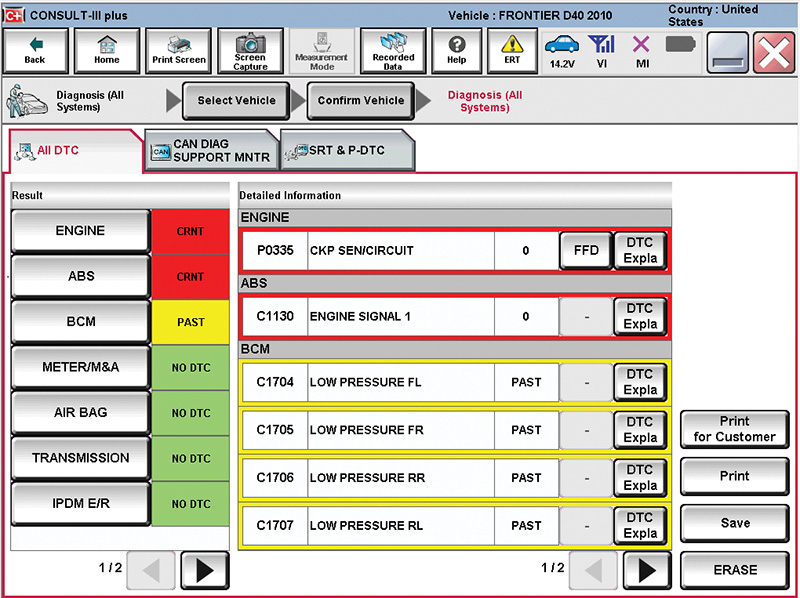
The engine cranked over for an extended time the first time it was started in the parking lot. After that first start, the vehicle did not act up the rest of the day. The next step was a fault scan to determine if the CEL was related to the no start condition or not. There was one fault for the crankshaft position sensor circuit, which confirmed a correlation between the no start and the CEL.
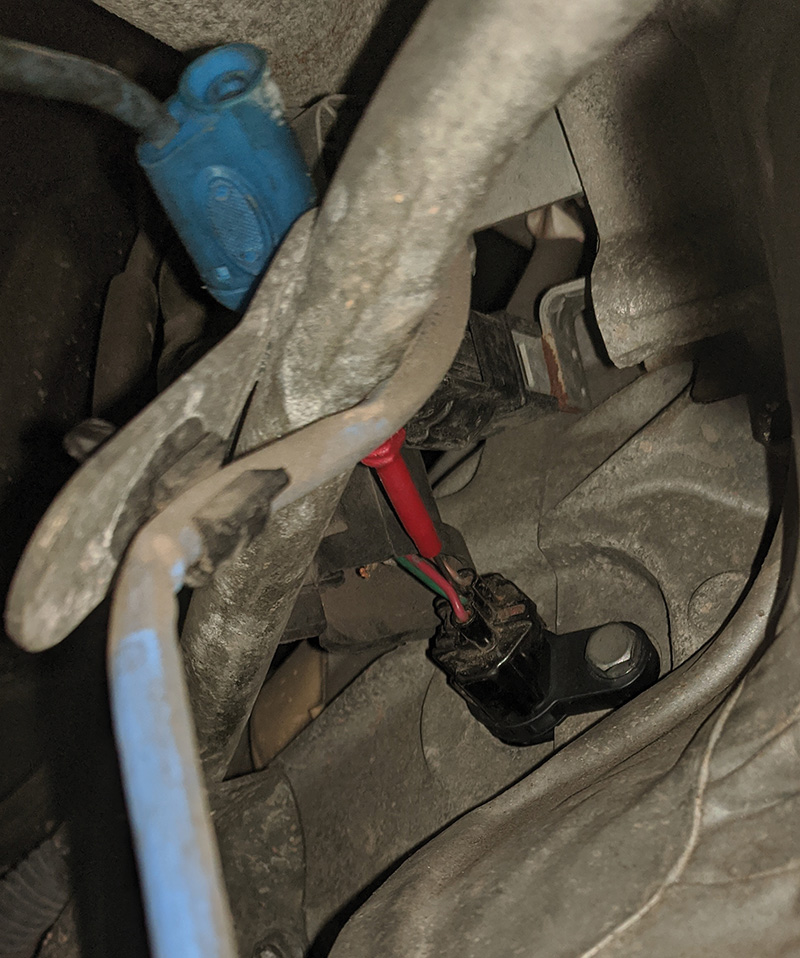
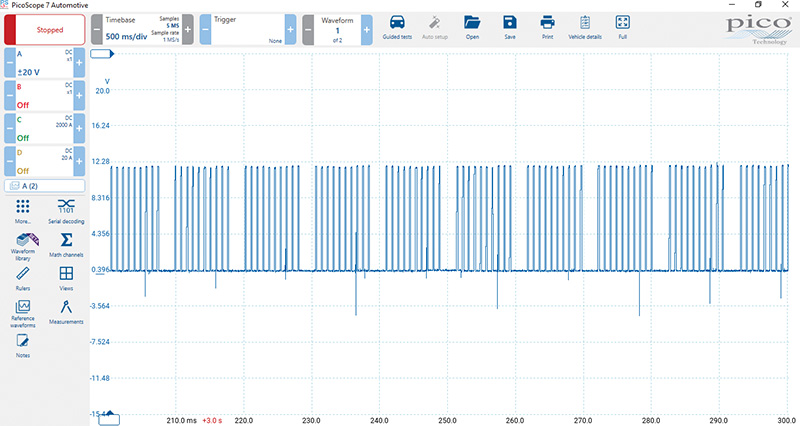
Even though the engine was starting correctly, a lab scope was connected to the crankshaft position sensor signal wire and a good signal pattern was recorded.
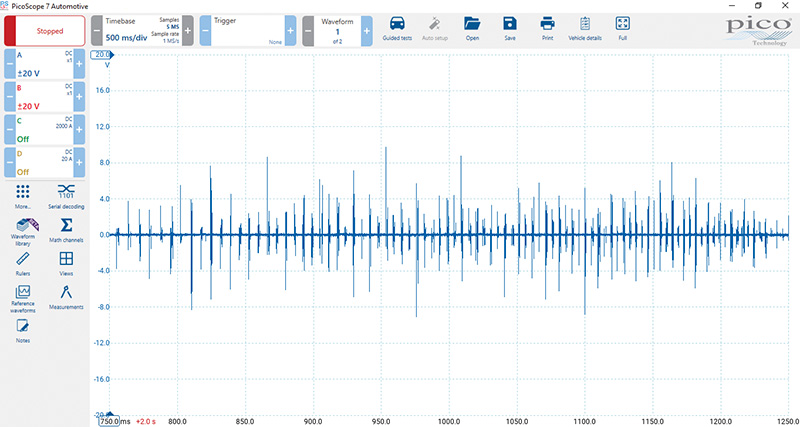
The vehicle did not act up again until the next morning, but with the scope lead still connected, the crank sensor signal was captured while the engine was cranking and not starting. There was no discernible signal from the crank sensor, confirming an intermittently failing sensor.
A new OEM crankshaft position sensor was installed and the fault cleared. The Frontier, now starting correctly every time, was returned to the owner. This was a straightforward diagnosis and repair, but that is no reason to alter the testing procedure or skip over steps. On the contrary, straightforward failures are a chance to try out new testing methods or refine portions of the diagnostic process.
2008 Altima No Crank, No Start
Kyle’s Nissan Altima died on him while he was driving home from work one afternoon. He reported that it felt like he ran over something even though he didn’t, and then the car slowly lost power and coasted to a stop. After that happened, the vehicle would no longer start. The dash lights and radio would work, but nothing happened when he tried to start the engine. A tow truck was then called to rescue this Altima.
When the vehicle made it to the repair shop, the battery was found to be discharged, possibly from the emergency flashers being left on while waiting for the tow truck. A new battery was temporarily installed to allow testing to continue. With the new battery in place, the no crank no start symptoms could be verified.
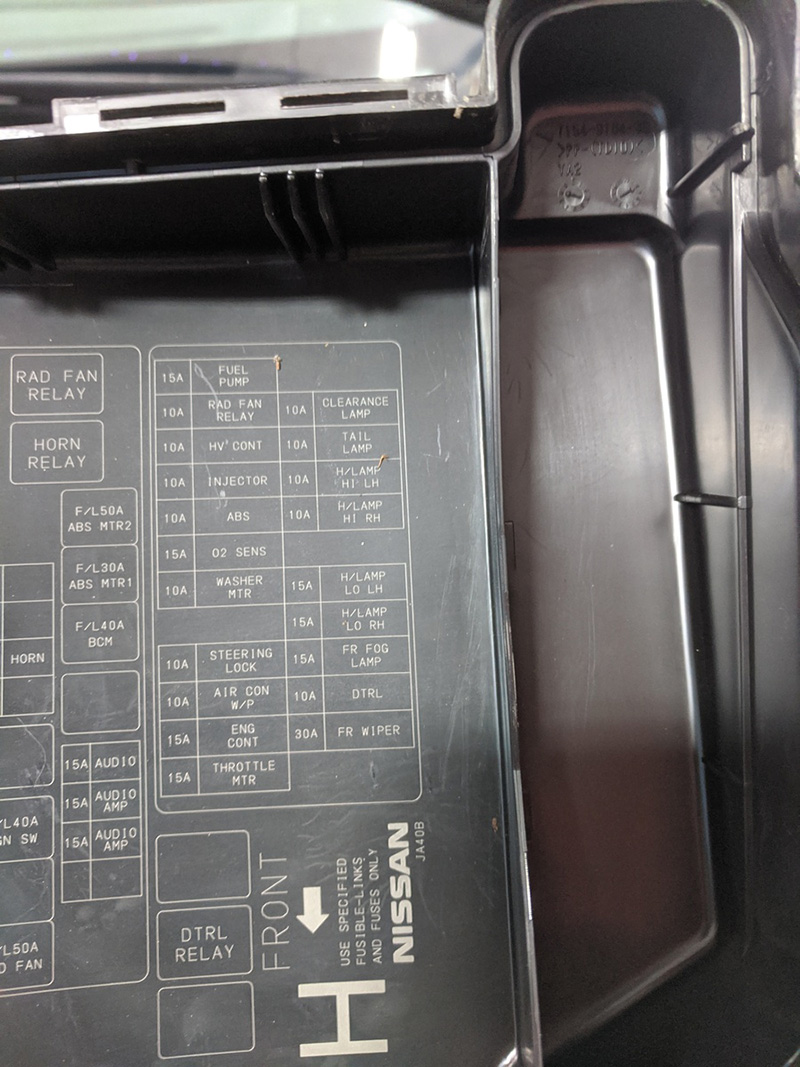
A vehicle scan revealed there was no communication with the engine control module and there were Loss of Communication faults for the ECM logged in several other modules. A great first check in a situation like this is to verify the condition of all the fuses. This is a quick basic test, but it paid dividends on this sedan because the 15 amp Engine Controls fuse in the under-hood fuse box was blown.
The fuse was replaced and the vehicle now started up. This success was short lived though, because the engine only ran for a few seconds and then shut off. The same Engine Controls fuse was blown again. Following the fuse distribution wiring diagrams showed that the 15 amp Engine Controls fuse provided voltage to the engine control module and the ignition coils along with a few other components. By disconnecting the ignition coils one at a time and sacrificing several more fuses, it was determined that the cylinder 1 ignition coil was completely shorted and blowing the Engine Controls fuse. With the cylinder 1 ignition coil unplugged, the engine would continue running without blowing the fuse.
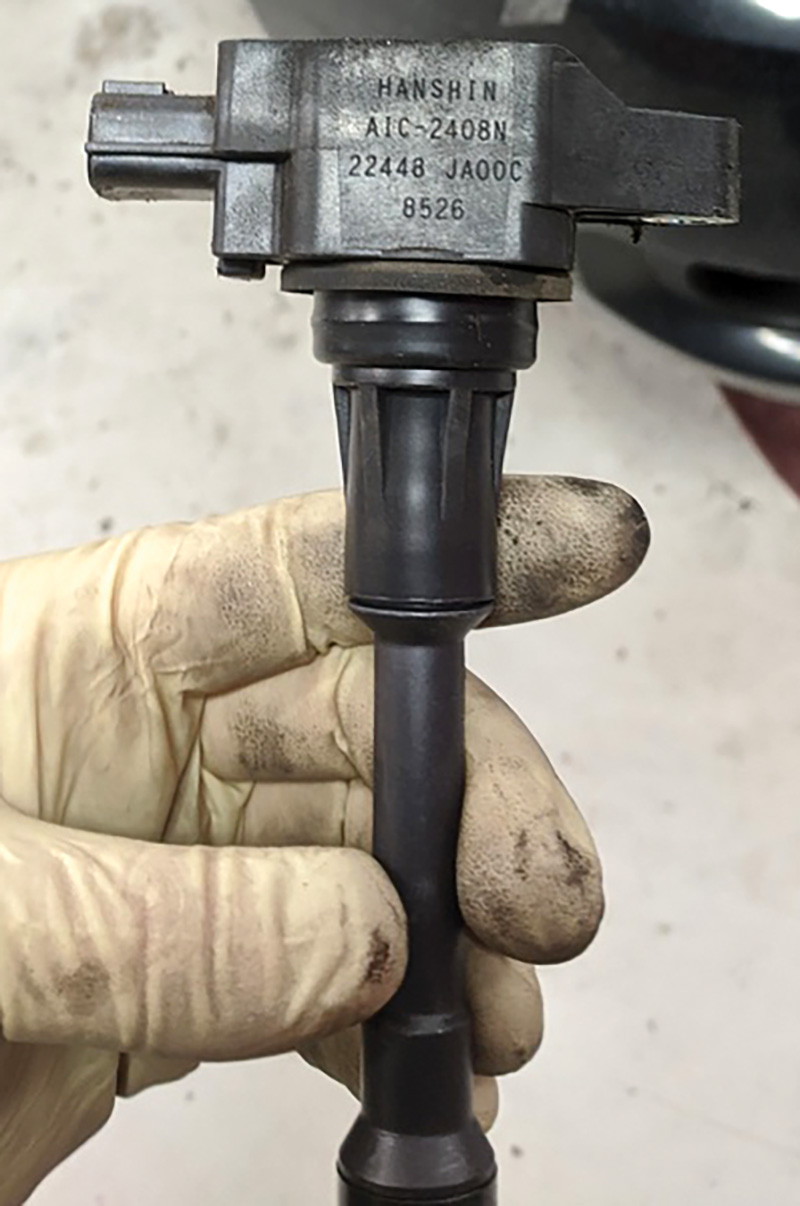
It was strongly recommended that all four ignition coils should be replaced to prevent this situation from happening again, but Kyle was on a tight budget and opted to only replace the one ignition coil that was shorted. The one new OEM Nissan ignition coil was installed along with another new Engine Controls fuse in the under-hood fuse box. All the communication faults were cleared and the Altima was taken on an extended road test to confirm the vehicle was repaired and was ready to be delivered back to its owner.
2011 Sentra Cranking Start and Stall
A 2011 Sentra was being lowered off the tow truck as the phone rang in the repair shop office. The owner of the Nissan, a lovely elderly woman, was calling to see if her vehicle had been dropped off yet. At first she was reluctant to reveal why her vehicle needed to be towed in. After she finally gave all the details, it was clear why she was reticent and embarrassed.
She explained that she had not driven her Sentra in several days because she could not find the keys. She looked everywhere in her house, but the keys were nowhere to be found. Finally she realized the only place she hadn’t looked was inside the car. This is where she ultimately found them in the ignition, and to add insult to injury, the ignition was still in the ON position. The battery was completely dead, so she called her auto club to have the vehicle jump started. The tow truck driver arrived and was able to jump start the vehicle, but it would only start for a moment and then stall. After several jump starting attempts it was clear that a ride on the tow truck would be required.
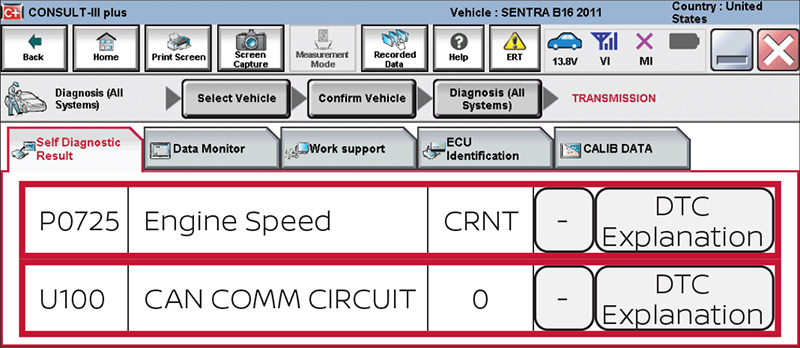
With the embarrassing ‘senior moment’ details out in the open and the vehicle now in the service bay, it was time for testing to begin. The battery was tested first and it was in need of a recharge. With the charger attached to the battery, the rest of the basic checks were carried out. Everything else under the hood looked great. This B16 was very clean and clearly owned by someone who did very little driving, as the odometer had not even broken 30,000 miles. The fault scan showed a couple interesting faults in the transmission control module. There was an engine speed fault and a CAN communication error.
After allowing the battery to charge, the vehicle was cranked over. Just as the tow truck driver had described — the engine would start briefly and then stall out. These symptoms seemed similar to a security system issue. However, there were no key or immobilizer related faults stored, and the security light was not blinking when the key was inserted into the ignition or when the engine was cranked over.
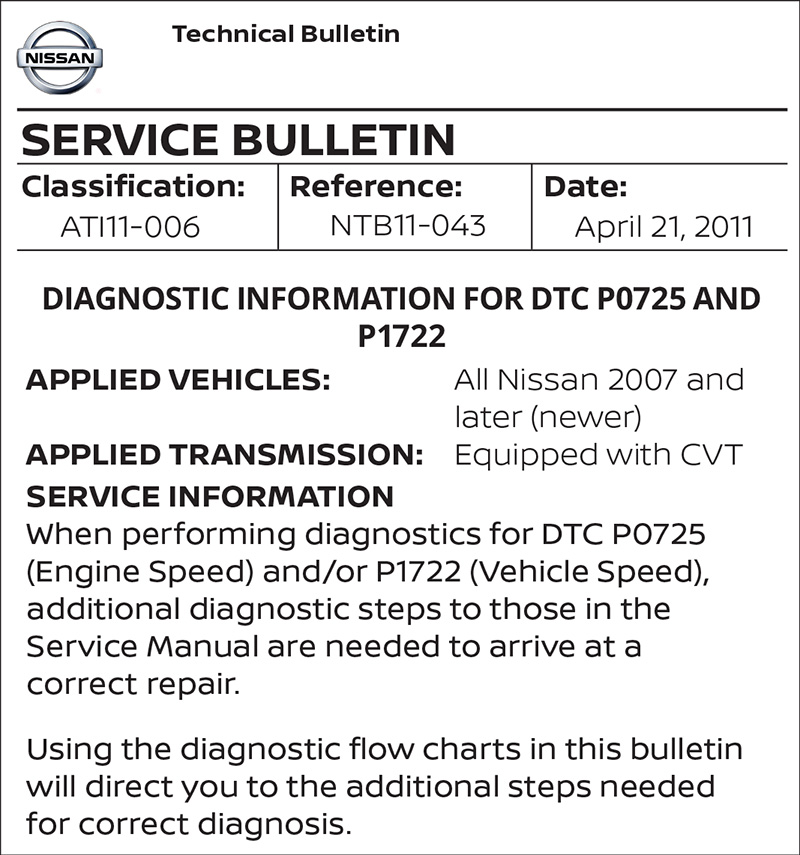
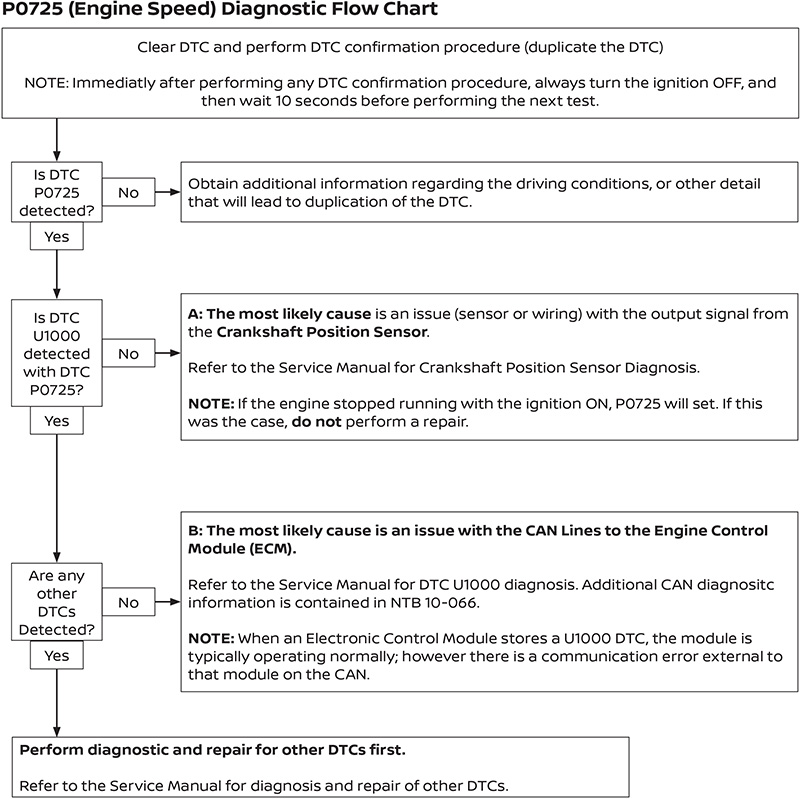
The ignition had been left in the ON position for several days, and it had been jump started, so checking the fuses was the next logical step. The under-hood and passenger compartment fuses all tested good though, so focus was shifted to the fault codes that were in the transmission module. The codes were hard faults that remained in the module after trying to clear them several times. Researching through service information revealed that Nissan had released Service Bulletin NTB11-043 which addressed both the engine speed fault and CAN communication fault that this Sentra had.
The service bulletin flow chart stated that the most likely cause of both the fault codes was an issue with the CAN lines to the Engine Control Module (ECM). It seemed extremely unlikely that a crank sensor or CAN communication lines would be damaged from the battery voltage being drained low, even if the battery was discharged from the key being left in the ON position.
Knowing how strangely modules can behave when supply voltage is too low, a capacitor discharge was deemed to be the correct next step. A capacitor discharge is achieved by touching the positive and negative cable ends together after they have been disconnected from the battery. This procedure allows the long term capacitance memory of a module to be cleared. It is best to use a 1 ohm 10 watt resistor in line between the battery terminals to slowly discharge the capacitor voltage.
Performing the hard reset of the module memory did the trick on this Nissan. The vehicle started right up, ran normally and no faults returned. The owner of the Sentra was very happy to find out that her forgetfulness had not damaged anything on the vehicle, and she swore she would not leave the keys in the ignition again. This vehicle was a good reminder to always perform basic checks and memory resets before extensive testing and replacing components.
2007 Altima No Crank, No Start
Buying a used vehicle ‘as is’ without any history is often a recipe for disaster. This was certainly the case for the following 2007 Altima Hybrid. The owner of the vehicle stated that it kept dying out at random times when driving at any speed. He suspected that it had to do with the hybrid system, due to the warning messages that would come up on the dash. When the engine died out he had to put the vehicle in Park and it would start right back up. Now the symptoms had gotten worse and after it stalled the last time the vehicle would not start at all. He stated that all of these issues began within thirty days of purchasing the vehicle ‘as is’ from a used car lot.
With the hybrid off of the tow truck and pushed into the shop, the first step was to verify the symptoms. When the Start button was pressed the vehicle would not Ready On, and the internal combustion engine did not start either. There was power present, however, as all of the warning lights were displayed in the instrument cluster and the engine cooling fan was running at high speed. The cooling fan running any time the ignition was switched ON was a strong indicator of a communication issue. That is a default strategy that is often used when engine temperature data is not being transmitted correctly between modules. A fault scan confirmed that there was indeed a communication issue present on this Altima.
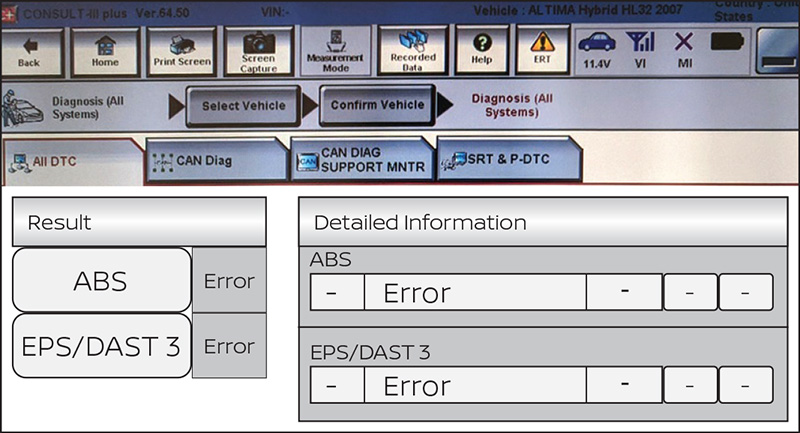
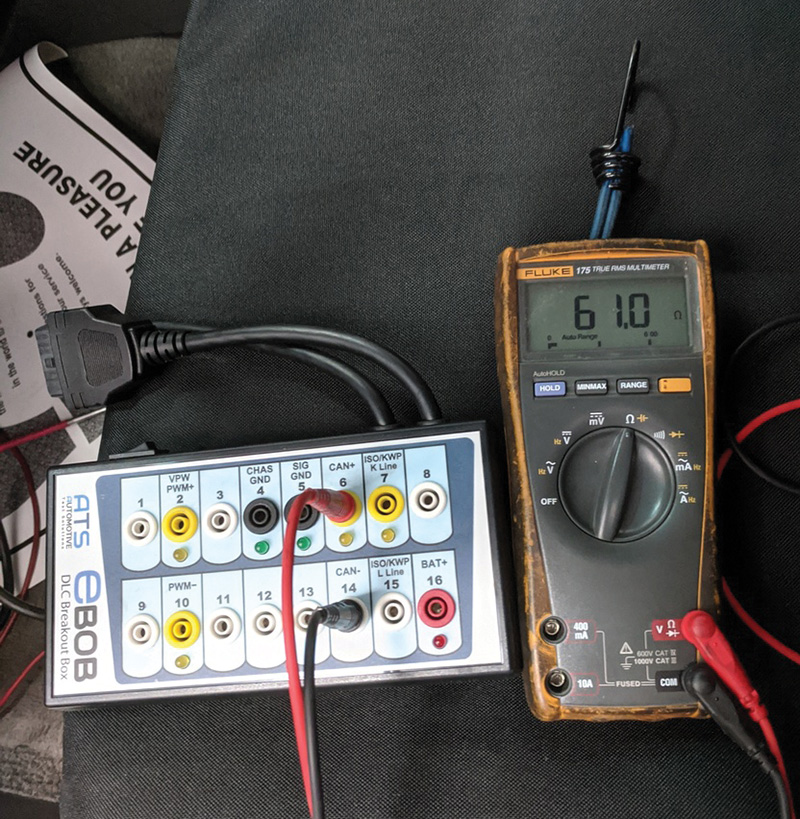
There were only two modules registering when the All Systems Diagnosis scan was run with the CONSULT III. The ABS and EPS modules were present, but they could not communicate correctly either. At this point, the health of the network communications needed to be checked. A breakout box was connected to the Data Link Connector to test the resistance of the CAN communication bus. The bus resistance was found to be 61 Ohms, an acceptable reading. This is quick test to establish if the terminating resistors are damaged or if the CAN lines are open or shorted.
Next, a lab scope was hooked up to the breakout box to test the CAN line voltages. The CAN High and CAN Low voltages were incorrect and it was clear that no data was being transmitted.
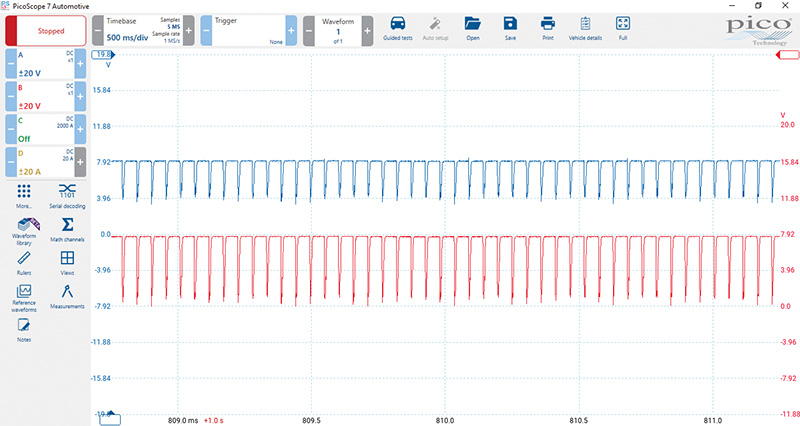
This was a great point in the diagnosis to pause and look for some direction before heading down the rabbit hole of disconnecting modules and tracing CAN wires in an attempt to see what was bringing the communication bus down. The pause in testing was fortuitous because it was when the rear seat cushions being askew were noticed for the first time.
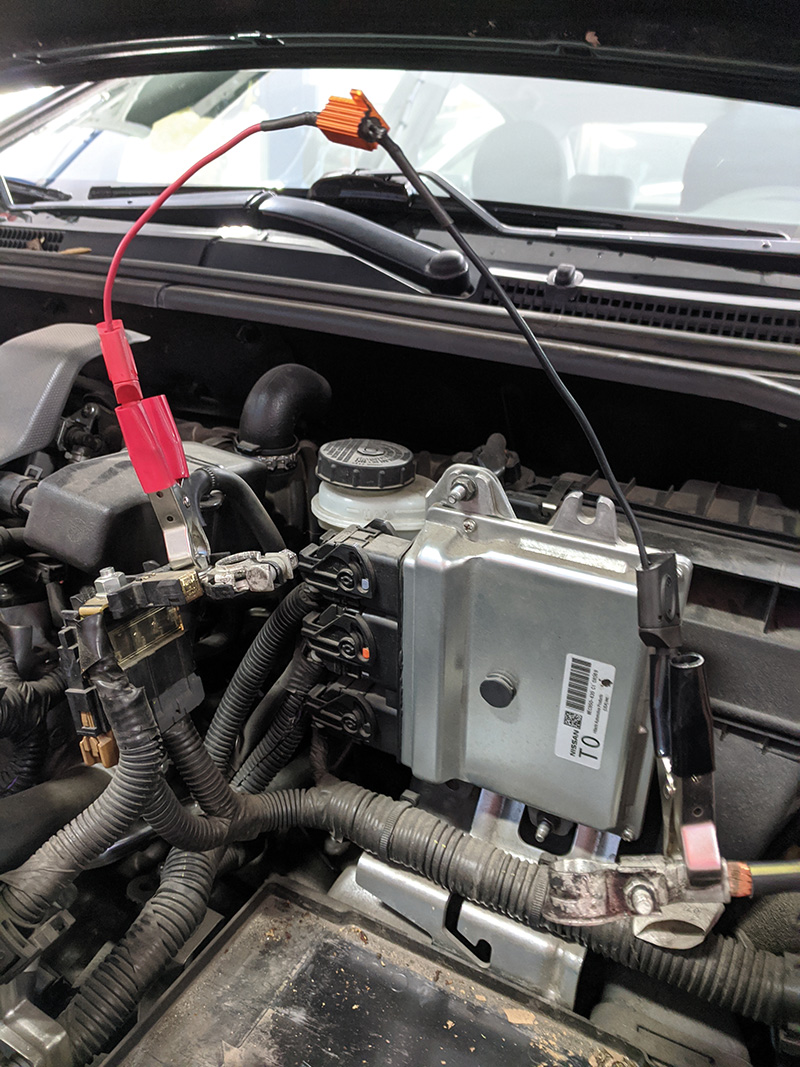
Further inspection revealed the High Voltage battery covers were improperly installed and there was a damaged ground wire on the battery housing. The ground wire was repaired and reattached to the High Voltage battery housing. Incredibly the vehicle would now Ready On and the engine started. All modules were now present on the scan results and the CAN line voltages were correct.
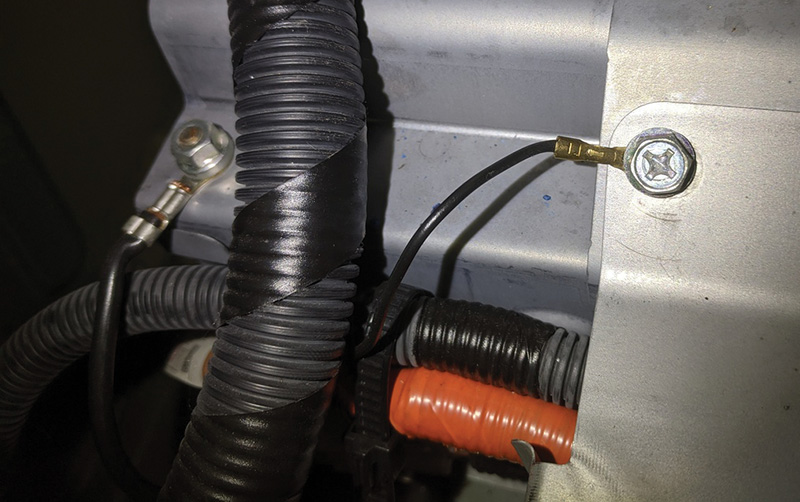
Wiring diagrams verified the ground wire was for the Hybrid ECU. The missing ground for the Hybrid ECU had taken down all communications on the CAN network. The faults were cleared and the vehicle was taken on two test drives. During the second test drive the Check Engine, Brake, VDC and Red ! Warning lights came on. All the modules were scanned for faults again and now there were several codes indicating a failing high voltage battery pack.
The freeze frame and live data showed that battery cell #3 was weak and was 1.5 volts less than the rest of the cells, which is out of the acceptable range for battery cell imbalance. Ultimately the High Voltage battery also needed to be replaced on this hybrid vehicle.
These new faults explained why the rear seat cushions and the high voltage battery covers had been disturbed and how the ground wire was damaged. The used car lot had tried to repair or had possibly replaced the High Voltage battery and created the stalling and no start conditions. Unfortunately, the vehicle’s new owner got more than a mode of transportation when he bought this Altima; he got someone else’s problems that were not correctly repaired. No starts won’t be going away any time soon, so it is necessary to have a solid diagnostic plan ready to conquer these challenges.
By Jordan Hill


0 Comments