Certain jobs you do one way when the shop is busy and another when time runs a bit slack, shifting the percents between parts and labor to keep everyone working while still providing your customers with the best value for their money. One of these variable jobs is the different ways you deal with a defective CV joint. For most of the busy times, the best way to keep your customers happy and your car workthrough high is to replace the entire halfshaft, solving the current joint problem and some we can anticipate when the other joint on the same shaft fails. But when the work slacks off seasonably or just in one of those unpredictable slow times, you might replace only the failed joint instead, channeling more of your customer’s money toward labor and somewhat less toward parts, often with a lower overall price. How different are these two jobs from the point of view of the shop doing the work and from the customer’s point of view?
Our subject vehicles were a 1987 Integra and a 1991 Camry, both with just over the predictable 100K to the first failed outer CV joint. In neither case was there the grim grinding and clacking of dry bearing elements; there was not yet metal chaff ornamenting the greasy inside of the bellows-boot. We’re not big believers in replacing a boot alone, though, not with that kind of time on the car’s clock, so we chose to replace one shaft entirely and replace one joint alone to compare the two jobs. There is, of course, the option of rebuilding the joint itself with the original races, but we passed on that one this time. Sometimes, of course, parts prices or availability decide the choices for you.
Most of the wrenchwork is the same for both jobs: Hold the wheel steady with the brake and remove the axle nut; pull the cotter pin and spin off the castellated nut on the ball joint tapered stud; free the ball joint and push the axle stud back through the now-dangling strut. Next pop the inner joint splined shaft from its spring clip and lower the halfshaft out of the car.
Routine bread-and-butter work with little but the predictables to go wrong — the ball joint stud may turn in its socket, flagging a replace-now knuckle; the brake line may kink or break under any unusual movement, meaning the rubber should have been replaced long ago; the inner joint spring clip may be one from the ‘Godzilla’ box, and you may fear you’ll break the case, your slide hammer or your prybar getting it out. Some halfshafts, though not these on the Camry or on the Integra, mount with internal hex or spline heads, whose hollows collect the most recalcitrant road grit known to man. Others will let the transmission or differential fluid gush from the shaft seal aperture when you pull the shaft out. Still others require leaving at least one of the halfshafts in the transaxle to keep the differential gears from falling to the bottom of the case (a mistake nobody makes a second time since you have to pull and remove the transaxle to stack everything back into place!).
A major reason for choosing one fork in the CV-repair road rather than another, of course, is cost. This varies from time and place and from model to model. In our case, we found a complete halfshaft for the Camry for about the same thing the joint replacement parts cost for the Integra, presumably a function of the numbers of such cars around.
While it’s irritating to do, shopping around for parts availability can sometimes work to the benefit of both the shop and the customer, provided you find a way to keep your standards of quality at a high enough level. Presumably we could have found the prices reversed or lower if we’d just spent more time on the phone and less time under the cars.
The additional work, if you replace the joint rather than the entire shaft, comes with dismantling and replacing the outer CV joint. Our kit included everything from the female splined fitting in the joint to the new axle nut. All we had to do was to tap the old joint off with a drift (and since we were round-filing the old joint, there was no need to use a brass drift in this case), slip the clamps and new boot over the shaft, pack the new bearing with the grease in the packet and drive it on until the spring-clip snapped into place. About the only thing that can go wrong would be smearing some grease under the boot lip. If you make that mistake the boot can slide off the cup, letting the lubricant out and let-ting in whatever the tires kick up. You’d be doing that job over again pretty quickly.
What are the possible missteps in the rest of the procedure? You can blow the axle nut off, or even worse blow it on, with an impact wrench. Regardless of how careful you are feathering the trigger, the inertial hammers can trip the drive enough to brinnell the wheel bearing races and balls or rollers. The same is true in spades, of course, reinstalling the nut — so use a breaker bar coming off and a torque wrench going on. Have someone stand on the brakes while you do it, because if the weight of the car is on the wheels when the axle nut loosens, a disproportionate weight falls on one or two bearing elements, possibly causing similar damage.
When the centerlink comes out of the transaxle, be careful to pull only on the joint tulip, the outer shell, not on the shaft itself. Many inner joints, designed to plunge in and out as the suspension moves through its travel, can lose the bearings from the tulip before you reach the expansion limit of the bellows-boot. If you’re not replacing that joint, you don’t want to take it apart unnecessarily — and they fail much less frequently than the outers since they don’t get the stress of turning through sharp angles.
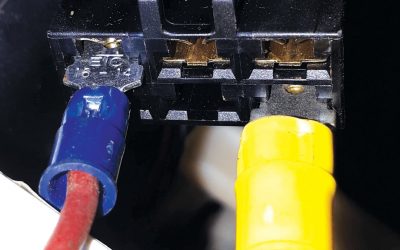
In either case, joint or shaft replacement, the work is straightforward, as you can see from our photos. The points of important attention, obviously, are seeing that the shaft fits completely into the inner splines at the differential; fitting the ball joint stud properly back together and pinning it with a new cotter pin; and torquing the axle to specifications, using whatever locking device the manufacturer provides for that axle stub.


0 Comments