For so long and so often, you’ve heard R-12 supplies are running out, you’ve probably stopped believing it ever will happen. EPA officials at the Mobile Air Conditioning Society (MACS) 2000 convention don’t blame you, but they say they have hard numbers now and suggest this summer will be the last with enough R-12. The total supply may be so close that all bets will be off late in the season, especially if this summer is a scorcher.
The EPA’s numbers: 25 million pounds are available now, and 19 million will be needed through this season, leaving six million for 2001 (when EPA predicts 15 million will be needed). So should you retrofit any good candidate now? If you’re replacing a compressor, the new pump was built for R-134a, so why not? Well, because nothing ever is that simple. The joker in this deck could be the condenser.
At low speeds and in very hot weather, R-134a doesn’t perform as well as R-12. So this raises the next critical question: Are you in a location where the A/C could be under a cooling load that could result in a dissatisfied customer? If so, that often makes it worthwhile to stick with R-12, unless …unless you also install a new condenser — and not just any condenser that fits, either. See Figures 1-4.
Condenser Designs
There are four mass-production condenser designs, three of them are ‘more efficient’ than the first and earliest. The long-produced 3/8-inch tube-and-fin condenser is a perfectly good design, reasonably priced and used for a long time in R-12 systems. But size for size, it can’t condense as much refrigerant gas to liquid as any of the newer designs. And with the higher pressures of R-134a, that becomes a cooling performance difference. Consequently, the 3/8-inch condenser has few remaining applications in R-134a systems.
You can find the 3/8-inch round tube condenser as a replacement. But never use it to replace any of the following later-design condensers:
- 6 mm round tube-and-fin (smaller diameter tubes, more densely packed to transfer more heat in less space), and with an improved refrigerant flow pattern,
- serpentine (snake- or wave-like tubing pattern from inlet to outlet, typically several flow paths within that tube),
- parallel multipath (a series of oval tubes with parallel flow paths, each oval tube with more than nine passages in the superhigh-efficiency designs).
Condenser design seems to be the most critical for ‘underbody breathers,’ cars with the radiator/condenser air inlets below the bumper, drawing cooling ram air from just above the pavement. Among imports, Honda Accords with R-134a systems long have used high-performance, parallel-flow multipath condensers, and nothing less will work. Today, you can get aftermarket replacements in reputable name brands. Most Toyotas needing a replacement condenser will require the equal of their original condenser, some of which are high-performance serpentines.
Unfortunately, these high-efficiency condensers are more expensive, so replacing a 3/8-inch tube-and-fin condenser with one of these could add hundreds to your retrofit bill. If the compressor failed and has to be replaced, too, this could make the job a very tough sell. When a compressor fails, the scattered debris often restricts flow through the condenser. A 3/8-inch condenser has large openings and a simple flow path, so you can often flush out failed compressor debris.
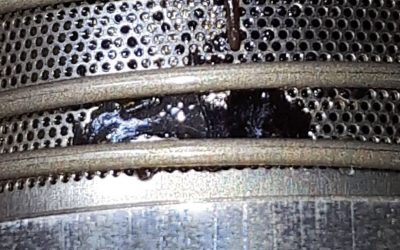
The more efficient condensers typically have very tiny flow passages to achieve a higher surface-to-volume ratio and thus improved heat-transfer. After a compressor failure, they often plug with debris and defy all attempts to flush (see Figure 3). In fact, there’s no way you can tell how successful (or unsuccessful) flushing has been on a car, until you put the system back in service. Installation of an in-line filter on the high-pressure side is the only way to catch debris residue. This keeps debris from circulating through the system and causing restrictions or a repeated compressor failure. Finding a suitable location, however, isn’t always possible. Few imports have orifice-tube systems, but on those that do, inspect the orifice tube for compressor debris, and replace it if necessary.
Given all of these potential problems, are you better off just flushing a 3/8-inch condenser and re-using it for retrofit? As with many automotive A/C problems, there are no perfect answers.
If your customer simply wants moderate cooling and can tolerate the limits of R-134a in an older-design condenser even when the weather is torrid, a basic retrofit can serve his interests ‘enhancements,’ such as an auxiliary pusher fan, can be left to a later ‘let’s-see’). Just do the job ‘by the numbers’ so it holds up.
Retrofit ‘By the Numbers’
- Check the manufacturer’s recommendations for retrofit. They should be in your CD- ROM service information system. Or get a retrofit manual from MACS (215-679-2220). You might find the system you’re servicing requires some special seals or other parts. Examples: Nippondenso compressors normally require new O-ring seals. Sanden compressors for European cars may require new shaft seals. And you can forget about retrofitting vehicles equipped with Panasonic (rotary) or Keihin (piston) compressors.
- Draw a deep vacuum, allowing the system to out-gas any refrigerant and any moisture. If the system won’t pull down to 28 inches and hold for a few minutes with the pump off, find and fix the leak. R-134a may be less expensive than R-12, but that doesn’t mean a leaking system is acceptable.
- Replace the accumulator or receiver-dryer with one using XH-7 or XH-9 desiccant. There are no options on this one, since that R-12 system must now be at least six years old. Recharge the system with the specified amount of R-134a, typically 85 percent of the original R-12 charge. Charge accurately, as discussed in this report. Don’t add extra refrigerant to compensate for a small leak. Instead, find and fix the leak.
- Use the PAG (poly alkylene glycol) oil recommended by the compressor supplier Every compressor supplier that ships ‘dry’ compressors recommends a PAG oil and will void the warranty if you use a polyol ester (POE) oil instead (and that difference can be identified easily).
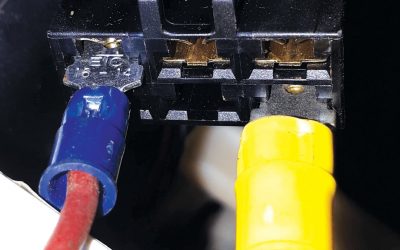
- Install a high-pressure cutout switch if the vehicle came without one. Again, this is not an option; it’s the law. If the old compressor still is usable, your best choice is a switch that cuts out at 400 psi. or lower (to protect the com-pressor clutch) and cuts back in about 280-300 psi. (so there’s some cooling without a long delay). Japanese compressors in R-12 systems often use a ‘melting-bolt’ pressure-relief valve, and if this opens, it can’t reset (Figure 5). You’ll have to replace it. Install the cutout switch with a fitting on a service valve or with a saddle fitting on the liquid line, both of which you can get from all the major A/C service parts distributors.
- Pay attention to details. Fit plastic foam strips into front-end gaps around the condenser and radiator, around the headlamps, etc., so all the air must pass through these heat exchangers and none can pass around them. If there’s a fan shroud, make sure it fits properly. On systems with an accumulator, wrap it with insulation (household foil-backed foam tape works). Secure refrigerant lines to their brackets, adding any brackets necessary to shield the lines from the exhaust or other hot surfaces of the engine.
- Check the fan operation. A fan clutch that slips or an electric fan that comes on late will raise system pressures, reducing cooling.
- Don’t forget an R-134a-retrofit label to go with the new fittings. And be sure to put a new retro-fitting on both service valves, not just the one you use to charge the system.
- If you’re replacing a compressor that failed, explain your condenser decision to the customer, too.
Replacement Condensers
The condenser, part of the car’s crush-zone, is one of the first parts to go in a front-end collision. Both the motorist and the insurance company will put the pressure on to do the repair for less. Saving money by installing a 3/8-inch tube-and-fin replacement condenser is tempting. But that solution may mean a 25-percent reduction in cooling capacity (maybe even lower capacity than that).
How to tell a good replacement condenser? It’s not simple. Sticking with the major brands and picking the recommended replacement type are your best bets. The big companies (and most smaller suppliers) just won’t list a woefully inadequate condenser.
However, even among the 6 mm serpentine and parallel-flow multipath designs, there’s significant variation in design and manufacturing quality and therefore, in performance.
The details are still being worked out, so nothing is for sure in the following:
The real answer is a heat-exchanger rating system, and MACS supports a program to produce ratings for all automotive heat exchangers. The Performance Review Institute, an affiliate of the SAE (Society of Automotive Engineers) in cooperation with commit-tees of industry technical specialists, has been asked to help produce and then administer the program. If it goes into effect, each condenser from a participating manufacturer would be compared with the original equipment specification part, for heat-exchange capacity, for fit and for durability.
Charge Accuracy
Today’s R-134a systems take as little as 16-18 ounces of refrigerant. The systems are leak-tight, and the low capacities leave little margin for error, low or high. A 10-percent margin still is the rule of thumb for charge accuracy. However, on late models that translates into 2-3 ounces, not the 6-8 ounces of older systems with their 3 to 4-1/2 lb. capacities and their giant receivers (handy reservoirs because the old systems leaked a lot).
So did every shop that invested in charging equipment that promised ‘0.1 lb.-pinpoint accuracy via digital scales and electronically-controlled solenoid valves actually get that accuracy? The short answer is “no.â€
Folks, there’s a big difference between a machine’s capacity to display a resolution of 0.1 lb. (1.6 ounces) and its capacity to meter refrigerant into an A/C system with such precision. In the early ‘90’s, General Motors had its dealers buy then-state-of-the-art machines, and GM soon found these machines typically delivered refrigerant with 15-20 percent variation in charge volume — on three-lb. systems. With system-capacities coming down, the charge variation percentages would go up, and that was a disaster in the making. Too much refrigerant raises pressures and causes noise; too little affects lubrication and causes noise; either reduces cooling.
New Machines
A/C performance after service wasn’t good in too many cases, and perfectly good compressors were being replaced unnecessarily. So GM and Delphi (its former parts division) teamed up with equipment manufacturers to develop a new generation of machines that not only recovered, recycled and recharged a lot faster, but also did so more accurately.
The so-called “Y2K technology†was promoted among all the equipment manufacturers, not just those who competed for the GM contract (Figure 6). So if you look at what’s new, you’ll find Y2K technology widely available and at a modest premium over the older models. The Y2K technology machines have microprocessors that not only calculate the amount of liquid refrigerant left in the line during a high-side charge, but may pull it back into the machine after the recharge is complete. If you want to use longer or shorter hoses, the machine can be reprogrammed to compensate. These features can overcome charge-variance inaccuracies, which may occur if different technicians use different recharge techniques.
The refrigerant scales are an improved, higher-accuracy design whose calibration can be confirmed in the shop — no more excuses. There’s a new built-in refrigerant identifier that’s more robust, so it won’t die from a few drops of refrigeration oil. If you already have a hand-held identifier that can read percentage of air in the system, you can hold off on this purchase.
Your Old Machine
Want to get more use from your current A/C machine before you buy a new one? Then don’t keep pressing the CONTINUE button (or bypass whatever tells you to change the filter), but maintain your machine. The simplest kind of all: Keep it clean and covered when you’re not using it, so dirt doesn’t accumulate and then get sucked in through the air intakes (Figure 7). Change your filters. Change the vacuum pump oil after each 10-15 hours of operation, so the pump can consistently pull a deep vacuum, and you don’t chase imaginary refrigerant leaks (the new GM-dealership machine has an oil-less vacuum pump to eliminate this maintenance, but this approach has both pros and cons). Mount your tank squarely on the scale so your reading is accurate (Figures 8, 9), and call the equipment manufacturer to learn how to recalibrate it in your shop (often there is such a method, even if it isn’t published in the operating manual).


0 Comments