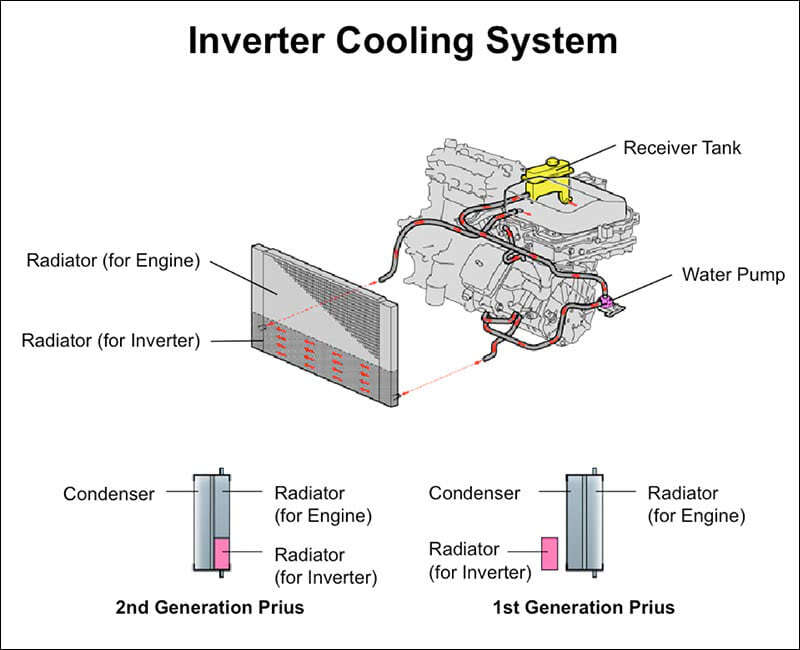
 The Prius uses an independent cooling system to keep the inverter and motor/generator (M/G) at a safe temperature. In warm weather, problems with the inverter cooling system are fairly common in both the Gen 1 Prius (2001-2003), and Gen 2 Prius (2004-2009). If you’re not already familiar with these systems, this article will bring you up to speed and save you some time when the first failure rolls through your bay door.
Let’s start with an overview of the basics. The inverter cooling system is completely independent of the ICE (Internal Combustion Engine) cooling system. It uses a separate radiator and water pump, and it operates at a lower temperature than the ICE cooling system.
Coolant
The inverter cooling system uses the same type of coolant as the ICE cooling system:
- Gen 1 was factory filled with Toyota Long Life Coolant (LLC). LLC is full strength and must be mixed with distilled water to obtain the correct ratio (50/50).
- Gen 2 was factory filled with Toyota Super Long Life Coolant (SLLC). SLLC is premixed, eliminating the hassle of mixing and the potential for error.
SLLC can be used in Gen 1, but LLC should not be used in Gen 2. The Gen 1 maintenance schedule calls for coolant replacement every 30K miles, but the Gen 2 schedule neglects the coolant for 100K miles.
You may want to consider stocking only SLLC. It will cover 100% of the Toyota line. It’s easier to use since there is no need to premix or stock distilled water. And it’s arguably a superior coolant. The only down side is a slightly higher cost per mixed gallon.
Temperature Regulation
Since the inverter and M/G do not need to achieve “operating temperature†to work efficiently, there’s no need for a thermostat or other temperature-based control of the inverter pump. The inverter pump runs any time the power mode is “ON†or “READY.â€
What’s hot?
The heat in the inverter coolant comes from two sources – the inverter and the M/G. Heat sinks in the inverter and the transaxle transfer heat into the coolant.
The inverter radiator removes heat from the coolant, and the design and location changes from Gen 1 to Gen 2. The inverter radiators are both positioned to avoid radiant heat from the ICE radiator.
With Gen 1, the inverter radiator is located between the ICE radiator assembly and the bumper. It might be mistaken for an oil cooler if it were not for the 16mm coolant hoses attached to it.
On Gen 2, the inverter radiator is the lower section of the ICE radiator, but the ICE and the inverter sections are compartmented — no coolant is shared between the two. The division is hard to see while with the radiator is mounted in the car, but it’s there.
Fans & Pump
The inverter radiator is cooled by the same set of electric fans used for the condenser and radiator.
Water pumps are a source of confusion for many. The Gen 2 Prius has 4 water pumps total: ICE water pump, heater water pump, thermos water pump, and the inverter water pump. Sorting out what’s what can be time-consuming just by itself if you’re not familiar with the Prius. You’ll find the inverter pump mounted on the body just behind the driver’s side headlight on both the Gen 1 and Gen 2.
Necessary tools
Scan tool:
The most important piece of equipment for any Prius diagnosis or repair is the Techstream scan tool. An older Toyota Intelligent Tester or Vetronix Mastertech with a Genuine Toyota card will also work, but is much slower and does not have the same features. Other scan tools have promised full coverage, but so far none has delivered, at least not reliably. Using one that lacks capability, or provides incorrect information can waste hours of diagnostic time.
Any shop can purchase a Techstream here: https://techinfo.toyota.com/t3Portal/staticcontent/en/techinfo/html/prelogin/docs/ts/tsprodinfosheet.pdf
Vacuum Fill Tool (A.K.A “Air Liftâ€): 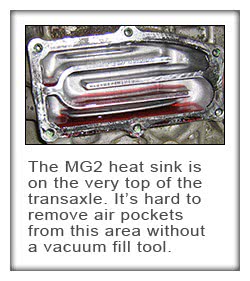
The transaxle heat sink is near the top of the transaxle and the inlet/outlet pipes are near the center of the transaxle. The heat sink chamber can become air locked during service. A vacuum fill tool is the best way to ensure no air is trapped when refilling the system. Depending on the design of the vacuum fill tool, you may also need a cap adaptor.
Safety Equipment:
Lineman’s gloves, CAT IV-rated test equipment, and other hybrid safety issues have been discussed ad nauseam in many publications and training courses to the point of crowding out more useful material, so I won’t torture you by repeating more of the same. If you are not already familiar with hybrid safety, please read the safety information in the service manual before starting work. The most important safety precaution is being sure you understand the system you are servicing. Asking and answering the questions, “How does this work?†and “How can it hurt me?†will provide far more for your safety – and diagnostic capability – than a set of rubber gloves.
 Pump Diagnosis
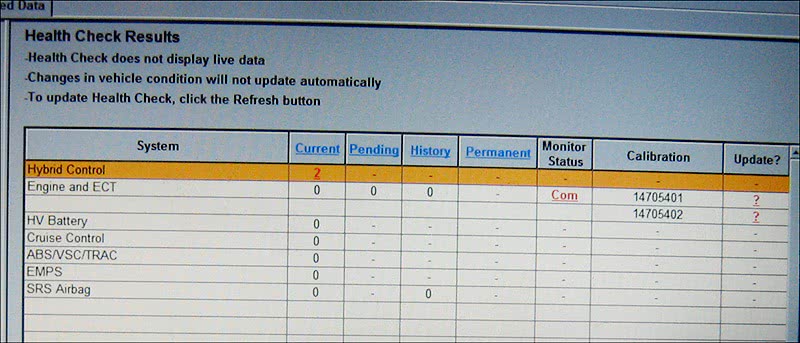
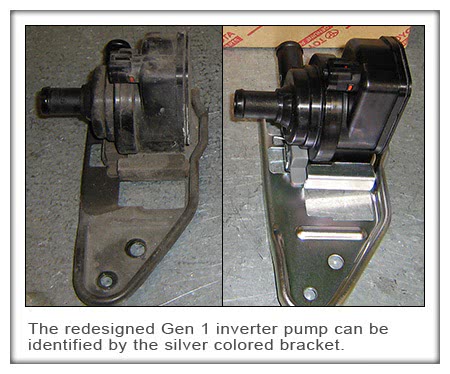
The most common failure for both the Gen 1 and Gen 2 is the inverter pump. There are TSBs addressing this and improved design pumps for both the Gen 1 and the Gen 2. Diagnosis of a failed inverter pump is usually pretty simple, but virtually any Prius diagnosis should start with a Health Check, if for no other reason than to establish a baseline. Even if you’re pretty sure there will be no codes when you start work, you’ll always want to check for codes post repair to make sure you haven’t caused any to set. If you don’t perform a baseline check, how will you know which codes you caused and which were pre-existing?
 •Gen 1:
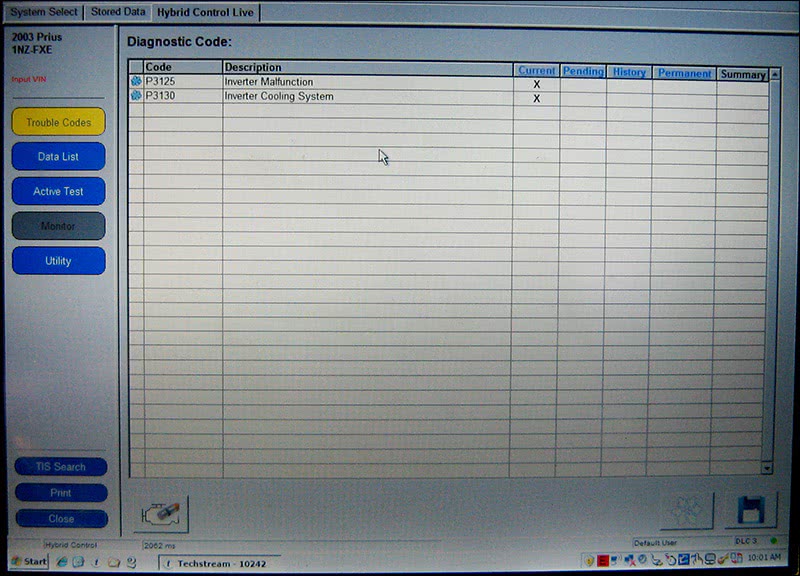
Inverter water pump failure diagnosis typically begins with finding a P3130, INF Code 346. P3130 indicates a problem with the inverter cooling system and INF Code 346 specifies that the problem is with the water pump. INF Code 347 indicates trouble with the cooling fan. I assume the HV ECU logic uses the ICE coolant temperature to determine that the fan is at fault, but I don’t know this for a fact.
Sometimes there will also be a P3125, INF Code 264 – DC/DC converter malfunction, and a bunch of low-voltage-related codes in the ABS/VSC ECU, Transmission Control ECU, etc. Ignore these codes for now. When the inverter overheats, the DC/DC converter (part of the inverter) will stop working. The DC/DC converter charges the 12V battery, like a generator on a standard car, so your customer may report dimming lights, the Multi Function Display (MFD) screen flickering, or similar “alternator-like†symptoms. The car may even stall and require a tow. The DC/DC converter will probably work OK once the auxiliary battery is charged and the inverter cooling system problem has been corrected.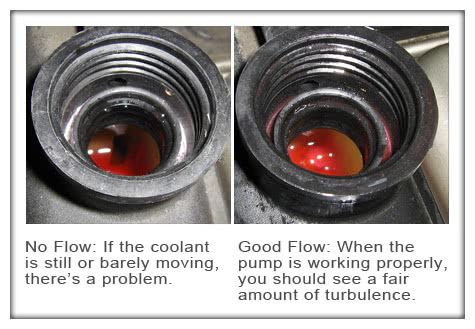
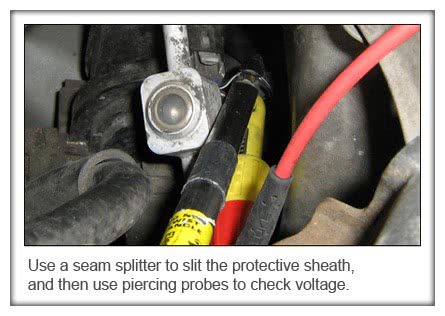
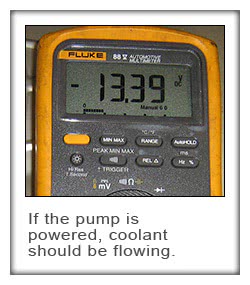
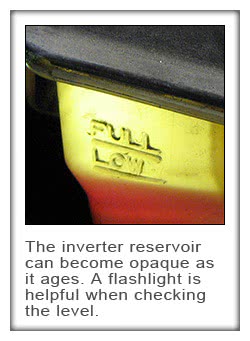 Once you’ve found a P3130, INF Code 346, a visual inspection is the first step. Is the coolant level low? Are any hoses kinked? Are the radiator fins blocked? If not, the next step is to remove the inverter reservoir cap, and check to see if the coolant is flowing. You should see a fair amount of burbling. If there is a placid pool of pink tranquility under the cap, check for voltage across the two-wire connector at the inverter pump with the power mode in READY or ON. No coolant flow + Battery voltage across the inverter pump = Bad inverter pump. Simple huh? Flat rate diagnostic guys rejoice!
 If you pull enough inverter reservoir caps off, you may notice that some cars with no codes also have no flow. The right combination of driving style and ambient temperature may allow a Prius with a bad inverter pump to continue driving trouble-free.
This common lack of flow was one of the problems with the Gen 1 inverter bleeding procedure found in the service manual. Half of the time, the coolant flow was imperceptible or non-existent, which made following the bleeding instructions an endless loop, repeating steps (H) through (L) forever. You may also run into inverter pumps that work intermittently. Flat rate guys may stop rejoicing when they encounter one of these.
•Gen 2:
The Gen 2 Prius has a different trouble code for the inverter cooling system — P0A93, INF code 346 — but the diagnostic procedure is the same. TSB EG001-07 recommends that the inverter pump be replaced if no trouble is found during the standard testing. I’m not sure if this is an acknowledgement of the possibility of an intermittent failure, or an indication the old pump design lacks pumping capacity. Regardless, after checking the basics, pump replacement is the best option.
Inverter
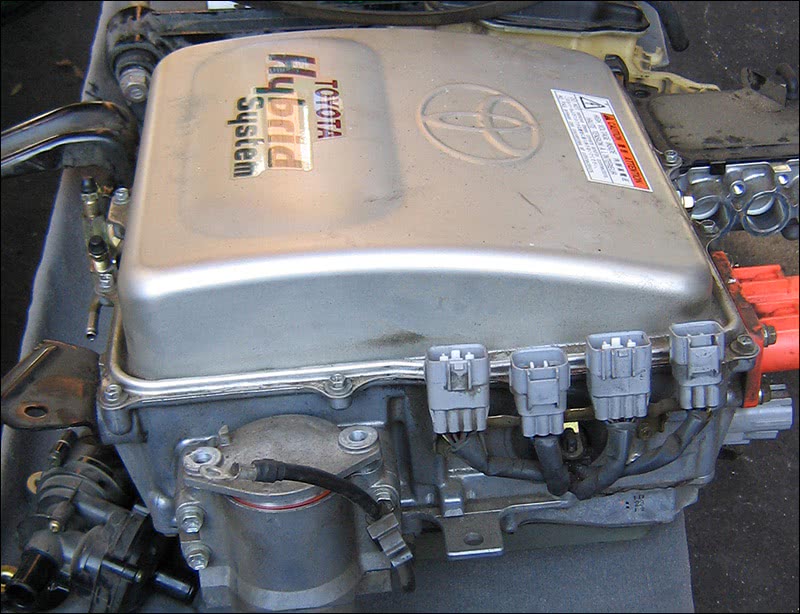 Gen 1 TSB EG023-07, which addresses the improved inverter water pump, also contains a “Plan B.†If the inverter pump flow seems adequate, and the code set while ambient temperature was above 90 deg. F., Plan B is to replace the inverter with an updated unit. If the inverter is out of warranty (8 years/100K miles), this could be a pricey repair for your customer. If the inverter pump is original, it makes sense to do your best to confirm that the problem is not caused by an intermittent pump failure. In fact, replacing a seemingly good pump with an updated unit might be a gamble your customer is willing to take. A few hundred dollars wagered on a new pump may save a few thousand. Then again, the money may buy nothing more than an assurance that an expensive repair was really needed.
Crash!
Collision damage to components of the inverter cooling system is common. The inverter radiator is obviously in harm’s way, but the inverter, inverter pump, hoses, and even the transaxle can be damaged when a Prius is smacked in the front. Frequently, the damage is subtle and will go un-noticed during the body shop repair. You may encounter a Prius that has been repaired and on the road for months with low coolant and a P3130 or P0A93.
 Inverters can be cracked by impact, or sometimes the inverter reservoir outlet will crack where it enters the inverter. If the reservoir cracks, the inverter can be pressure-tested using a single-hole stopper and 16mm cap before spending money on a new reservoir. Tire leak detection fluid (soapy water in a spray bottle) works great for this. Only use a regulated air supply, not shop air.
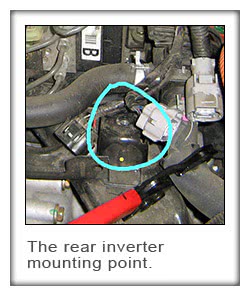
 While not directly related to the inverter cooling system, you may encounter the following during cooling system repair: When the inverter is hit, the rear mount bracket is often bent. If you remove the two front mounts and the inverter goes “SPROINGNGNG!†as it jumps up a few inches, this is probably the case. The ABS/VSC actuator is mounted to the rear mount bracket. If you’ve never done one, plan on it taking at least six hours. This job cannot be done without the Techstream since you’ll need it for ABS bleeding and calibration.
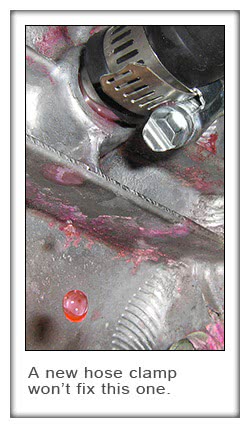
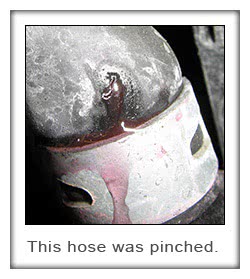 Transaxles can be damaged at the coolant fittings. Sometimes body shops will figure the leak is coming from the hose, install a hose clamp and then assume it’s fixed. I’ve seen post-collision-repair leaks from these fittings twice now. There’s only one “right†fix: a new transaxle, an option that’s bound to be unpopular with your customer or their insurance company.
Toyota hoses are of superior quality, so it’s unusual to see a leaking hose even after eight years of service. However, hoses do get damaged during collisions or repairs. You may need a mirror and some patience to fully inspect all of the inverter system hoses.
Conclusion
Most techs will have no trouble diagnosing and repairing the inverter cooling system, provided they have a Techstream and vacuum bleeding tool. The common mechanical failures are covered by TSBs, and collision-related surprises shouldn’t present much of a challenge since this system has more diagnostic capabilities and less complexity than a standard ICE cooling system.
Replacing an Inverter Pump on a Gen 1 Prius

by Paul Cortes

0 Comments