A shop owner called me in on a complaint of erratic engine operation in a 2003 Saturn View with the 3.0L engine (Figure 1). He stated that the car would immediately start up and run fine with no problems at all. It even had plenty of power. That is, until you applied the brakes — then, it would begin to run rough and stall. When the trans was placed in Drive or Reverse, it would do the same thing, but when placed back into Park it would run fine again. It didn’t matter if the engine was cold or hot, but only if the vehicle was put into gear with your foot on the brake pedal. At first, this seemed like your typical brake booster failure, but it led me on a wild goose chase!
The techs had done their homework by looking at many data parameters to see if anything changed from the time the vehicle was placed in Drive from the Park position. They discovered that the fuel trims were increasing to accommodate a lean condition. At this point, they believed that the brake booster was leaking due to the fact that the problem only occurred with your foot on the brake pedal. They pinched off the vacuum line to the brake booster, but the problem still prevailed. They next decided that the brake switch was the only correlation to stepping on the brake pedal and having an engine-running issue, so they removed and unplugged the brake switch. Once this was done the vehicle no longer experienced a problem when the brake pedal was applied. The shop had found the culprit, but they were confused as to what the brake switch had to do with an engine problem, so they called me in for technical assistance.
When I arrived at the shop, I had the technician show me the problem. He reinstalled the brake switch and started the engine, which ran very smoothly without any problem. Then, as soon as he stepped on the brake the engine started to surge and run erratically. He removed his foot from the brake pedal and the car ran fine. I stood there in disbelief because I have never seen anything like it. I thought it was some kind of practical joke the shop was playing on me, but it was for real. There definitely was a connection between latching the brake switch and having the car run poorly.
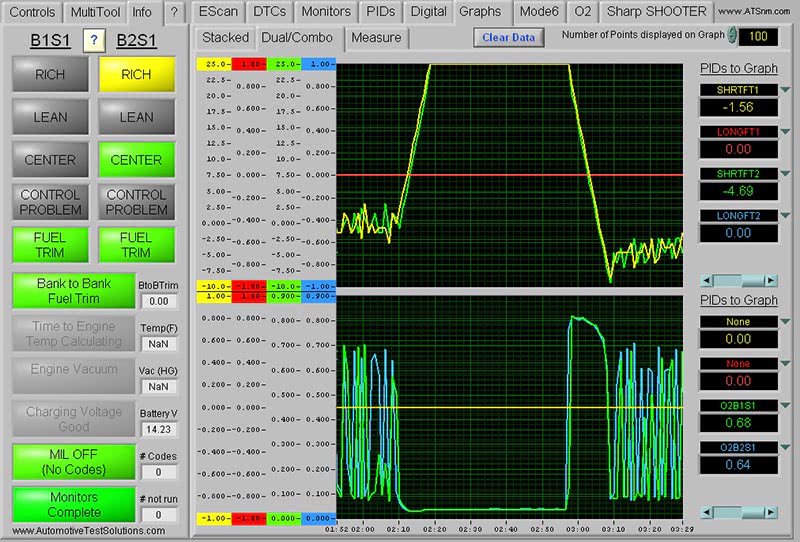
Figure 4: Stepping on the brake pedal, both O2 sensors went lean & the short-term fuel trim maximized to positive 25% without the PCM achieving any fuel control.
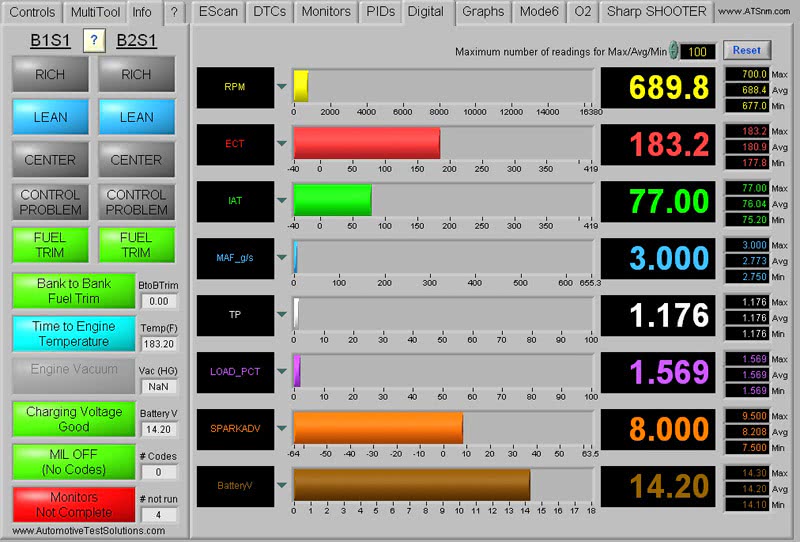
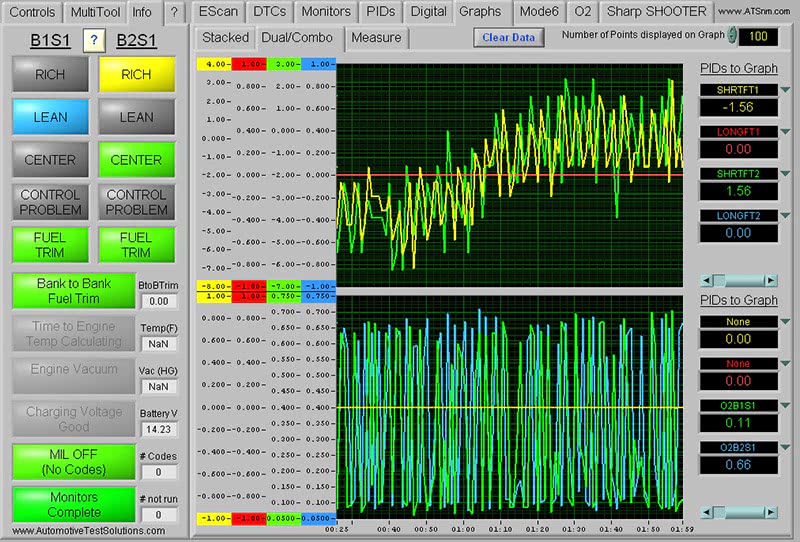
I hooked up my EASE scan tool to view some basic parameters such as rpm, coolant and air temp, mass air flow and throttle position (Figure 2), and everything seemed to be within range with my foot off the brake pedal. When I placed my foot on the brake pedal, I didn’t see any drastic changes in any of the parameters to point me in a sensible diagnostic direction. The shop mentioned to me that the fuel trims were changing when the brake pedal was being applied, so I decided to warm up the engine to take a look at it myself. I placed the long-term and short-term fuel trims in a graphing mode using one screen on the Escan, then placed both upper O2 sensors in a graphing mode on another screen. I watched the O2 sensors and fuel fuel trims with the engine idling and all seemed okay (Figure 3). When I stepped on the brake pedal, however, both O2 sensors went lean and the short-term fuel trim maximized to positive 25% without the PCM achieving any fuel control at all (Figure 4). This could be seen by viewing the flat line in both O2 signals that stayed near zero. As soon as I took my foot off the brake pedal, both O2 sensors hung at close to 800 mV due to the added fuel needed to overcome the prior lean problem. The PCM immediately went into fuel control by decreasing the fuel trim to about negative 10% to achieve O2 switching.
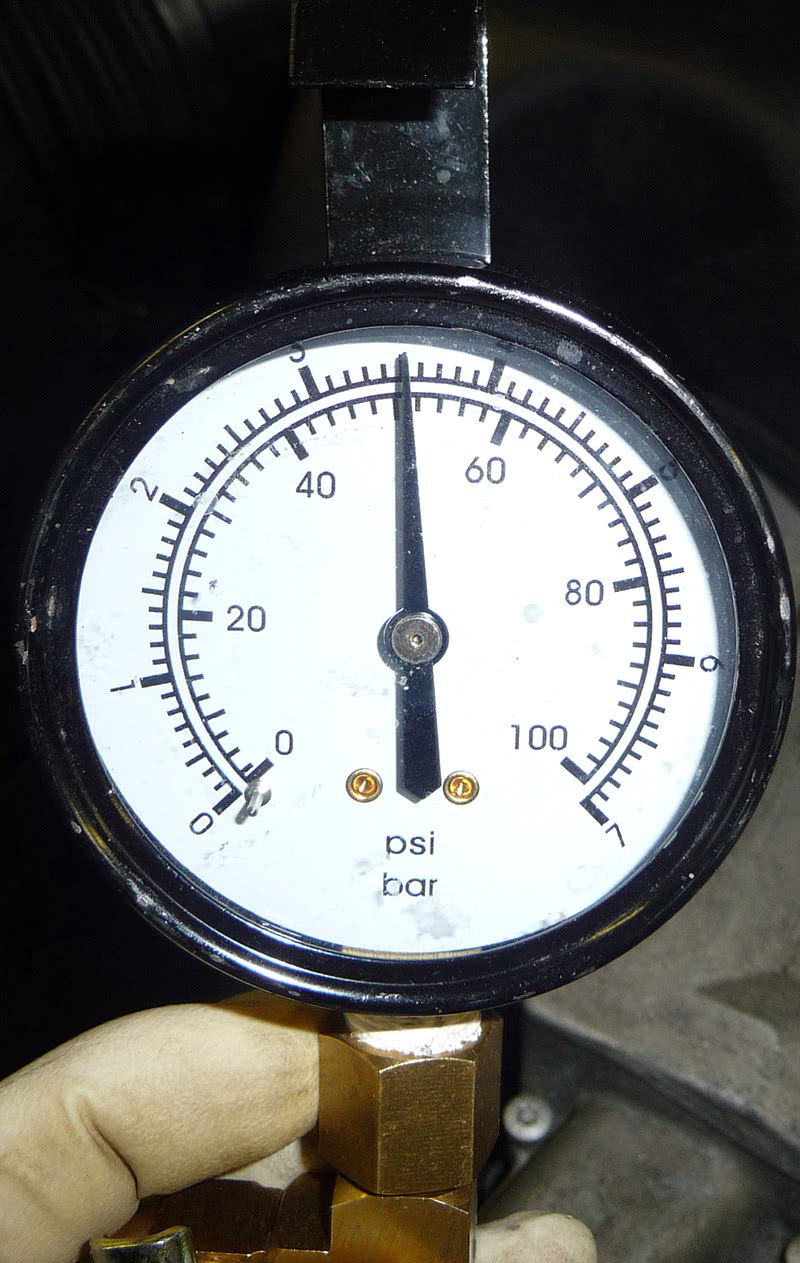
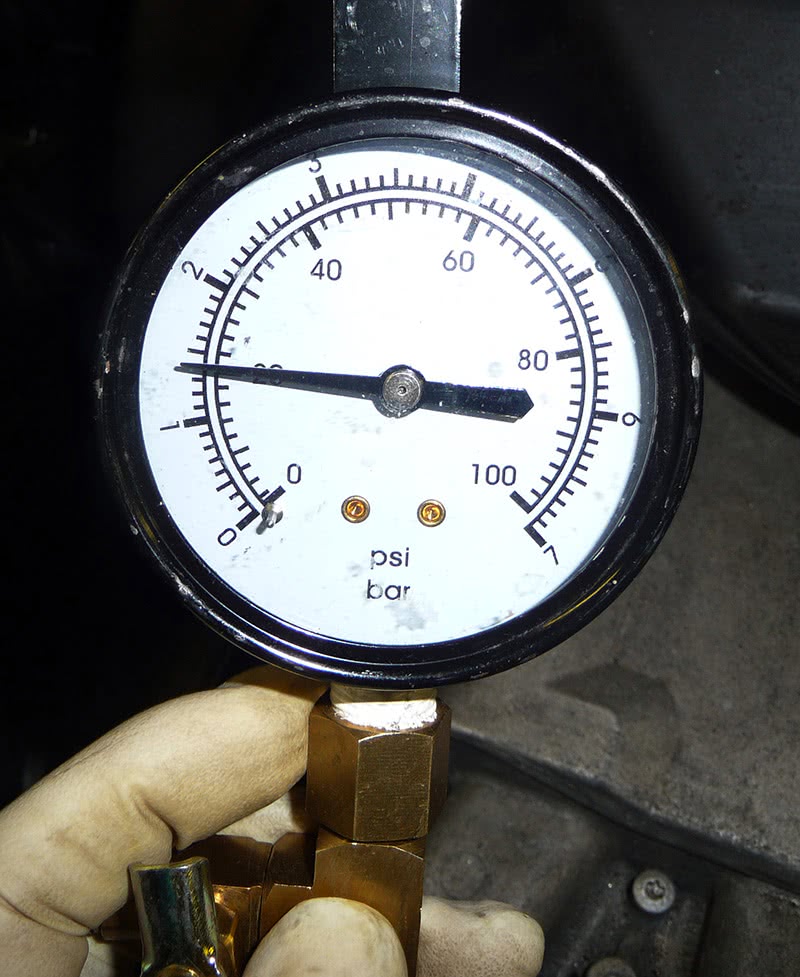
Figure 5: At idle, with foot off the brake pedal, pressure was within specifications at about 50psi.
The engine was running very lean with my foot on the brake pedal, and the PCM just could not add enough fuel to overcome the condition. The only major contributors to fuel delivery on this system would be the MAF sensor and the fuel pump. I didn’t see a major change in the MAF reading on the scan tool as I put my foot on and off the brake pedal, so I decided to check the fuel pump output with a pressure gauge. At idle with my foot off the brake pedal, the pressure was within specifications at about 50 psi (Figure 5), but as I applied the brake pedal it dropped to about 20 psi ( Figure 6). This was why the engine went lean and the PCM increased the fuel trim counts on both banks. The only correlation I could put together at this point was that when my foot was on the pedal, the brake lights were being energized, so there had to be a shared ground or power feed with the fuel pump that was being overloaded. I was now on a diagnostic blitz mission because I had found the cause of the seemingly mysterious problem, but I needed to isolate the specific location of the defect. It was all about fuel pump wiring.
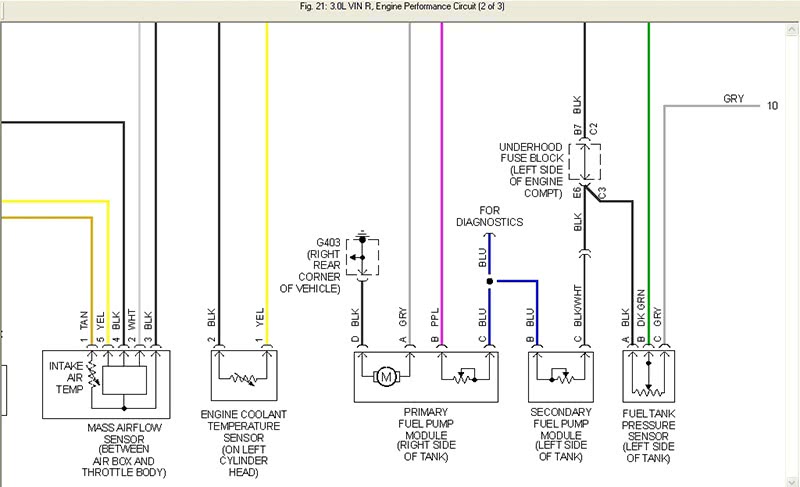
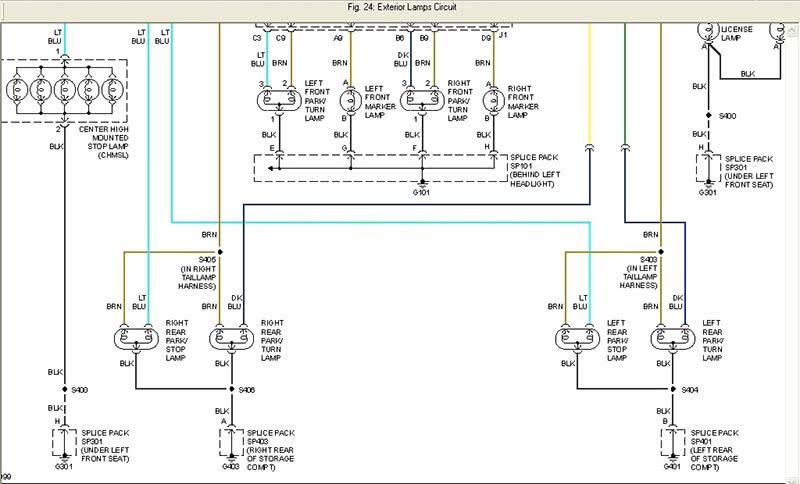
I went directly to the fuel pump feed wires under the vehicle and I had the tech apply the brake pedal while checking the power and ground feeds to the pump. I discovered a weak ground for the fuel pump. I followed the ground wire, but it seemed to travel back into the car. I didn’t want to waste a lot of time just looking around and hoping and poking — I needed to know exactly where the pump ground resided. This is where an information system that will show you what grounds are shared and where to locate them in the vehicle comes in handy. So, I went to my Mitchell Repair Information system to pull up a diagram of the fuel pump circuit. It labeled a pump ground #G403 located at the “right rear corner of the vehicle†(Figure 7). I also pulled a diagram of the brake lights (Figure 8) and discovered that there was a common ground “splice pack” #G403 located in the “right rear of storage compartment.†I appreciated this more precise location description because “right rear corner†did not specify inside or outside of the vehicle. Then again, it was only a label on a diagram and not a ground location feature, which I would have used next within the program.
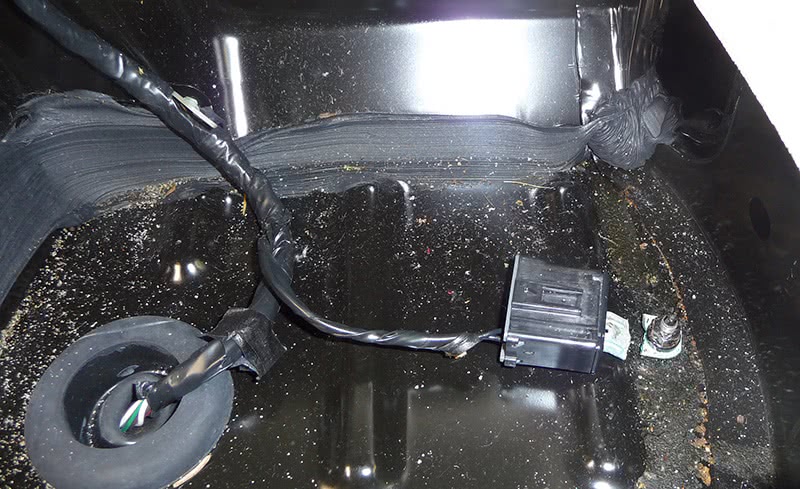
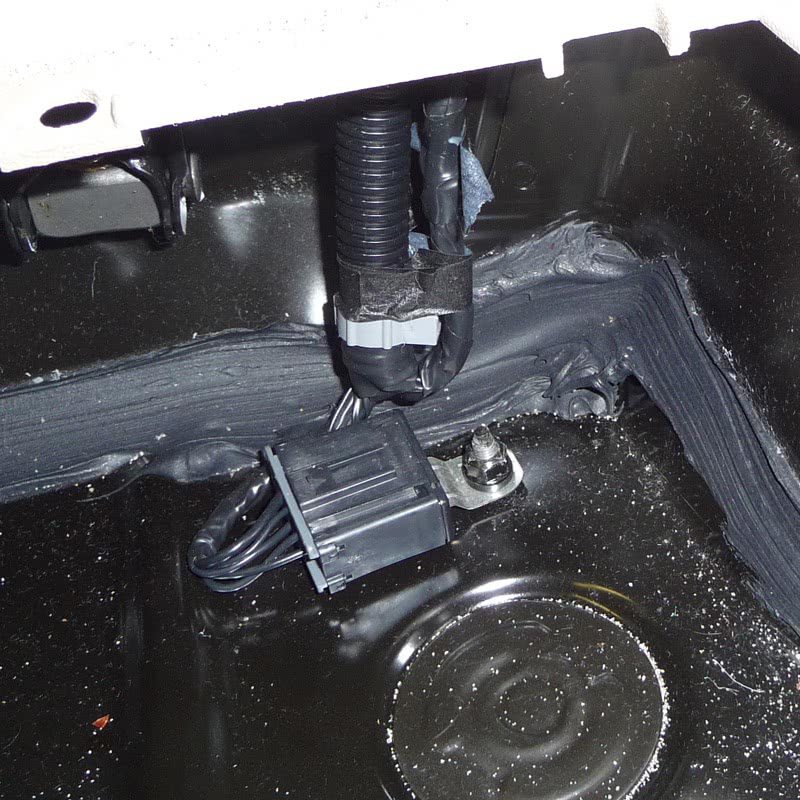
I opened the hatch and pulled back the rug at the right rear and found a broken ground strap (Figure 9). There was no direct fuel pump ground feed to the body of the vehicle, but rather a ground that was supposed to back-feed through this broken strap into the harness. Looking at a similar ground in the left rear cargo compartment gives you an idea what a good connection should look like (Figure 10). What was amazing to me was how the fuel pump motor back-fed through that connection to achieve enough of a ground to run at all. If any shared circuit on that connection suddenly needed a ground when the brakes were applied, there was just not enough to go around. This was why the fuel pump slowed down and put out less fuel pressure whenever the brake lights were energized.
This was a crazy problem because it was so hard to believe that a brake switch could take down a vehicle. At first it made my mind wander and draw a blank because stuff like this just doesn’t fit the pattern of normal diagnostics. It was exciting in the end to nail the culprit, and my only hope is that you can walk away learning something from this story.
by John Anello, the “Auto Tech on Wheels”




Great find just goes to show how important grounds are to these newer cars and trucks we see this all the time since we specialize in electrical repairs just had a Toyota Pu towed from another town to our shop for a no start it turned out that there was a broken ground strap at battery where customer had replaced the battery and had broke the strap and thought it was not necessary it would start and run as long as scanner was connected
Great find just goes to show how important grounds are to these newer cars and trucks we see this all the time since we specialize in electrical repairs just had a Toyota Pu towed from another town to our shop for a no start it turned out that there was a broken ground strap at battery where customer had replaced the battery and had broke the strap and thought it was not necessary it would start and run as long as scanner was connected
Great Article.
Great Article.