

This article is part of a continuing series that will cover some of the problems that may come up on higher mileage Volvos.
Fuel Injectors (2016-2019 2.0L Engines)
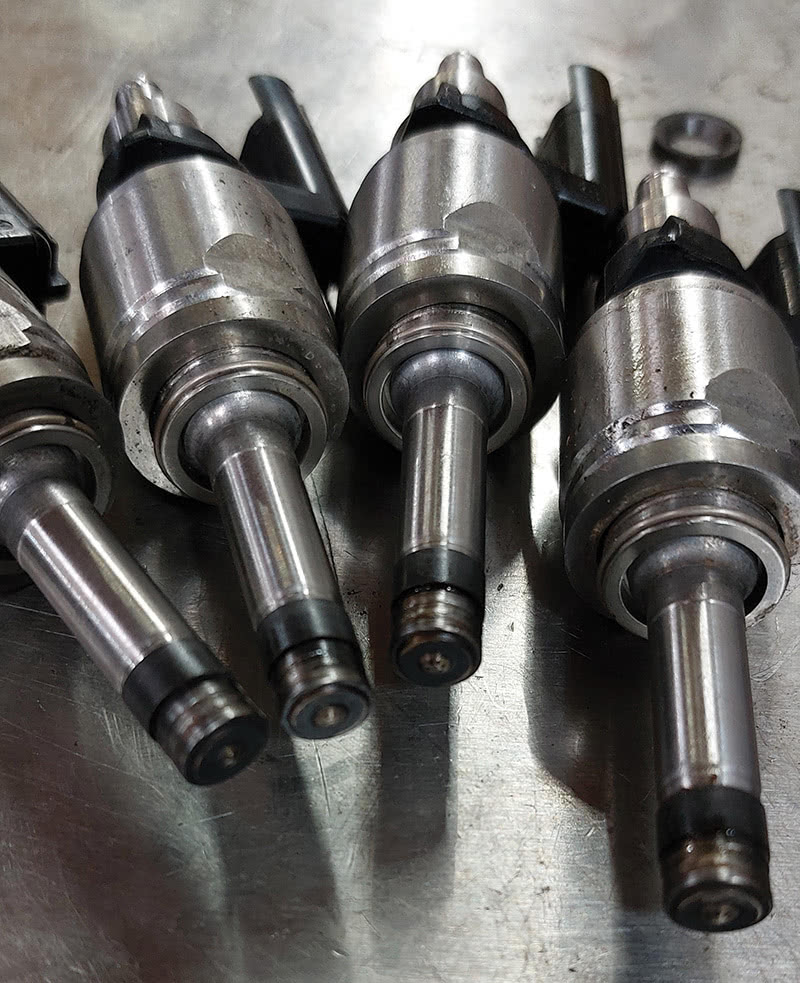
You may get a later Volvo in your shop that exhibits fuel injector problems. Most commonly if this type of fuel injector starts to leak, it will do so intermittently and may not be bad enough to set any trouble codes in the ECM.
The first thing the customer may or may not notice is lower fuel mileage than they are used to.
The next symptom they may experience is a long cranking time when starting the car cold or after the engine has been turned off for a while.
This is because in most cases, the leaking injector or injectors will only start to drip when they cool down.
In some cases, these cars will come into your shop with a Check Engine light illuminated and stored misfire codes.
The car will most likely be running fine at the time the car comes in and on your test drive.
Of course, a misfire code in one of these 2.0L engines is not always caused by worn fuel injectors, so make sure you perform the needed testing to eliminate any other possibilities before you throw a set of new fuel injectors at your customer’s car.
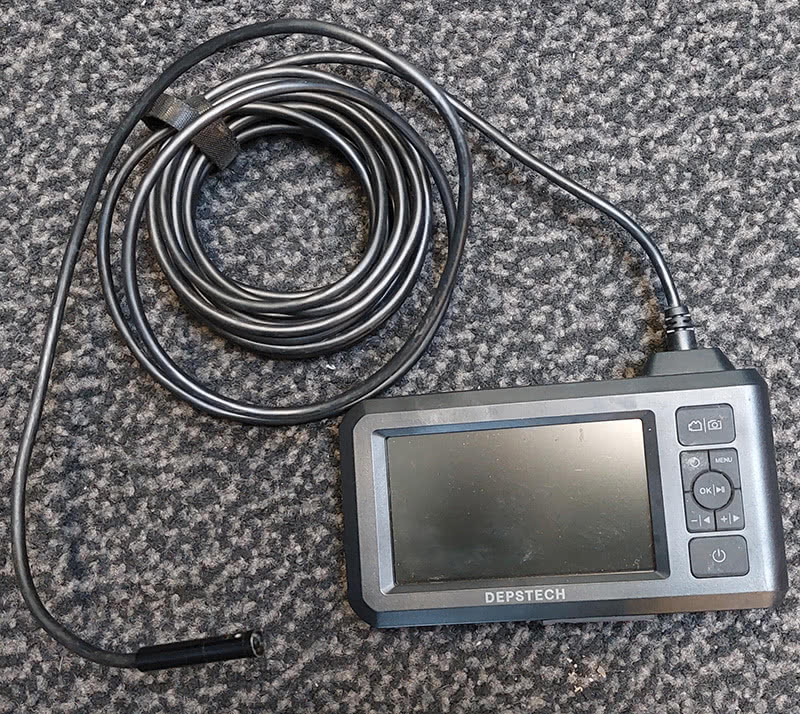
There is a low tech way to check to see if one or more of the fuel injectors is leaking when the engine is off.
You can park the Volvo in question in a stall that you can leave the car in for a few hours or even overnight. You should then bring the engine up to operating temperature and then shut off engine.
The next step is to remove the ignition coils and spark plugs from the engine.
Let the car sit for at least a couple of hours or so before doing your first visual inspection of the tops of the pistons for raw fuel. It’s best if you wait until the engine has cooled down completely, so heat from the pistons won’t cause any leaking fuel to evaporate before you can see it.
You can use a flashlight to try and see the surface of the pistons, but it will be tough to see much because the spark plug holes on the 2.0L engine are long and at an angle.
If you have an endoscopic inspection camera you will be able to see a lot better.
In most cases, the injector that is leaking will start to drip after some time and leave a puddle of fuel on top of the corresponding piston.
Volvo 3.2L SI6 Water Pump Coupler Problems Causing Overheating
You may get one of these Volvos into your shop with a mysterious overheating problem that’s not caused by the usual suspects.
Volvo 3.2L engines have been very reliable over the years, and a lot of them are still going strong, even with 100K plus miles on them.
The problems that most technicians have seen on these engines are caused by high mileage or lack of maintenance. But occasionally you may get one in your shop whose problems can be traced to another source.
Case Study 2007 Volvo XC90 with 3.2L SI6 Engine
This XC90 came into the shop with a complaint from the customer of intermittent overheating.
The technician that checked out the car performed the usual testing associated with an overheat condition.
The first thing the tech did after a visual inspection was to get the engine up to operating temperature to check the function of the thermostat and engine cooling fan.
This is best done with a scan tool like VIDA hooked up to the ECM and reading the live data.
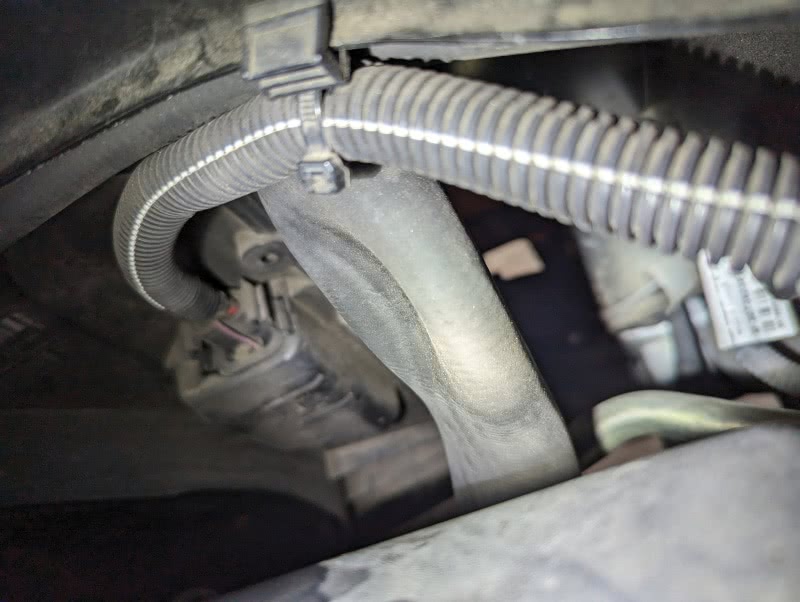
In the case of this XC90, as the engine warmed up, the technician noticed that the radiator hose that is connected to the thermostat had collapsed, like it was under vacuum.
The technician’s first thought was that the collapsing hose was due to a problem with the thermostat.
The technician decided to drain the coolant and remove the thermostat assembly to inspect it.
When the technician got the thermostat off and visually inspected it, the thermostat looked fine.
There is an old-school way to test to see if the thermostat is opening all the way and opening at the correct temperature.
To perform this old-school test you will need to heat up some water in a pot if you have a stove handy, or in most shops, you will have to heat up some water in a microwave oven (DO NOT PUT THE THERMOSTAT INTO THE MICROWAVE). Use a microwave-safe dish to heat up enough water to submerge the thermostat assembly.
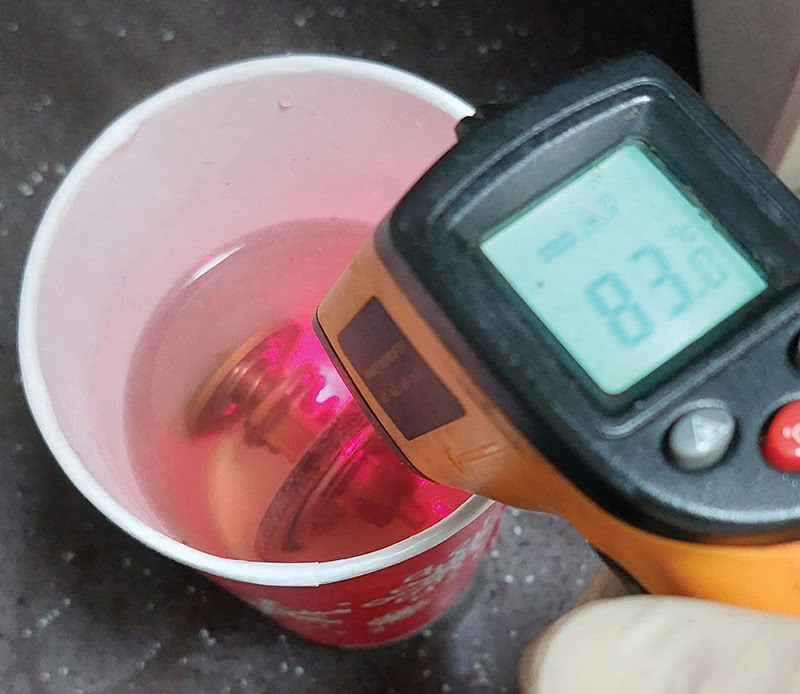
Use a thermometer to check the temperature of the water to make sure it is hot enough to open the thermostat fully.
You will need to drop the thermostat assembly into the hot water quickly because the water will start to cool down right away.
If the thermostat is working correctly, it should fully open within ten seconds or so.
Of course even if the original thermostat passes the test, depending on the car’s mileage, you should probably recommend that your customer replace it as part of the cooling system repairs.
The Volvo in this case study had a working thermostat, so the technician had to dig a little deeper.
During the inspection, the technician noticed that the water pump and drive belts looked new, so the technician asked the service writer to call the customer and inquire if the overheating condition started around the time that the belts and water pump were replaced.
It turned out that another shop had just replaced the belts and water pump recently when the family was on a road trip.
The customer stated that the car broke down in the middle of nowhere.
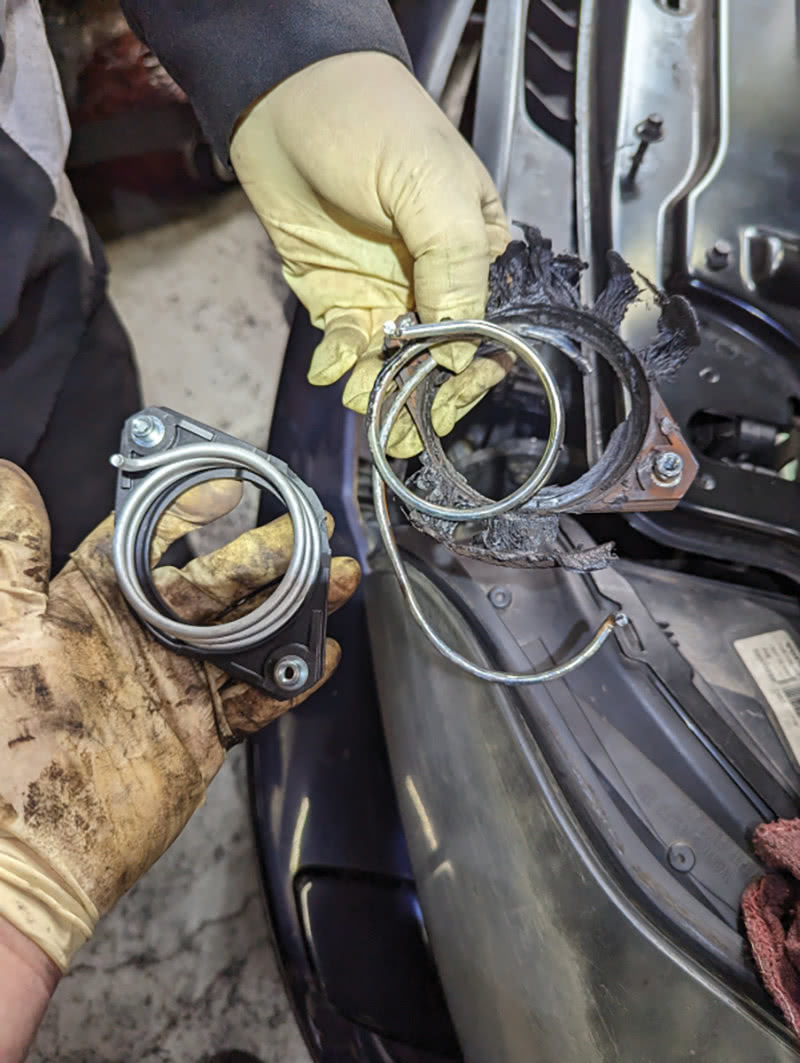
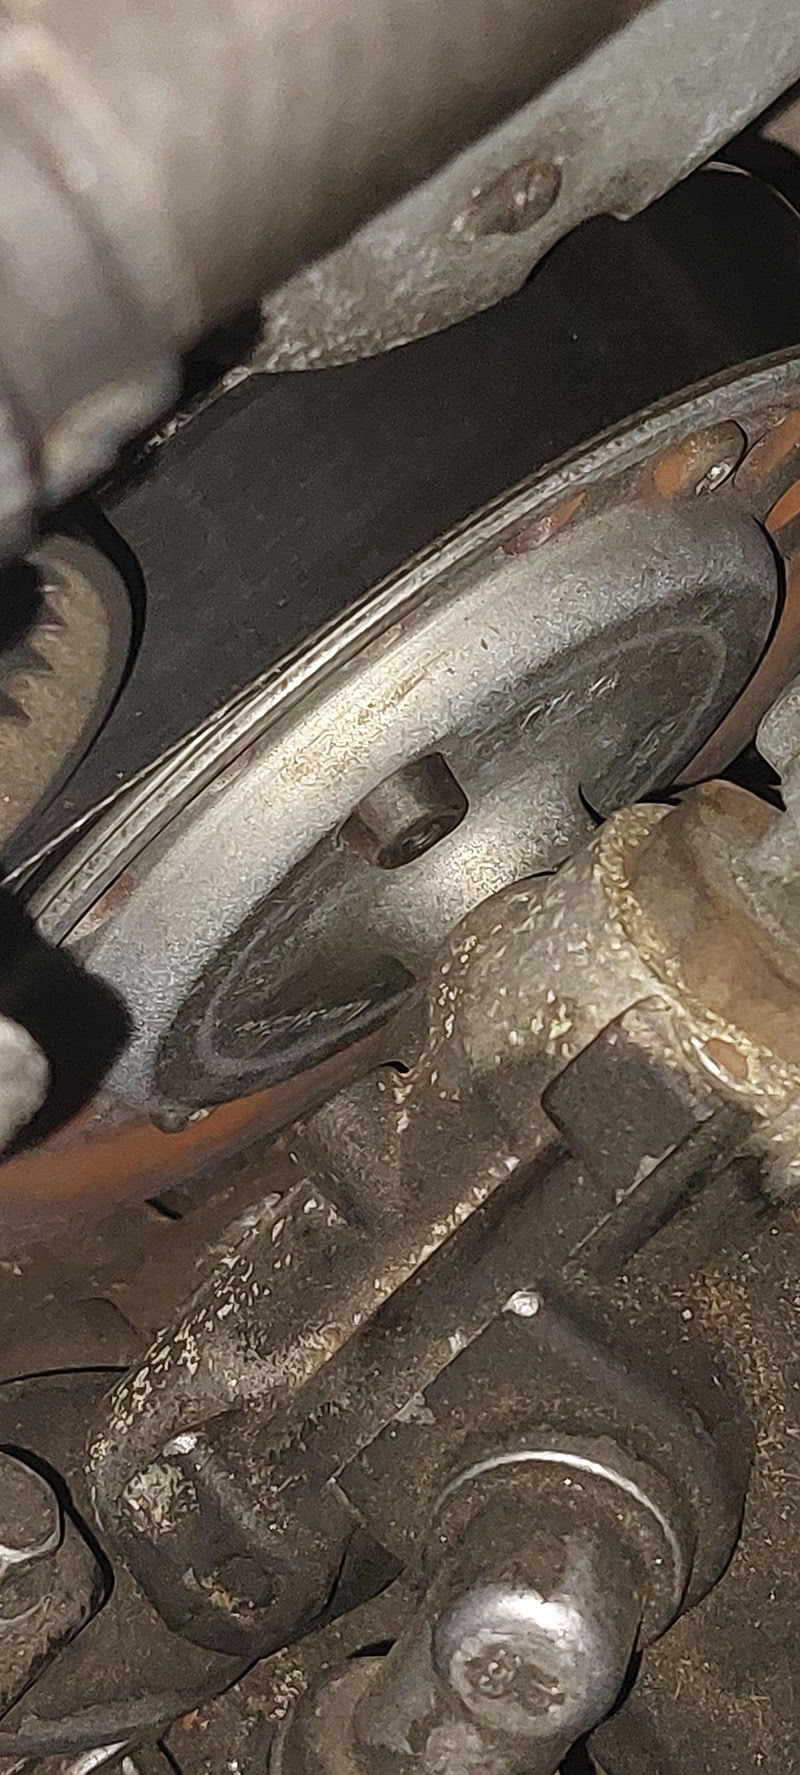
So with this new information, the technician took a really close look at the new water pump. Upon close inspection, the technician saw that the water pump’s drive pulley seemed to be wobbling slightly while the engine was idling.
The problem turned out to be caused by an incorrectly installed water pump drive coupler and spring assembly. The result was a water pump that was not being driven as fast as the engine needed to keep up with its cooling needs.
The incorrectly installed and damaged water pump coupler on this Volvo was causing the water pump to only turn at full speed intermittently, and when the engine got hot, the water pump was turning even less.
The water pump needs to turn at the speed it’s designed for in order to pump the necessary volume of coolant through all the passages and hoses of the engine’s cooling system.
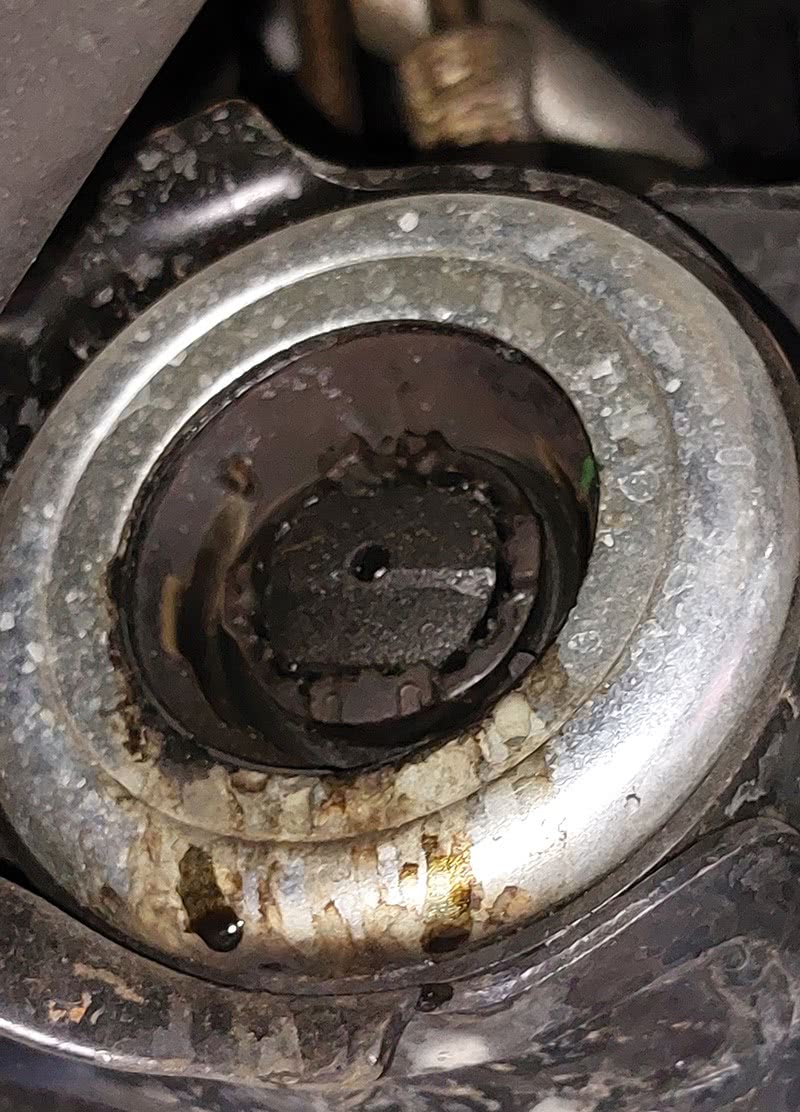
The water pump is driven by the power steering pump’s pulley which is driven by one of the auxiliary belts.
There is a spring-loaded coupler that connects the two pulleys that can be tricky to install and should be replaced when replacing the main water pump on these engines.
Replacing the water pumps on these Volvo 3.0L and 3.2L SI6 engines is not for a beginner; they can be very difficult for the inexperienced technician.
Most of the job is pretty straightforward, except for the couplers between the two pulleys.
The alignment is critical for the pump to work correctly.
There are plastic alignment pins that must be put in the right place when installing the coupler.
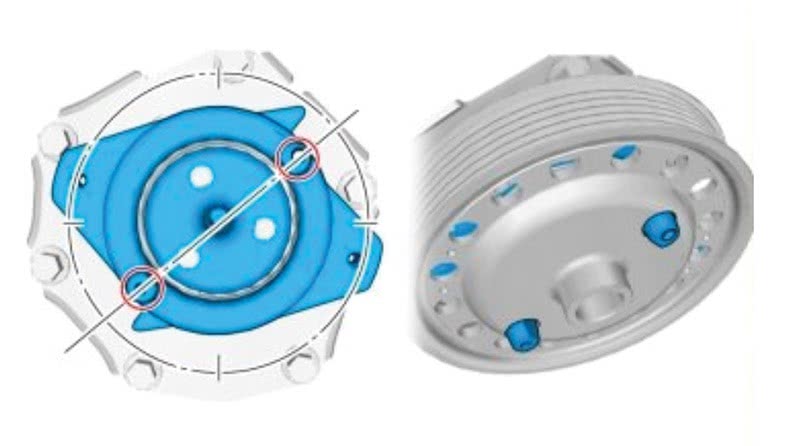
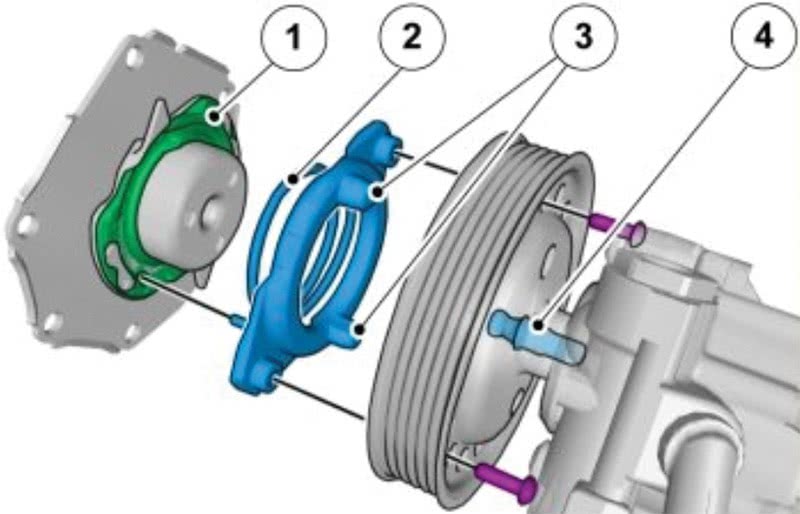
When Removing
Remove the pins from the pulley. Rotate the power steering pump upward and rearward. When installing, to facilitate fitting of the water pump coupling to the power steering pump pulley, turn the coupling until the spikes are in the 8 o’clock and 2 o’clock positions, as illustrated. Make sure that the pins stick out through the holes in the pulley.
When Installing
Make sure that the coupling’s spring (2) clicks into position at the bonded part of the water pump (1),
and that the pins (3) enter the holes of the pulley. Always use new centering pins (4).
It’s a tight fit for most technicians, but with practice, it can be mastered.
Worn Lower Control Arm Bushings (or Hydro Bushings) Leaking and Squeaking on P2 Volvos (2007-2011 V70, XC70, S80)
That’s right: lower control arm bushings that leak fluid. It’s a real thing, not made up like the ever-popular “blinker fluid” joke.
Like a lot of modern motor mounts and some bushings, the engineers started to design hydraulic fluid-filled bushings that are superior at dampening and isolating road feel and vibration from the driver.
That’s, of course, if the bushings have not leaked out all or some of their hydraulic fluid.

The customer may have a complaint of loose steering, pulling to one side, or more commonly, a squeak noise from the front end when the car is driven over bumps.
Volvo has issued a Technical Journal or TSB that covers a squeaking from the front end that can be caused by these bushings (TJ 14507).
Volvo has designed a new updated version of this type of control arm bushing that reduces the movement of the control arm.
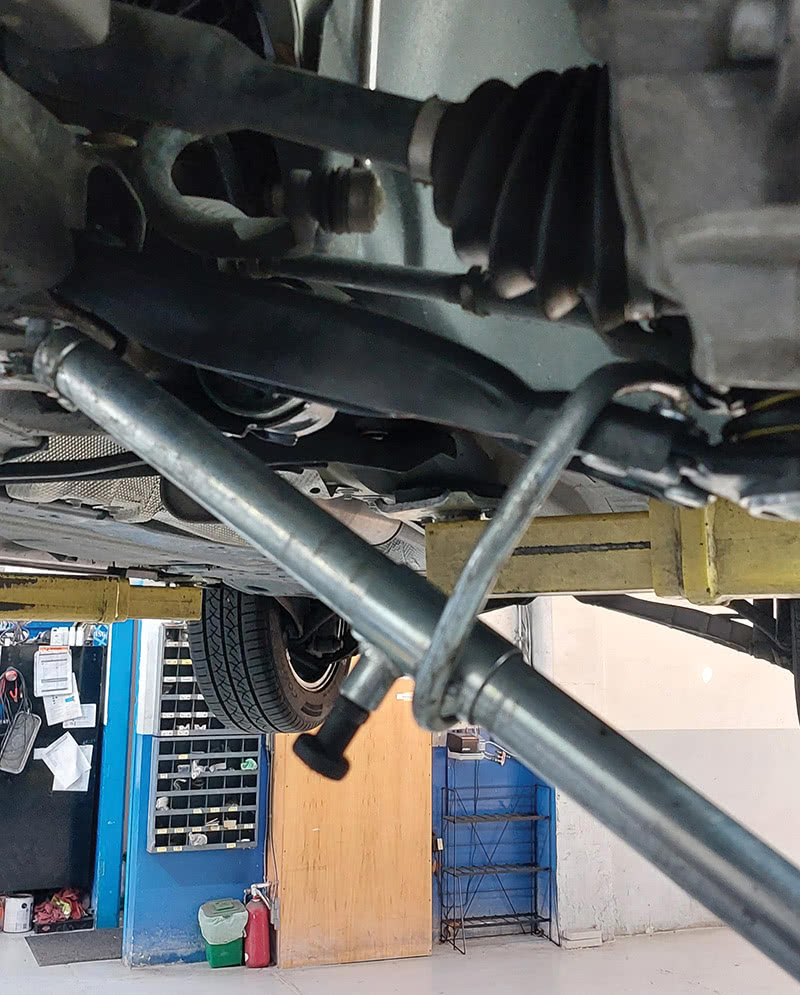
To replace these bushings, you will have to remove the lower control arms from the vehicle.
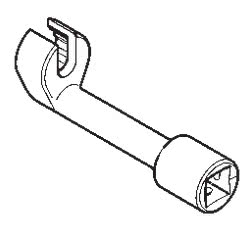
Start by removing the front wheels; next, remove the bolt that clamps the ball joint to the knuckle.
It will make it easier to pop out the ball joint if you loosen the axle bolt first.

Use Volvo special tool #999 707 6c or similar to pull the ball joint out of the lower part of the wheel knuckle.
Next step is to remove the nuts and bolts from the rear part of the control arm assembly.
You should support the control arm before you remove all the mounting bolts from the subframe so you won’t drop it on your foot.
Use a pry bar to pry the lower control arm hydro bushing housing away from the subframe.
Install the new control arm in reverse order.
Here are the torque specs:
- Torque: Ball joint to wheel knuckle: 110 Nm
- Torque: Lower arm front to subframe (front mounting):
- Stage 1: 140 Nm;
- Stage 2: 45 degrees
- Torque: Lower arm front to subframe (rear mounting): 175 Nm
- Torque: Lower arm front to subframe (rear mounting): 175 Nm
When you have to replace these bushings, make sure you only use OE Volvo parts from your local Volvo dealership’s parts department.
Aftermarket replacement bushings may look the same, but are they built the same?
Just like brakes and tires—”You get what you pay for.”


0 Comments