

Under certain conditions the Nissan sunroof assembly may stick in one spot, repeat various phases of the opening or closing cycle, or not operate at all. Our diagnostic and repair tips will help you teach that unruly sunroof to behave.

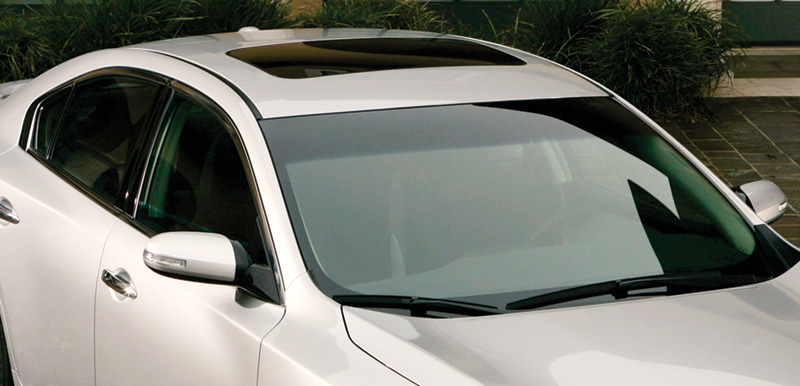
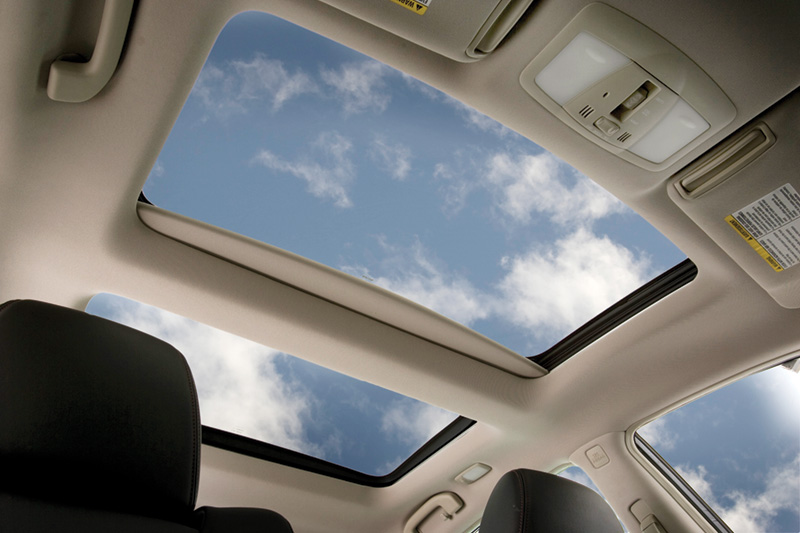
The 2013 Murano is equipped with a dual panel sunroof that lets passengers enjoy the outdoor ambiance with their choice of degree of protection from the elements.
The Nissan sunroof assembly includes a powered sunroof and, depending upon the vehicle model, a sunshade which may be motorized or manually operated. The two separate motors operate with power supplied by the Body Control Module (BCM) when the ignition is ON or retained power is operating.
Retained power is a backup power supply that enables power sunroof operation for up to 45 seconds after ignition shutoff. Note that the retained power function cancels if the front door opens (door switch OFF) or closes (door switch ON) during the 45 seconds. Retained power is also lost if the ignition is turned back ON, or if the 45-second time limit is reached.
A signal from the sunroof switch activates the sunroof motor, which then forwards the signal to the sunshade motor. A vehicle speed signal from the combination meter increases sunroof motor torque to assist in sunroof tilt-down during high speed operation of the vehicle.
The sunroof switch, which controls both the sunroof and sunshade motors, is located in the roof, near the rear view mirror. The motors for the sunroof and sunshade are also located in the roof, above the headliner.
The sunroof motor has an integrated CPU that controls the tilt up/down and slide open/close functions when it receives the appropriate signal from the sunroof switch. The sunroof motor CPU is also responsible for forwarding from the sunroof switch the open or close signals to the sunshade motor. The sunshade motor also has its own built-in CPU, which receives the signal from the sunroof motor CPU and then activates the sunshade to open or close.
Here comes the Sun
The sunroof tilts up to open partially, and slides toward the rear of the roof to open fully. It then slides back toward the front until it reaches the position where it can tilt back down to close.
The sunshade slides open and closed horizontally, with no tilt action. If the sunroof and shade are closed, pressing the sunroof switch once will open the shade and tilt the sunroof up. Pushing the switch back toward the rear of the vehicle to the first of two detents (stops) causes the sunshade to open. Once the sunshade is open, then pushing the switch back to the second detent causes the sunroof to tilt up and slide completely open.
Reverse the process by pressing the switch toward the front of the vehicle. To automatically move both the sunroof and sunshade to the fully open or fully closed position with just a single step, push the sunroof switch in the desired direction until it reaches the second detent. Do not pause at the first detent.
If both the sunshade and sunroof are closed and you want the sunroof to tilt up without sliding completely open, instead of sliding the switch back (or forward), press it into the console. The sunshade will open, and the sunroof will tilt up but not slide back. Press again and the sunshade will close.
If either front door is opened while the sunroof/sunshade assembly is being operated, the sunroof will shut down.
Anti-Pinch function
When the sunroof CPU detects an interruption, such as a hand or object in the sunroof opening during auto operation (close or tilt down operation), the motor will tilt the sunroof up or open 150 mm (5.91 in) or more. Similarly, when the sunshade CPU detects an interruption, the motor will open the sunshade 150 mm (5.91 in) or more.
Off track
A customer complaint that their sunroof is sticking, juddering, or making noise could be a purely mechanical problem. The sunroof or sunshade mechanism could be corroded or otherwise damaged due to normal wear or due to an impact event. Glass lid problems may be related to cracked, deformed, or sticking weatherstrip material, loose or missing glass lid mounting bolt, or misalignment. The sunroof frame assembly could have foreign material blocking its guide rail, insufficient lubricant in the rail, or simply have a deformed rail.
First, verify the customer’s complaint about system performance. Then your visual inspection, based on Nissan information showing the appropriate model-specific sunroof/sunshade assembly layout, should tell you whether there is a track alignment, corrosion, or other mechanical problem.
Nissan offers a “Chassis Ear†tool that aids in pinpointing the source location of sunroof assembly squeaks and rattles. Refer to your Nissan repair manual for the appropriate sunroof motor type, glass lid specifications, installation clearances and information about mounting kits and special tools.
  |
|
The 2011 Maxima was introduced in the US market with both a single and a dual panel sunroof option. |
Note that different Nissan vehicle models may have very different sunroof/sunshade design and engineering, and require different diagnostic and repair procedures. For example, the 2011 Maxima was marketed with either a single panel or a two-panel design, while the 2013 Murano was offered with only a dual-panel sunroof design. See your Nissan repair manual for sunroof/sunshade access and repair/replacement procedures for the model you are diagnosing.
Initialization procedure
Just as a computer reboot is often the first thing to try when faced with a frozen web page or sluggish software application on your laptop, try re-initialization before anything else when a sunroof or sunshade problem is not related to physical damage. Initialization is easy, and information about the procedure for the specific model you are repairing is available in your Nissan service manual.

On the 2013 Murano, you should see battery voltage between ground and the sunroof harness connector (R101) at terminals 3 and 6.
For the 2013 Murano, there are four steps. First, close the sunroof and sunshade, then release the sunroof switch once. Second, press and hold the sunroof switch to the CLOSE position again, for approximately ten seconds. The sunroof will move forward and will be stopped mechanically. Third, release the sunroof switch, then press and hold the sunroof switch to CLOSE again. The sunroof and sunshade will automatically move through the sequence fully closed=>fully open=>fully closed. Fourth, after the sunroof has completed step three (fully closed), release the sunroof switch and put the sunroof and sunshade through their paces to make sure that both function normally.
 at terminals 4 and 10, and ground.")
On the 2011 Maxima with single panel sunroof, look for battery voltage between the sunroof motor harness connector (R5) at terminals 4 and 10, and ground.
After initialization, check to ensure that the anti-pinch feature is functioning properly.
Fully open the sunroof. Place a block of wood in the sunroof path, near the fully closed position. Using the auto-slide (no pause at the first detent), close the sunroof completely. The sunroof should lower for approximately 150 mm (5.91 inches), or two seconds, and stop without pinching the block of wood.
Next, fully open the sunshade. Place a block of wood near the fully closed position. Close the sunroof completely with the auto-slide close. In addition to the sunshade attempting to close, the sunroof should lower for approximately 150 mm (5.91 inches), or two seconds, and both should stop without pinching the block of wood.
Perform these initialization procedures whenever the auto-slide or anti-pinch functions do not operate normally, if the sunroof or sunshade motor is replaced, or after power has been disconnected and re-connected to either motor.
No, low, or incorrect current flow
There are only a few basic things that could go wrong with sunroof and sunshade electrical system operation. Current flow is either reduced (high resistance), not flowing (open circuit), excessive (short to power), or going somewhere that is undesired (short to ground). Standard electrical tests for each of these potential problems are appropriate, although the connectors for the test may differ by vehicle model and year.
High resistance in a circuit can cause slower than normal electric motor speeds, resulting in sluggish or sticking sunroof/sunshade movement. Resistance that causes too high a voltage drop could even result in the sunroof or sunshade failing to operate at all. Voltage drop across a circuit should never exceed 0.300 volts, or 300 mV (millivolts).
Excess resistance in a circuit could be caused by loose fitting terminal pins, damaged or corroded connectors, frayed wires, or unsecured ground straps.
Save before you disconnect!
The Nissan CONSULT III Plus diagnostic tool allows you to activate and test various components in the sunroof/sunshade system by sending signals through the Body Control Module (BCM). You can also monitor the input and output signals from the BCM, confirm the reception status of CAN communication between various system components, and display diagnostic results of assessments made by the BCM. And of critical importance, CONSULT III Plus allows you to read and save the vehicle specifications, and to change settings of various system functions. You need to have the specifications saved prior to any procedure that requires you to disconnect, remove, or replace the BCM.
 services the BCM on the 2013 Murano through connector M118 at terminal 1.")
The fusible link (L) services the BCM on the 2013 Murano through connector M118 at terminal 1.
Is this thing on?
 at terminals 2 and 3, and the sunroof motor connector R5 (B) at terminals 10 and 4, on the 2011 Maxima with a single panel sunroof. There should be no continuity between the BCM connector M16 (A) at terminals 2 and 3, and ground.")
There should be continuity between the BCM harness connector M16 (A) at terminals 2 and 3, and the sunroof motor connector R5 (B) at terminals 10 and 4, on the 2011 Maxima with a single panel sunroof. There should be no continuity between the BCM connector M16 (A) at terminals 2 and 3, and ground.
The first thing to do is locate and visually inspect the fuse (#10 on the 2013 Murano, numbers 10 and 11 on the 2011 Maxima) and fusible link (L on the 2013 Murano, H on the 2011 Maxima) to confirm each is still functional. If you cannot tell by looking through the clear cover of the fusible link, try to wiggle the link to see if it makes contact and allows the circuit to come back to life, even only temporarily. A fusible link can cause intermittent failures without being completely blown. In this case, replacing the link or damaged connector could solve the problem.
If either the fusible link or fuse has actually blown, check the affected circuit for problems before replacing the link or fuse. If there is corrosion, an open circuit, or a loose wire in the wiring harness or its connector, repair the damage in the affected circuit, then replace the blown link or fuse.
Is power reaching the sunroof motor?
Turn the ignition OFF. Disconnect the sunroof motor connector. Turn the ignition back ON. Check for battery voltage between the sunroof motor harness connector and ground.
Next, check whether there is power reaching the BCM. With the ignition OFF, disconnect the BCM connectors. Check the voltage between each BCM harness connector and ground.
 and ground on the 2011 Maxima with dual panel sunroof.")
Check for continuity between the BCM harness (connector M17 at terminal 13) and ground on the 2011 Maxima with dual panel sunroof.
On the 2013 Murano, you should see battery voltage between ground and connector M118 at terminal 1, and between ground and connector M119 at terminal 11. If not, repair the damaged harness or connector.
If the wiring harness to the sunroof motor tested OK, check for continuity between the BCM harness connector (M119, terminal 13) and ground on the 2013 Murano. On the 2011 Maxima, check between ground and connector M16 (A), terminals 2 and 3 on the model with single panel sunroof, and connector M17, terminal 13 on the model with dual panel sunroof).
If either continuity test results in a fail, replace the appropriate harness. If continuity tests show circuits functioning normally, check for battery voltage between the sunroof motor and ground. On the 2011 Maxima with dual sunroof, check between ground and connector R101 terminals 3 and 6, with single panel sunroof, check ground to connector R5 terminals 4 and 10.
If voltage is normal, check for continuity between the sunroof motor and ground. On both the 2013 Murano and the 2011 Maxima with dual sunroof, there should be continuity between connector R101 at terminals 1 and 2, and ground. On the 2011 Maxima with single panel sunroof, you should see continuity between ground and connector R5 at terminal 8. If not, replace the appropriate harness.
There are similar tests for an inoperative sunshade, and a faulty sunroof switch. Refer to the wiring diagram and diagnostic procedures in your Nissan repair manual for the appropriate connectors and terminal locations to test on the vehicle you are repairing.
Essential communication
We mentioned above that the sunroof motor CPU sends the signal to activate the sunshade motor. Because the CPU for each motor is built into the motor assembly, if there are continuity problems between the sunroof motor assembly and either the BCM or ground, the required communication between the sunroof CPU and the sunshade motor will be faulty, or fail completely. Refer to your Nissan repair manual for model-specific continuity test procedures and connector locations.
Similarly, the sunroof and sunshade motor controllers need to know whether or not the left and right front door switches are working in order for the retained power feature to function properly.
Most problems can be addressed by replacing the appropriate wiring harness. Normal wear may cause a door switch to fail. On occasion, the sunroof or sunshade motor may need replacing. Rarely, the BCM may be faulty.
Power disconnect
, you need to re-initialize the BCM. Initialization enables the BCM and sunroof CPU to ensure that the sunroof and sunshade start and stop at the correct locations in the sunroof frame assembly, so you can return to your customer a vehicle with a properly positioned sunroof similar to that of this beautiful 2013 Murano.")
If during your repair you disconnected power to the body control module (BCM), you need to re-initialize the BCM. Initialization enables the BCM and sunroof CPU to ensure that the sunroof and sunshade start and stop at the correct locations in the sunroof frame assembly, so you can return to your customer a vehicle with a properly positioned sunroof similar to that of this beautiful 2013 Murano.
After you’ve repaired a mechanical or electrical problem, the sunroof or sunshade may still not work properly. Don’t worry, the solution may still be simple.
Software algorithms in the built-in CPU in both the sunroof and sunshade motor assemblies know how many motor shaft rotations it takes to move the sunroof or sunshade from their respective start and stop locations, and vice versa. The CPUs monitor where the sunroof or sunshade is at any point in time by measuring how much the respective motor shaft rotates after receiving actuation commands from the CPU. The rotation is translated into a digital signal that can then be interpreted and responded to by the CPU to control sunroof or sunshade position.
Of course, correct repositioning of the sunroof or sunshade requires that the software has an accurate measurement of the original starting position of the component being moved. Without accurate knowledge of the sunroof or sunshade position, the CPU’s actuation commands may result in any number of errors, including sunroof or sunshade movement in the wrong direction, or failure to operate at all.
Unfortunately, anything that interrupts the power supply to the sunroof or sunshade CPU/motor assemblies, whether it is normal wear, a collision event, or just a repair procedure, can throw off the accuracy of CPU information about the current sunroof or sunshade position. So, your repair may have one more step before it is complete: re-initialization of the CPU.
Master these sunroof diagnostic tips and tests, and you will become known as “the sunroof whisperer†in your shop.


0 Comments