
Overview
Audi has always been known for building great handling vehicles. Since the company’s beginnings, they have strived to push vehicle design and performance into the future. The suspension design of any vehicle plays a large role in ensuring safety, handling, and performance. Audi has this quality in spades.
The double wishbone is the most common suspension layout in modern Audi vehicles. This design has been proven to have the best handling characteristics and is in use on most higher-end vehicles across the globe.
This multi-link suspension design allows vehicle designers to control movement through the suspension range very precisely. Compared with a standard MacPherson strut suspension design, camber, caster and toe angle offer much better control.
Standard Front Layout
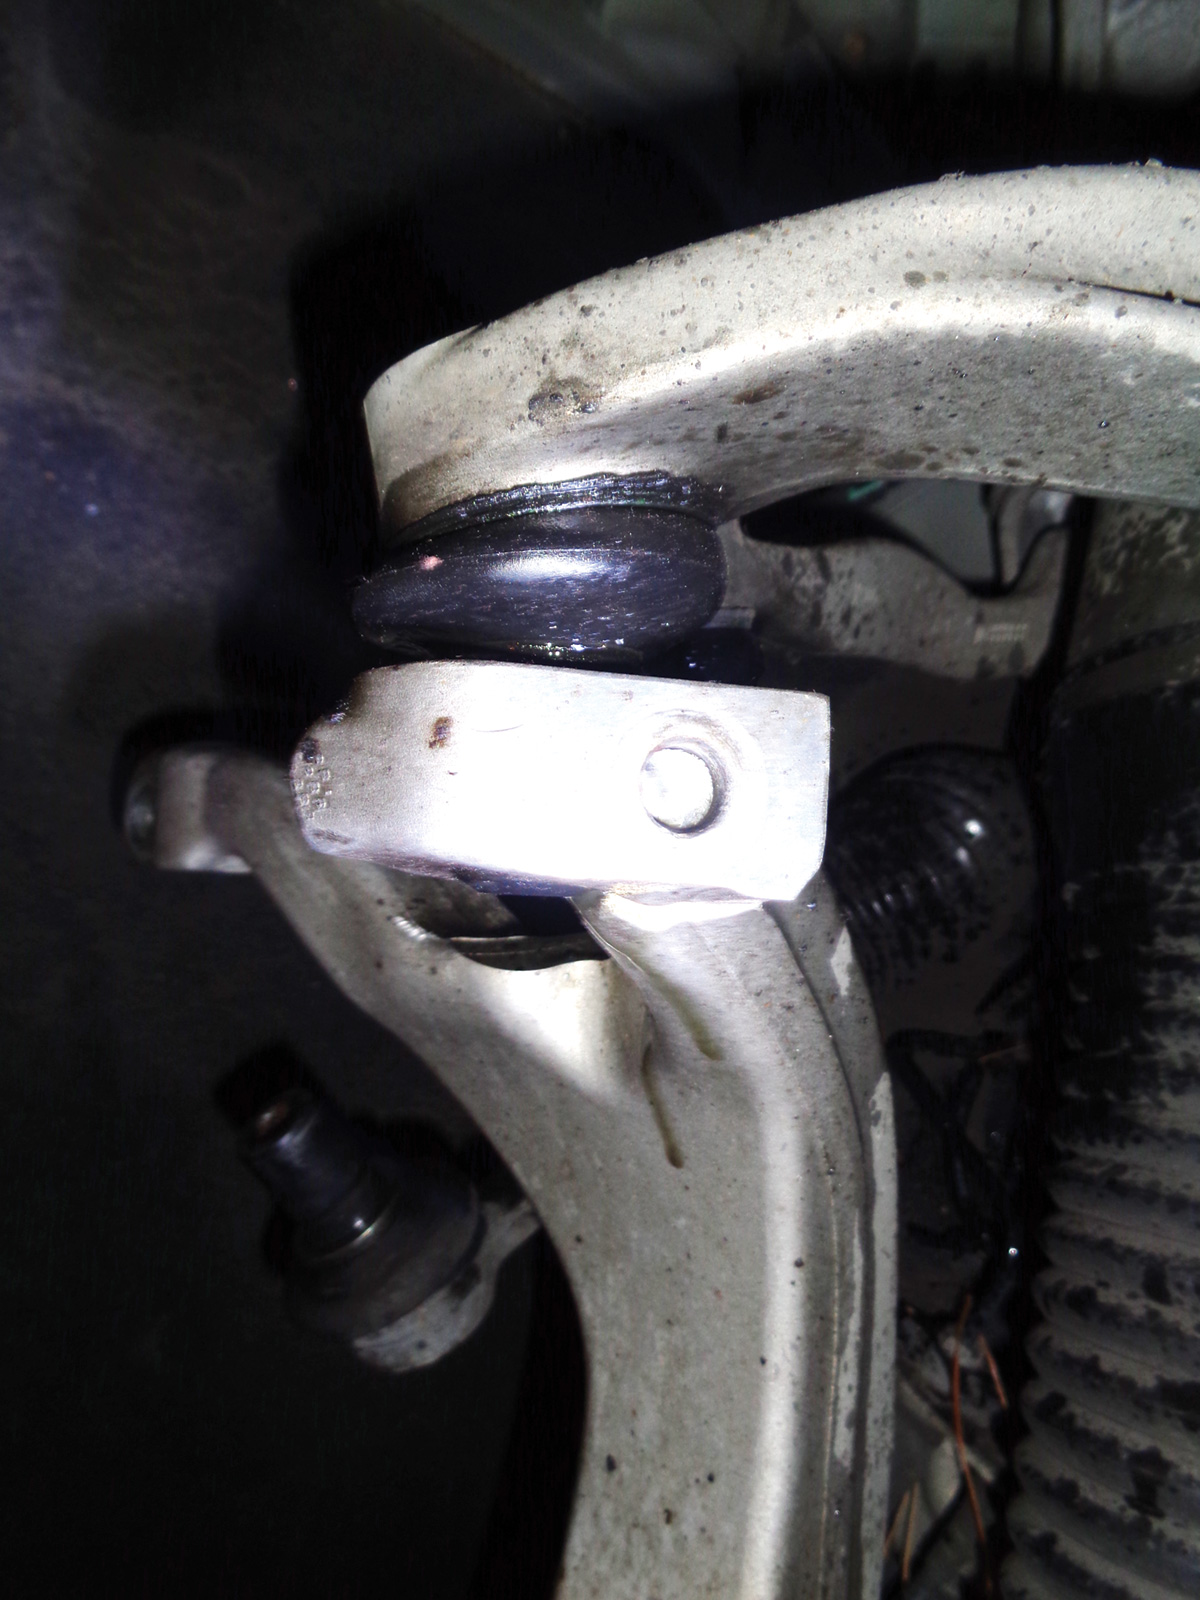
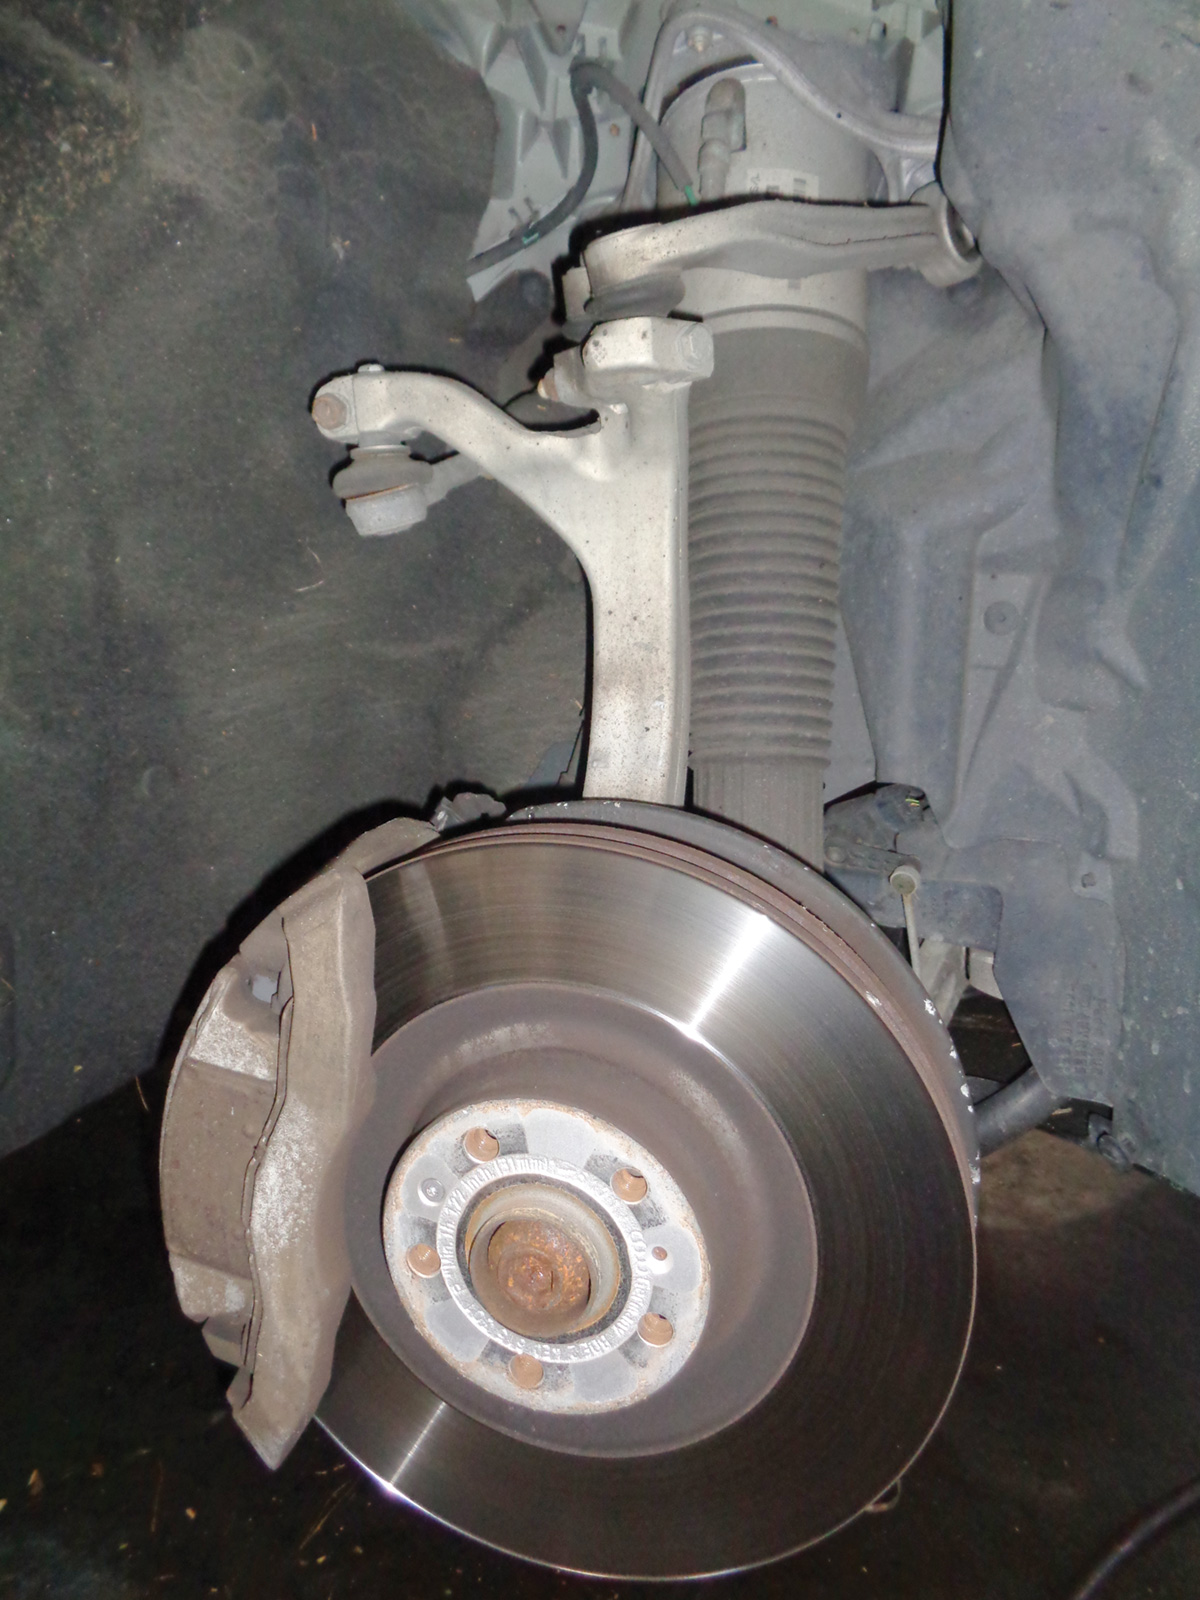
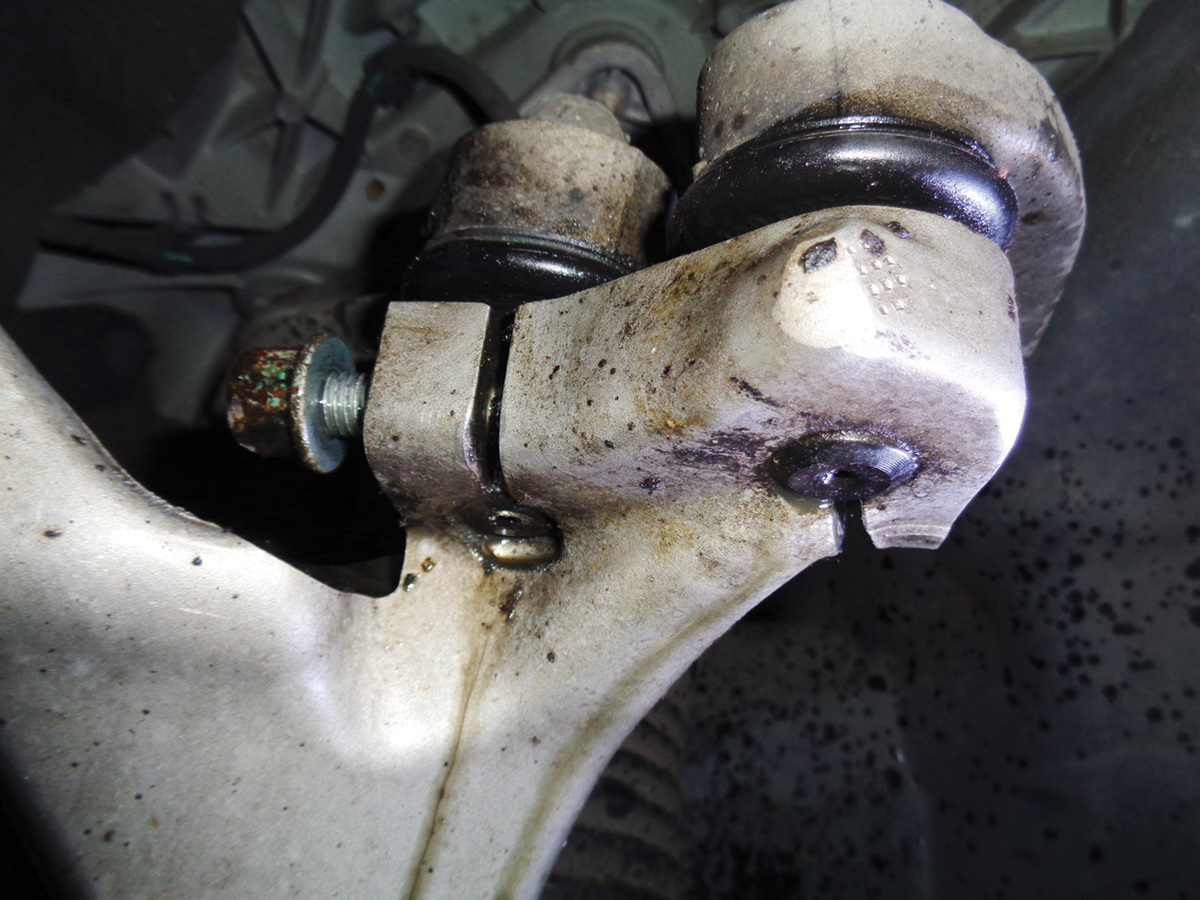
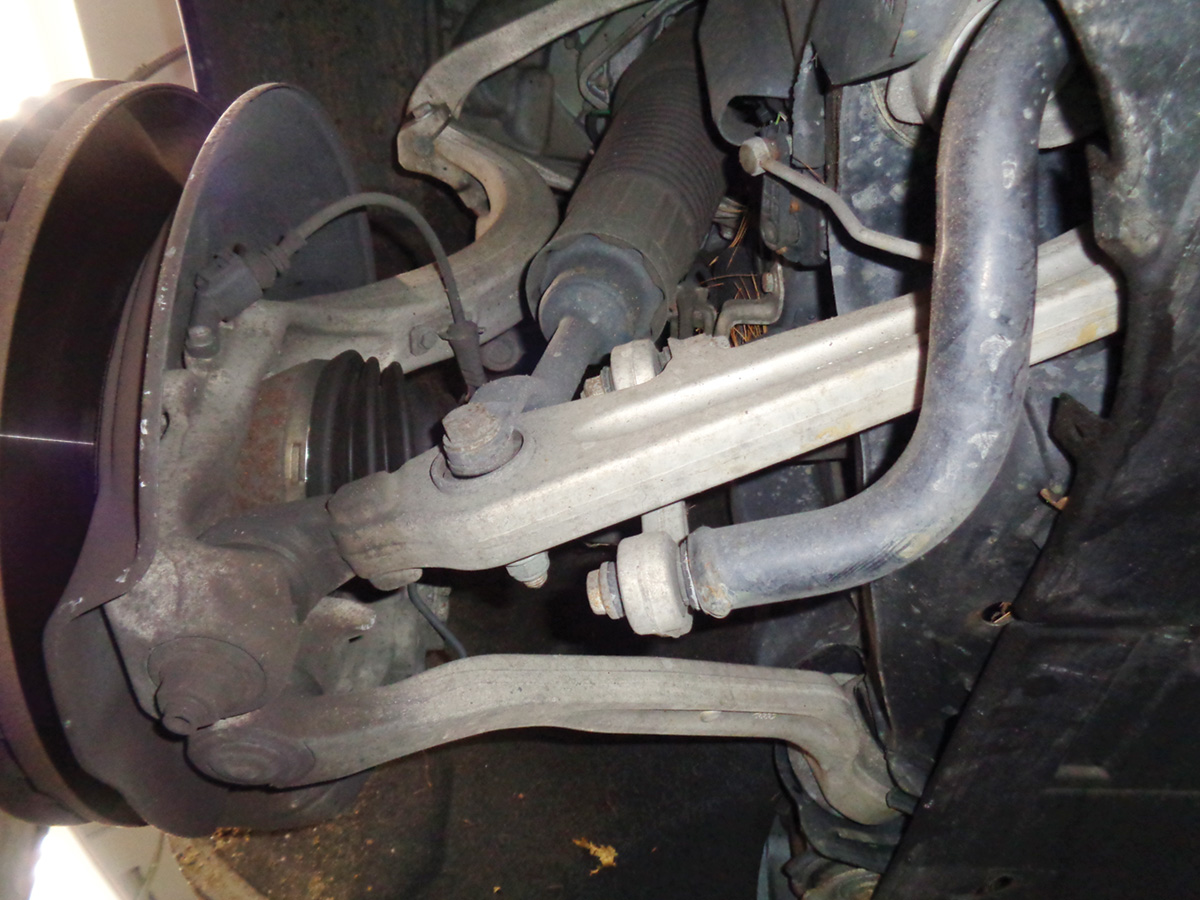
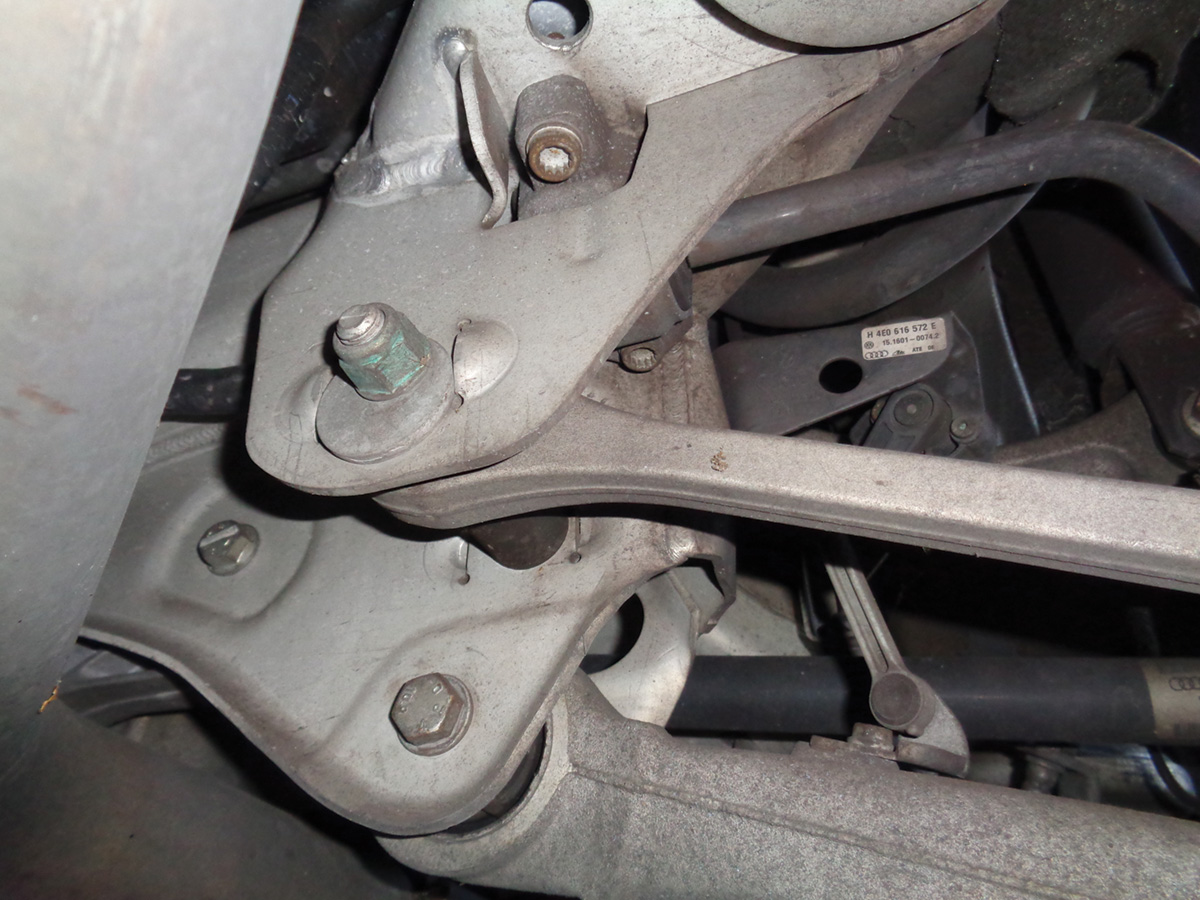
The standard front layout on Audi includes upper control arms mounted to the strut mount bracket and the upper spindle. The inner bushings take a lot of abuse, particularly with larger wheels and in heavier vehicles. Small cracks and tears in these bushings are normal. However, once split through, replacement is necessary. When the vehicle is on a lift, visual examination of the upper bushings is straightforward.
Replacing the upper control arms can be a time-consuming task. Due to space constraints, the strut assembly must often be loosened and moved to allow access to the securing bolts. Always refer to work instructions for different vehicles. On certain models, removal of the inner fender liner is the only step required to access inner control arm bolts.
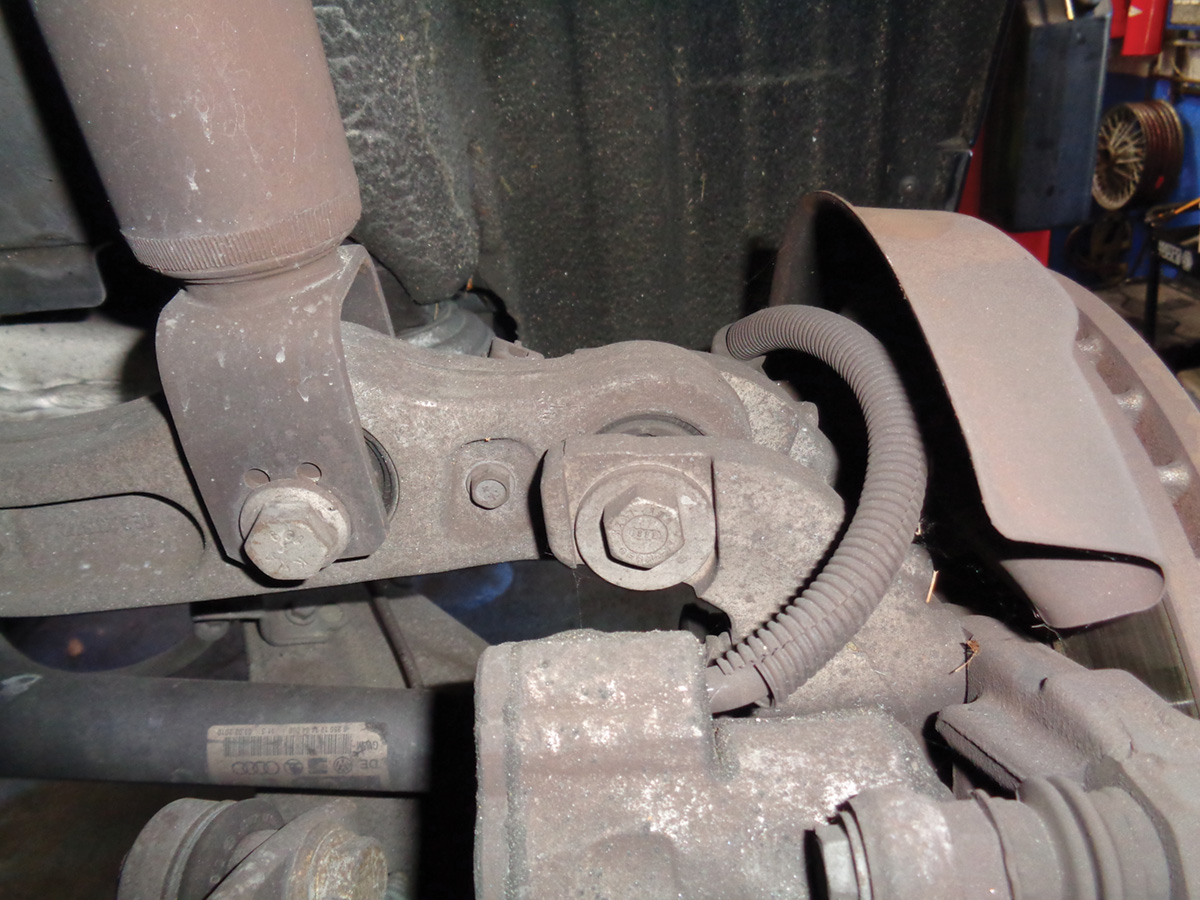
If you live in a climate where rust and corrosion are a problem, the upper outer control arm bolt can become quite stuck. This long bolt lives in the direct path of spray from the tires and also suffers from galvanic corrosion. After the zinc coating on the securing bolt wears off, corrosion quickly sets in, especially in humid climates.
If you are lucky, the upper bolt will work loose with a liberal application of patience, rust penetrant, and/or heat application. And, if you have access to an air hammer, it will assist in pushing the bolt through. Be very careful with the upper spindle. It is aluminum and can easily be damaged if care is not taken.
As a rule of thumb, always replace the securing hardware when doing control arm replacement. Applying a layer of assembly grease or anti-seize compound aids in re-installation and protects from future corrosion intrusion.
During re-assembly of the upper control arms, it is critical to install and tighten them in the proper position. Pay attention during disassembly, and note arm position. Failure to properly assemble will result in premature bushing failure and strange handling characteristics. The point is to tighten fasteners with the suspension in its normal loaded condition. If you tighten fasteners with the suspension hanging, the bushings will be subject to twisting when the suspension is loaded, which is virtually all the time the car is in motion.
Tie Rods
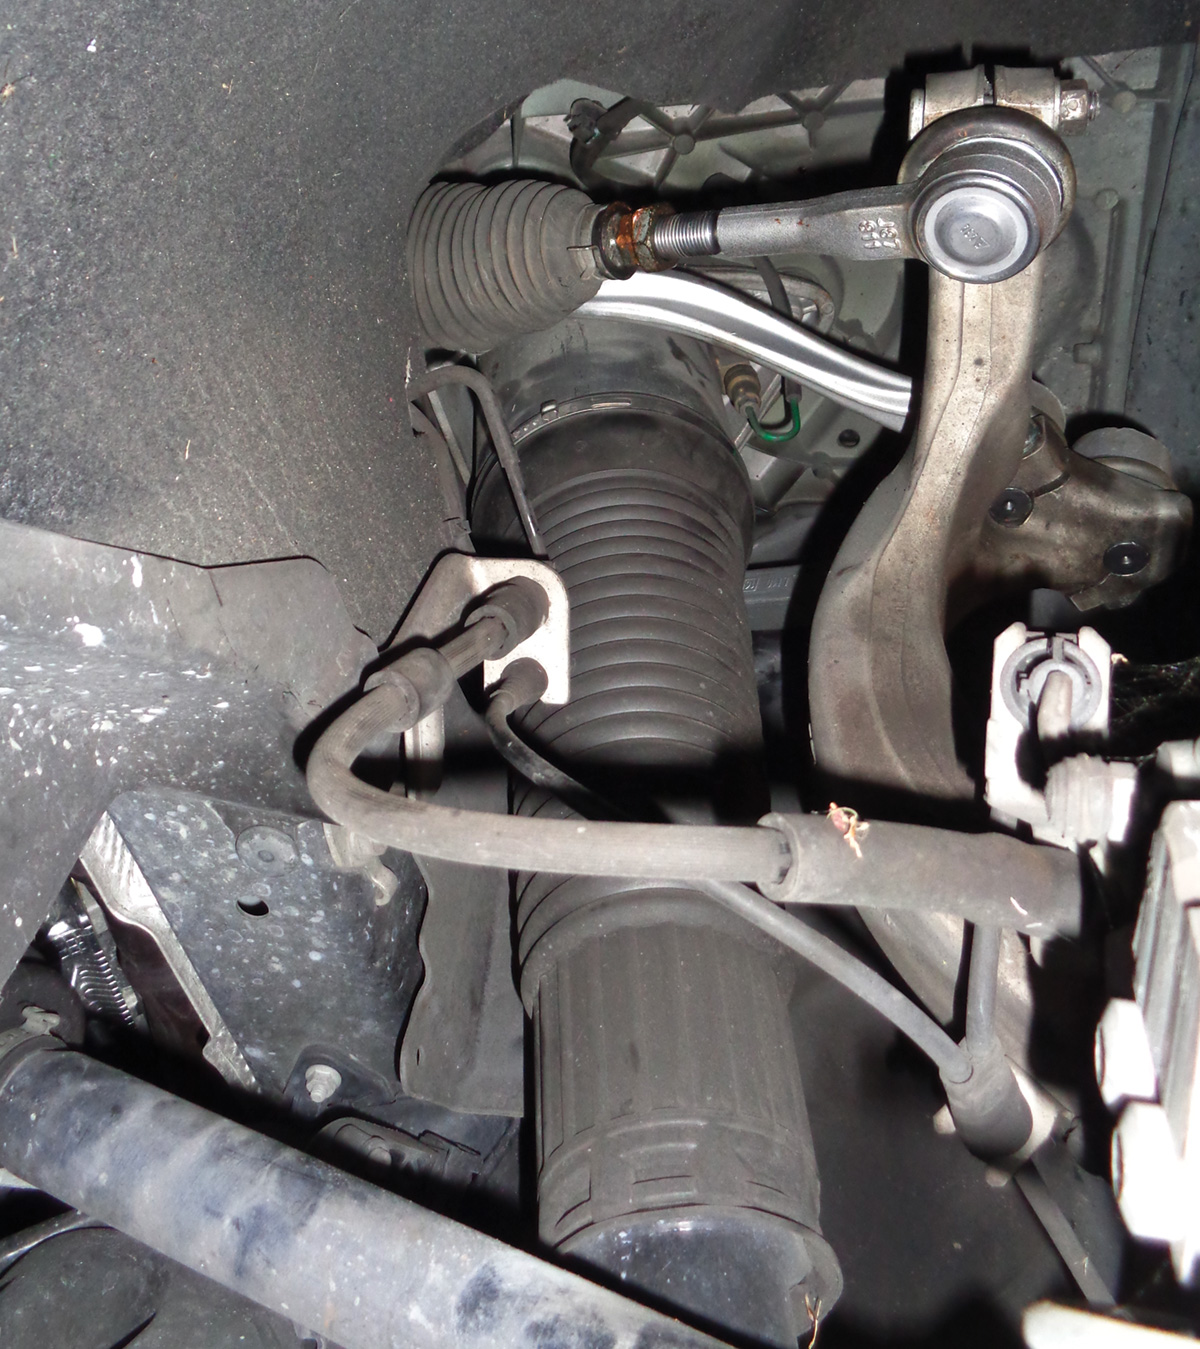
One additional note: Always check for tie rod end play. The tie rod ends are notorious for developing play, and can be unsafe if left unchecked.
The tie rod adjusters often seize, and performing an alignment can be a headache. Do not apply heat to loosen Audi tie rods. Most Audis have bushing dampeners in the tie-rod ends, and heat will destroy these and potentially cause tie rod failure. No heat!
Lower Control Arms
The lower control arms are generally trouble-free. But the lower control arm bushings tend to wear out eventually. Fluid leakage from the bushing itself is the most common visual clue of lower bushing degradation.
Audi uses a fluid-filled design to aid in ride quality characteristics. When the bushing has reached the end of its service life, the dampening fluid leaks out and appears to be ATF or gear oil. The engine mounts also share the same fluid-filled design and commonly leak or wear out.
The lower bushings can be replaced easily with most bushing press tool kits. When installing, always check for alignment positions. These bushings are made specifically to be in one position. If installed incorrectly, poor alignment and handling characteristics will result.
The ball joints in the Audi suspension design are overall robust, but care should still be taken during the inspection process. When checking for ball joint play, having a helper assist in loading components can be very useful in cases where play is minimal or hard to locate.
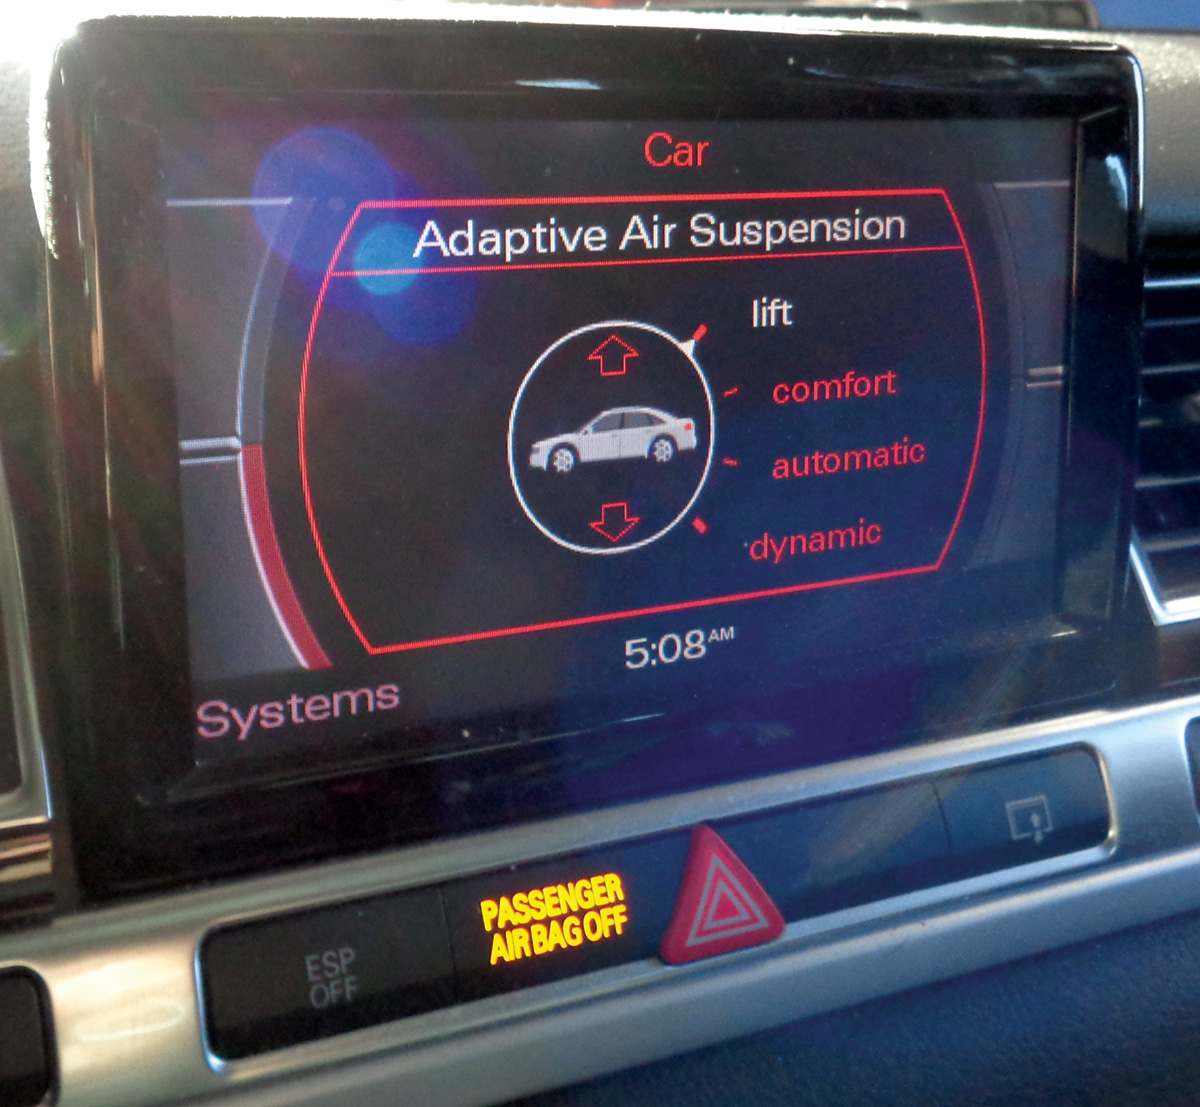
Air Suspension
Vehicles with air suspension are becoming more popular as technology progresses. Having an air spring, or pneumatic spring suspension, allows vehicle engineers to exercise much greater control over ride quality and handling. These systems are much more complicated than standard steel spring suspension designs.
The shock absorber, or air spring, is the workhorse of the air suspension system. The air spring is constantly adjusted at all four corners to ensure proper ride height and comfort for the occupants. Most designs utilize a twin tube damper design with an oil chamber to assist with damping control. Between the air spring and oil damping control, comfort, safety, and handling can be ensured. This is the same for both front and rear struts.
The brain of the Audi air suspension system is the adaptive ride control unit (J197), which receives signals from multiple sensors to control the system. It is usually located behind the passenger glove box near the firewall. The control unit operates on the CAN network to operate solenoids in the system as well as controlling the compressor to inflate the air springs.
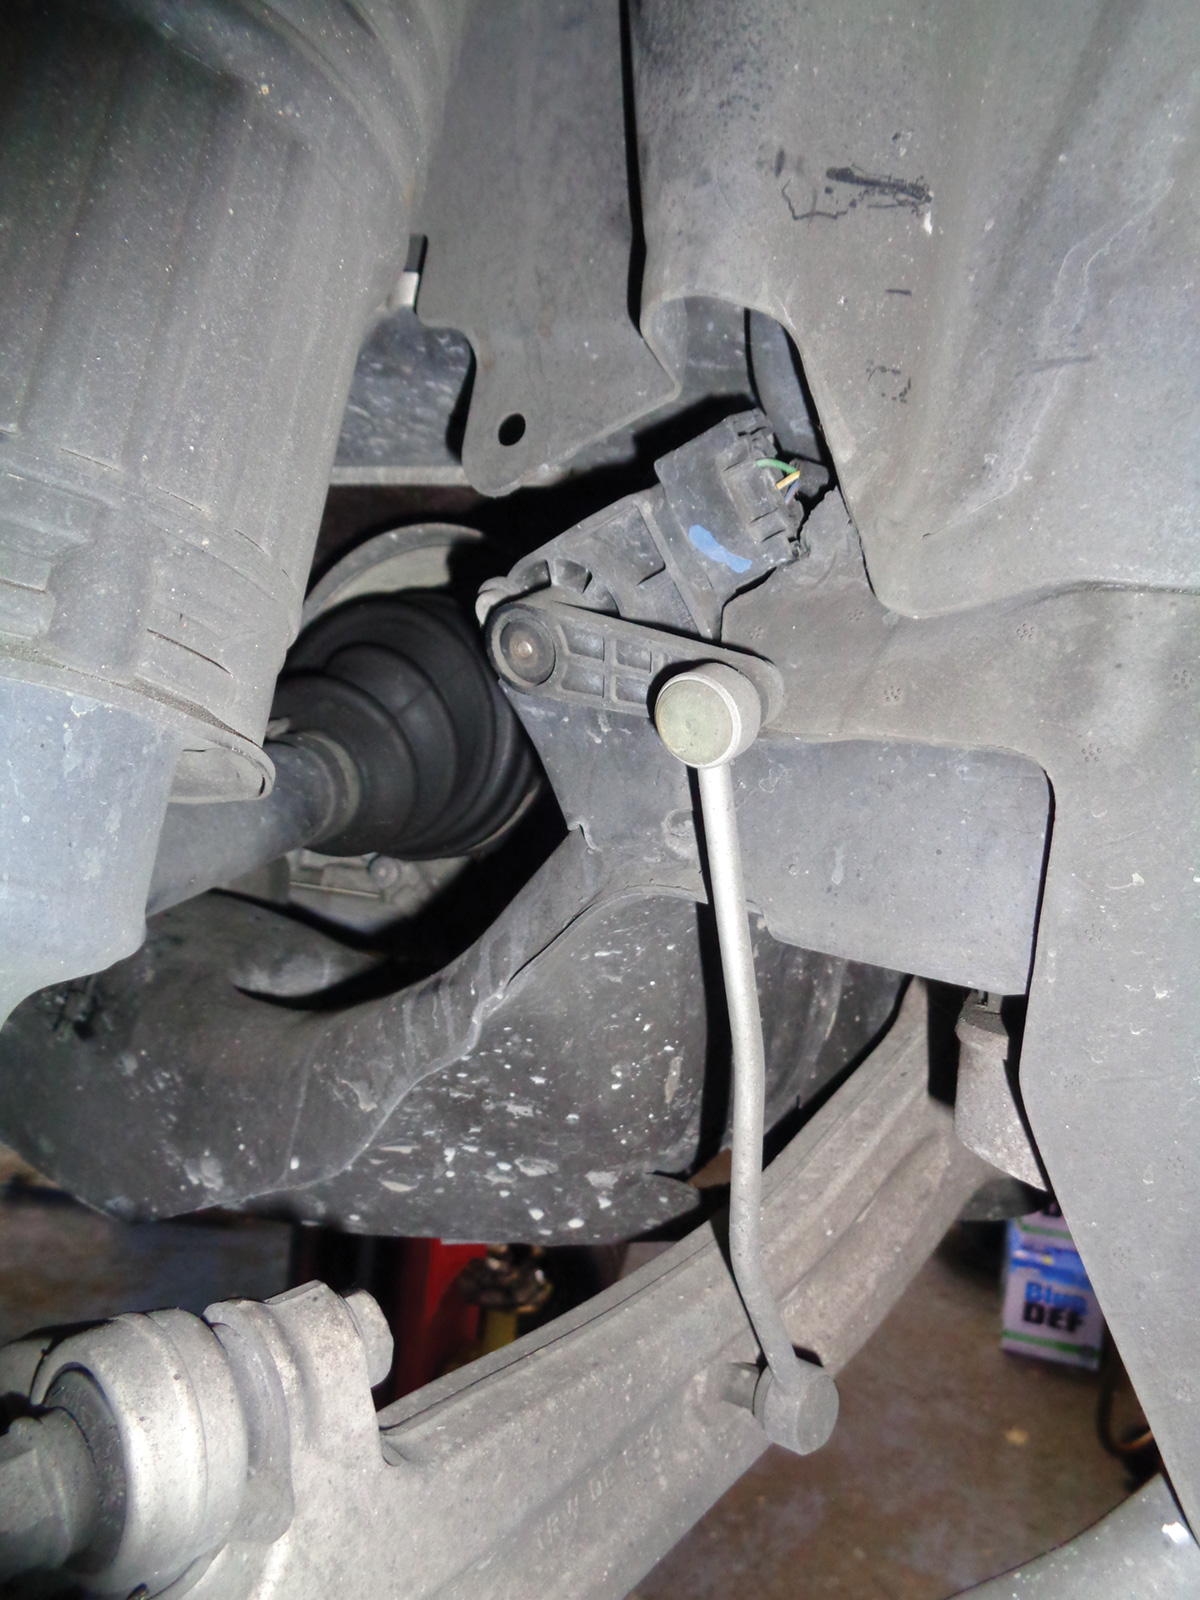
The ride height sensors provide the primary input the suspension control unit uses to determine how much air pressure each air spring needs. The vehicle ride height sensors (G77) are a critical piece of the suspension system. They are located on both front lower control arms, as well as in the rear of the vehicle. If any of these sensors are damaged or misaligned, the suspension control system can malfunction. The most common damage to these sensors is from impact due to being close to the road surface, improper installation, or even technicians forgetting to re-install them. The sensor arm is plastic. Be careful not to damage it during removal and installation.
In addition to ride height sensors, the suspension control unit monitors acceleration sensors within the vehicle. This allows the system to compensate for changes in the vehicle when driving over bumps and around turns, increasing stability and ride comfort. These are also used by the stability control and ABS systems. If faults are stored for the acceleration sensors (G341, 342, 343), they may affect suspension riding characteristics.
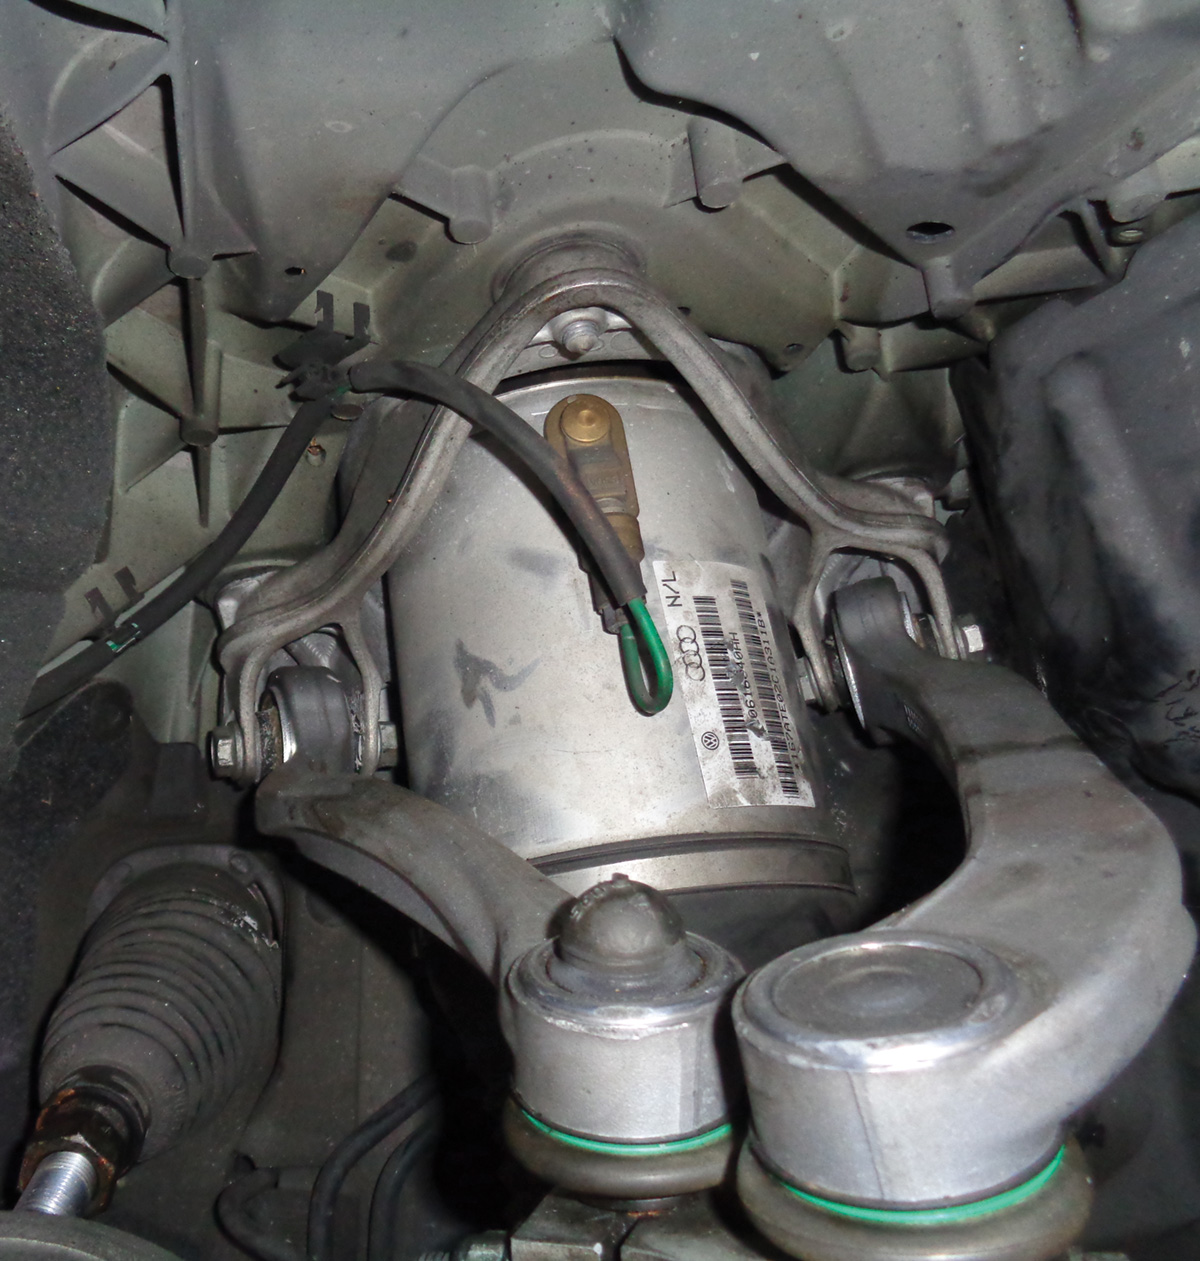
Air Compressor
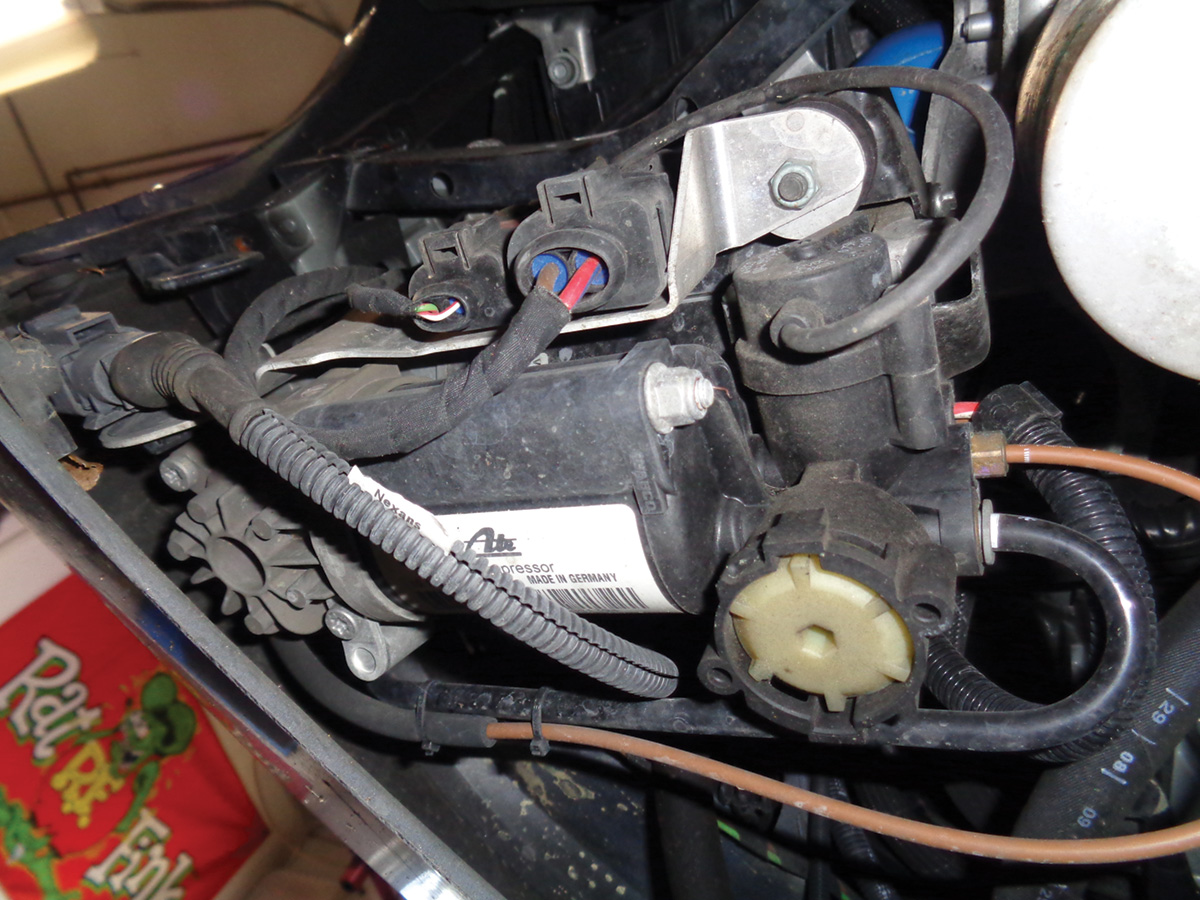
The air compressor or air supply unit is used to fill the air struts. It may be located in the rear undercarriage or, more commonly, behind the driver’s fender liner. This system uses a 12 V electric motor to drive a small air compressor. These air pumps have a safety system designed into the pump. A temperature sensor shuts down the pump if it runs for too long, preventing an overheat situation. The most likely cause of the air supply unit overheating is a leak in the system. The vehicle usually stores faults if it senses an overheating air compressor. This is part of the reason Audi installs the air pump in locations that receive air flow; the pump does get hot and can eventually become degraded after extended use.
Air compressor failure is, unfortunately, common. Often a leaking air strut forces the compressor to run constantly in an attempt to keep up with the leak. This eventually burns out the pump or relays that control the air compressor. The air suspension relay (J403) should not be ignored if diagnosing an inoperative air compressor. These can burn contacts internally from overuse. If pump failure can be confirmed, it is always wise to replace the relays as well during the repair, as they will most likely suffer from internal burnt contacts.
Air compressor replacement is straightforward. There is a single plug for the electric motor, a connection to the thermal sensor, as well as air inlet and outlet connections. Most air compressors are mounted on spring seats. These keep vibration and sound transmission to a minimum. They can be finicky to re-install and overcome the spring tension that properly secures the air pump. The spring mounts are necessary to ensure a trouble-free system.
The compressed air travels from the air compressor to a solenoid-activated valve block (N111). This valve block has outlets to each air strut that control ride height independently at each corner.
Most Audi air suspension systems operate on 16 bar or 230 psi pressure or less. These systems also use a pressure sensor to detect proper pressure levels at each corner. The pressure sensor is built into the valve block (N111) and is not serviceable.
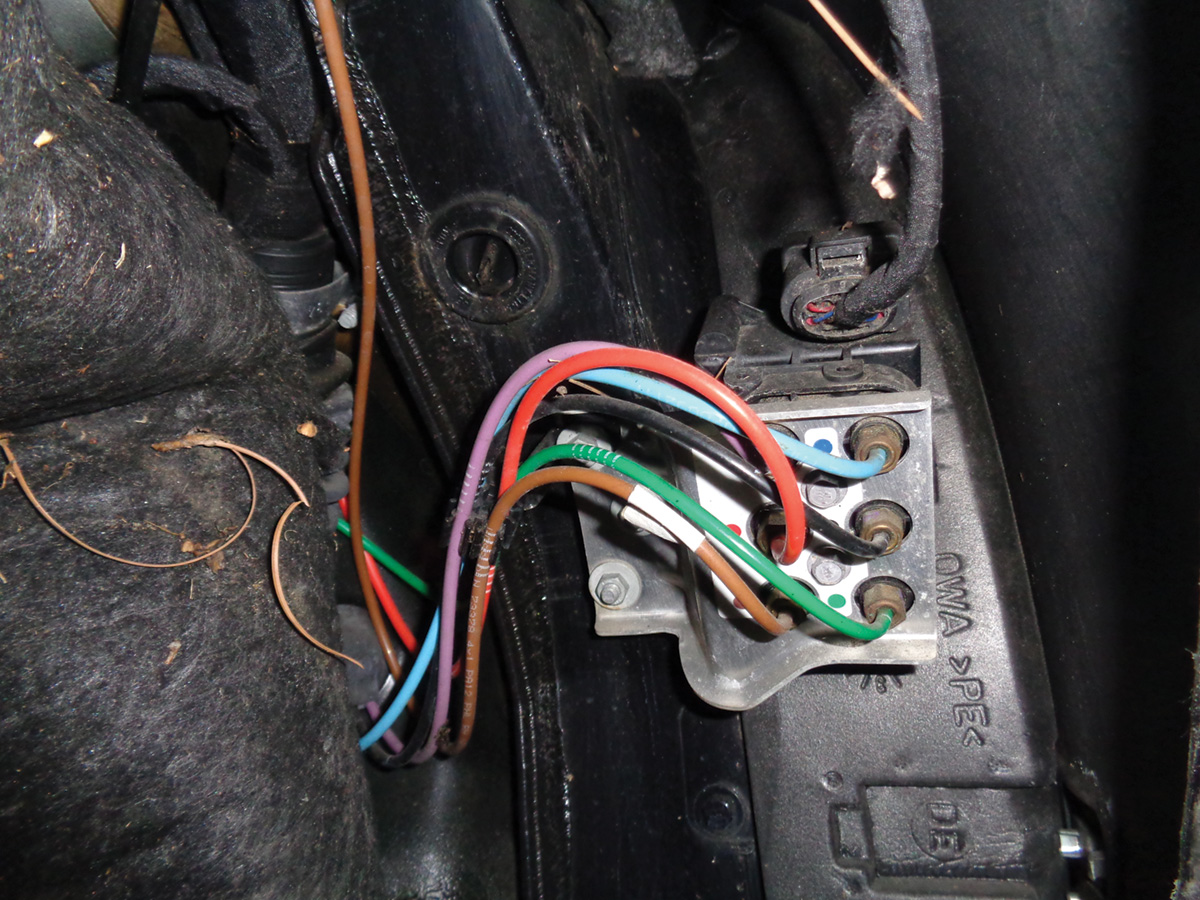
Depending on the model, the valve block may be located in the driver’s side fender liner or in the rear undercarriage of the vehicle. The valve blocks are quite sturdy and are generally trouble free. If repairs are necessary, the air line connections are color coded so it is easy to install without fear of mixing up lines. The right front strut is marked green, LF strut marked red, RR strut marked blue, left rear marked gray. The air tank line is marked yellow. Note that this can aid in diagnosis if searching for suspension system leaks.
Here is a tip for installing air lines into the valve block or struts: Do not disassemble the securing nuts from the new air block. Remove the old sealing washer from the air line after disconnecting it. To install, just push the air line into the pre-assembled valve block or strut. The sealing ring will be pushed onto the line correctly and be trouble free. There is no need to use line wrenches in a cramped location or guess how deep to set the securing washer.
Pressure Accumulator
The pressure accumulator, or air tank, also plays an integral role in the air suspension system. It is used to store air pressure for the system during operation. Using the stored air pressure from the accumulator instead of relying soley on the air compressor results in smoother, quieter operation of the air supply system. The accumulator/air tank usually resides in the rear corner of the trunk in Audi vehicles.
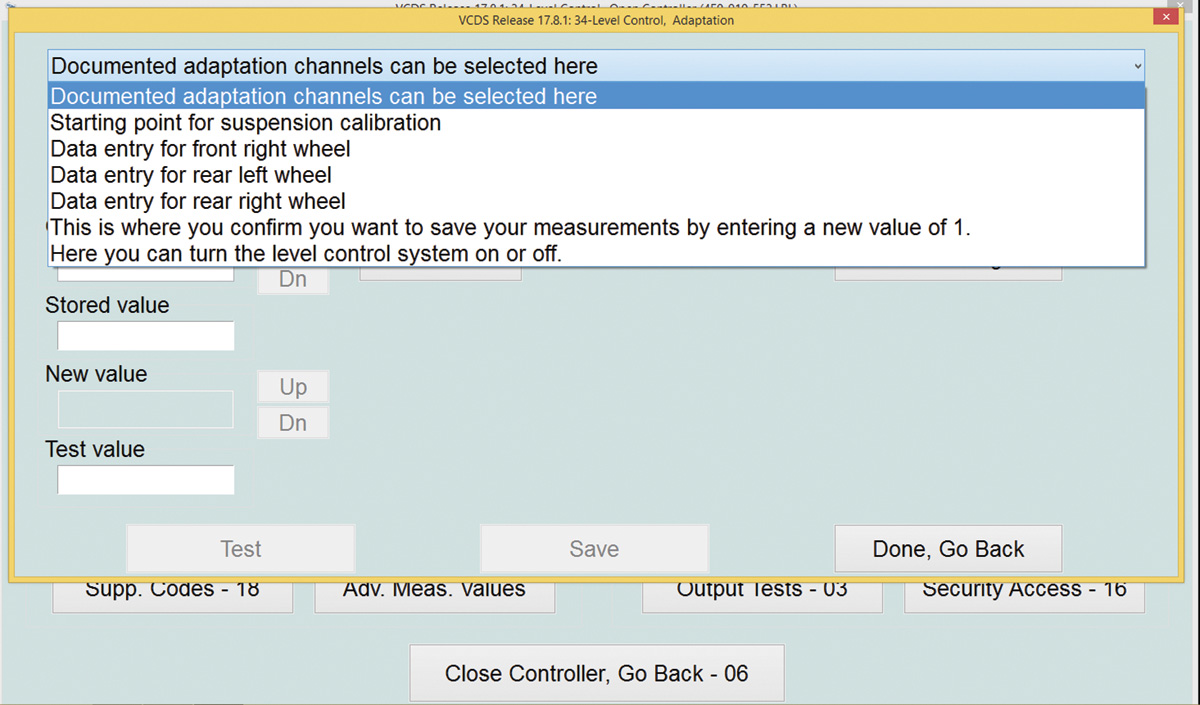
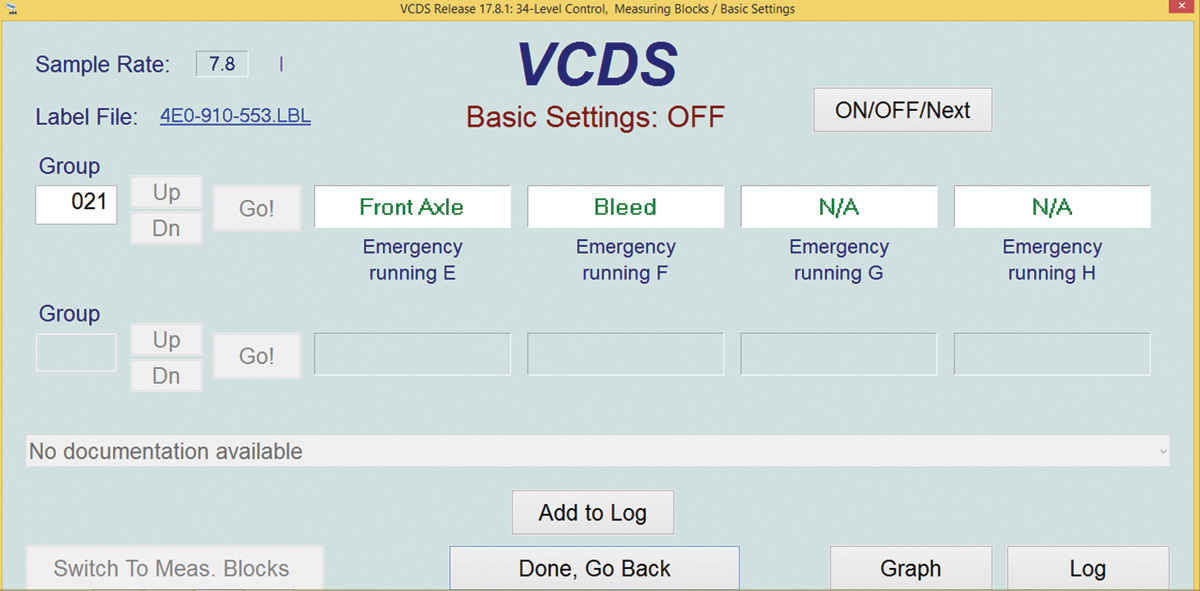
Any time service work to air suspension components is performed, depressurizing the system is a critical first step. This can be done manually at each connection. However, seal damage can occur to sealing rings when under pressure. Use caution! When using factory level scan equipment, you can safely bleed pressure from the system without risk
of damage.

Alignment
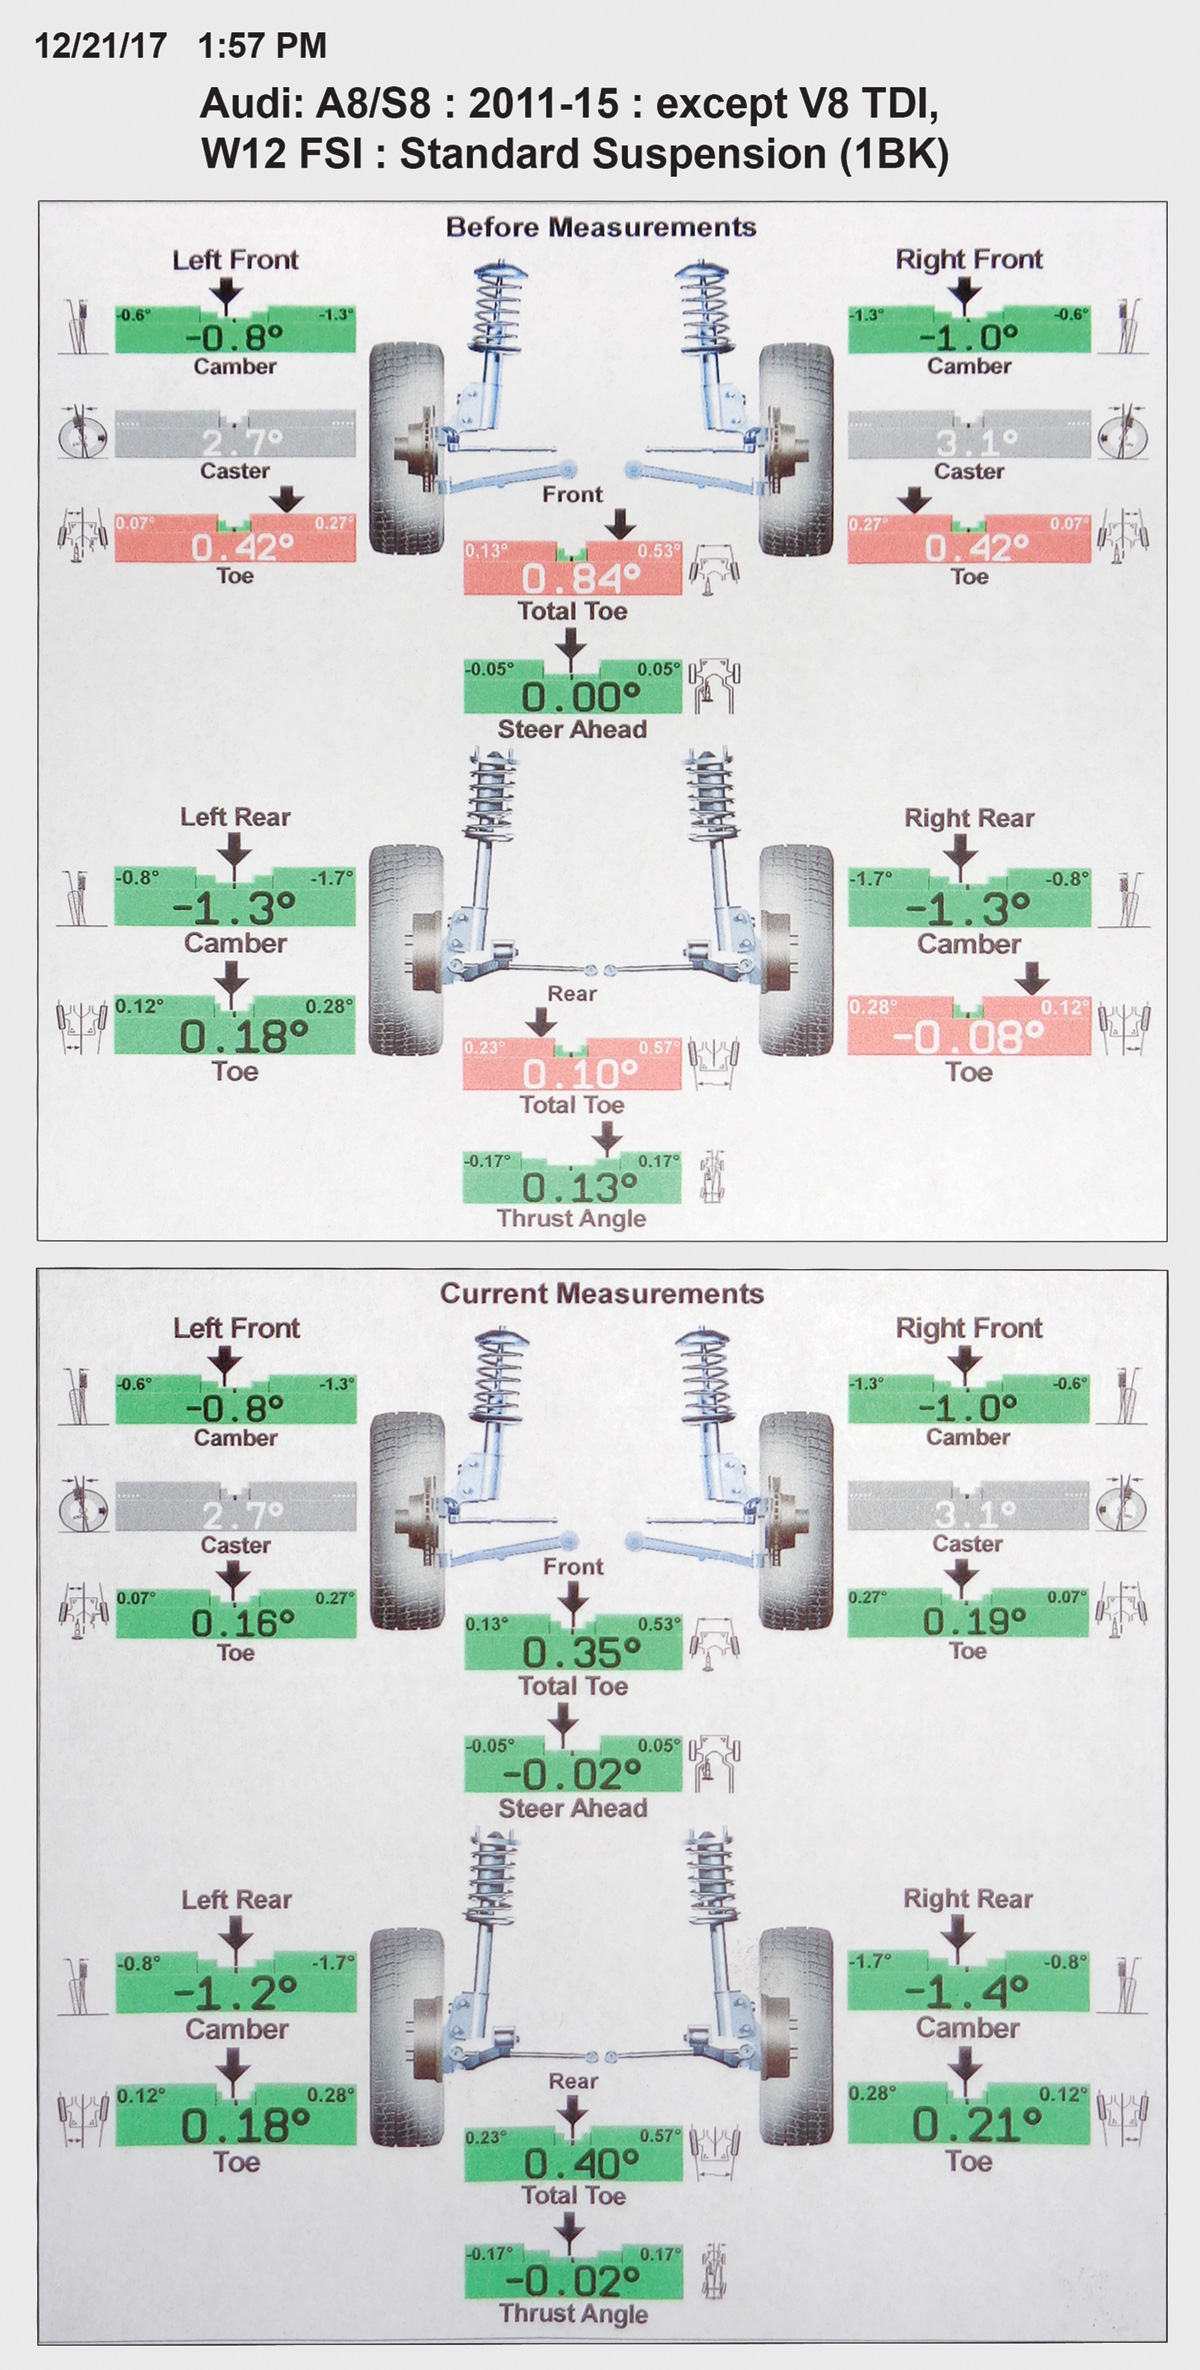
Any time suspension repairs are done to an Audi, which includes bushing, strut, and control arm replacement, the alignment should be checked and adjusted. This includes the multi-link design. Audi incorporates camber and toe adjustments for most models. If proper alignment angles are not achieved, adverse tire wear and poor handling occurs. This is particularly true with larger heavier models like the Q7 or A8.
Setting the correct tire pressures before doing an alignment seems obvious, but technicians often forget this critical step. Incorrect tire pressures can affect vehicle camber, ride height, and handling characteristics.
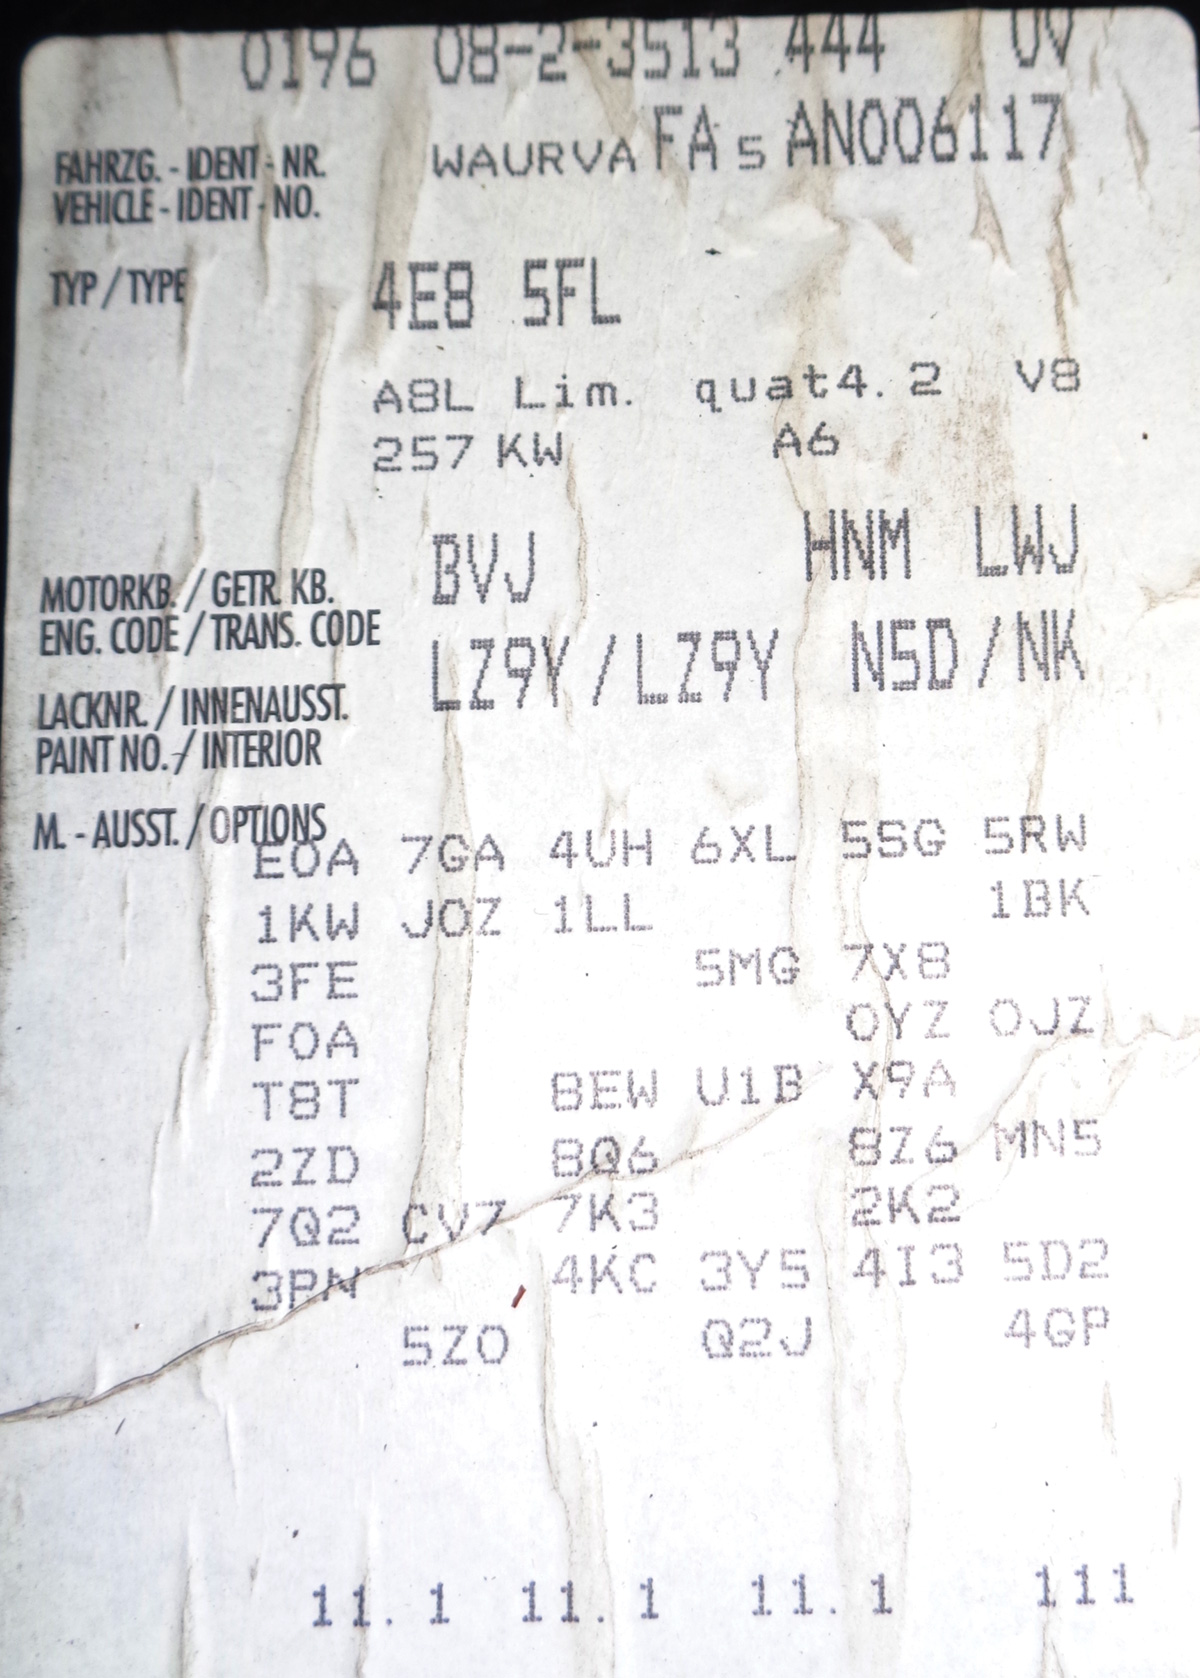
If your aligner offers ride height adjustment, it is wise to take the time to measure this value. This allows the alignment equipment to accurately determine alignment angles and compensate for different ride height. If a large variation is found from side to side, this may lead to suspected worn or damaged components, such as a collapsed strut, spring, or worn bushings. It is also important to verify which suspension option your vehicle has installed. The ID tag is usually located under the trunk mat. This verfies whether the vehicle has sport-lowering suspension installed, or any other options. This affects alignment specifications.
Always start the alignment process at the rear of the vehicle, working your way forward. Every newer Audi model allows for both camber and toe adjustments in the rear. In the front of the vehicle, often only toe angle is adjustable without aftermarket options.
As a good rule of thumb, always adjust camber before toe angle. Vehicle camber can affect toe angle, whereas toe generally does not affect the camber angle.
On most Audi models, the camber adjustment can be found at the inner mounting point of the lower rear control arm. On certain Audis, the rear camber adjustment is located at the upper spindle area. This can be difficult to access and even more difficult to make the adjustment. Access from the outside top of the wheel well is often the best approach to making the camber adjustments.
Rear toe adjustment can be found at the rear upper control arms on most models.
Front tie rods on many Audis are located in the upper portion of the wheel wells. This makes tie rod adjustment much more difficult due to access limitations. It is important to never use heat to loosen seized tie rods, or you will damage and destroy components in the process.
If all steps are followed, it is easy to get Audi alignments to be fully within specifications. This keeps customers happy, tire wear to a minimum, and the vehicle operating safely and efficiently.


0 Comments