
Help with intermittent operation or a system that does not maintain proper temperature
It seems like we just got ready for winter and performing cold weather maintenance on customer’s vehicles and now summer is upon us. It’s time to look at the HVAC system as it relates to air conditioning. Customers that noticed their air conditioning performance drop towards the end of summer or fall may not have been too concerned about it but the first 70 plus degree day and they are knocking your doors down to get an appointment for HVAC service. Quite often the customer states something like, “I need to get my AC recharged.†We all know how that ends sometimes. A good start is a service advisor with a sound knowledge of HVAC theory and operation who can explain that it may be as simple as that or it can be far more complicated.
Where to begin?
If the customer concern is that the air conditioning performance is not adequate, a likely culprit is a low refrigerant charge from a slow leak. Conversely, these systems are quite complicated and it’s easy to assume the problem might be something that you’ve diagnosed recently and get ahead of yourself. First things first: Always verify the customer concern. Perform a complete A/C performance check as prescribed by Mercedes-Benz as well as the Mobile Air Conditioning Society (MACS). What is the ambient temperature? It is far easier to tell if the performance of the A/C system is not quite right on a hot day than a cool one. An infrared temperature meter or thermometer placed in the central A/C duct will take the temperature of your patient. Use only a good quality infrared temperature meter. Remember that an infrared meter reads the temperature of surfaces, so wait for the duct to cool down before taking a measurement. Some of the better ones will show you a picture of the heat (or absence of it) so that you can distinguish between the duct and the air coming out.
Here are the conditions for testing performance that you should follow:
- Know the ambient temperature for comparison.
- Do not park the vehicle in direct sunlight.
- Roll all windows up.
- Place the HVAC system on Max A/C with the vent door in recirculation mode, and the fan on a lower setting.
- Consult the Mercedes-Benz Workshop Information System (WIS) or the diagnostic manuals in STAR TekInfo for a correct chart of acceptable temperature readings.
Below is a sample table of typical performance and pressure readings. Again, consult WIS for your specific model, but these numbers can give you a fairly accurate reading for an HFC-134a system.
| Ambient temp. | Center outlet temp. | Low side pressure (psi) | High side pressure (psi) |
| 70°F | 27-38°F | 26-35 | 180-240 |
| 80°F | 33-44°F | 32-41 | 200-260 |
| 90°F | 37-48°F | 38-47 | 250-300 |
| 100°F | 43-55°F | 44-53 | 270-340 |
| 110°F | 50-64°F | 50-60 | 300-390 |
Customer concern confirmed
By comparing your performance readings with the system specifications, you can confirm the customer complaint of insufficient cooling. Regardless of whether the system is performing normally or not, you should now connect a XENTRY Diagnostics system or other compatible scan tool and run a quick test of the vehicle. You may have relevant fault codes stored in the SAMs as well as the A/C control unit, so check the entire vehicle. In the case where your customer’s complaint couldn’t be verified, perhaps you are dealing with an intermittent issue, in which case, your quick test could turn up some useful information.
It should be noted that Mercedes-Benz does provide step-by-step diagnostic trees for most newer models. However, these can only be found in the XENTRY Diagnostics system, so without one, you may be flying blind. A thorough knowledge of basic A/C system theory and operation, along with any possible diagnostic trouble codes and Actual Values from the A/C system front SAM, and engine control unit should allow you to proceed with a working diagnosis of the concern.
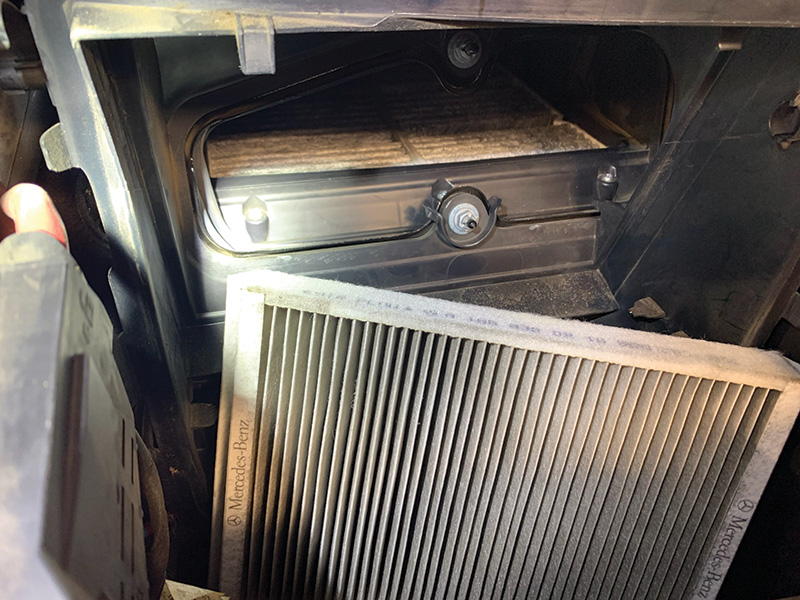
Now it is time to take a moment and analyze exactly what you have found. Is the cabin temperature too high? This could be a cabin temperature sensor electrical or mechanical issue. Does the air not come out of the proper duct? Perhaps you have a blend or mode door issue. You can exercise each flap manually using XENTRY Diagnostics and some scan tools. Do you have proper air volume? If your air temp is cool enough, but you can’t get enough of it, you may have a blower or cabin filter issue, perhaps a blockage in an air duct. Many a tech has a story of finding a nest of critters in one of the air ducts or cabin filter housing.
Good maintenance
Speaking of critters in the heating ducts, we have found that many issues with low airflow can be attributed to lack of maintenance of the cabin or combination filters. Mercedes-Benz generally recommends changing the filter every 2 years or 20,000 miles on most models. Using Genuine Mercedes-Benz cabin air filters helps eliminate problems with poor fit and performance. They don’t cost a lot more than cheap, ill-fitting and ineffective aftermarket imitations which can lead to customer complaints of odors and poor filtering.
If cost is concern for your customer, consider the Mercedes-Benz StarParts line. These are lower-cost alternatives to common maintenance parts, saving money where it doesn’t matter (such as packaging and labeling) but still delivering the outstanding performance (and carrying a warranty!) that you can expect from Genuine Mercedes-Benz parts. Ask your dealer about the StarParts line or visit mbwholesaleparts.com/starparts.

All A/C systems extract moisture from the air as a normal part of their operation. It’s just plain physics and cannot be avoided. Under certain conditions, this moisture can leave a damp, musty odor even in a system that is operating normally. But your customer may ask if anything can be done about this.
Of course, verify that the evaporator housing drains are clean and functional. Ask the customer about their parking habits, since parking on an incline might reduce the ability for any water condensate to drain out as intended. Mercedes-Benz suggests the use of a Wynn’s® product “Airco-Clean†in conjunction with a Wynn’s® Aircomatic™ ultrasonic cleaning system. In extreme cases, you might consider using the Mercedes-Benz HVAC cleaner, part number BQ1830001, as described in Dealer Technical Bulletin S-B-83.00/135.
Visual inspection
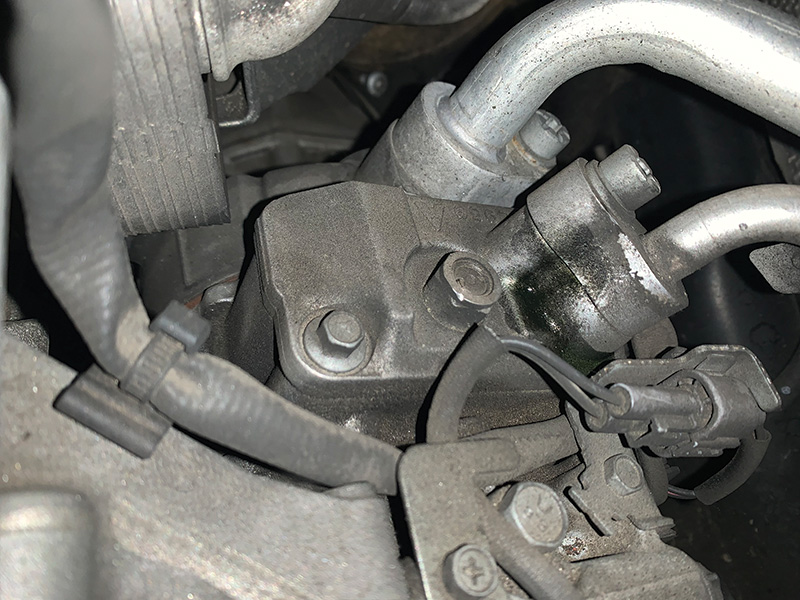
Be sure to do a thorough visual inspection of the mechanical components of the HVAC system. Check the compressor for smooth and quiet operation, the belts and engine cooling fan as well. Connect an approved A/C machine or manifold gauge set to get a reading on the system pressures using the manufacturer’s specifications. You should verify that the engine cooling fan is coming on and working properly. High pressures may indicate that the fan is not working. With a XENTRY Diagnostics system you can manually engage it, as with some scan tools, to verify its integrity.
Pressure issues
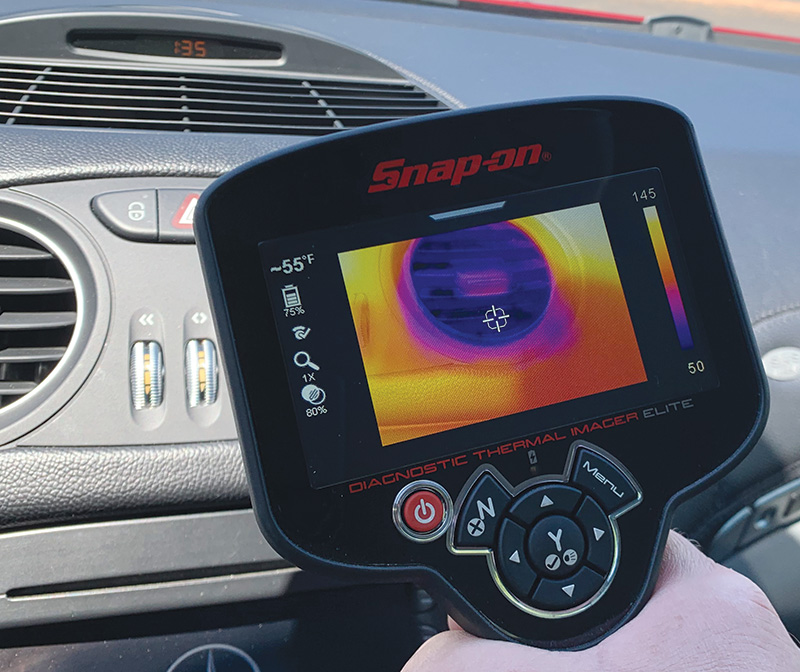
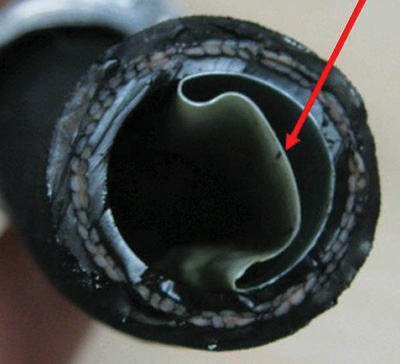
Both low and high pressures can cause poor performance in the A/C system. High pressure on the low side and high temperatures in the evaporator may indicate a blockage in the system, which might not show any fault codes. Use your thermal imaging meter to check temperatures along the length of each hose — an abrupt change indicates a blockage. Check XENTRY TIPS document LI83.00-P-047480 from 2009, which addresses a potential suction hose fault which can also be intermittent.
Your XENTRY Diagnostics system or scan tool may direct you to a fault with the A/C pressure sensor, which we have come across on occasion. Compare the pressure reading in Actual Values with your gauges. The sensor itself can also be checked: Back-probe the connector to look for 5-volts between the Red/Black and Brown wires. With the A/C compressor OFF, the Violet/White wire should read about 1 V.

Other high pressure readings may indicate a blockage in the high side of the system, possibly the compressor or condenser. Your infrared gun can help pinpoint any blockages. Typically, these will show up as high side with high pressures and low side lower or even in vacuum.
What about low pressures? Low or no pressure in both low and high sides of the system may indicate a low refrigerant charge. If you have that, combined with a compressor not coming on, the system probably has a fault code stored and has shut down. Clear the codes and recharge the system with the proper amount.
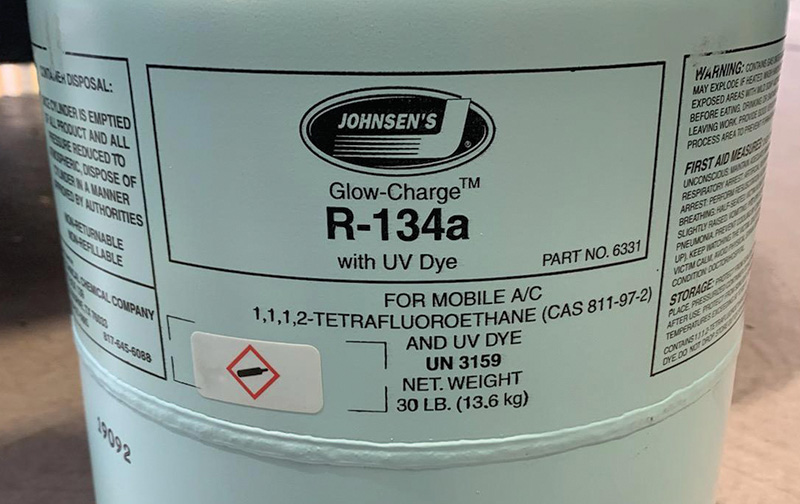
A word here about getting the charge amount right: In today’s vehicles, the refrigerants used are known as critical charge gases. Whether you’re using HFC-134a, R1234yf, or the European mandated CO2, what that means is that they need to be at just the right volume and pressure to operate at maximum capacity. This quite often can be the cause of what seems to be an intermittent cooling problem. A low charge may cool for a while but then begins to blow warm air.
Be sure to charge your vehicle to the exact amount called for. If you are replacing a component be sure to add oil — the correct type! — to the system. The model you are servicing should have the proper refrigerant and oil types and amounts on a label under the hood. If the label is missing, consult WIS. After a proper charge and a code clearing, you should have nice cool air blowing out of the vents, but you’re not out of the woods yet. In the case of a low charge, where did that refrigerant go? Was the system empty? Just a little low? These are good questions to reflect on. An empty system indicates a large leak, while a low system indicates a small leak. In either case, you now need to find the source of that leak.
Mercedes-Benz has long recommended the use of a refrigerant leak detector, or ‘sniffer’ to identify leaks. In some years, the factory fill of refrigerant included a leak detection dye. We’ve found that most leaks are best found with the sniffer, but for very small leaks it may be necessary to add some dye to the system and run it for several days.
Before you do, check over the entire system with your ultraviolet (UV) lamp to see if there might be any dye from a previous repair. Clean any that you find so you aren’t chasing a wild goose. Have the customer use the system and return in a few days for a courtesy inspection of the leak. Many times, with smaller leaks, the dye won’t show up right away and this will protect you from having to explain why you didn’t catch it the first time.
Next, use your ultraviolet (UV) lamp to scan every inch of the system, with a focus on connections between hoses and components. Check the condensate water coming from the underbody drains for traces of dye. Even the smallest trace of dye needs to be investigated. In our experience, an inexpensive o-ring solves the problem in most cases.
Other telltales of leaks include oil staining, again, mostly where hoses connect to components. Dark oil stains around an A/C compressor’s fittings are good clues. Clean the area and run the system a few days to make sure the oil isn’t from a previous repair.
Cooling fan output
As stated earlier, high system pressures can come from a malfunctioning cooling fan. Verify the fan’s operation: Spin the fan to check for a seized motor. Disconnect the electrical connector and check for power and ground on the large wires. The two smaller wires are for Circuit 15 (key-on power) and the controlling PWM signal, which can be checked with a lab scope or with some advanced multimeters for the percentage ON time.
In cases where the fan runs full-on all the time, the cause could be a bad sensor reading in the engine control module or A/C module, particularly those related to coolant temperature or refrigerant pressure. In cases where the system doesn’t know whether to run the fan or not, it will command it to run 100 percent as a fail-safe, so check the Actual Values in both systems for unexpected readings. Check for DTCs as well, as these can indicate missing or implausible signals.
While monitoring the PWM control signal, compare it to the engine suction fan request: If they don’t match, find out why. In the case where the fan isn’t running, but the commanded fan operation is above 0 percent, suspect a motor fault. Note that in fans using these two control wires simply applying power and ground on the large wires won’t cause the fan to run, unlike older fans with only the to large power connections.
It is also possible that the engine control unit needs re-flashing. According to XENTRY TIPS document LI07.08-P-057165, a complaint of fans running at 100 percent with no obvious cause in vehicles equipped with system ‘ME97’. If you find Fault Code 2237 (Coolant temperature sensor 1 – malfunction), this may be caused when driving from cold temperatures into very warm temperatures, such as driving out of a cool garage on a very hot day. The control unit sees this as a fault, setting the code and running the fan at 100 percent. Reflashing the control unit can address this problem.
Blower faults and intermittents
Many times the A/C is plenty cool but there is insufficient air flow, or air flows only intermittently. If the blower is not operating, a simple trick is to access the motor housing and give it a whack or two (with the power applied) to see if it begins to operate. If it does, then the blower will need to be replaced because the motor brushes, commutator or bearings have likely worn to the point of failure.
On many models, you can access the blower cage by removing the cabin filter. Check to see if the motor has gotten wet. If it has it should be replaced. At the blower motor speed regulator, verify that there is battery voltage on the large red wire. If there isn’t, check the fuse. The brown wire should be the ground. Consult the wiring diagram and disconnect the blower if possible. Using a fused jumper and a ground, supply power to the blower motor to see if it operates, if not it should be replaced. Determine the signal wire from the blower speed regulator and, using a lab scope, check the PWM control signal. If your signal is good, then most likely you will have a faulty speed regulator. Also check the input to the regulator for the proper signal, which is an output from the A/C controller.
Even though the systems we service today have gotten far more advanced in terms of customer comfort, efficiency and environmental safety, the “bones†of the A/C system remain the same. Remember first things first when it comes to keeping your customers cool this summer.
Download PDF


0 Comments