


The EVAP System in different Volvo models, how it works and how to diagnose the system when a Check Engine light is present.
The EVAP system (EVAPorative emission system) is an emission system that prevents hydrocarbons from entering the atmosphere. Fuel vapors are collected and stored In the EVAP canister. The canister contains carbon that adsorbs the fuel vapors.
In this article, we will talk about the EVAP system in different Volvo models, how it works, and how to diagnose the system when a Check Engine light is present.
The EVAP system vapors must be stored in the system’s canister and can be redirected into the induction system of the engine, after which they’re burned off, harmlessly and unnoticed.
The EVAP system consists of the following components:
- Fuel tanks
- Canister purge valve
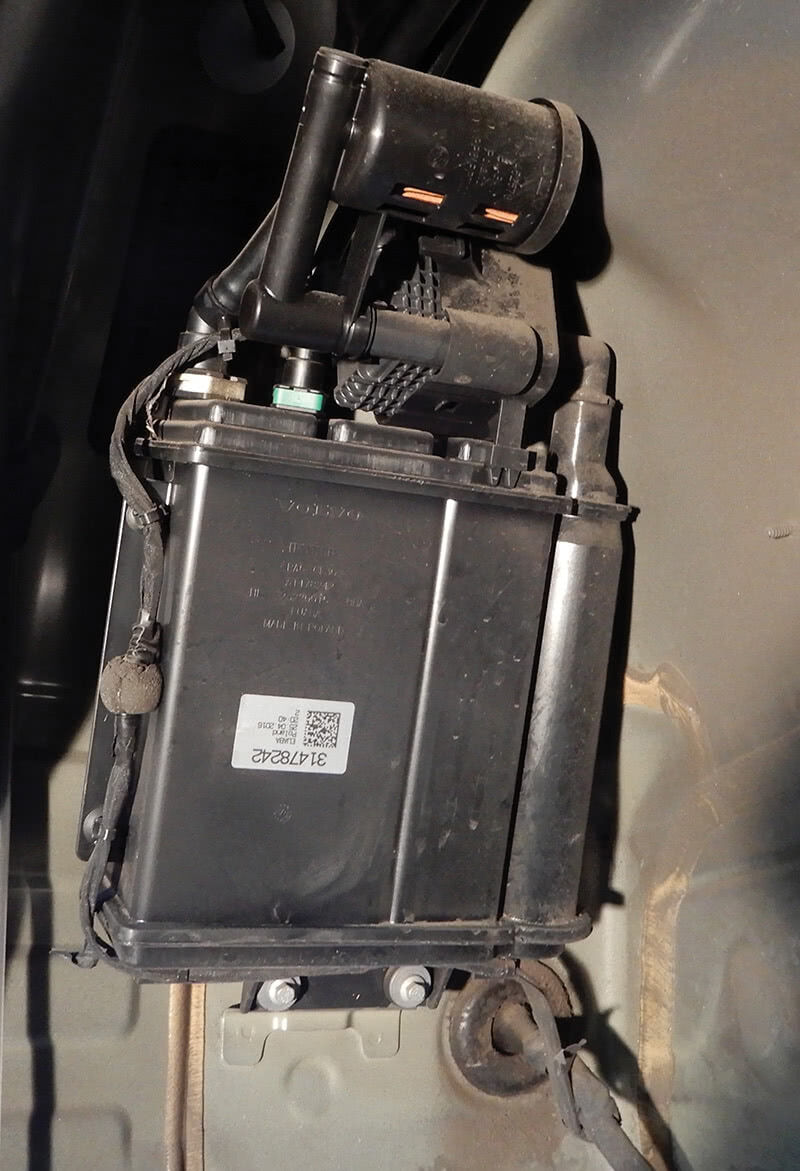
- EVAP canister
- Leak diagnostic unit
- Air filter
- Rollover valve
- Float limit vent valve
- Fuel filler pipe
- All the lines connecting all components
The EVAP system has its own leak diagnostics that check pressure in the fuel tank EVAP system; an opening larger than 1.0 mm would be considered a large leak and should be much easier to diagnose.
If a certain pressure during the EVAP system on board test is not achieved, the Check Engine light will be illuminated, and you will need to diagnose the system problem.
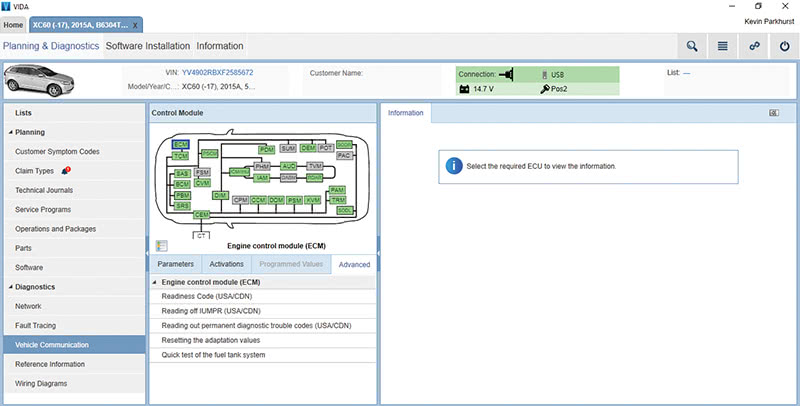
The engine control module, and the leak detection pump, control and monitor pressure and flow in the system. If a Check Engine light appears in the EVAP system, the system has detected a pressure or flow problem which must be remedied using Vehicle Information and Diagnostics for Aftersales (VIDA) Volvo’s Service, Parts and Diagnostic Application.
Common problems could be fuel smell caused by escaping fuel vapors, or maybe the vehicle is stalling, hesitating, or is running rough. Most of the time you won’t notice driveability problems, but you might have an increase in fuel consumption.
There are many factors that cause error codes, and some of the most common are:
- A cracked or disconnected hose
- Disconnected or loose wiring at components
- Open circuit in purge valve
- Detection pump not working correctly
Look over the EVAP system and try to identify problems. If the system has a small or large leak, using a smoke machine can inject smoke into the system to find any kind of vapor leak at a hose or component. If smoke is escaping from a hose after repair, it is important to run a fuel tank pressure test on VIDA to make sure all is well with the system.
The leak detection pump pressurizes the fuel tank system and checks to make sure the system has no leaks and all components are functioning correctly. The pump has an electric pump, a solenoid that adjusts air flow in the component, and a heater element that warms up the pump.
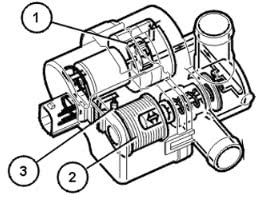
The pump is controlled through the ECM and checks the pressure and monitors parameters in the EVAP system.
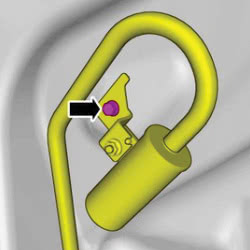
The EVAP valve in the system is used to open and close the connection between the intake manifold and the EVAP canister. The vacuum from the engine intake manifold controls the hydrocarbon flow through the EVAP valve to the canister and makes sure the hydrocarbons are stored, to be burned off in the combustion chamber.
When running EVAP tests in VIDA, there are a few conditions that need to be met.
No Diagnostic Trouble Codes (DTCs) for the EVAP valve or atmospheric pressure sensor can be stored.
Engine must be warmed up to operating temperature, and then switched off until engine temperature is a few degrees above the outside temperature.
Engine is off and stationary.
Engine temperature is between 38 to 95 degrees F.
Maximum altitude of about 8,000 feet above sea level.
Battery voltage must stay between 11 to 15 volts and stable.
Fuel tank volume should be between 0 and 85%. If there is a trouble code in the system for the fuel level sensor, the ECM (Engine Control Module) ignores this trouble code and continues.
EVAP canister purge valve must be closed.
Low volume in the canister.
Tank cap must be tight and sealed. The diagnostic procedure has three different phases — reference phase, function test, and check tank system pressure.
Reference Phase
The ECM runs a reference phase for leakage before the test begins. The detection pump forces air through a 0.5 mm hole back into the outside air. During that time the system monitors the leakage diagnostic unit and stores the values which are used later to check fuel tank sealing. During this test, if values for the pump are too high or low, a trouble code will be generated and the test will abort.
Function test
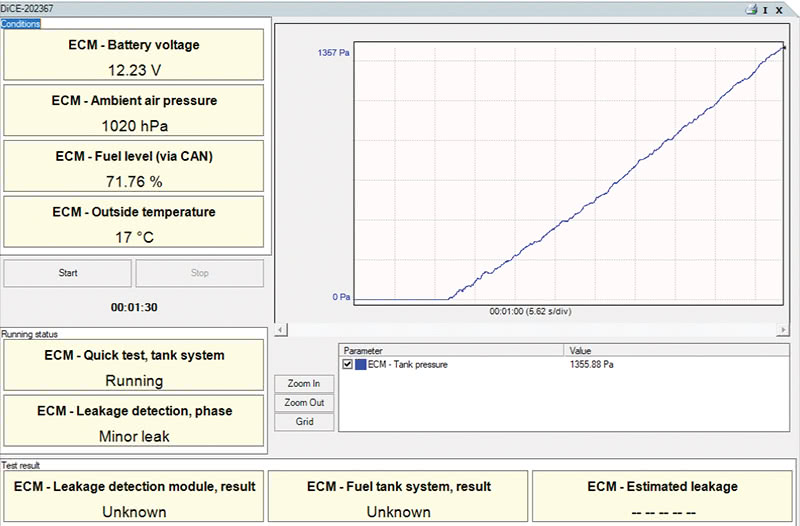
During the function test, the fuel tank is pressurized. Through the detection pump, air is generated into the system and monitored. The EVAP system will monitor pressure; the pressure should drop briefly before building up in the fuel tank system. If for some reason this test is not done within a reasonable time, the diagnostics will abort and a Check Engine light will set.
Checking major leak (leakage through an opening larger than 1.0 mm) in the fuel tank system
The leak detection pump pressurizes the fuel tank system using calculated pressure, which is controlled by the detection pump. If pressure in the fuel tank system stabilizes and/or if the pressure does not go above 1500 Pa within 450 seconds, there is a problem in the system for large leak.
Checking small leak (leakage through an opening larger than 0.5 mm but smaller than 1.0 mm) in the fuel tank system
The small leakage test is performed after the large leak test. The leak detection pump continues to pressurize the fuel tank system. The ECM checks the sealing of the fuel tank system by measuring the difference between the reached pressure and flow from the leak detection pump. If readings are outside the reached relationship, a minor leak trouble code will be generated.
Let’s say the customer comes to your shop with a Check Engine light on and you find the fuel cap to be loose and a large leak is detected. After tightening the fuel cap, the system will run the EVAP test and find that the cap problem is corrected and no code will appear in system.
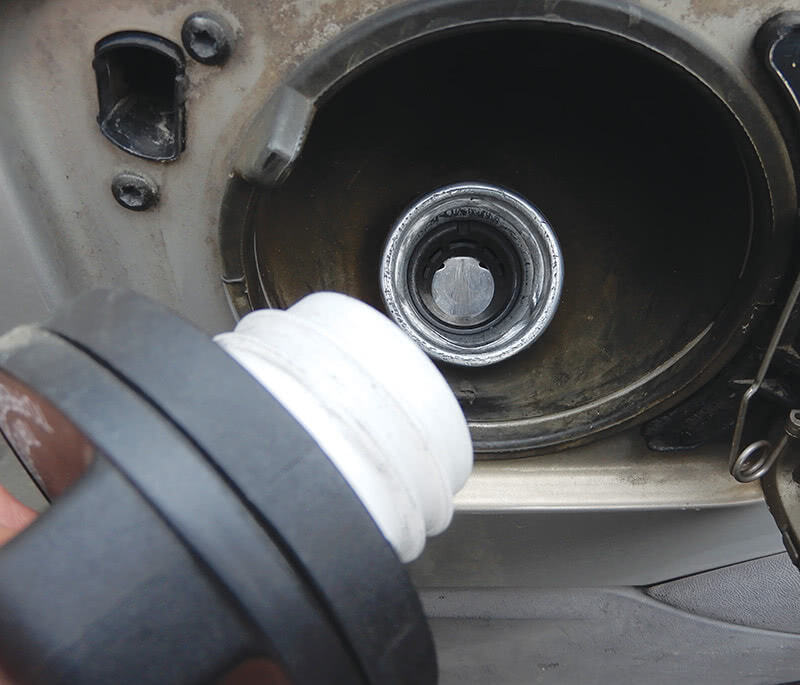
Sometimes the fuel neck can be stripped or distorted and the fuel cap will not seal correctly, thus making a Check Engine light appear. A smoke testing system can help to find this problem.
Suppose a customer comes in with a Check Engine light on. You hook up to VIDA and check codes in the system, and you find code ECM – EVAP Emission System Incorrect Purge Flow on a 2013 Volvo S60 B5254T12.
The ECM has detected a problem with the function of the EVAP valve by analyzing the signal from the pressure sensor in the induction pipe.
Possible Problems
The hose between the induction pipe and EVAP valve is broken, pinched, or clogged.
The hose between the EVAP valve and canister is broken, pinched, or clogged.
The EVAP valve is stuck in the open position.
The EVAP valve is stuck in the closed position.
Check all hoses for these possible problems. Use VIDA and go into Activation and see if the purge valve is working. Click on purge valve and listen for a click sound; try a couple of times to make sure the valve is working. If no sound is heard, you will need to check for a possible loose connection or maybe no power to the connector. If power and ground are present, it’s more than likely that the purge valve is bad and needs to be replaced.
Replacing the valve is fairly simple to do. Disconnect the electrical connector, remove the hose on each end and remove the valve from the rubber holder. Replace the valve with a Volvo genuine part.
Communicate again using VIDA, go into Activation and see if the valve is working now. If so, you have located the problem. Reset the codes in the EVAP system and run the fuel tank test to make sure the code is no longer present.
In the EVAP canister, fuel vapors are collected and the ECM will determine when to burn these vapor fumes, so they don’t escape into the atmosphere. Since the EVAP canister is subject to the weather elements, sometimes this canister can crack and release fuel vapors into the air and that’s what we don’t want to happen. There is also a filter for the canister that will need to be replaced periodically so not to let dirt into the EVAP system and contaminate other components in the system.
Remove the right rear tire, and remove the inner fender. Eight T25 Torx screws and three 10 mm plastic nuts need to be removed. Set the inner fender aside. Now you will see the filter in line to the fuel neck.
Remove the screw and cut the pipe and add rubber hose and new filter for charcoal canister. Screw down and install the inner the fender and tire.
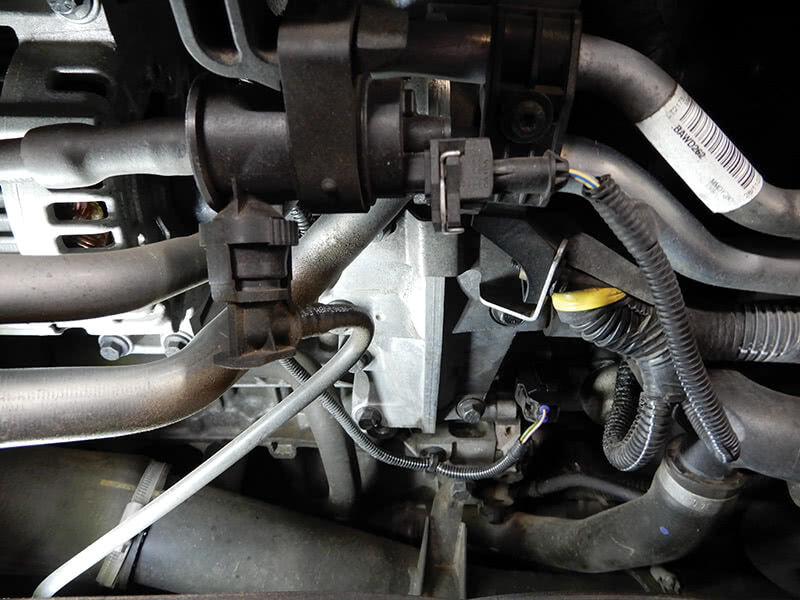
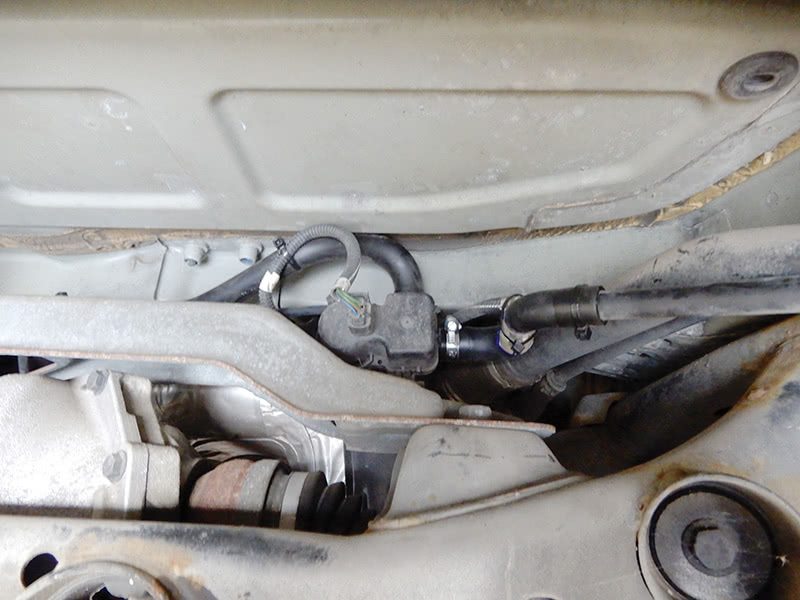
Another problem with the EVAP system is the detection pump. This pump is located close to the charcoal canister, usually at the rear of vehicle depending on model.
The two-wheel drive Volvo detection pump is a little easier to replace than that on all-wheel drive models.
The 2013 XC90 two-wheel drive vehicle affords a pretty easy replacement of the detection pump. Open the rear hatch, locate the tool for spare tire removal, and crank down to release the spare tire from vehicle.
Now that the spare tire is out of the way, you will now be able to see the detection pump and hoses. Remove the hose clamps from both hoses, disconnect the electrical connector from the detection pump, and pull the pump out of the rubber mount.
For this model, the leak detection pump part number is Volvo 30774518, the two hoses, one from the canister to the pump is 30622231, and the other, depending on the emission code for the vehicle, could be part number 8653367 or 30713602.
Install the hoses on the detection pump before installing the pump just to make things a little less complicated. Install the pump into the rubber mount and secure the hoses with hose clamps. Connect the electrical connector to the detection pump.
It would be a good idea to warm up the vehicle and run a fuel tank test with VIDA to make sure the EVAP system is working properly before installing the spare tire back into place.
Now that you have run the EVAP test and the system is working correctly, you can install the spare tire back into place. Always test drive the vehicle after any repairs just to make sure there are no problems.
The following codes will sometimes appear when the Check Engine light is on (and this could have to do with the detection pump). The leak diagnostic unit preheating signal could be too high or maybe too low. Too high would set code ECM 432C, and too low would set code ECM 432D. If you encounter either code you will need to use VIDA to activate the pump to see if the code is permanent or intermittent. Intermittent codes are definitely harder to diagnose.
If the pump cannot be activated, more than likely the pump is the problem. Make sure to check for power and ground at the pump. An intermittent code could indicate that the pump is just working part of the time, but still might need to be replaced.
The EVAP system on Volvos is a pretty straightforward system, but sometimes can be difficult to diagnose. A permanent code is always less daunting to figure out. Always use VIDA to help diagnose the problem and an electrical diagram can come in handy when needed. Start with the basics and keep it simple.


0 Comments