

Proper windshield replacement calls for the right tools, techniques, and replacement glass
The windshield, needless to say, is a vital component in every vehicle, and if a Volvo’s windshield has been damaged in a collision or is cracked and needs replacement, today’s techniques and equipment make the job faster than ever and ensure a safe, trouble-free windshield replacement. The trick is — do it right!
The windshield glass obviously provides a clear view of the road ahead, protects vehicle occupants from the weather, and can add strength to the vehicle structure when properly installed with the correct materials and procedures.
Replacing a Volvo windshield in the shop? Start with becoming aware of Volvo recommended or mandated windshield procedures, available on VIDA, and keep in mind that because of laser technology in newer vehicles it is best to use OE Volvo parts. Aftermarket products may be incorrect in fit, form, function, angle of glass and recalibration requirements.
OE Windshield Works Best, Provides Strong Customer Satisfaction
Volvo recommends that the replacement windshield itself be an original Volvo part — manufactured for a specific vehicle model — which is normally superior to aftermarket parts in reflectivity, transparency, distortion, and is readily available from your Volvo dealer parts department. This generates excellent long term customer satisfaction, and will avoid possible incompatibility with operation of the rain sensor.
Here are the major steps:
- Remove the windshield wiper assembly and lay it aside if it is in the way.
- Protect the front seats with a cover to avoid possible damage from the glass removal, and cover the instrument panel to protect it from possible damage from the high tension nylon wire cutting tool.
- Disconnect the vehicle’s rain sensor.
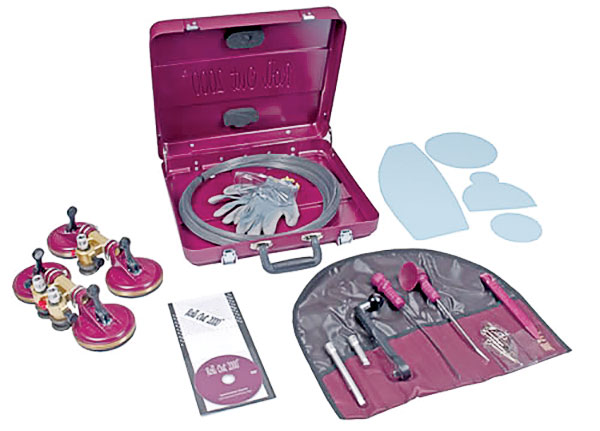
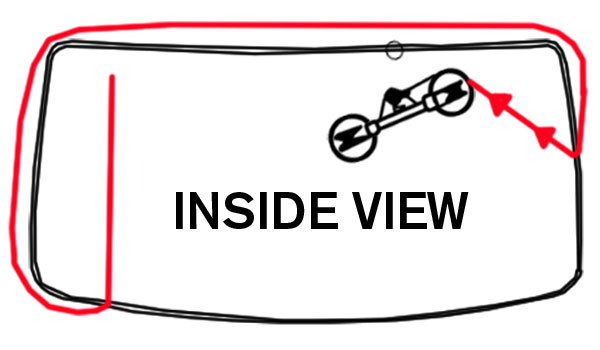
- Get to know the Rollout 2000 removal tool that Volvo specifies, which uses a fine nylon wire to cut the windshield out of the old adhesive. No power is needed for this tool, which winds the wire and cuts the adhesive by simply “cranking†the tool with a ratcheting “winding handle†similar to a socket wrench. The Rollout 2000 is available through Volvo parts, #T9512925, with an acceptable optional tool, the Kong Tool from GT Glass, available in the aftermarket, although Volvo supports and offers the Rollout.
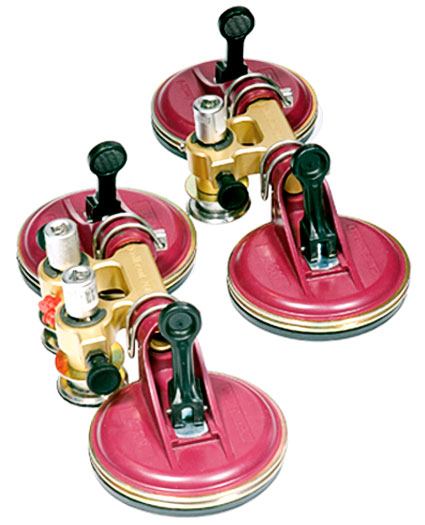
- The Rollout is basically two sets of pulleys that are attached to the inside of the windshield with large suction cups. Nylon wire is placed to surround the edges of the windshield and gently pressed into the adhesive and attached to the Rollout pulleys after insertion through a tiny opening in the adhesive at the bottom left corner of the windsheld.
- After piercing the fine hole in bottom corner of the windshield adhesive, insert both ends of the wire and pull several feet of nylon wire into the interior reaching up to about the visor.
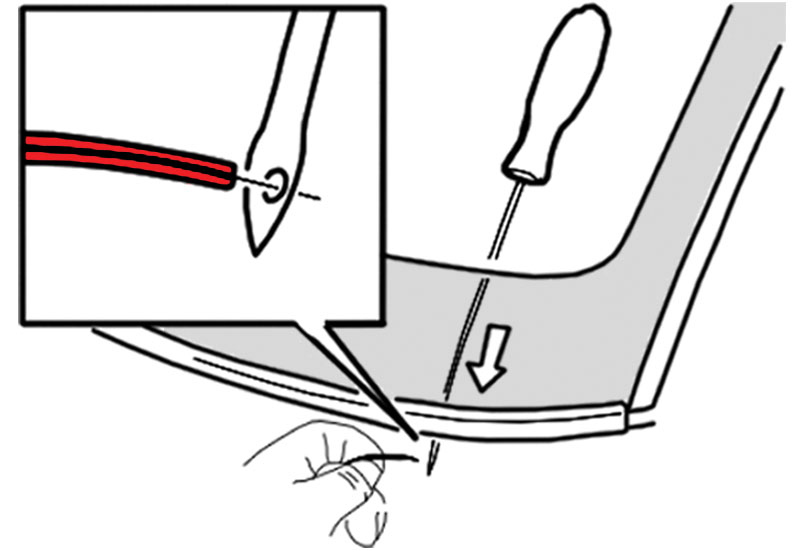
- Outside the windshield, carefully press the nylon wire from where it is inserted into the interior into the adhesive up against the outside edge of the windshield all the way around the windshield to the insertion point for both ends of the wire. Take care to ensure that the wire is tucked into position at the corners. Applying sticky tape over the wire at the top will keep it from slipping out of position.
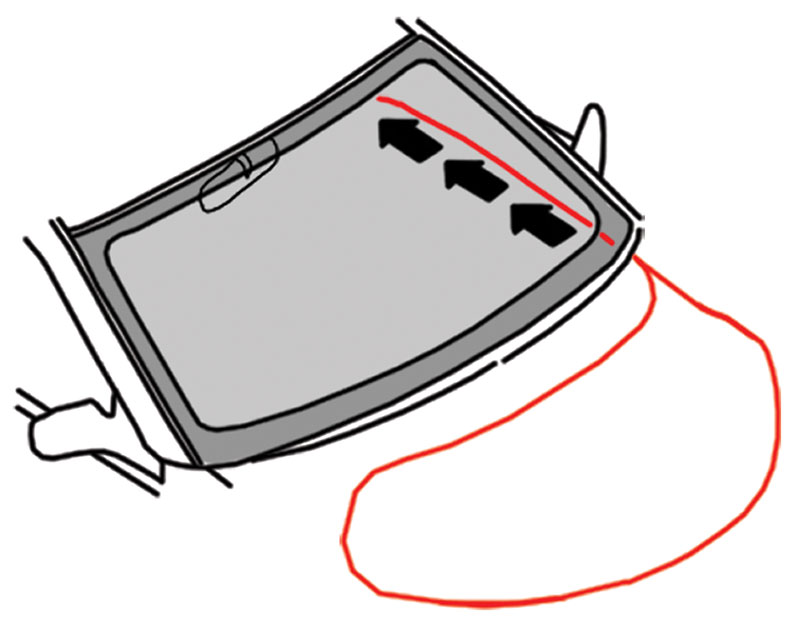
- Mount the Rollout 2000 with the suction cups strategically inside the windshield, and fasten the ends of the inserted wire into pulleys on each of the Rollout units. Place the units so that cranking the pulleys will pull the wire along the outer edge of the windshield and cut through the old adhesive. By carefully cranking the tools and moving them into different positions, the nylon wire is drawn under tension around the windshield, cleanly cutting the windshield glass out of the adhesive.
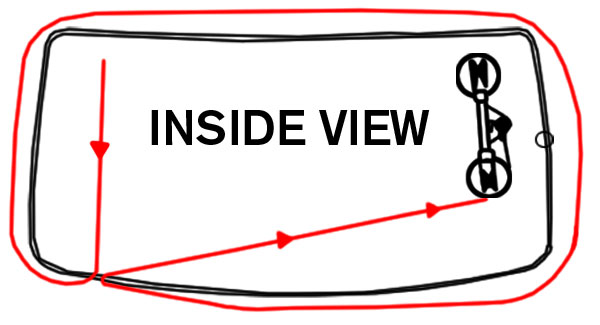
- As the wire reaches the windshield corners, crank slowly against strong resistance to make sure it is pulled around the corner. Move the Rollout tools to different positions on the windshield to gain needed leverage to pull the wire — this operation takes about 15 minutes. When the wire has completely cut the adhesive all around the windshield, the old windshield glass is free and can be lifted out.
Remove Old Adhesive, Clean Up Area
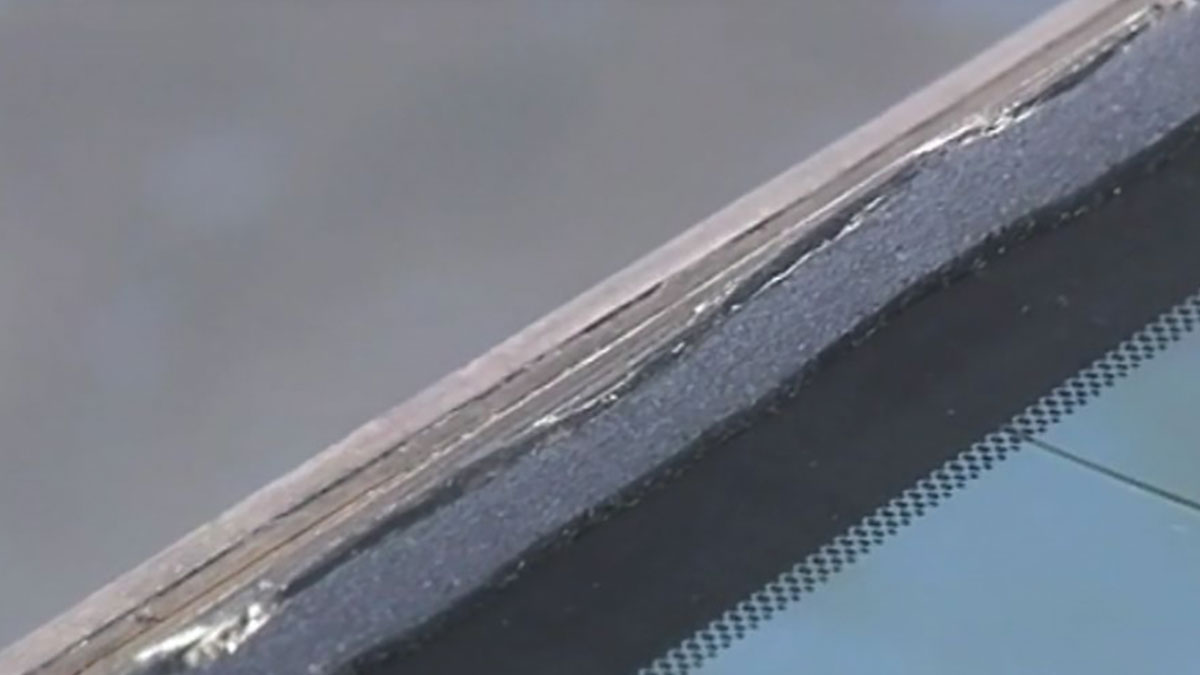
Once the old glass is out of the windshield opening, scrape or pull the remaining old adhesive out of the opening and clean the opening out with a solvent. Be sure to note rust in the opening if there is any, and touch up rust or bare metal with primer before putting fresh adhesive in place to make sure the rust patches or bare spots don’t grow and become a problem.
It is now time to place a good bead of adhesive around the windshield opening.
Use Only Approved Special Epoxy/Urethane Adhesive
Volvo insists on the mandatory use of a special proprietary adhesive for any windshield replacement. This adhesive is unique to Volvo and available through Volvo dealers. This special adhesive is a two-part combination of epoxy and urethane, joined at the tip of the tube when dispensing, and bonds with an accelerator, and cures in three hours instead of eight hours. This nearly immediate bonding and rapid curing means the vehicle is ready to drive within a few hours of windshield installation.
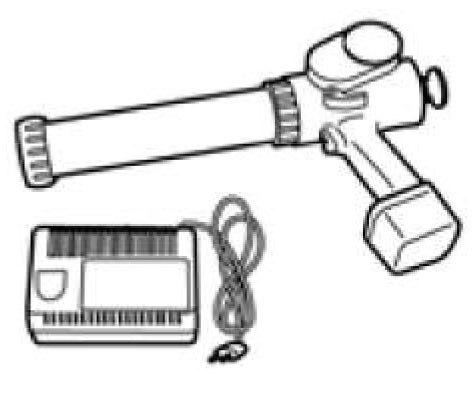
With the opening clean, carefully apply a smooth, uniform bead of the special adhesive all the way around the windshield opening, after first making sure the new windshield edges are clean and ready for installation. To increase vehicle structural rigidity, Volvo’s high shear strength adhesive is available in a glass adhesive and glass installation kit for repair work (Adhesive Kit #31298559) and includes:
- Adhesive cartridges
- Special adhesive applicator nozzle
- Glass cleaner
- Primer and instructions
Prepare glass for installation
Identify replacement glass part numbers to make sure you have the appropriate glass for the vehicle. This might include the last four digits of the part number under the Bar Code in glass identification information, usable when looking up the correct windshield for installation in the specific vehicle.
When replacing:
- Wear clean gloves to prevent fingerprints.
- Clean entire glass with glass cleaner and adhesive area with cleaner provided in kit.
- Attach any antennas or other connections, if appropriate.
- Depending on the age of the vehicle, apply the molding removed from the old windshield around the new windshield. Fit new molding if appropriate.
- Dry fit the new glass before the adhesive is applied, making sure the VIN plate aligns in the glass opening.
- Use tape to provide reference points.
- Apply the adhesive with an adhesive bead of 13-15mm, making sure that the adhesive bead is smooth and straight, there is no excess adhesive in one area with an uneven application, and there are no air bubbles which could result in an eventual leak. The glass should be installed soon after applying the adhesive, which will start to cure after 10 minutes.
Install the new windshield
Keep door windows open when installing glass to prevent cabin pressure build-up. Install the new windshield, aligning the glass to reference points made previously using tape. Place the glass into the vehicle windshield opening, then press down firmly on the entire outer perimeter of the glass directly over the adhesive, which serves to anchor the glass to the vehicle frame.
The replacement is complete. Almost.
You must perform a water leak test after three hours and after the adhesive has cured. You should replace all removed clips and parts, reconnect the rain sensor and make sure it is operative — and possibly recalibrate cameras that operate looking through the windshield using a scan tool. We say possibly recalibrate, because if a genuine Volvo replacement windshield is installed for a specific vehicle, recalibration will not be necessary. It should be checked to make sure calibration is on target, but probably unnecessary.
Non-OEM windshields will likely have slightly different optics that can render forward-looking cameras unable to provide accurate readings even if calibrated to the Lane Departure and Forward Collision warning camera, for instance, or other systems. These systems will not work correctly, may have aiming issues, the Lane Departure warning may activate too early while drifting to the right side of the lane and may not activate at all to the left until crossing the lane markings.
In addition to the driver annoyance factor and safety issues, such an installation will almost certainly bring an unhappy customer back breathing fire, and possibly invalidate insurance claims.
The idea is, if a system works by using the windshield, re-calibrate it to make sure it is within Volvo specifications. This may well use up the three hours needed for the windshield adhesive to cure before being able to turn the vehicle back to the owner for miles of safe driving — with a strong, sound, clear windshield.
Download PDF


0 Comments