


Not-so-common noise from the XC90 4.4L V8 2004-2014
Here is a story that is strange but true. In a few rare cases, there have been some shops that have had one of these V8 XC 90s come into their shops with the customer complaining about an intermittent loud pop or crack noise coming from the engine compartment.
If you get one of these Volvos in your shop that actually is displaying this symptom, you will know it because the pop or crack is so loud you will hear it from way across the shop.
At first, some shops will mistake this sound for a secondary ignition leak. But in most of the cases, the crack noise is very loud and very irregular and only happens at idle. It usually displays itself randomly when the engine is at operating temperature, and it will pop or crack once every couple of minutes. Believe it or not, this loud crack noise is caused by an electrostatic discharge from a worn auxiliary belt and worn pulleys.
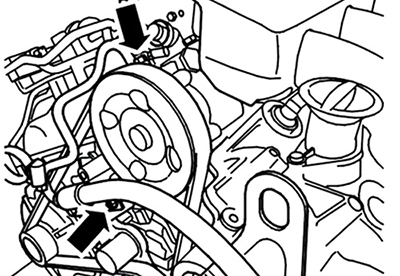
To check for this, put the XC90 up on a lift and remove the right front tire. Next, remove the splash shield from the right side wheel well and start the engine. Allow the engine to reach operating temperature, and watch the space between the crank pulley and the engine block. It’s best to see this without a flashlight. When you hear the crack noise, you will see a powerful electrostatic spark jump across the gap. This is caused by dragging pulleys and a worn, dry auxiliary belt. Make sure you replace the belt and all three pulleys, including the auxiliary belt tensioner assembly, when you do this repair. Here are the instructions for replacing the belt and tensioner bearings.
Removal
Removing the upper engine covers
Remove the upper engine covers by pulling them straight up.
Removing the cover over the servo pump
Remove:
- One end of the ground cable between the engine and body and the hose between the expansion tank and engine
- The 2 screws on the cover over the servo pump
- The cover.
Removing the servo oil line
Remove:
- The nut of the clamp
- The screw on the oil feed pipe
Plug the openings and wipe up any spills.
Bend aside the servo oil line.
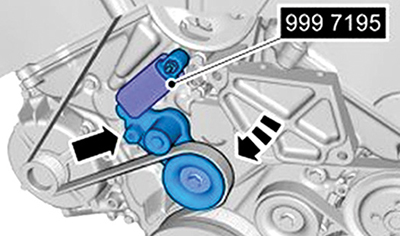
Removing the auxiliary belt
999 7195 Holder (See: Tools and Equipment\999 7195 Holder)
Lift off the auxiliary belt.
Hint: Note the routing of the belt to facilitate reinstallation.

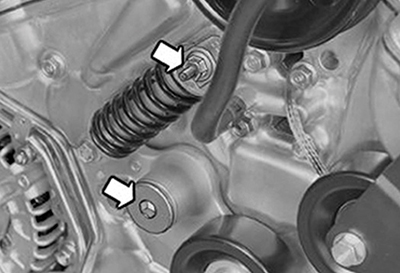
Removing the belt tensioner
Remove:
- The screw of the tensioning and damping element
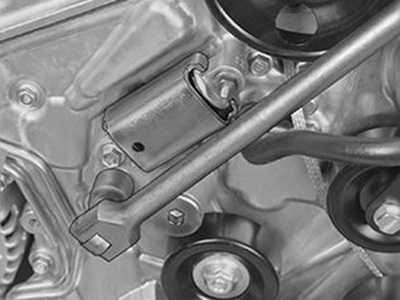
- The center screw to the belt tensioner. 999 7279 Wrench
- The belt tensioner
Installation
Installing the belt tensioner
Install:
- The belt tensioner
- The center screw to the belt tensioner
- The screw of the tensioning and damping element; tighten
Installing the auxiliary belt
Rotate the belt tensioner clockwise to max. 230 Nm and remove tool: 999 7195 Holder.
Installing the servo oil line
Install:
- A new gasket
- The servo oil line
- The nut on the clamp; tighten
- The screw on the oil feed pipe; tighten.
- Wipe up any spills.
Installing the cover over the servo pump
Install:
- The cover over the servo pump
- The 2 screws; tighten
- The ground cable between the engine and body and the hose between the expansion tank and engine
Installing the upper engine covers
Position the upper engine covers and press them into the retainers.
Download PDF


0 Comments