


Heater core replacement has come a long way from the early 1970s and 1980s. The days of removing the complete dash board have gone away. Through the years Volvo engineers have made it easier to install a heater core in newer Volvos.
By easier we mean that the right qualified technician with the right Volvo tools and certified Volvo parts makes this job professionally done. The shop and your customers will feel at ease and satisfied.
The heater box or HVAC system, (Heating, Ventilation and Air Conditioning) that is inside the vehicle dash is the collection of parts, including the vents and temperature control, that gives heat or cool air depending on your desire.
Heater cores are the source of heat inside the cabin. A heater core is like a radiator but inside the cabin. Hoses are routed from the engine to the connection at the core itself. So when the vehicle is started and the cooling system heats up, circulation of the liquid is controlled by the amount of heat you want inside the vehicle.
How often do heater cores need to be replaced?
Heater core issues are most commonly associated with lack of engine cooling system maintenance, as corrosion inside the heater core is the cause of most failures. As engine coolant sits in the engine, anti-corrosive agents help prevent corrosion and rust. Though these protective chemicals are present, corrosion and rust will occur over time. The majority of vehicles will never need a heater core replacement, but without the factory scheduled coolant flushes the heater core may not make it to 100K miles.
Let’s not go back too far, but for the Volvo 240s still on the road, replacing heater cores can be quite challenging, with an extensive degree of difficulty to remove the complete heater box. Once the heater box was removed, the heater core could be replaced.
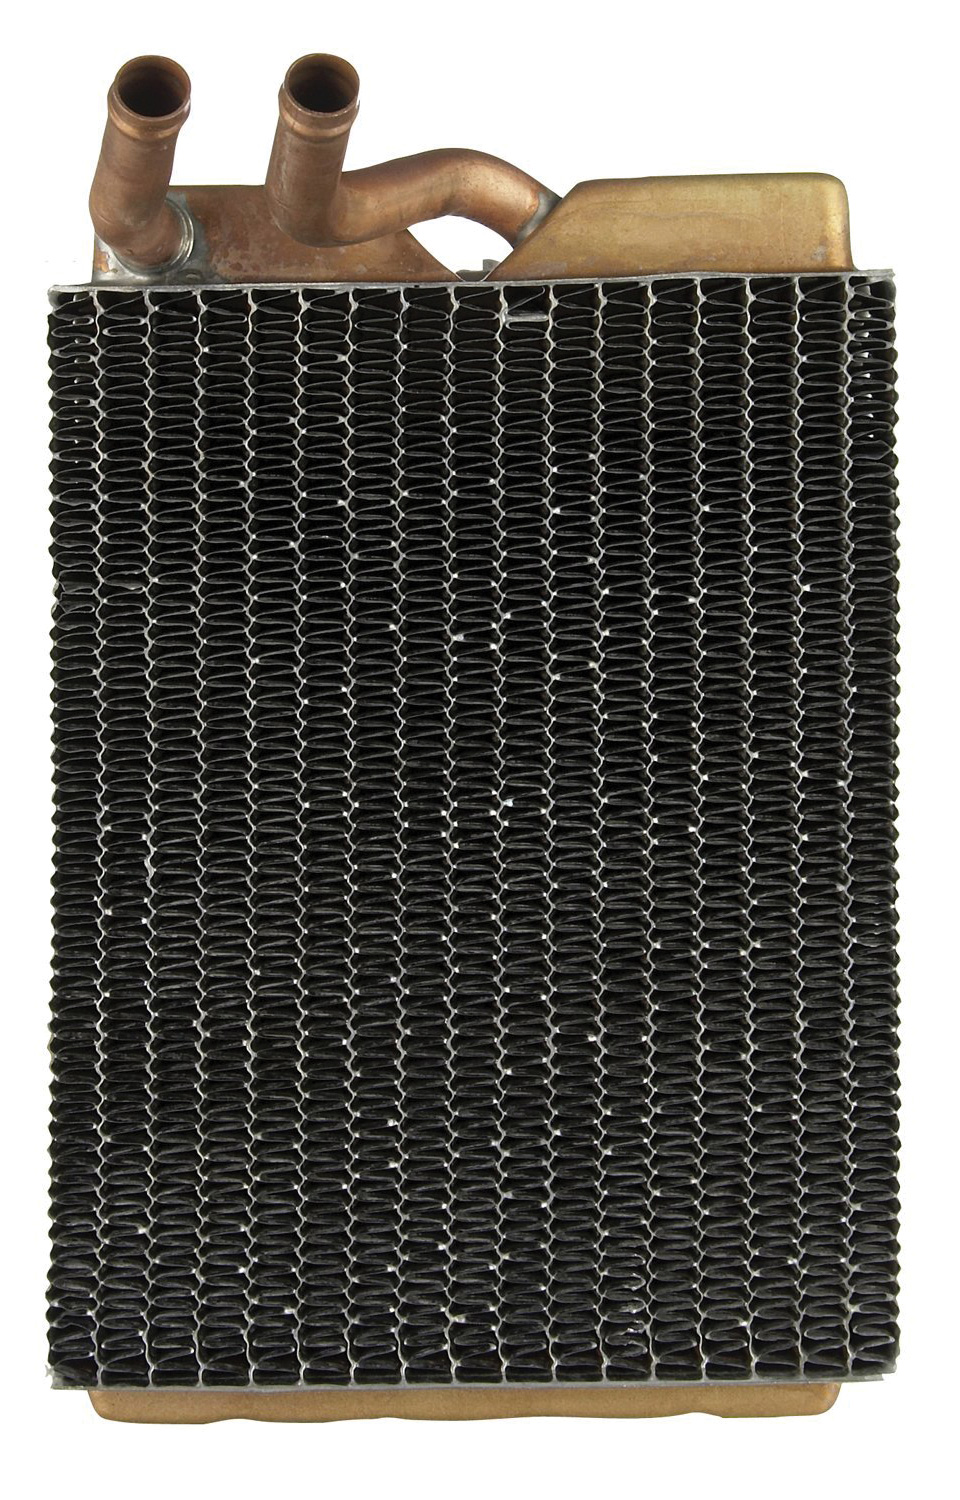
Replacing the heater cores on 740 and 940 Volvos was time consuming also. These types of heater cores lasted many years and were very reliable.
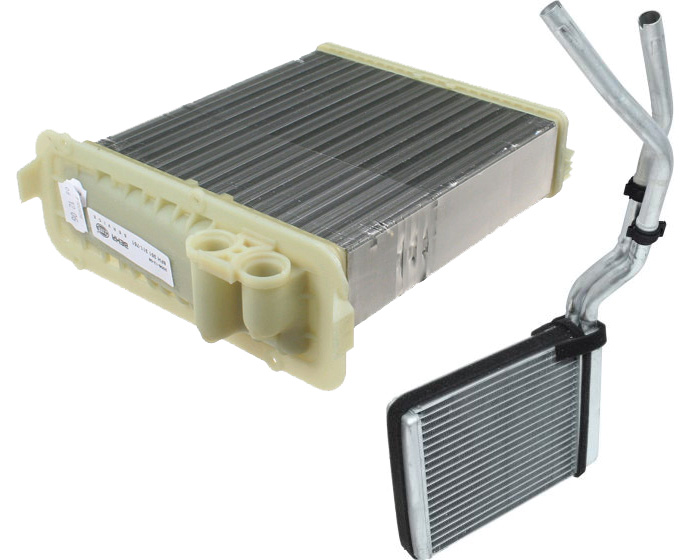
The start of the 850 models featured a new heater box and a different type of heater core. The old traditional copper and brass heater core had gone away, replaced by new aluminum units with plastic ends. These heater cores were introduced in the late 1990s in the 850 models and then later in the S70s and V70s. Today’s models all use the same style of heater cores.
Heat in the cabin makes for comfort in the chilly winter seasons. Once the vehicle is warmed up, the coolant circulates through the engine and into the heater system in the cabin to make heat. Climate controls can adjust heat to certain temperatures to make the cabin comfortable.
You might be wondering what a heater core is, what it does, and how it can affect your customer’s vehicle. These are all great questions, and we’re going to get you some quick and easy answers so you can get this car fixed ASAP.
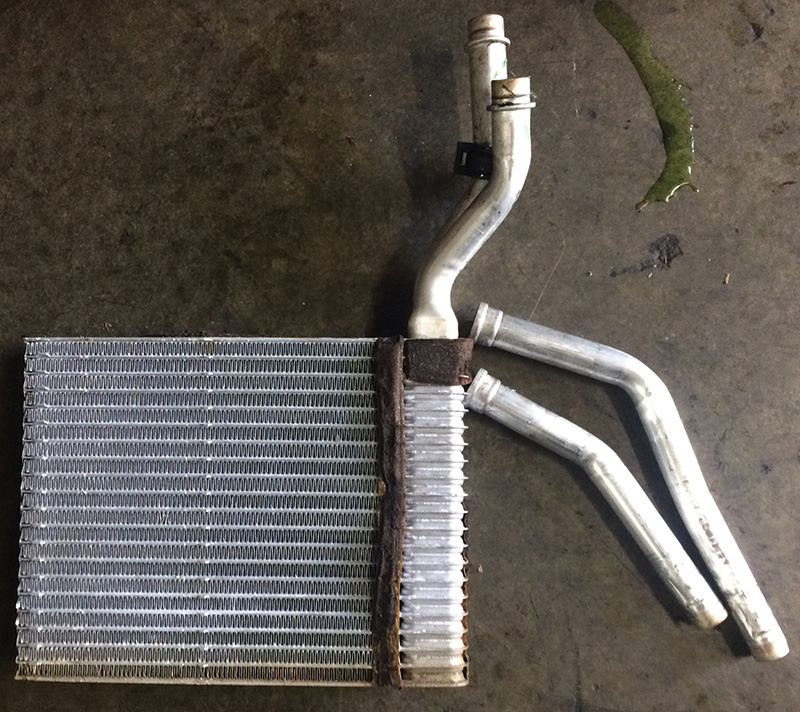
In fact, the heater core is simply a small radiator itself, with a grid of little tubes and a waffled appearance from the fins that disperse the heat. The heater core allows the heater and defroster to function. Volvo calls this the heat exchanger.
Here are some clues that will help you decide if heater core replacement is needed. Diagnosing a bad or blown heater core is pretty easy. Replacing a heater core may not be so easy.
Fogging up inside the vehicle on windows is a sign that the heater core has developed a hole in the core and is leaking into the heater box, causing condensation on the inside windows.
A sweet smell is also an indication that the heater core is leaking inside the cabin. Peel back the floor carpet and look for coolant under the mats. Sometimes the coolant will come out through the A/C condensation drain and you will see coolant on the ground under the vehicle.
Turning the heat on and finding that only cold air blows is an indication that the heater core is plugged and coolant can’t circulate to make warm air.
Having to frequently add coolant to the cooling system and finding no leaks under the hood or on the ground could mean coolant is leaking in the cabin and there may be a puddle under the carpets. Pressurizing the cooling system and checking for leaks can sometimes make diagnosis less difficult.
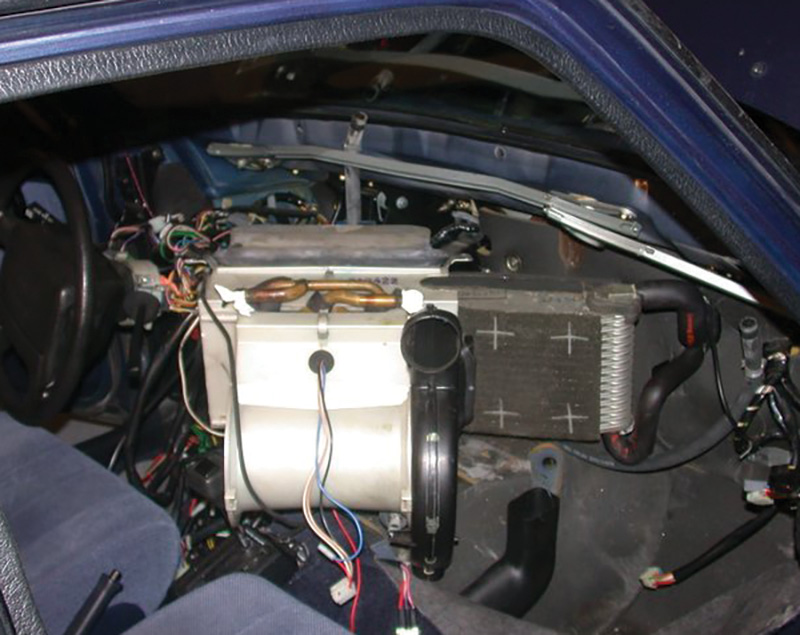
When replacing the heater core on a Volvo 240, start by draining the complete cooling system and disconnecting the battery ground cable. Removal of the complete heater box is necessary. In order to do this you will need to remove; steering wheel, glove compartment, and both side kick panels. Remove the front panel, radio, climate controls and the duct tubing for heater vents. Disconnect wires and vacuum connections and set aside. Taking a picture or two will help during reassembly. Disconnect heater hoses coming into the cabin and set aside.
If equipped with air conditioning, connect your A/C machine and remove all of the refrigerant in the system. Remove A/C hoses going into cabin and put caps or tape on the ends so moisture will not get into system.
Remove all vent tubing that goes to the heater box. The two heater hoses going inside the vehicle and connecting to the heater core must be removed. There are four bolts at the top of the heater box; two on each side need to be removed. Once this is done you will need to wiggle out the heater box on the passenger’s side with the seat adjusted completely back.
Now that the heater box is completely removed from the vehicle you can split the heater box, which is held together by clips, and the heater core can be removed. Clean inside the heater box with water and bleach so all coolant leaking inside will be removed, as well as any mold that may be growing there.
You can re-install the heater core and assemble in reverse order. Be careful when installing the heater box not to damage the hose connections for the heater core. Having someone help can save time and make it easier to secure.
The 740 and 940 Volvos were quite similar to the 240s, meaning you had to remove many things to remove and install a replacement heater core. But it is possible to split the heater box in the vehicle and expose the heater core without removing the complete heater box. Still, these jobs could take eight hours and more depending on the person doing the job.
In the early 1990s the 850 model was introduced by Volvo with many changes made to make heater core replacement much easier.

When replacing the heater core in 850 models, first drain all coolant from system. Just like with all heater cores this is the first step. You can do so by disconnecting the bottom radiator hose and draining into a pan. Once the coolant is drained you can re-connect the hose.
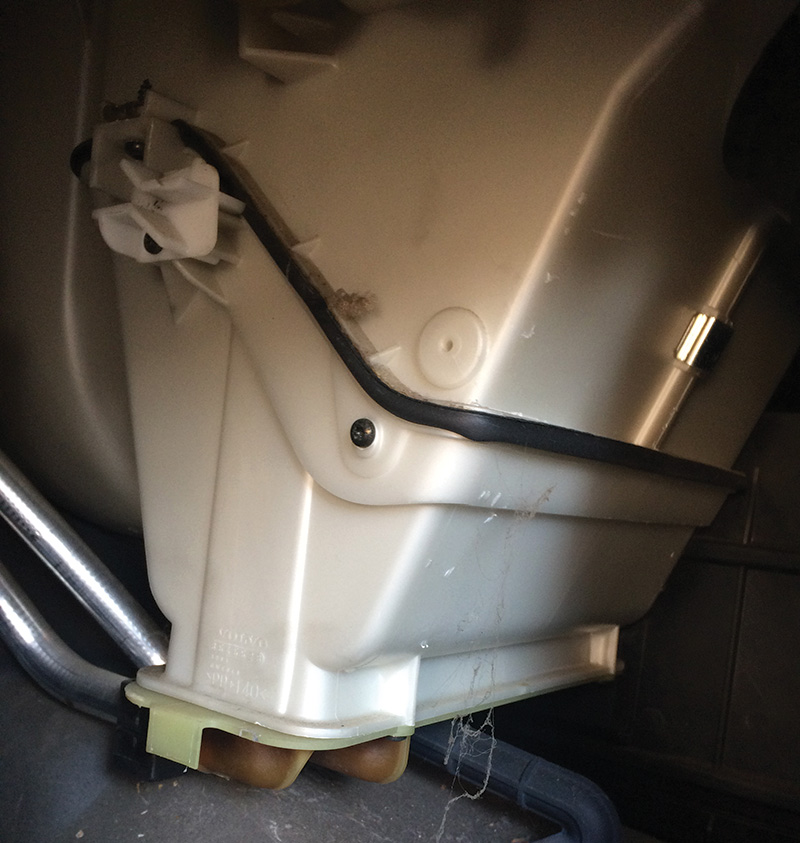
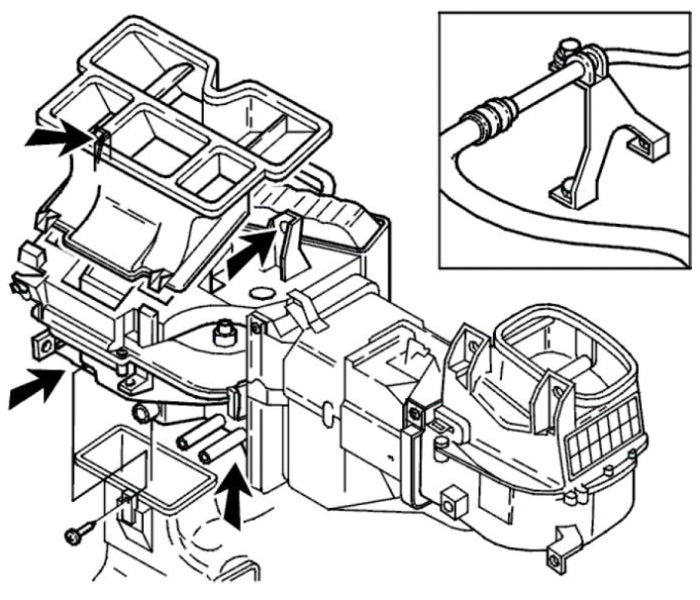
Inside the cabin of the vehicle remove both under-dash kick panels and inner kick panels. The passenger’s side inner glove compartment might also have to be removed. After the kick panels are removed, the heater box will be exposed as will be the metal pipes connecting to the unit.
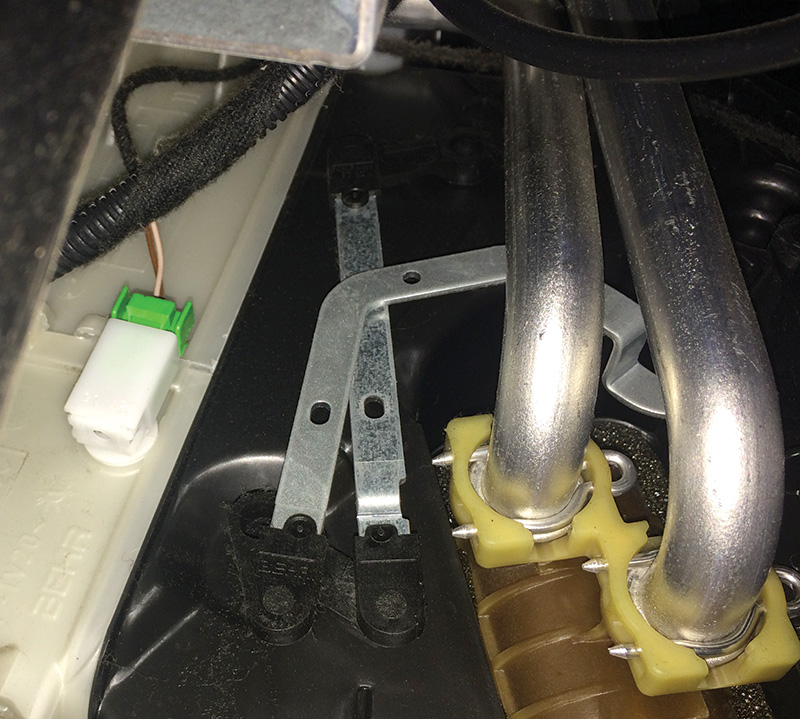
Solid pipes inside the vehicle are connected one end to the firewall of the vehicle, and the other end is connected to the heater core with o-rings to seal coolant from escaping. When installing new o-rings make sure not to cut or slice the rubber because coolant will escape. A plastic coupling at the firewall will sometimes need to be replaced due to cracks caused by the heating and cooling of the plastic.
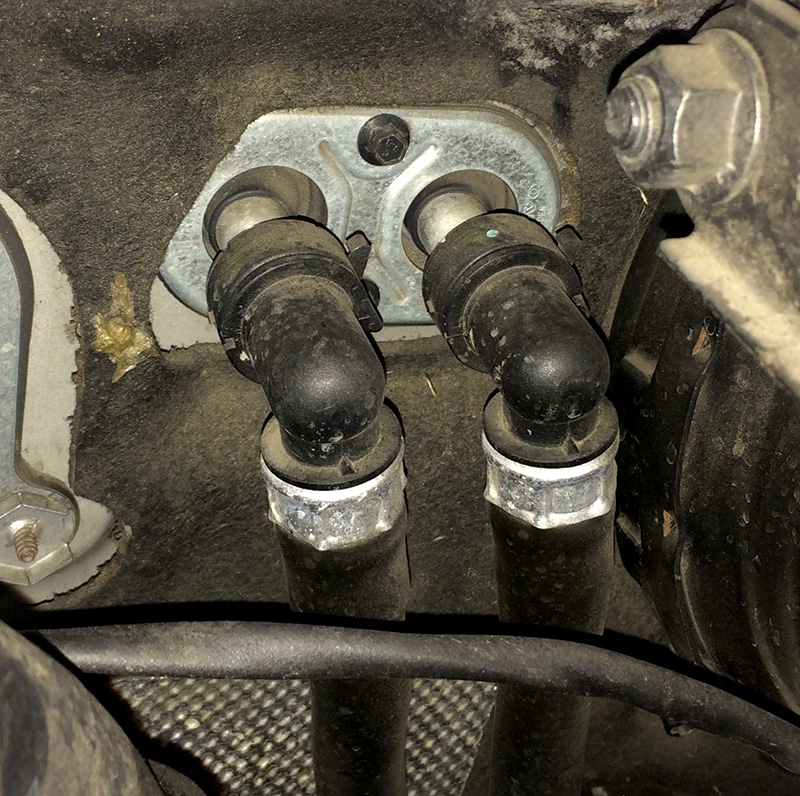
Under the hood of the vehicle disconnect the heater hoses at the firewall. You’ll need to replace the o-rings and connectors when reconnecting the heater hoses.
Inside the vehicle at the heater box remove the T25 Torx fasteners that connect the pipes to the core and disconnect. Some coolant will escape, so have shop rags or something to catch this coolant. Using a shop vacuum cleaner works well.
If the heater core has been leaking into the cabin, sometimes it may be necessary to remove the seat and carpet to dry them out. Your shop vacuum cleaner can be used to clean out coolant from under the carpet if it’s not too saturated.
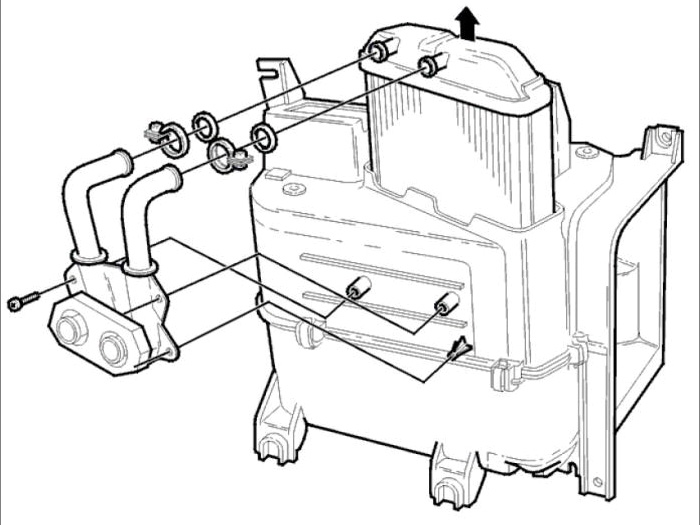
Pull forward on the heater core box and remove. Remove the screws that hold the heater core in and replace with genuine Volvo parts. Clean the inside of the heater box with detergent and wipe down.
Install the new heater core back into the heater box and secure the screws. Connect the heater pipes with new o-rings and tighten. Before installing the kick panels, connect the heater hoses at the firewall. Install new coolant into the system and start the vehicle. Adjust the climate control to full heat coming out the floor area. Let the vehicle warm up and top off the coolant.
After the system is pressurized, check inside the cabin and all hoses to make sure there are no leaks in the system. If no leaks appear, install the kick panels and test drive. Make sure heat is working in every position.
The heater cores in S70s and V70s in the early 2000s were similar to those in the 850 models, by removing the heater core that is centered in the heater box.
2001 came along and the Volvo XC70 heater core became a little more difficult to replace. Lets talk about it.
Begin by disconnecting the battery and make sure the steering wheel is straight. This will help for reassembly. Remove the steering wheel and disconnect the SRS wiring connections to the air bag. Lock down the clock spring with a screw to hold it in place.

Remove the bolt that holds the steering wheel on and mark the shaft and wheel so re-installation will be perfect. Remove the electrical connectors for turn signals and wipers, along with the ignition switch and antenna ring.
Move the key to position one and remove the cable for the shifter. Now remove the bolt at the steering shaft universal joint towards brake pedal. Remove four bolts that hold the column in place and remove the steering column.
Heater hoses can now be removed after the coolant is drained. During re-assembly use new o-rings as needed.
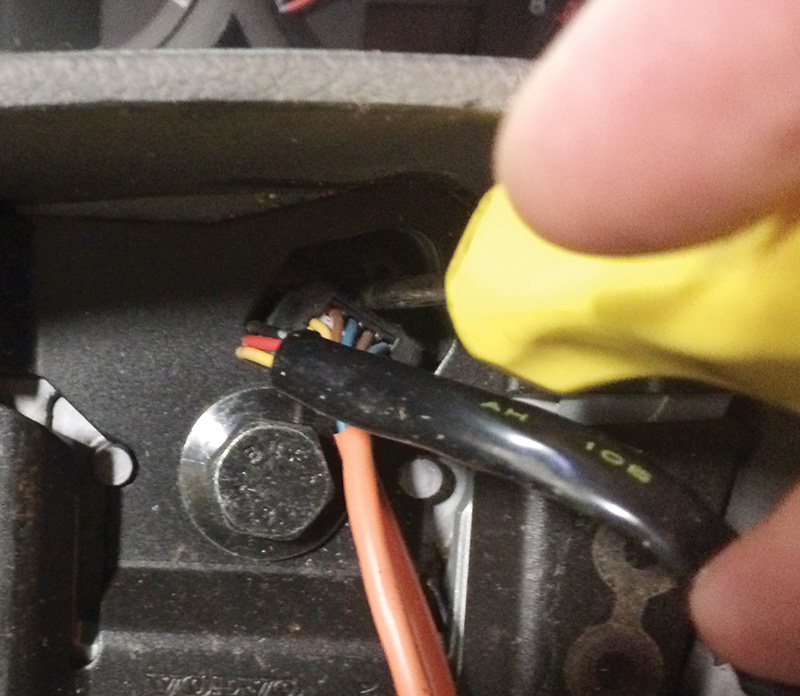
Inside the vehicle remove the brake light switch so you have more room to remove the core. Adjust the heater controls so levers are out of the way of the core.
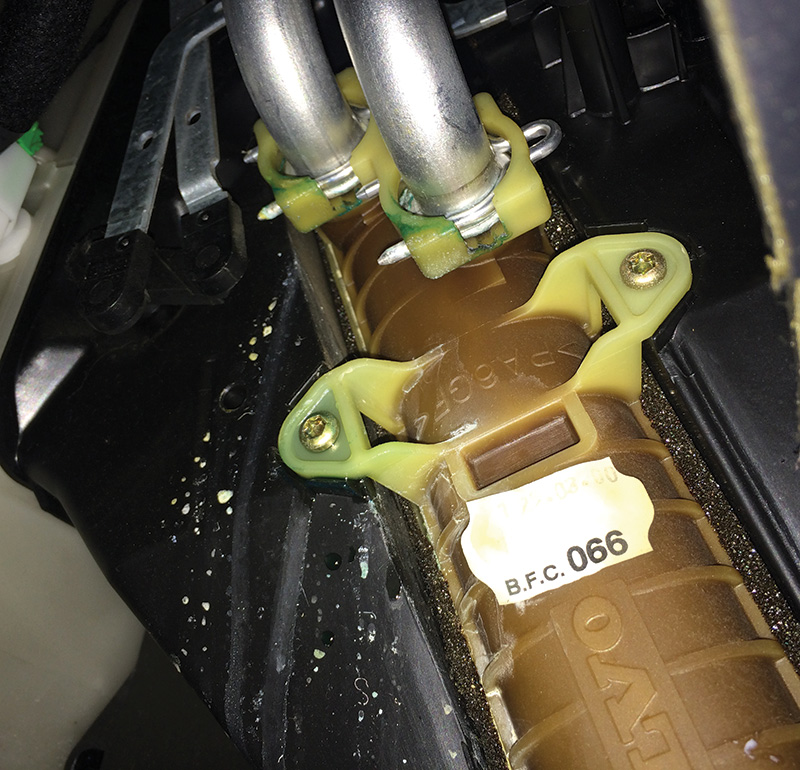
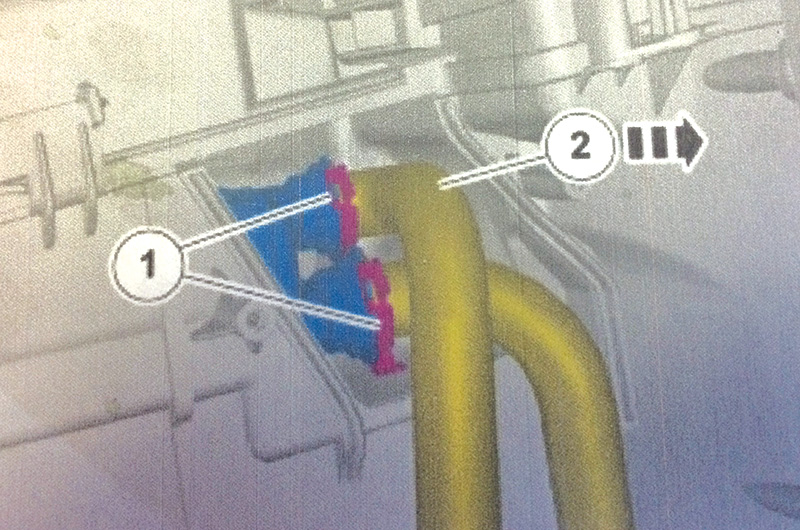
Remove the two lock inserts with pliers. Push in on the pipes going into the heater core and remove the clip. Move the pipes out of the way and remove the heater core.
Install the new core, install new o-rings on pipes and secure them in the heater core. Push in on the pipes and install new clips. This process in limited space can be very difficult, so make sure to align the pipes correctly. Leave the kick panels off in order to check for leaks. Connect the heater hoses and replace if necessary with genuine Volvo parts. Fill the cooling system with the correct Volvo antifreeze/coolant and check for any leaks.
Install all parts in reverse order and remember to remove the screw that was used to hold down the clock spring. When installing the steering column be sure to line it up correctly.
The S40 had a few different steps necessary in replacing the heater core. The older ones, from 1999 to 2004, were the first generation of the S40. Removing the complete dash is necessary on these vehicles, making it more difficult and time consuming.
After disconnecting the battery ground cable, remove all coolant from vehicle. Disconnect the heater hoses going to the heater core at the firewall. Use your air conditioning machine to remove all refrigerant from the A/C system. Remove the A/C pipe going into the vehicle firewall.
Remove the dash including the air bags. In the passenger compartment disconnect the cable harness and connectors located on the middle supports.
Remove the attaching screws from the middle supports and remove the supports. Remove the control panel. Disconnect all connectors and remove the power unit. Loosen the screws and the nut from the power unit and pull it backwards as far as possible. Remove the top part of the housing. Disconnect the connector for the floor heater. Press down on the pipes and remove the bottom piece. Remove four nuts and pull down on the unit and remove the core.
Make sure to replace all o-rings when installing the new unit from Volvo. Install all parts in reverse order.
The newer version of the S40, from 2005 onward, was a little different and the dash doesn’t have to come off.
After disconnecting the battery, remove the center console and the glove compartment. Remove the CEM by disconnecting all connectors. Remove brackets and air ducts. Remove screws and remove cover to expose the heater core.
Disconnect the heater pipe clamps, move pipes out of way and remove the heater core. Install new core and pipes. Replace o-rings and clamps to hold the pipes together.
Reassemble in reverse order.
Volvo vehicles have changed through the years and so have the heater cores — from the old 240s to the newer XC70s; from all manual controls to the most recent Volvos with electronic controls to adjust heater temperature and venting to either side of the vehicle.
Lets take a look at the 2012 XC70, which has all electronic adjustments for comfort and convenience.
First of all disconnect the battery and remove the center console. Behind the climate control are a couple of screws that will need to be removed. Turn the key on and put the shifter into Drive to make room to remove.

Use an interior tool to remove the cover over the CD player. This tool is nice to use on all interior components.
Pop up the panel around the shifter and remove two screws that hold the bottom of the climate control panel and radio. The other two screws at the top of the CD player front panel were removed earlier.
Two screws behind the console compartment must be removed also. Remove the trim on both sides of the console using your bone tool. On the driver’s side you will need to disconnect the electrical connector for the controls. Now it is possible to remove the climate control module by lifting it up and out.
Remove the screws at the front of the console towards the floor board. Lift up the trim and remove two more screws. Disconnect the shifter cable and vent tubes for rear air and heat. Now remove the complete console out of the way.
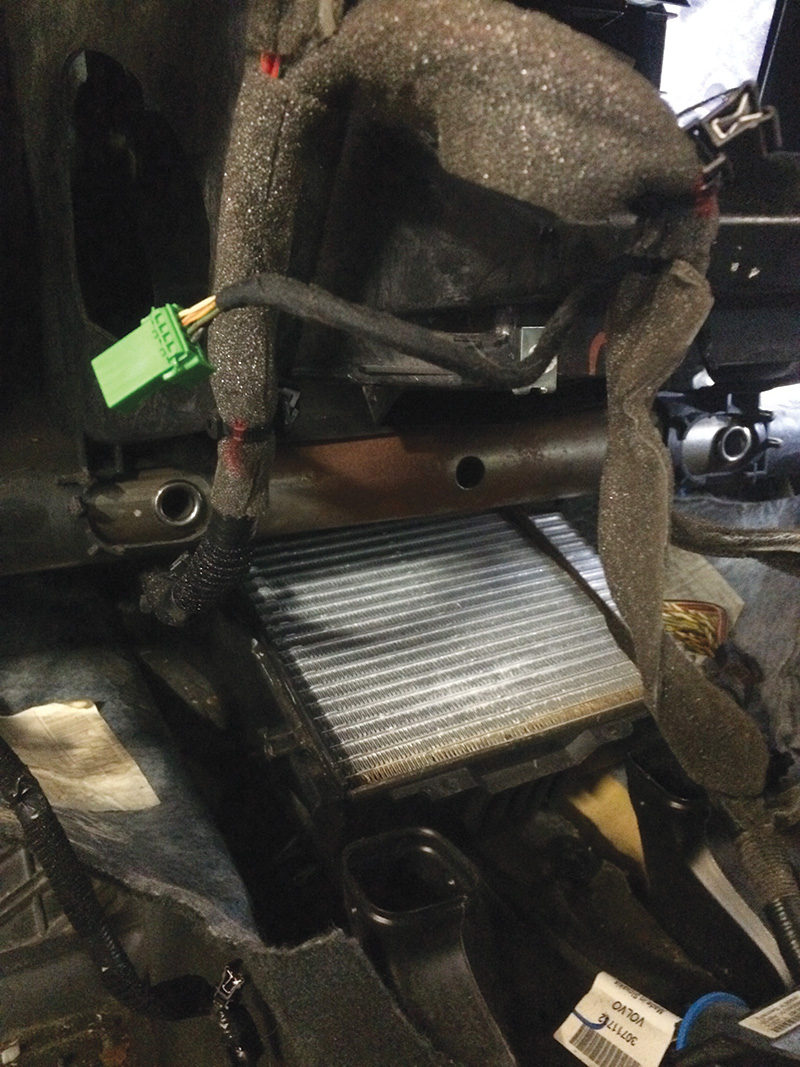
Remove coolant from the vehicle. Remove all vent tubing by pulling downward and remove. Now you can see the cover over the heater core. Remove four screws and cover to expose the heater core.
On the passenger’s side remove the plastic cover over the hard pipe lines into the heater core. Now push in on the clips and pull out on the pipes. Be prepared to collect escaping coolant. Even after draining the coolant there will still be some in the heater core. Remove the heater core and replace with a new Volvo core. Re-install all components and fill with coolant, making sure that all components are installed correctly and that there are no leaks.
Replacing heater cores can be a very trying job. With good technical skills and tools the right person should be comfortable with doing these jobs. Always remember to take pictures as you go in case something is forgotten. Using Volvo parts and tools will make the job less confusing and your customers very happy.
Download PDF


0 Comments